How Do I Create a .CRT File in Linux?
.CRT file extension represents an SSL/TLS certificate to secure communication between a web server and a browser.
Today, we will explore how to generate a certificate using the OpenSSL tool on Ubuntu 22.04. Before getting started, ensure OpenSSL is installed on your system with good libraries and dependencies.
Pre-Requisites
OpenSSL installed on Ubuntu 22.04.
Guide
We will use the following steps to generate a .crt file in Ubuntu 22.04:
Step 1: Generate a Private Key File
This step will show how a private key is generated using OpenSSL.
To generate a private key using the OpenSSL tool, execute the following command:
![]()
Output

As you can see, a private key is generated using the RSA algorithm. The output also tells us that the key is 2048 bits long.
Step 2: Generate a Private Key and a Certificate Signing Request (CSR) File
This is the step in which we will create a certificate signing request using the private key we generated in the previous step. To create CSR, issue the following command:
![]()
You will be prompted to provide information for your certificate like your country name, state or province, locality name, organization name, organization unit, common name, email address, an optional company name, and a challenge password, as shown in the output below. Make sure to provide the correct information.
Output
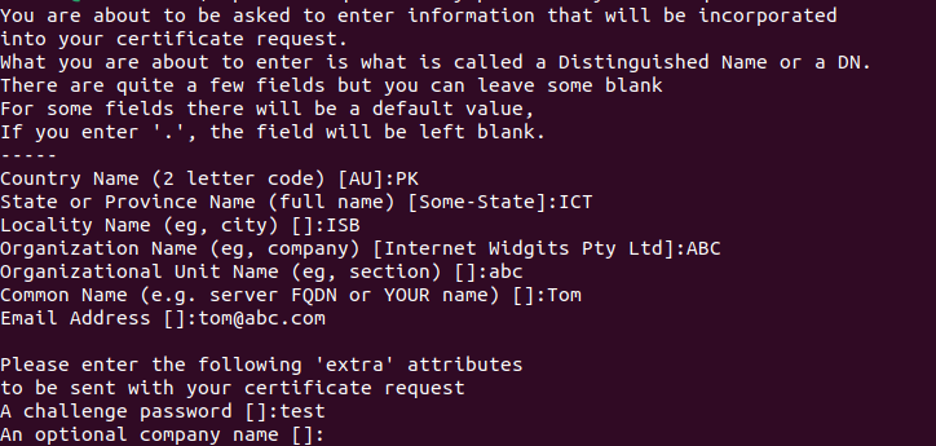
Once the information is accepted, a .csr file will be generated.
Step 3: Create a .CRT File
We will create a certificate file using the .csr file and the private key file we generated in the previous steps. This can be achieved using the following command:
![]()
Output

The .crt file will be created in your home directory or your current working directory.
Step 4: Verify .CRT file
Now, let’s check whether the .crt file has been successfully created. To do that, go to the home directory. You will find a file with the name certificate.crt. This is the file we created in the previous step. Then, publish its content with the following command:
![]()
Output
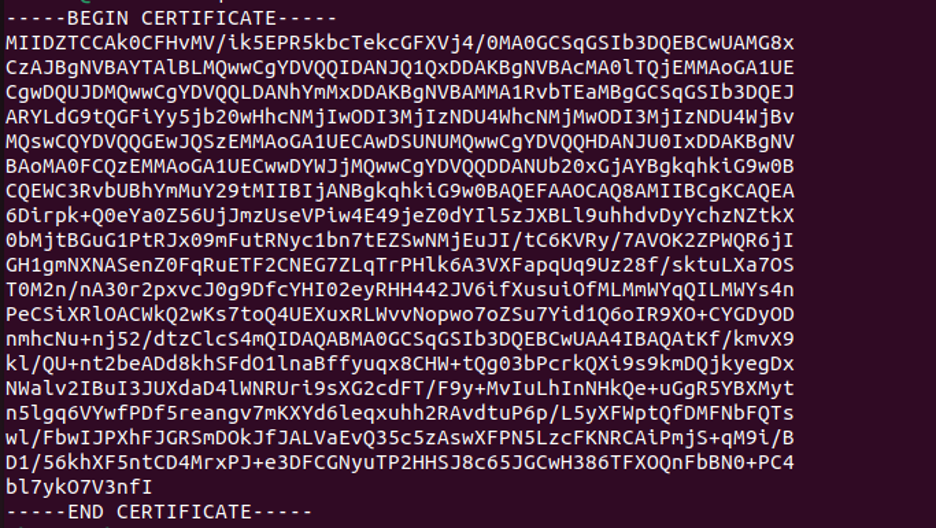
This tells us that we have successfully generated a certificate.
Conclusion
This guide detailed how to generate a private key, a certificate signing request, and a certificate using the OpenSSL tool. Once the certificate is created, it can be applied to a web application for testing purposes.
Source: linuxhint.com