How Can I Move HEAD Back to a Previous Location in Git
It’s a phenomenon that humans can make mistakes, and therefore they need to tackle them. Similarly, while working on Git, sometimes developers make changes in the local repository or add new source code files. Meanwhile, they realize added changes are incorrect. In such a situation, it is required to revert the HEAD pointer to the previous location. More specifically, the “$ git reset” command can be utilized to perform this operation.
This guide illustrated the procedure to move HEAD back to a previous location.
How Can I Revert HEAD to a Previous Location?
Git users can revert the HEAD position to the previous location whenever required. To do so, using the Git command, move to the Git repository and create new text files. Then, track them to the staging index and commit changes. Next, view the HEAD current position and move it to the previous location using the “$ git reset –hard HEAD^”.
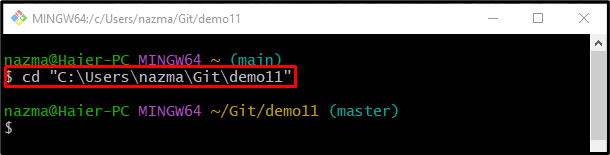
Step 1: Navigate to Git Local Repository
Use the “cd” command and move to the desired Git local repository:
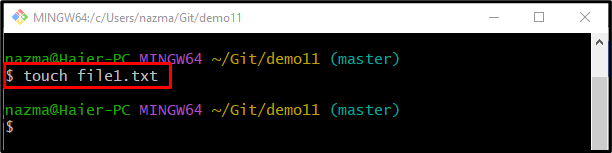
Step 2: Create Text File
Next, execute the “touch” command to create a new text file in the repository:
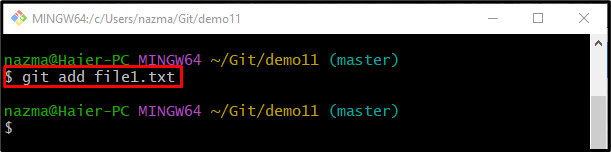
Step 3: Track Text File
Now, add the text file to the staging area with the help of the following command:
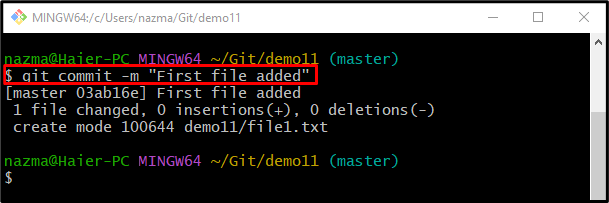
Step 4: Update Repository
After tracking the added changes, update the repository by utilizing the “git commit” command with the desired commit message through the “-m” option:
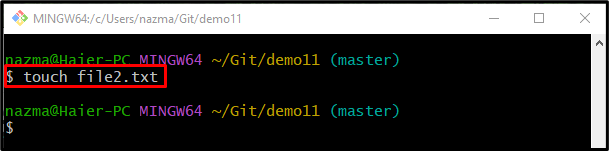
Step 5: Create New File in Local Repository
Now, run the below-stated command to create a new text file in the repository:
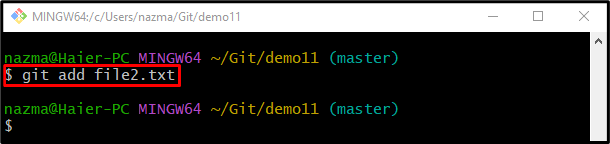
Step 6: Add File to Staging Index
Add the newly created file into the staging index through the “git add” command:
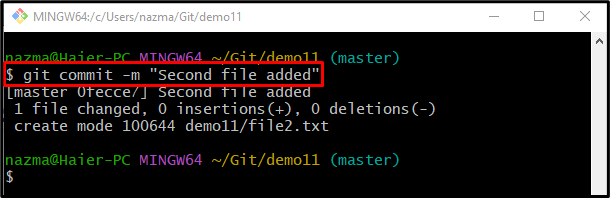
Step 7: Commit Changes
Execute the “git commit” command to add changes along with the “-m” option:
Step 8: Check HEAD Pointer
Now, check the Git reference log history to view the current HEAD pointer:
According to the below-listed output, HEAD points to the most recent commit:
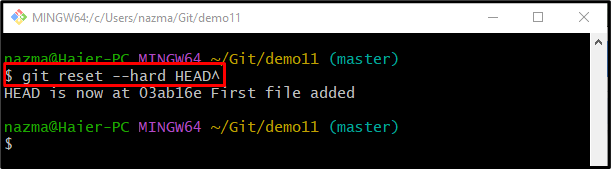
Step 9: Move HEAD Back to Previous Location
Finally, execute the “git reset” command with the “–hard” option and the “HEAD^” pointer:
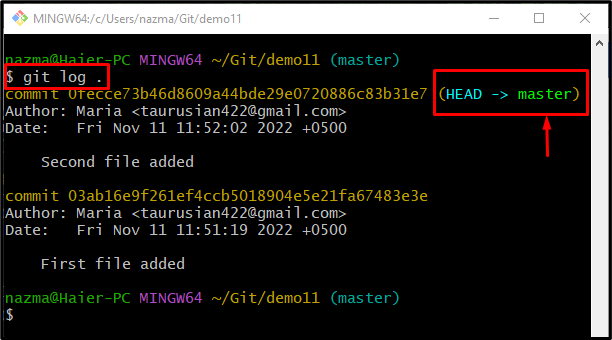
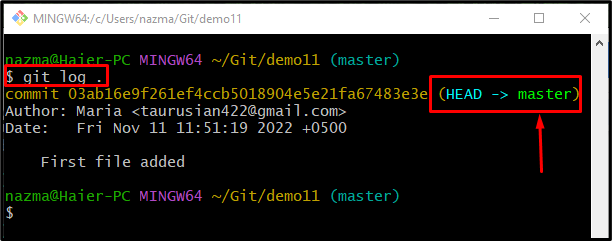
Step 10: Verify Move HEAD Pointer
Lastly, verify the HEAD pointer moves back to the previous location or not using the “git log .” command:
That’s all! We have provided the procedure to move the HEAD back to a previous location.
Conclusion
To move HEAD back to a previous location, first, move to the Git repository and generate a new file. Next, track it to the staging index and commit changes. Then, check the HEAD current position and execute the “$ git reset –hard HEAD^” command to revert the HEAD to the previous location. This guide demonstrated the method to revert HEAD to a previous location.
Source: linuxhint.com