HAProxy Beginner’s Tutorial
HAProxy works to reduce overloading any server, and it achieves this by distributing a traffic to ensure that no server overloads, yet other servers are available. A platform such as Instagram has a massive traffic due to the requests sent per second, hence the need to use HAProxy to define the frontend, backend, and listeners for the servers to avoid overloading.
Why Use HAProxy
Before learning about the installation and configuration of HAProxy, you should understand why we need it, courtesy of the features it offers. The following are the primary features of HAProxy:
- Load Balancing – With HAProxy, you can comfortably distribute the traffic across different servers to avoid overloading a single server. That way, your application won’t face any downtime issues, and you will have attained faster responsiveness, reliability, and availability.
- Logging and Monitoring – You will get detailed monitoring logs for your servers to help with troubleshooting problems. Besides, HAProxy has a statistics page where you can get the real-time performance analytics for your load balancer.
- Health Checks – Even your servers require a health check to determine their status. HAProxy frequently runs the health checks to know the status of your server to enhance its reliability. If an unhealthy server gets detected, it reroutes the traffic to another server.
- Reverse Proxy – One way of enhancing the security is by hiding the internal structure. Luckily, HAProxy lets you receive the traffic from clients and route them to appropriate servers. That way, your internal structure is hidden from the hacker’s eye.
- ACLs (Access Control Lists) – With HAProxy, you can define how the traffic routing should occur using various criteria such as paths, headers, and IP addresses. Thus, defining a custom routing logic for your traffic becomes easier.
- SSL Termination – By default, SSL/TLS is offloaded by the backend servers which causes a reduced performance. However, with HAProxy, the SSL/TLS termination occurs at the load balancer, offloading the task in the backend servers.
Installing HAProxy
So far, we defined what HAProxy is and discussed the features that it offers to help you understand why you need it for your application. The next step is to understand how to get started by installing it on your system.
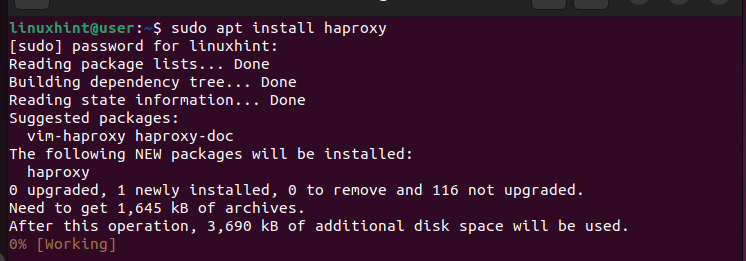
If you’re running the Ubuntu or Debian systems, HAProxy can be installed from the APT package manager. Run the following command:
$ sudo apt install haproxy
Similarly, if you’re using the RHEL-based systems or CentOS, HAProxy is available from the “yum” package manager. Run the following commands:
$ sudo yum install haproxy
In our case, we are using Ubuntu. Thus, we have our command as follows:
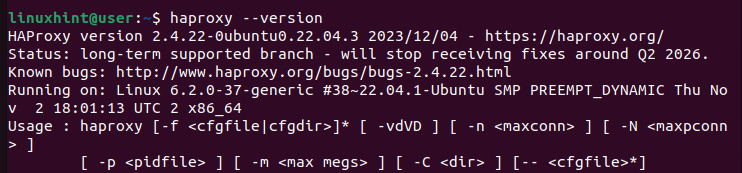
We can then check its version to ascertain that we managed to install HAProxy successfully.
How to Configure HAProxy
With HAProxy installed, you can now open its config file (/etc/haproxy/haproxy.cfg) and define the settings that you wish to use for your load balancer.
Open the config file using an editor such as nano or vim.
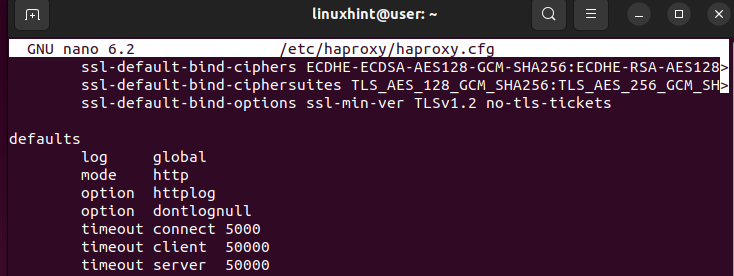
You get a config file like the one in the following:

From the config file, you will notice that it comes with two main sections:
- global – It is the first section in the file and its values shouldn’t be altered. It contains the process settings that define how the HAProxy works. For instance, it defines the logging details and groups or users that can execute the HAProxy functions. Note that in this config file, you can only have one global section, and its values should remain unaltered.
- defaults – This section contains the default values for the nodes. For instance, you can add the timeouts or the operational mode for your HAProxy in this section. Besides, it’s possible to have numerous defaults sections in your HAProxy config file.
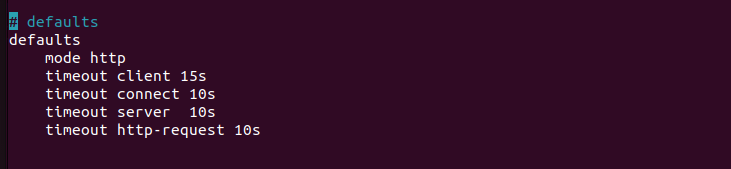
Here’s an example of a “Defaults” section:
In the given image, the mode defines how your HAProxy will handle the incoming requests. You can set the mode to HTTP or TCP. As for the timeout, it specifies how long HAProxy should wait. For instance, the timeout connect is the time to wait before a backend connection is made. The timeout client is how long HAProxy should wait for a client to send the data. The timeout server is the time to wait for the appropriate server to send the data which will be forwarded to the client. How you define the defaults values matters a lot in enhancing the response time of your application.
There are three more sections that you should define for your load balancer to work as expected.
- frontend – This section contains the IP addresses that you wish your clients to use to establish the connection.
- backend – It shows the server pools that handle the requests as defined in the frontend section.
- listen – It is successionally used when you want to route a specific server group. This section combines the tasks of the frontend and backend.
Let’s Have an Example
For this example, we define the frontend to use the localhost with a specific port. Next, we bind it with the backend which runs the localhost and then run a Python server to test if everything works as expected for the load balancing. Follow the given steps.
Step 1: Configuring the Defaults Section
In the “Defaults” section, we set the values to be shared across the nodes. For our case, we set the mode to HTTP and set the timeouts for the client and the server. You can adjust the time to suit your needs.
Remember that all these edits are in the HAProxy configuration located at “/etc/haproxy/haproxy.cfg”. Once the defaults section is configured, let’s define the frontend.
Step 2: Configuring the Frontend Section
In the frontend section, we define how we want the application or website to be accessed by clients online. We give the IP addresses for the application. But for this case, we work with the localhost. Therefore, our IP address is the fallback address of 127.0.0.1 and we want to accept the connections via port 80.

You must add the “bind” keyword which acts as the listener for the IP address on the specified port. The IP address and the port that you define are what the load balancer uses to accept the incoming requests.
After adding the previous lines in your config file, we must restart the “haproxy.service” with the following command:

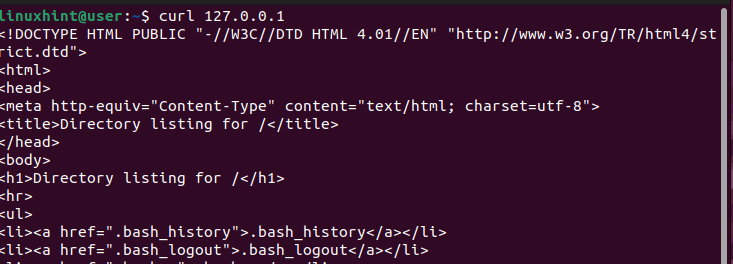
At this point, we can try sending the requests to our website using the “curl” command. Run the command and add the target IP address.
Since we have yet to define how the backend of our HAProxy will be, we get a 503 error as shown in the following. Although the load balancer managed to receive the requests, no server is currently available to handle it, hence the error.

Step 3: Configuring the Backend
The backend section is where we define the servers that will handle any incoming requests. The load balancer refers to this section to know how it should distribute the incoming requests to ensure that no server gets overloaded.
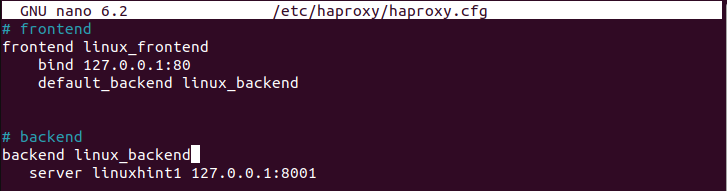
The 503 error that we got earlier was because we didn’t have any backend to handle the requests. Let’s begin by defining the “default_backend” to handle the requests. You define it in the frontend section. We named it “linux_backend” for this case.
Next, create a backend section that has the same name as the one that is defined in the frontend section. You must then use the “server” keyword followed by the name of your server and its IP address. The following image shows that we defined the “linuxhint1” server using IP 127.0.0.1 and port 8001:
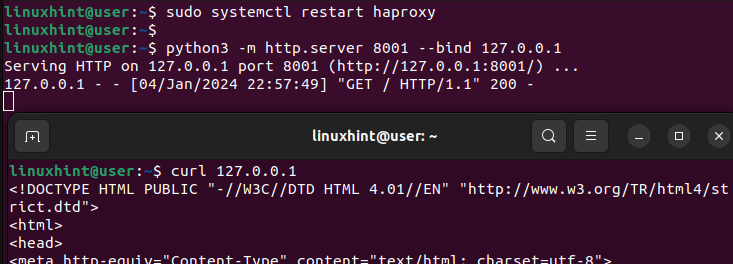
You can have a pool of backend servers, but we only defined one for this case. Ensure that you save the file. We must again restart the HAProxy service.

To test the created HAProxy load balancer, we create a web server using Python3 to bind the backend ports using the IP address that we specified. We run the command as follows:
Ensure that you replace the values to match your IP address and the port that you wish to bind. Notice how the web server gets created and listens for any incoming requests.

On another terminal, let’s use the “curl” command to send a request to the server.
Unlike how we got the 503 error earlier which shows that no server is available to handle the request, we get an output this time which confirms that our HAProxy load balancer is working.
If you go back to the previous terminal where we created the web server, you will see that we get a success output 200 which confirms that HAProxy received the request and handled it by sending it to the defined server in our backend section.
That’s how you can set a simple HAProxy for your website or application.
Working with Rules
Before we wind up on this beginner HAProxy tutorial, let’s quickly talk about how you can define the rules to guide how the requests will be handled by the load balancer.
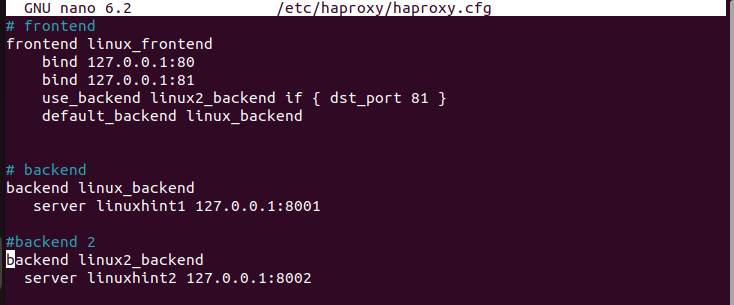
Following the same steps as before, let’s leave our default section intact and define different IP addresses in the frontend section. We bind the same IP address but accept the connections from different ports.
Moreover, we have our “default_backend” and another “use_backend” which is a different pool of servers that we will use depending on the port where the requests are coming from. In the following configuration, all requests via port 81 are handled by the servers in the “Linux2_backend”. Any other requests are handled by the “default_backend”.
We then create the backend sections as defined in the frontend. Note that for each backend, we have a different server that we specify to use for handling the requests.
Quickly restart the HAProxy service.

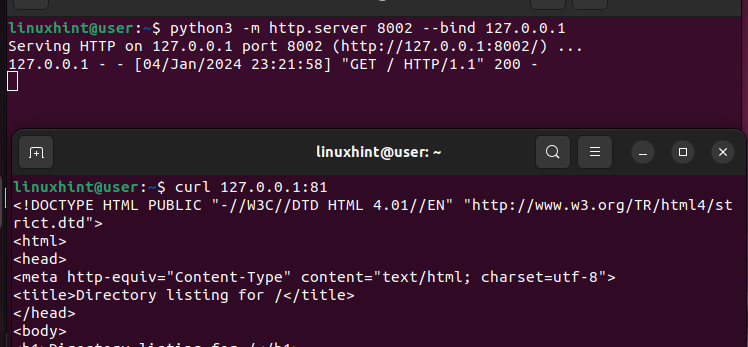
Let’s create the web server using Python3 and bind the requests on port 8002 which is the alternate backend server.

When sending requests to it, we specify the port as 81 to trigger the load balancer to send the requests to the alternate server which isn’t the default one.
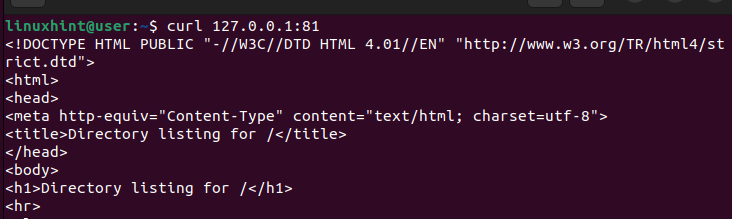
Rechecking our web server, we can see that it manages to receive and handle the requests and gives a 200 (success) response.
That’s how you can define the rules to guide how your load balancer will receive and handle the requests.
Conclusion
HAProxy is an ideal solution for load balancing for TCP/HTTP applications. Once installed, you can comfortably edit the configuration file to define the defaults, frontend, and backend sections to guide how your load balancer will work. This post is a beginner’s guide to HAProxy. It began by defining HAProxy and its features. Next, it digged into understanding how to configure HAProxy and concluded by giving an example on how to use HAProxy as a load balancer.
Source: linuxhint.com