Golang Protobuf Examples
Install the Dependencies
To execute the Golang protobuf code, you need to install the following given code on the IDE (the VS code is used in the following examples).
Example 1: Using the Golang Protobuf Package to Print the Employee ID and Department
Step 1: Protobuf File
First, name the protobuf file as the “Employee8.proto” with the succeeding data:
message Employee8 {
int32 eID = 1;
string eDepartment=2;
}
The syntax= “proto3” syntax requires the protobuf file to be transcribed using the “proto3” syntax. The message type that is described is “Employee” which has a field of integer type that contains the ID of the employee and has a tag 1 (tags are used to serialize the data). The other field is of string type which contains the department of the employee having the tag of 2 that specifies the serial number of the second field. When you are done writing the message, close the curly braces. It indicates that the message is completed.
Step 2: Generate the Go Code for Protobuf
The specified command is used to produce the Golang code in the Go programs to work with the definite protobuf message.
The given command creates the Go file which covers the Golang struct definition.
Step 3: Main.go
Now, produce the “main.go” file and write the code to print the ID of the employee8. The code that prints the employee8 ID is given in the following:
Code:
import (
"fmt"
"github.com/hiratassadaq/package/employee8"
)
func main() {
employee8 := &employee8.Employee8{
ID: 805,
Department: "Information Technology (main branch)",
}
fmt.Println("Employee8:", employee8)
}
The code example clarifies the main function of the Golang protobuf explanation. The “package main” states that this package is the main package of the Golang program. The “import” statement imports the packages. In this program, two packages are imported. The “fmt” is the first package that is used to print the employee8 data on the console. The second package which is “github.com/abc/package/employee8” indicates the produced Golang package for the employee8 that is defined in the message (replace the second package with the link of your GitHub package).
Within the main function, the employee8 variable is created. Then, this variable is initialized with the “employee8.Employee8” struct. Then, the employee8 is assigned with the values of employee ID and employee Department. Lastly, the “fmt.Println” prints the data that is stored in the employee8 protobuf on the console screen.
Step 4: Execute the Command
Execute the “main.go” file using the following command:
Use the command to run the “main.go” file. The “main.go” file is run by this command on the IDE, and the outcome is displayed on the console screen.
Output:
The variable type is defined in the protobuf file. Then, the values that are stored in the main function of “main.go” are displayed on the console:

Example 2: Using the Golang Protobuf Package to Print a Person’s Name, Age, Gender, and Email
Step 1: Protobuf File
Name the protobuf file as the “Person0.proto” with the following data:
message Person0 {
string pName = 1;
int32 pAge = 2;
string pGender = 3;
string pEmail = 4;
}
The syntax= “proto3” specifies that the protobuf file is written using the “proto3” syntax. The message type that is described is Person0 which has four variables. The first variable is a string type that contains a name and has a tag 1 (tags are used to serialize data). The second variable is the “int32” type which includes the age of the Person0 and has a tag of 2. The third variable is the “string” type which contains the gender of the person that has the tag of 3. The fourth and the last variable is also of “string” type which contains the email of the person and has the tag of 4.
Step 2: Generate the Go Code for Protobuf
The given command is used to generate the Golang code in the Go programs to work with the defined protobuf messages.
The previous command generates the go file as “person0.pb.go” which contains the Golang struct definition.
Step 3: Main.go
Now, create a “main.go” file and write the following code:
Code:
import (
"fmt"
"github.com/abc/package/person0"
)
func main() {
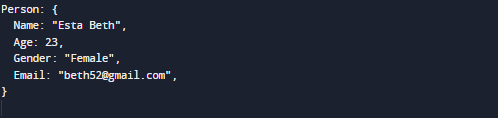
person0 := &person0.Person0{
Name: "Esta Beth",
Age: 23,
Gender: "Female",
Email: "Beth52@gmail.com",
}
fmt.Println("Person0:", person0)
}
The code example explains the main function of the Golang protobuf definition. The “package main” states that this package is the main package of the Golang program. The “import” statement imports the packages. In this program, two packages are imported. The first package, “fmt”, is used for printing. The second package, “github.com/abc /package/person0”, indicates the generated Golang package for the person0 that is defined in the message (replace the second package with the link of your GitHub package).
Within the main function, the person0 variable is created and is initialized with the person0.Person0 struct. Next, the person is assigned with values such as name, age, gender, and email. Lastly, the “fmt.Println” prints the data of person0 on the console.
Step 4: Execute the Command
Execute the “main.go” file using the following command:
Example 3: Using the Golang Protobuf Package to Print the Students’ Names and Subjects Enrolled
Step 1: Protobuf File
Name the protobuf file as “Student.proto” with the following data:
message Student {
string sName = 1;
repeated string sSubjects = 2;
}
The protobuf file must be generated with the “proto3” syntax, according to the “proto3” syntax. The message type that is described is “Student” which has two variables. The first variable is a string type that contains the name and has a tag of 1. The second variable is a repeated string type that contains an array of subjects and has a tag of 2.
Step 2: Generate the Go Code for Protobuf
Use the following command to generate the Go code to work with the defined protobuf messages:
This command produces the Go file “student7.pb.go” that contains the Go struct definition for the protobuf message.
Step 3: Main.go
Create a “main.go” file and write the following code:
import (
"fmt"
"github.com/abc/package/Student7"
)
func main() {
student7 := &student7.Student7{
Name: "Esta Beth",
Subjects: []string{"History", "Geo", "Mathematics"},
}
fmt.Println("Student:", student7)
}
This code example explains the working of Golang protobuf and how we can use the arrays in the protobuf. Import the required packages. Here, two packages are imported: one is for using the print function and the other is to access the GitHub repository of the student which corresponds to the student message. Then, create the variable to store the name of the student and subjects. Then, print the student’s name and the array of subjects.
Step 4: Execute the Command
The following command should be used to run the “main.go” file:

Conclusion
The Go protobuf is explained in the article from the very basics with the working coding examples. Golang protobuf or Go protobuf is like XML and JSON but it is more convenient and simple. To make things simple for the reader, every detail is given along with the stages.
Source: linuxhint.com