git pull vs git fetch
This post described the method to git pull and git fetch remote repositories. So, let’s start!
What is the Difference between git fetch and git pull in Git?
The local Git repository is used to make changes in the project files, and the remote repository is utilized for sharing and updating the files among team members. Multiple commands are available to download the remote repository or its content.
For example, the “git pull” command is used to download and merge the Git remote branch to the local branch with an updated copy, and to download the updated remote repository to the local repository, the “$ git fetch” command can be utilized.
How to git pull and git fetch in Git?
To download or copy a remote repository, first, move to the Git desired repository and clone the remote repository. Check and add the remote origin. Next, fetch the updated remote through the “$ git fetch” command and run the “$ git pull” command.
Now, let’s move to perform the above-stated scenario practically!
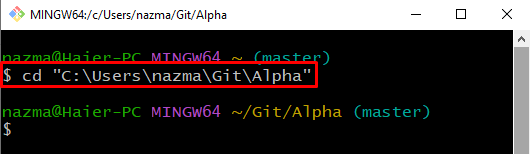
Step 1: Navigate to Repository
Move to the Git local desired repository using the “cd” command:
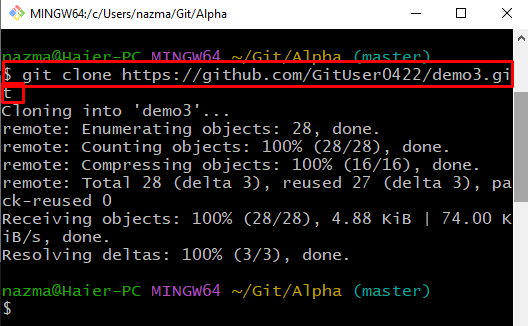
Step 2: Clone Remote Repository
Next, run the “git clone” command with the remote URL to clone the repository:
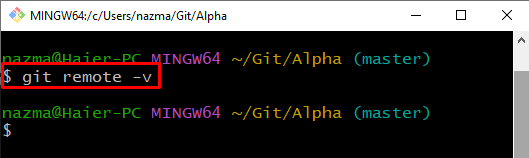
Step 3: List Remote Connections
Now, list the remote connections using the “git remote” command with the “-v” option:
It can be seen that currently, no remote connection exists:
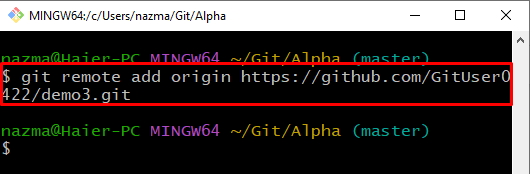
Step 4: Set Remote Origin
Run the “git remote add” command with the remote repository name and URL:
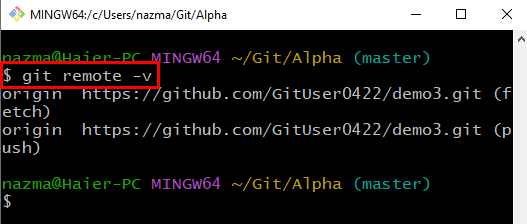
Step 5: Check Remote Connections
To ensure the added remote connection, execute the “git remote” command:
According to the below output, we have successfully established remote (origin) connections:
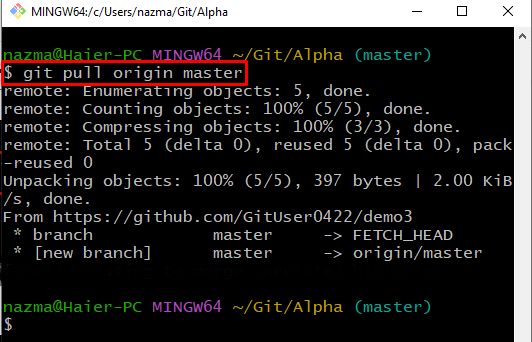
Step 6: Run git pull Command
Now, run the “git pull” command to download and merge the remote branch to the local branch with an updated copy:
In our case, we will download and merge the origin with the master branch:
Step 7: Execute git fetch Command
Lastly, execute the “git fetch” command to download the updated data of the remote branch:
As a result, the copy of the remote branch is downloaded and created:

We have discussed the usage of the git pull and git fetch commands.
Conclusion
The “$ git pull” command can be used to download the updated remote repository, whereas the “$ git fetch” command is utilized to copy or download the remote repository to the local repository. To download or copy the remote repository, first, move to the Git desired repository and clone the remote repository. Check and add the remote origin. Then, download and merge the remote by executing the “$ git pull” command or run the “$ git fetch” command to download the copy of the updated content. This post illustrated the git fetch vs git pull.
Source: linuxhint.com