Git Installation Process on Ubuntu
Git is a fast, reliable, and adaptable distributed version control system. It is designed to support the distributed, non-linear workflows, making it ideal for software development teams of all sizes. Every Git working directory is a self-contained repository with a complete history of all changes and the ability to track the versions, even without network access or a central server.
GitHub is the repository of git that is hosted on the cloud that provides all the features of distributed revision control. GitHub is a repository for git, hosted on the cloud. Unlike Git, which is a CLI tool, GitHub has a web-based GUI. It is used for version control which involves collaborating with other developers and keeping track of the changes that are made to scripts and code over time. With GitHub, each team member can create a cloud-based central repository and change the data, enabling a collaboration on the project.
This post demonstrates how to get Git on your Ubuntu system.
Git Installation on Ubuntu
There are three main methods to install Git on Ubuntu:
Method 1: Install GIT Using the Default APT Repository on Ubuntu 22.04
Step 1: Update the System
Updated packages are essential to lay a strong base for the Git installation on your Ubuntu system. By taking this action, possible package conflicts during installation are mitigated.
You can update your system’s packages using the “update” command in the “Advanced Packaging Tool”.
Output:

It is recommended that any outdated packages be upgraded after the update has been done. Use this command to carry out this upgrade:
Output:

Step 2: Check for the Existence of Git on Ubuntu
It’s advised to confirm if Git already exists on your machine before continuing with the installation. This allows us to avoid duplicate installations and keep our system clean.
Use the “git” command with the –version to check if Git already exists on your system. If Git is installed, this shows the previously installed version:
Output:
![]()
Step 3: Use the APT Command
If the previous command returns nothing, it verifies that Git is not installed on your machine. It’s now time to set up Git.
Since it offers an easy-to-use procedure, we install Git using Ubuntu’s repository. Install Git using sudo apt to run the “install” command.
Output:

Step 4: Verify If Ubuntu’s GIT Installation Is Successful
Once the installation is finished, you should make sure that Git was installed correctly.
Once more, we can verify the installation with the –version. At this point, the recently installed version of Git should be returned by this command:
You should see something like this when the command runs:
![]()
Method 2: Install GIT on Ubuntu via the Git Maintainers PPA
Working with the most recent Git version can sometimes be preferable, particularly when new features or critical bug fixes are required. The Ubuntu Git Maintainers team maintains the Personal Package Archive (PPA) which is usually the source of the most recent stable version of Git. Depending on your particular needs and your working environment, this approach may have a number of major benefits.
Step 1: Import the Git Maintainers PPA
We need to add the Git PPA to our system’s repository list. Access to the most recent stable Git release is guaranteed by this PPA. Even though your system probably already has the following packages installed, it is never bad to double-check.
Output:

Step 2: Refresh the Packages Index After the PPA Import
After you import the Git PPA into your system’s repository list, you must refresh the packages index. Now that the repository has been added, your system is able to recognize the recently downloaded packages.
To update the packages index:
Step 3: Use the APT PPA Command to Install GIT
Step 3: Use the APT PPA Command to Install GIT
You can upgrade or install Git once the PPA is set up. This command carries out this task:
Output:

You can upgrade Git to the most recent version from the additional PPA by running this command if you have already installed GIT from Ubuntu’s repository.
After the upgrade or installation is finished, confirm the installed Git version:
Output:
You should see something like this:
![]()
This indicates that the most recent Git version has been properly installed on your machine.
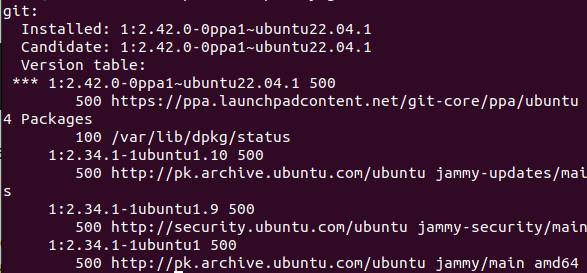
Checking the repository from which your Git installation originated can provide you with more information. Because the PPA usually contains a much newer version of Git, using the following command should reflect the most recent PPA addition:
Output:
Method 3: Installing Git via Source
This method gives the users with more control over the process of installation and grants an access to specific features that might not be included in pre-packaged distributions.
Step 1: Configure Ubuntu with the GIT Build Dependencies
First, you need to install the necessary build dependencies on your Ubuntu system. It takes these requirements in order for a Git compilation to work. To configure these, use the following:
Output:

Step 2: Get the GIT Source Code
Go to the Git release page to obtain the source code. To download the desired version, use the following command. Don’t forget to replace the {version} with the required Git version.
Output:

Step 3: Extract and Install the GIT Source Code
Now, compile and install GIT now. To start the compilation, use the following:
Locate and open the extracted directory:
Output:
![]()
Now, compile and install GIT. Start the compilation using the following:
![]()
This command directs the build system to anticipate an installation in the “/usr/local” folder at the end of the compilation process. The “all” flag assures a complete build that includes all components.
After the compilation is finished, start the installation:
Output:

Git is now installed in the “/usr/local” directory. The procedure includes copying the necessary files and granting the necessary permissions to make Git accessible on your machine.
Verify that the build is accurate and the installation was successful.
Output:
![]()
This command should confirm that Git has been properly integrated into your system by returning the version that you installed.
Conclusion
Git is a widely used and powerful distributed version control system. This article demonstrated how to install Git on Ubuntu 22.04 and earlier versions. We discussed three methods: using the Ubuntu package manager (apt), using the Git Maintainers PPA, and using the Git source. You can find many online resources, such as the official Git manual, to help you learn how to use Git.
Source: linuxhint.com