Getting started with JavaScript on Raspberry Pi
Installing node.js for JavaScript on Raspberry Pi
To start using the Raspberry Pi for JavaScript first there is need to install the node.js that is required for programming in JavaScript.
The process of installation of node.js on Raspberry Pi is quite simple just follow the below mentioned steps:
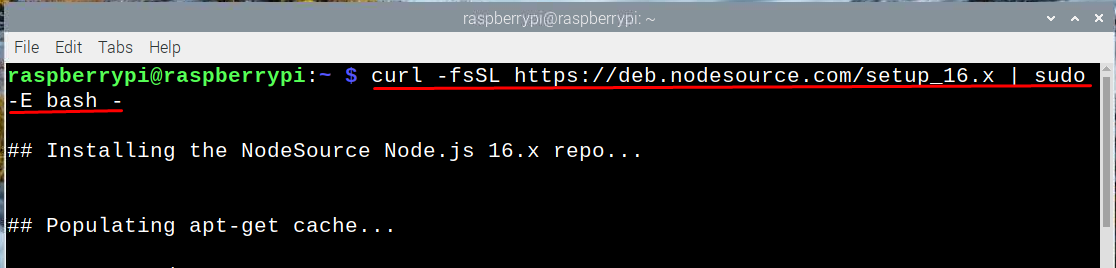
Step 1: To download the node.js runtime environment execute the following command:
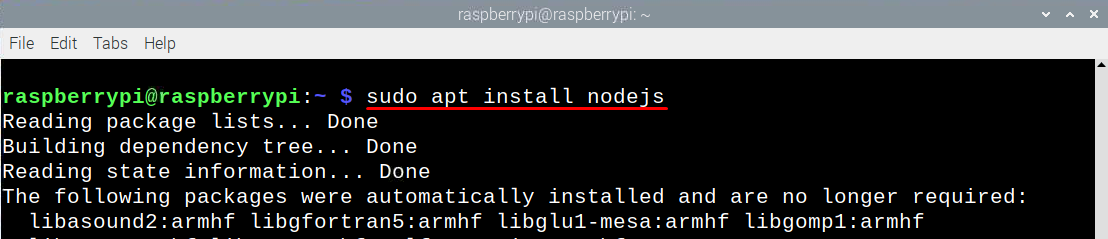
Step 2: Once the file is downloaded install the application by executing the following command:
Step 3: After installing the node js check the version to see if the same version is installed correctly by executing the following command:

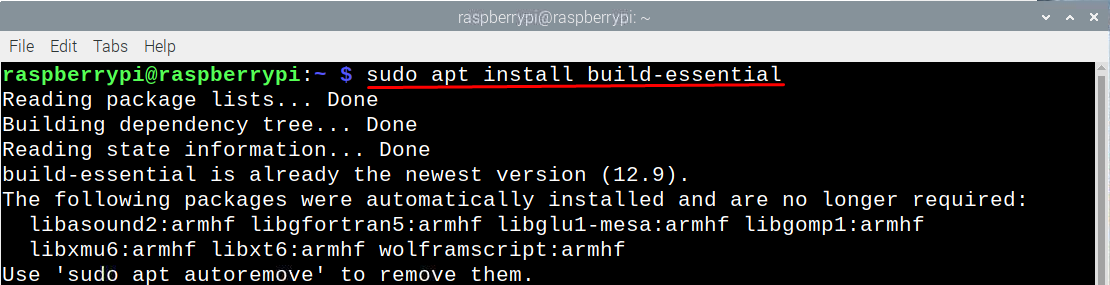
Step 4: To avoid any issues while using JavaScript it is better to install the build-essential package by executing the command given below:
Getting started with JavaScript on Raspberry Pi
NodeJS is primarily used for JavaScript to code outside the browser so let’s write a simple code of JavaScript. Just follow the steps mentioned-below:
Step 1: Now to get started with JavaScript first make the directory so for illustration I have named the directory “mycode” by executing the command given below:

Step 2: Next create a .js file in the mycode directory by running the command given below:

The name of the file in this example is “javascript”, you can name it anything. A text file will open in which you can write the code in JavaScript, so for demonstration I have written the following code:
let f = 6:
let multiply = e * f;
console.log(“Welcome to linuxhint”)
console.log(`The multiplication of ${e} and ${f} is ${multiply}`)

Step 4: Now to run the JavaScript code execute the command given below:

This is how you can code in JavaScript on Raspberry Pi.
Running javaScript on chrome browser in Raspberry Pi
As mentioned above you can also run JavaScript on the browser as well. For that just following the subsequent steps:
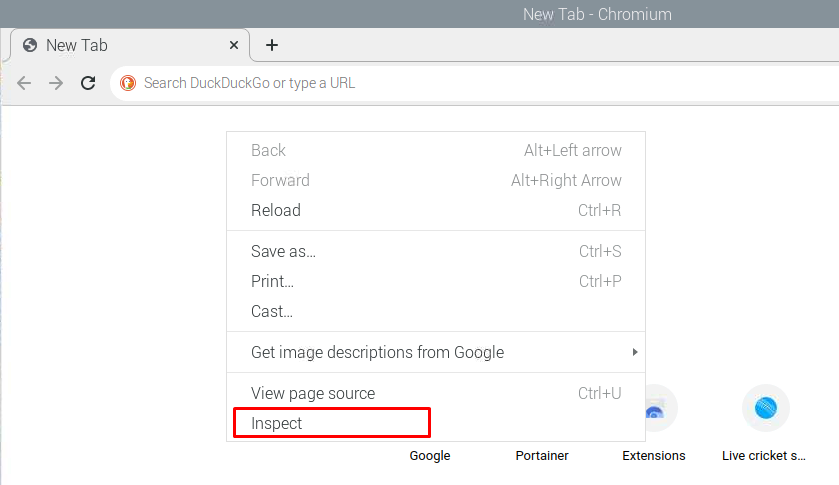
Step 1: Open your Raspberry Pi browser from the top menu bar:
From the right click menu click on the “Inspect” option:
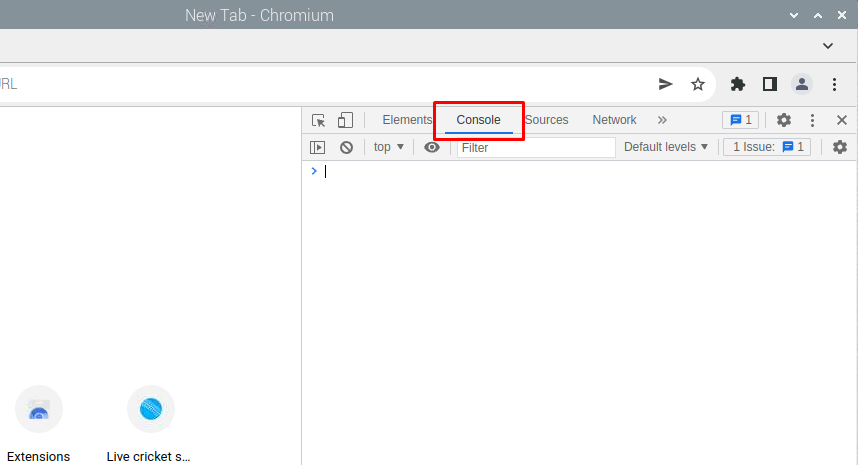
Step 2: From there click on the “Console” option or use the ctrl+shift+c shortcut key to open the console of chrome browser, write your JavaScript code in the tab:
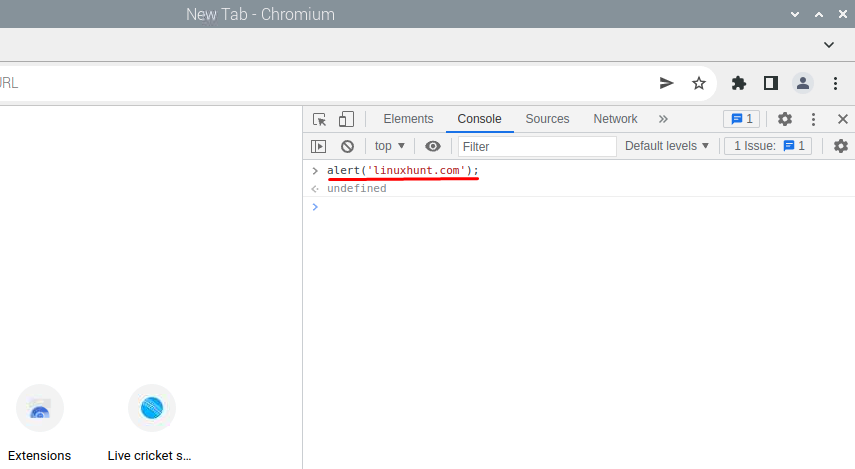
For illustration I have just printed linuxhint.com by using the following command:
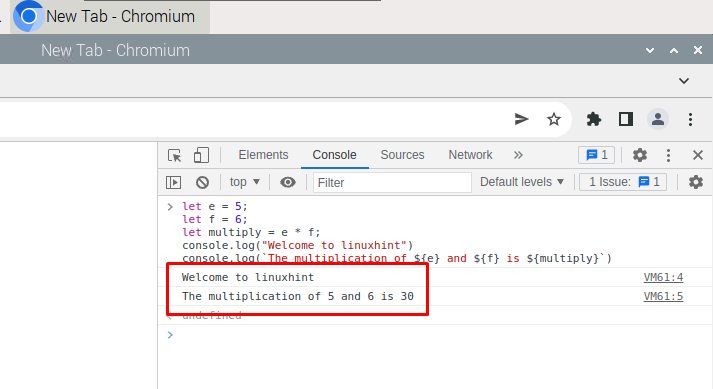
Now for demonstration i have run the same code used in the .js file
let f = 6:
let multiply = e * f;
console.log(“Welcome to linuxhint”)
console.log(`The multiplication of ${e} and ${f} is ${multiply}`)

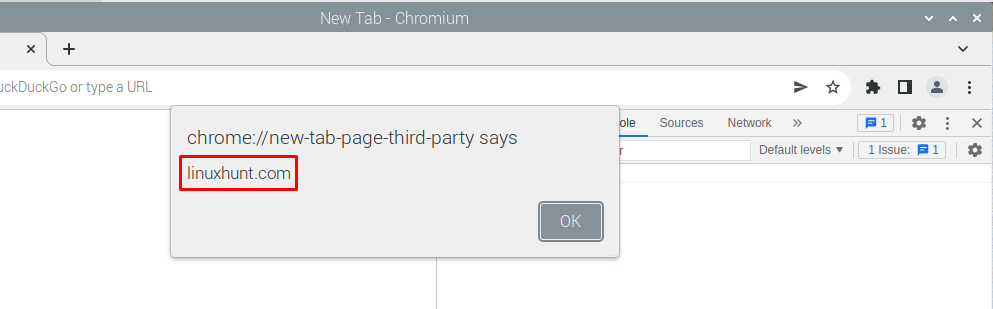
Once you have pressed enter the the output of the code will be shown in the console as in the image below:
Conclusion
Raspberry Pi is the most liked platform among the programmers because of its compact size and ease in usability. Moreover, like every programming language JavaScript also needs some software for programming especially if it is to be done outside the browser. So, if you are looking to get started with JavaScript on Raspberry Pi then read this guide as it explains the two ways for coding in JavaScript on Raspberry Pi.
Source: linuxhint.com