Getting Started With CMake and CPack on Linux
CPack is a packaging tool that is cross-platform and distributed by CMake. However, it can be used independently of CMake, but it uses generator concepts from the CMake suite tool.
This guide covers the installation and usage of CMake and CPack.”
How to Install CMake
You can install CMake via the command line or the Ubuntu Software Centre. In this case, we will install it via the command line, but you can check the complete CMake installation methods for more details.
First, update your repository.
Next, enter the command below to install CMake.
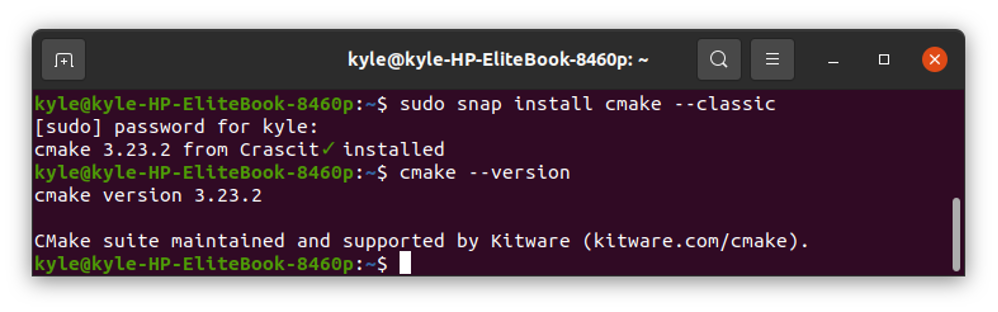
You can confirm the installation by checking its version.
Using CMake to Configure, Build, and Debug a C++ Project on Linux
CMake is popular for managing code builds for C++ projects, and it does so with the help of the CMakeLists.txt files for each directory. They define the tasks the build system should undertake.
In our case, we will write a simple C++ program using Visual Studio Code and build it using CMake.
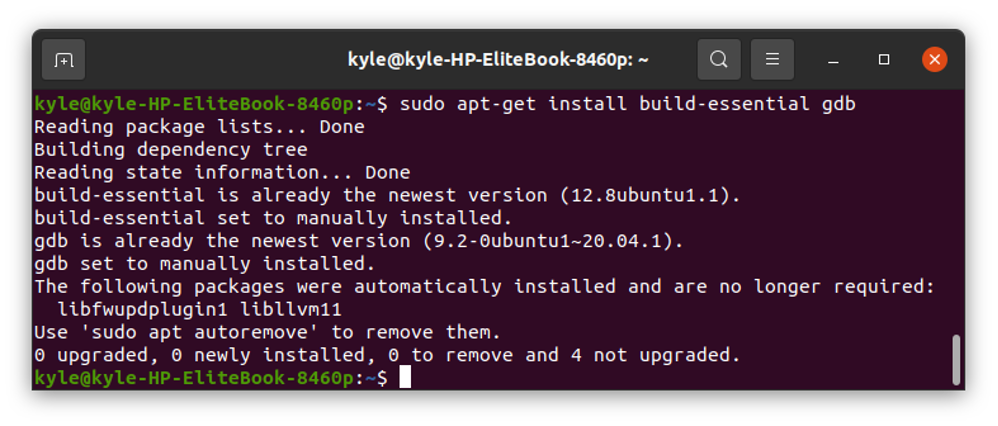
Ensure you have the C++ Visual Studio extension installed, a debugger, preferably gcc, and CMake.
You can install gcc using the command:
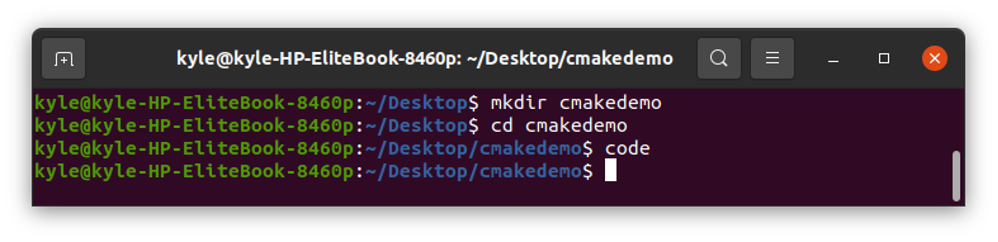
To start, create a working folder and open it in Visual Studio Code.
$ cd cmakedemo
Open Visual Studio Code
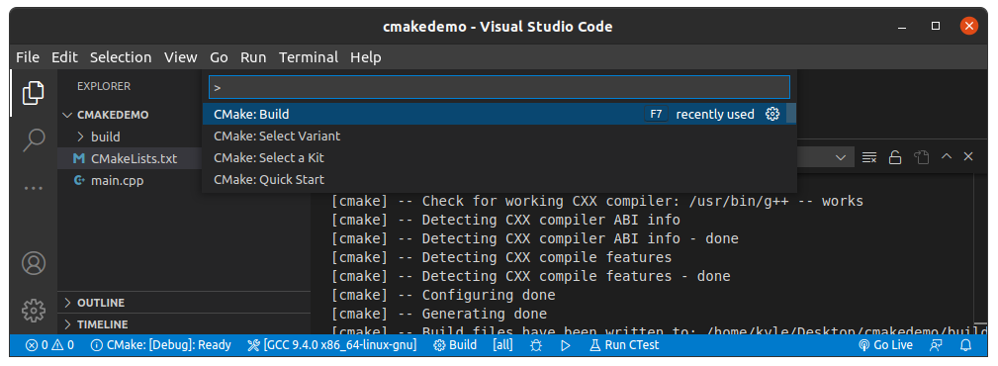
Once Visual Studio Code opens, open the Palette by typing ctrl + shift + p
To quickly create the needed CMake files, type CMake: Quick Start and choose the option like in the image below.
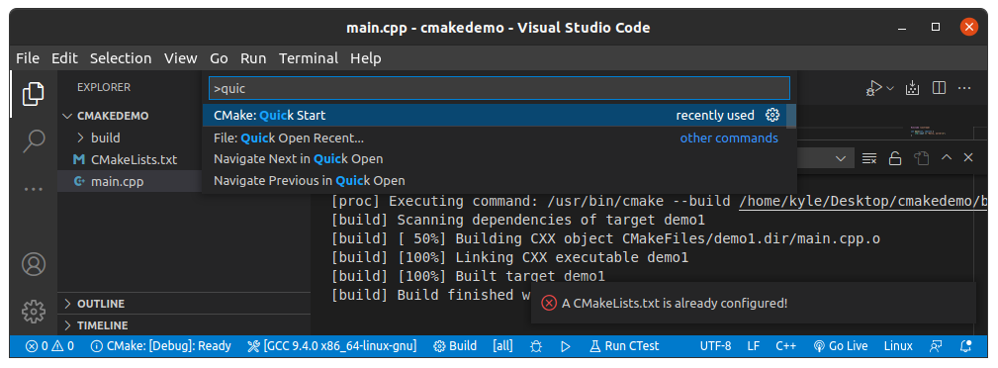
If prompted to choose between Library and Executable, choose Executable. You will notice two files, the main function and the CMakeLists.txt will be created.
You also need to select a Kit to inform CMake which compiler to use.
First, check your gcc version on the terminal. On the Palette, search for Kit and choose the one that matches your version.
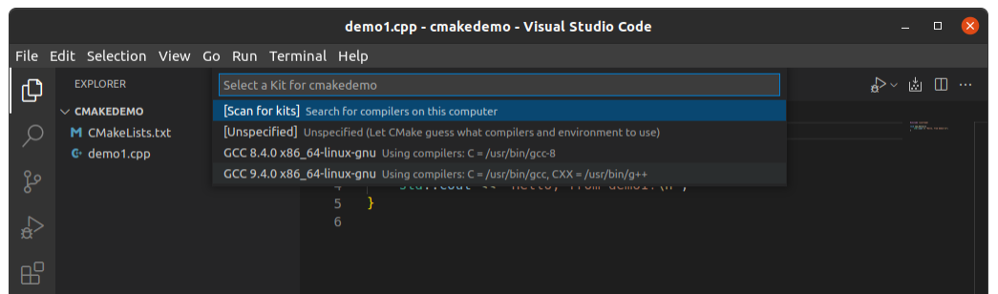
At the bottom of the window, you will see the selected kit. In our case, it’s GCC 9.4.0 x86_64-linux-gnu.
CMake also uses a variant that contains instructions on building the project. Still on the Palette, type CMake: Select Variant. There are four variants to choose from.
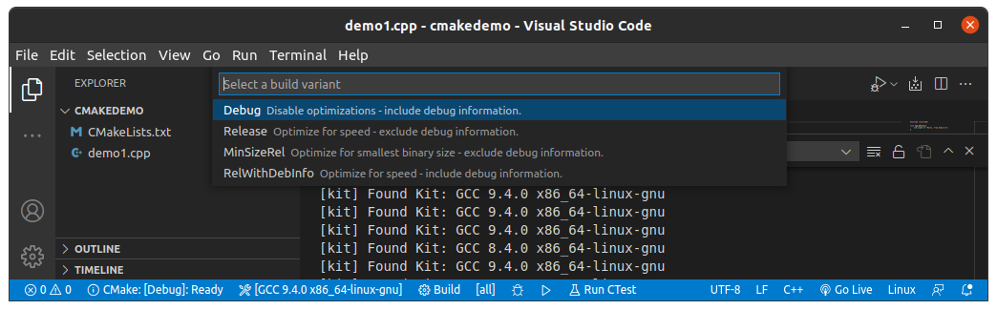
- Debug: it includes the debug details, but it disables optimizations.
- Release: no debug details, but optimization gets included.
- RelWithDebInfo: it includes debug info and optimizes for size.
- MinSizeRel: it doesn’t include the debug details, but it optimizes for size.
In our case, we need optimization and debugging information. So, we will choose Debug.
Configuration
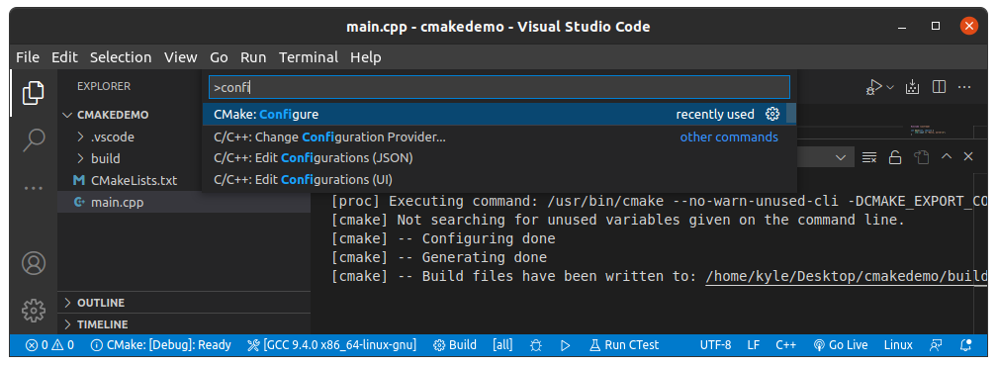
Everything is set. Open the Palette and type CMake: Configure, click the enter button, and CMake will generate the build files and configure the project.
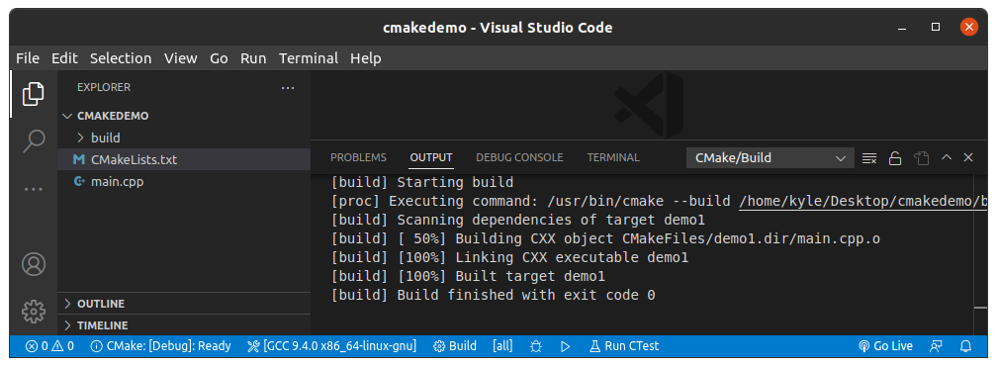
The final step is to build the project. You can do so by clicking the Build at the bottom of the screen or running CMake: Build.
That’s it! You’ve successfully used the CMake tool to configure and build the project.
In case of any error with the project, simply run the CMake: Debug, and it will show where the error is on the code.
CMake With CPack
Once you have a project configured and built as we did with CMake, you need a way to build the software to make it installable. What you need is a way or tool that lets you build the project on your development machine and create a form that can be transferred and installed on another device. That’s what CPack does.
CPack will create an installer and a package for the project. It can create binary and source packages. The good thing is that CPack supports the creation of installers for OS X, RPMs, zip files, .tar.gz, Debian packages, Windows, and .sh.
CPack works to create a duplicate of the source tree for the project and tar or zip file, and you can transfer the file to another machine and store them in the correct directory and have your project up and running. CPack does most of the work, including creating a temporary directory for the project and copying the install tree in a suitable format for the packaging tool.
Using CPack With CMake
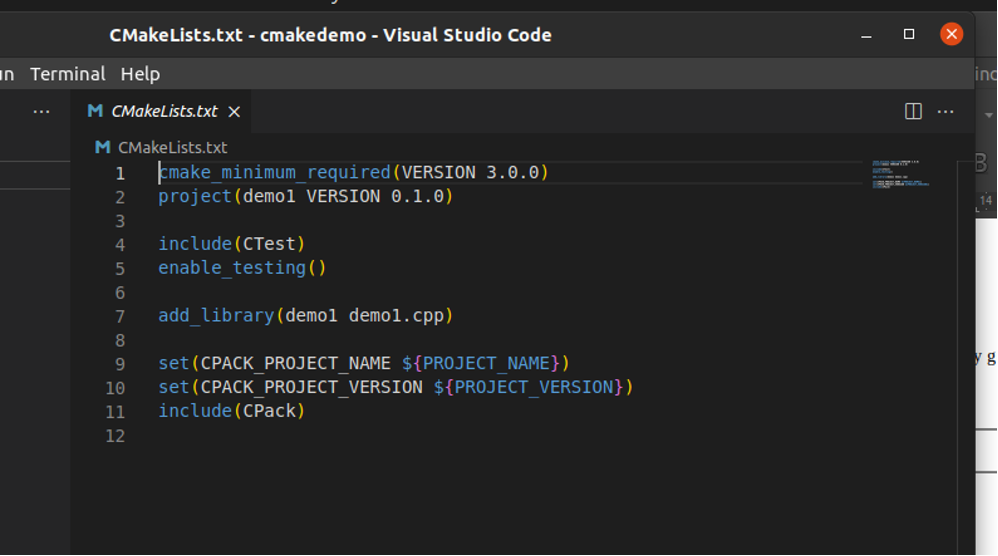
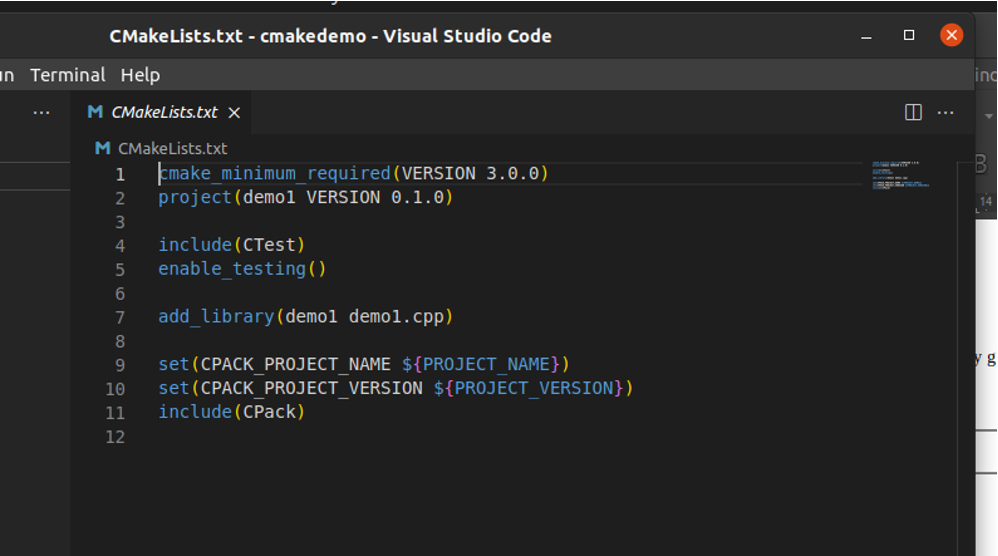
Since CPack is part of CMake, combining the two is pretty easy. In our C++ project using CMake, we had a CMakeLists.txt file created. Inside the file, there is support for CPack that comes auto-generated, as shown.
Therefore, the remaining part is to generate the installers and packages.
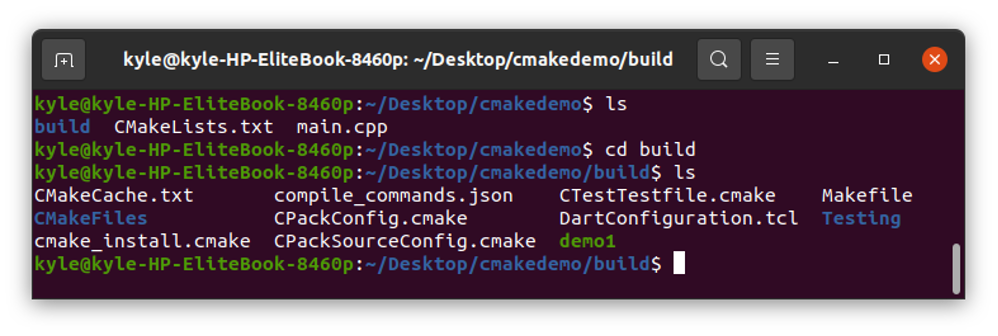
To do so, first, navigate to the build directory inside the project directory. In our example, it will be:
You can list the different files in the directory.
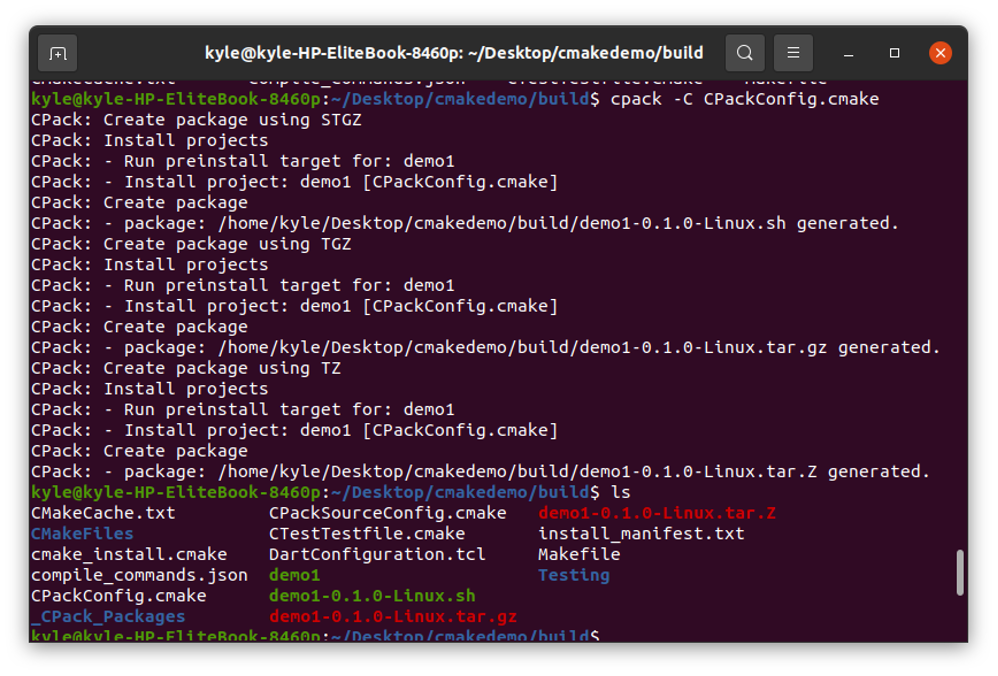
To generate the installers, run the command:
You can note the different generators from the output below, including .tar.gz, .sh, and .tar.z.
Alternatively, you can run the command:
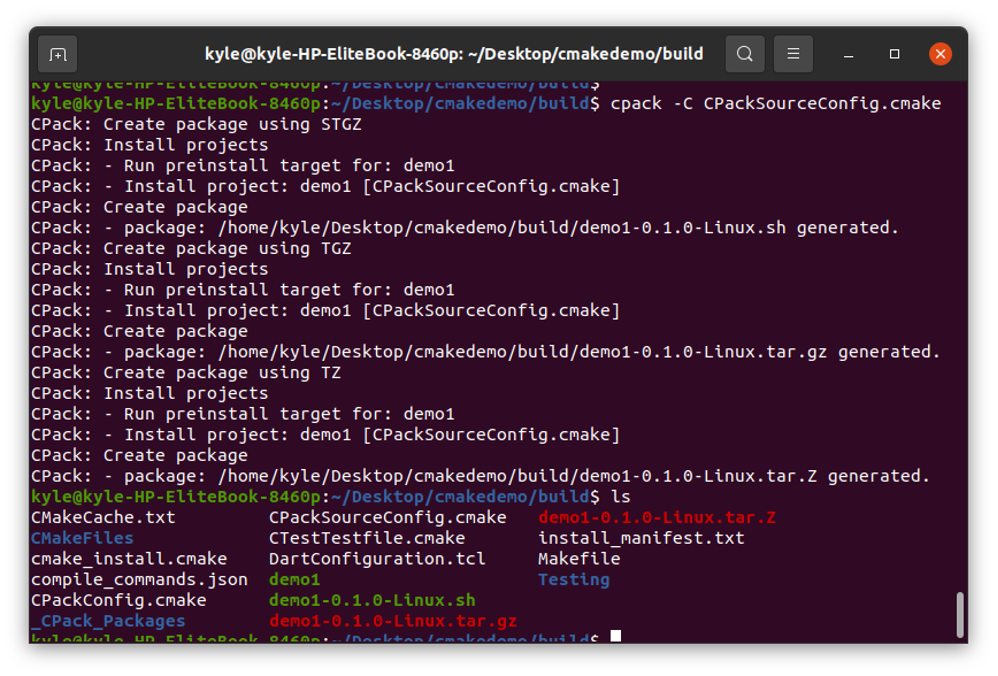
You now have the needed packages for your project.
Conclusion
CMake and CPack are helpful tools for generating configuration files, building, testing, and packaging projects. There are tons of options that you can use with the commands to achieve different things. This guide covered what CPack and CMake are, then went ahead to show an example usage that configures and builds a C++ project with CMake and packages it with CPack.
Source: linuxhint.com