Getting Started with Byobu Linux Command
Why Use Byobu?
The main reason for using Byobu is to save terminal states. If you are working on a remote server and is connected using a service like SSH, using Byobu will come in handy. For instance, if your session breaks in the middle of an update, you can reconnect, and Byobu will resume the sessions without breaking.
Furthermore, Byobu lets you group different terminal tasks without needing to open multiple terminal screens. It helps keep your screen organized. We will see how you can achieve that.
Installing Byobu
Byobu doesn’t come pre-installed. However, it’s available in the package manager. You can install it using the following command:

Once installed, confirm the version using the – -version flag.

How to Start Using Byobu
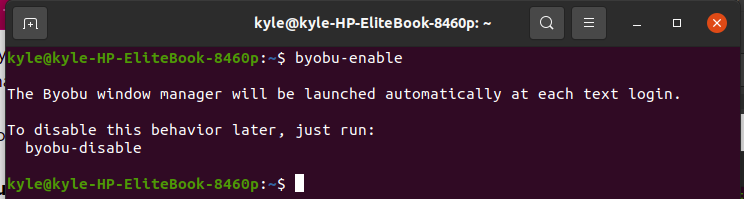
To get started with Byobu, you need to enable it on your terminal. To do so, use the command byobu-enable.
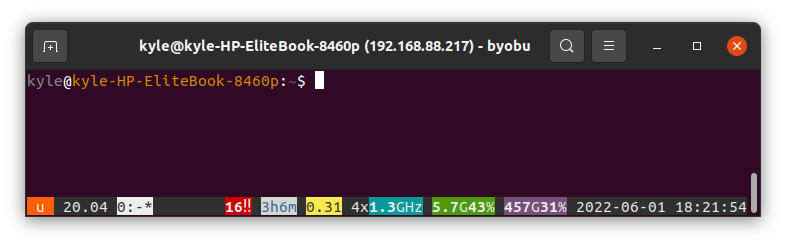
With Byobu enabled, you can now close your session and log back in to use Byobu. Type byobu on your terminal to pen the Byobu window manager.
It should be something similar to the following image:
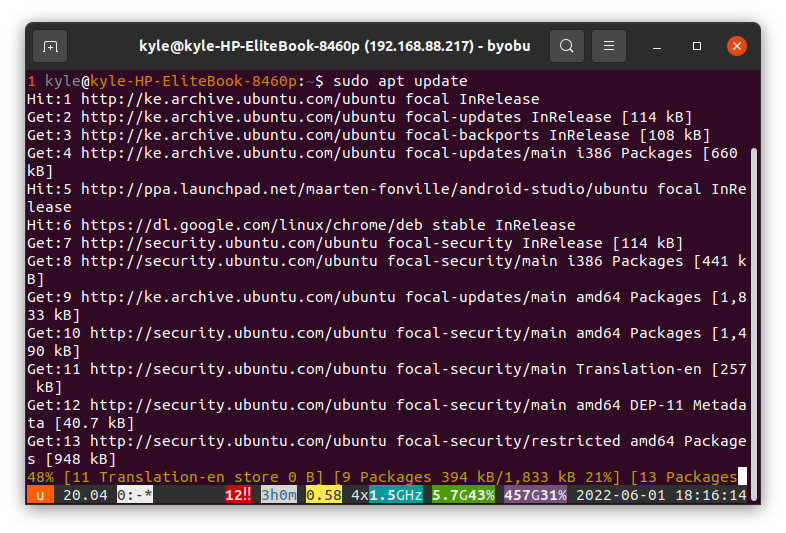
We can try running a command and then break the connection to see how it behaves. Update your system by running the sudo apt update. Once the update starts, close the terminal window.
Next, open the Byobu as we did earlier on.
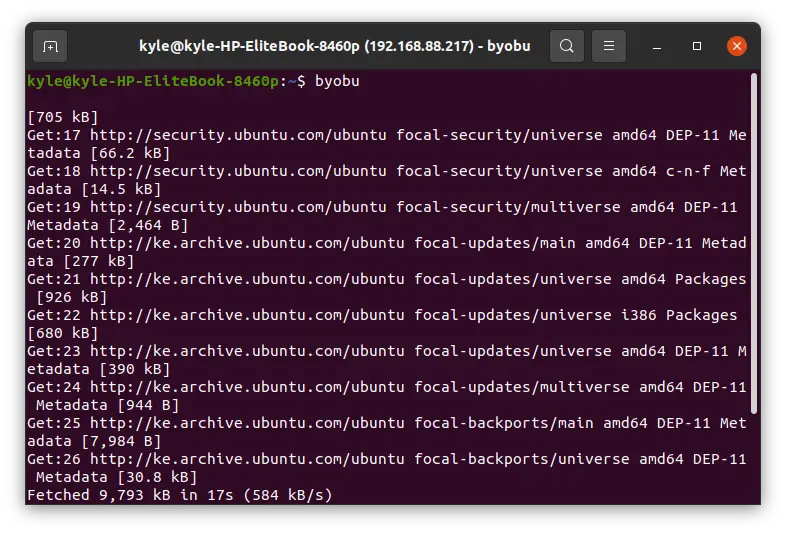
You will notice that the session resumes from where it was interrupted. That’s how Byobu comes in handy to save your workspace even after disconnection.
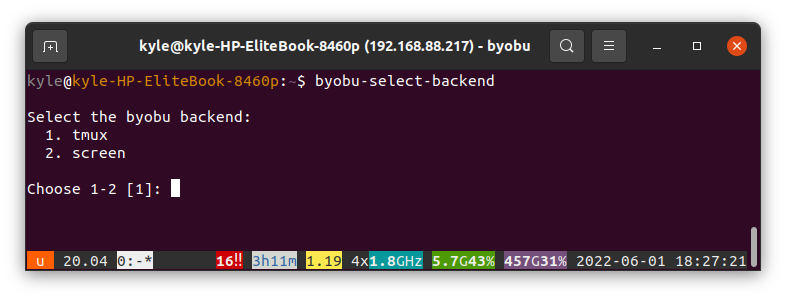
Byobu Select Background Multiplexer
Byobu offers two background multiplexers: tmux and screen. You can select which one to use, but tmux is used by default. The command to change the background multiplexer is as follows:
Once it opens, you can enter 1 to use tmux or 2 to use screen.
 Byobu Colorful prompt
When using Byobu, you can choose to enable the colorful prompt. However, you should have it by default. If that’s not the case, use the following command:
Similarly, you can disable it using the following command:
Using Byobu Sessions
Another great benefit of using Byobu is creating a running instance of different sessions without interrupting each other. The first session starts when you load Byobu. When you create different sessions, you will be prompted to choose which to use when you open Byobu.
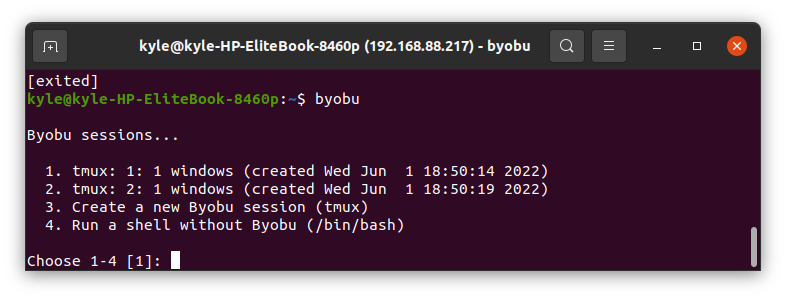
Enter the number of the session to open it.
There are different options to use when handling the sessions:
1. Create New Sessions
To quickly open a new Byobu session, press CTRL + SHIFT + F2. A new session will load up.
2. Close All Sessions
To exit Byobu and close all your sessions, press CTRL + D.
3. Toggle the Sessions
You can move up and down your sessions using the ALT + UP or ALT + DOWN keys.
4. Close a Session
You can detach a single session without closing Byobu. There are two ways to go about this. First, if you want to close the current session, press SHIFT + F6. Your other sessions won’t be affected. Besides, you can relaunch Byobu at any time. However, when you have multiple connections and only wish to close the active one, press ALT+F6.
Using Byobu Windows
Byobu windows help in multitasking from a single connection. Below is a quick cheat sheet for using Byobu Windows:
1. Create a New Window
Press F2 to open a new window. You will get a new command prompt for your window.
2. Scrolling Different Windows
Like how you can scroll different sessions, you can press F3 to scroll left and F4 to scroll the windows on the right.
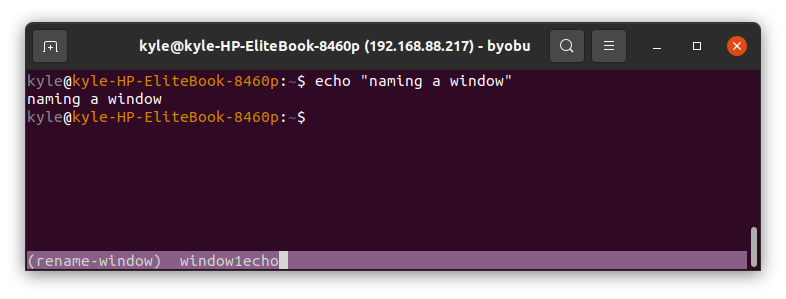
3. Naming a Window
You may need to name the current window to tell its purpose easily. Press F8 and add your name, then press the enter key.
4. Rearranging Windows
It helps give your windows order, and you can do that by pressing CTRL + SHIFT +F3/F4 and moving the window either to the right or left as per your preference.
5. Scrolling Back History
When running a command that displays multiple outputs and you need to track the history, you can press F7 followed by either PgeUp/PageDown or Up/Down keys to scroll the history. Once done, press the enter key. If you wish to exit, press the F6 key to exit Byobu.
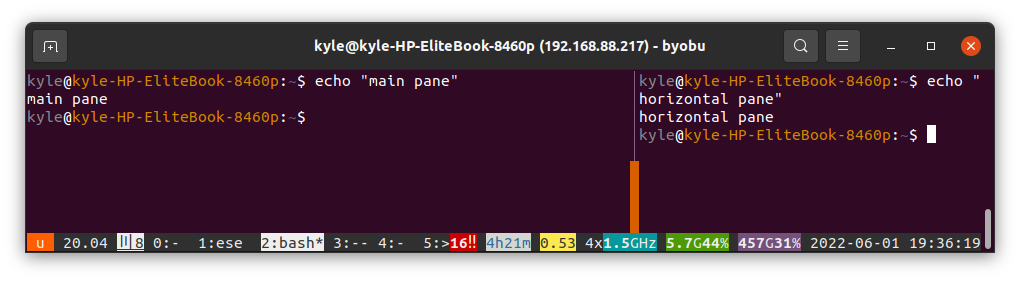
Using Byobu Panes
So far, we’ve seen how you can use Windows and Sessions on Byobu. There is also a way to split the windows either vertically or horizontally. This feature lets you run multiple tasks on the same window. Let’s see how that works.
1. To create a Vertical Pane
Pressing SHIFT+F2 will create a split of your current window vertically.
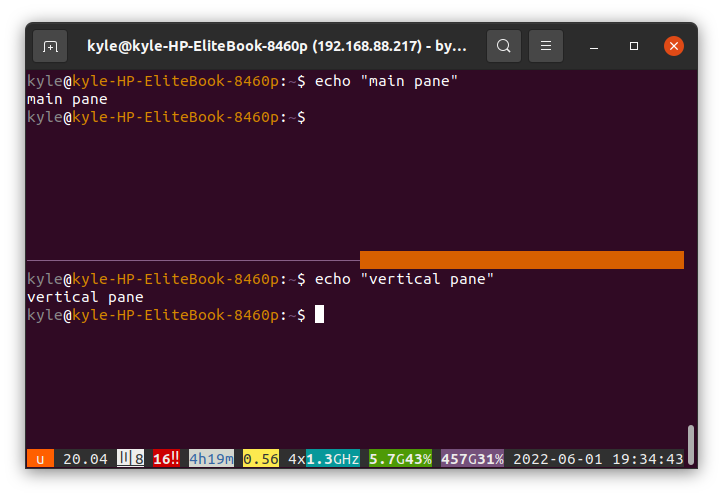
2. To create a Horizontal Pane
For a horizontal division, press CTRL+F2.
3. Resize the Current Pane
To resize the current pane, either change its width or height, use SHIFT+ALT+LEFT/DOWN/RIGHT/UP to resize it.
The UP and DOWN work for a vertical split. The RIGHT and LEFT work for a horizontal pane.
4. Switch Panes
To move up or down your panes, press SHIFT+RIGHT/LEFT/UP/DOWN.
5. Split a Pane into a New Window
If you want to split a pane to a new window instead of the current one, press ALT+F11.
Typing exit will close the current pane.
Conclusion
Byobu is a great choice when dealing with various tasks and you want to save their sessions. Besides, you can enable and disable Byobu anytime. We’ve discussed how and when you should use Byobu, and the examples presented help set the pace you need to understand Byobu.
Source: linuxhint.com