Format a USB Flash Drive on Windows (4 Methods)
The cool thing about the USB flash drives is that they are rewritable. This means that they can be formatted and can be refilled with the data again. There are methods from the beginner level to the absolute expert level to format USB. For instance, formatting a USB flash drive from the GUI (Graphical User Interface) is easy as compared to formatting through the CLI (Command Line Interface).
Quick Outline:
Format a USB Flash Drive on Windows (4 Methods)
- Method 1: Use Windows Explorer to Format USB Drive
- Method 2: Use the Disk Management Tool to Format a USB Flash Drive
- Method 3: Format a USB Flash Drive Using PowerShell
- Method 4: Format a USB Flash Drive Using Command Prompt
Format a USB Flash Drive on Windows (4 Methods)
There are several methods to format USB in Windows, such as using Command Prompt, PowerShell, via Windows Explorer or Disk Management tool. All of these methods are demonstrated practically to explain to you methods to format USB in Windows.
Method 1: Use Windows Explorer to Format USB Drive
The beginner-level or easiest method to format the USB flash drive is through Windows Explorer. Windows Explorer is a Windows file manager that is used to manage files and folders in the system. To format the USB using Windows Explorer, check the steps given below.
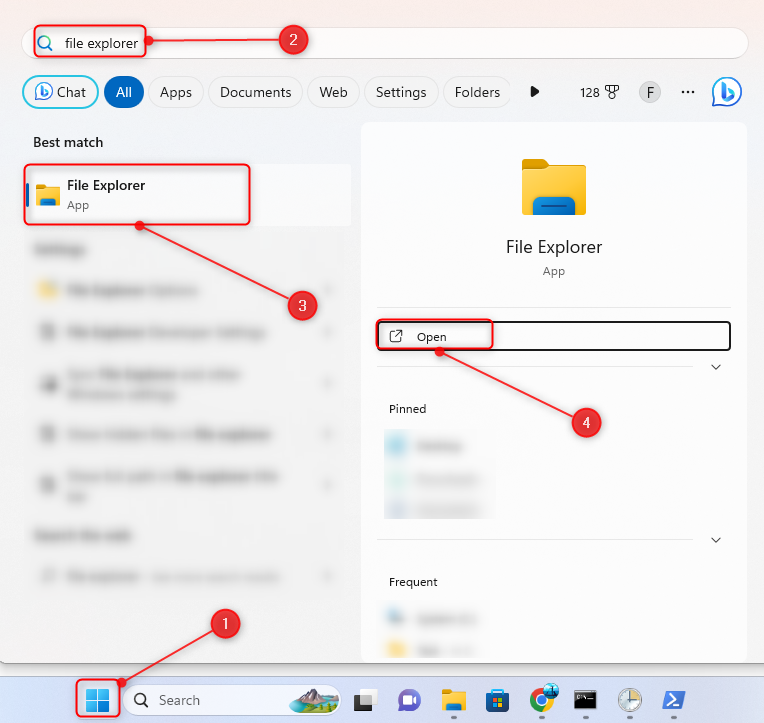
Step 1: Open File Explorer from the Start menu (Alternate: Windows + E):
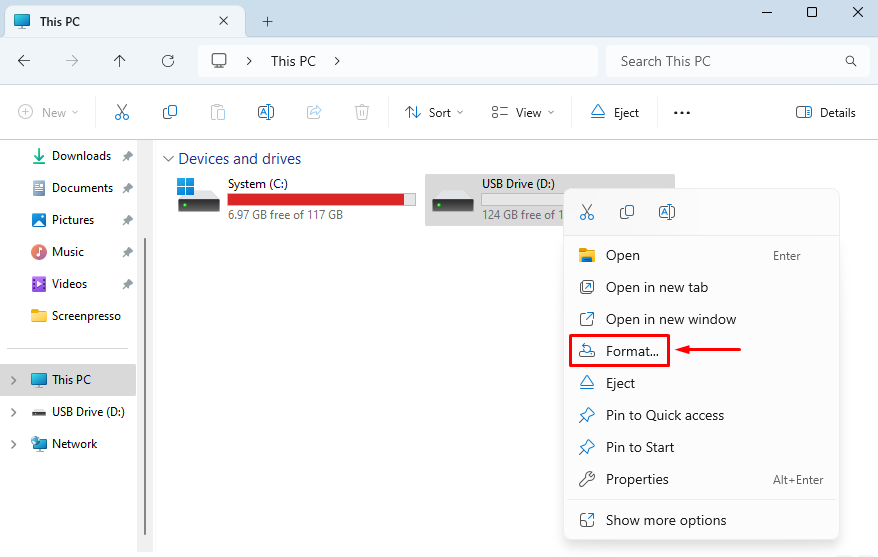
Step 2: Open This PC by clicking on it from the left pane.
Step 3: Right-click on the USB flash drive and select Format:
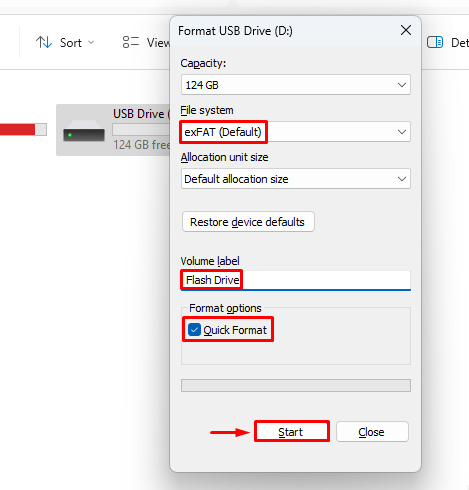
Step 4: Click on the Start button to format USB:
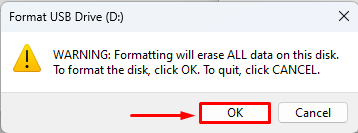
Step 5: Select the OK button:
Method 2: Use the Disk Management Tool to Format a USB Flash Drive
Disk Management is the Windows utility that is used for disk management. Its management includes formatting the drives, assigning letters, or changing drive size. Disk Management can also be used to format the USB flash drive on Windows 10.
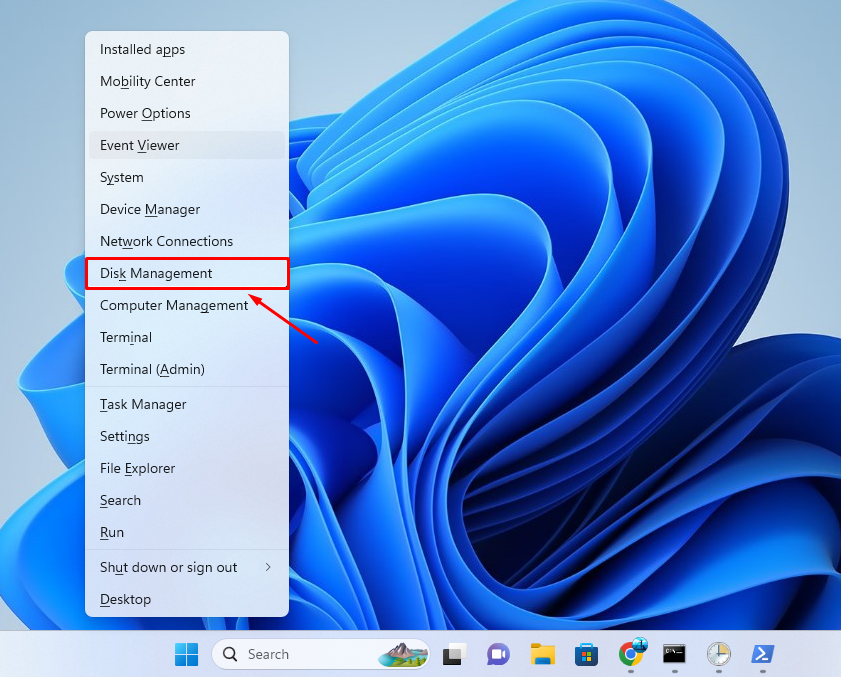
Step 1: Press the Windows key + X to open the Quick Access Menu and select Disk Management:
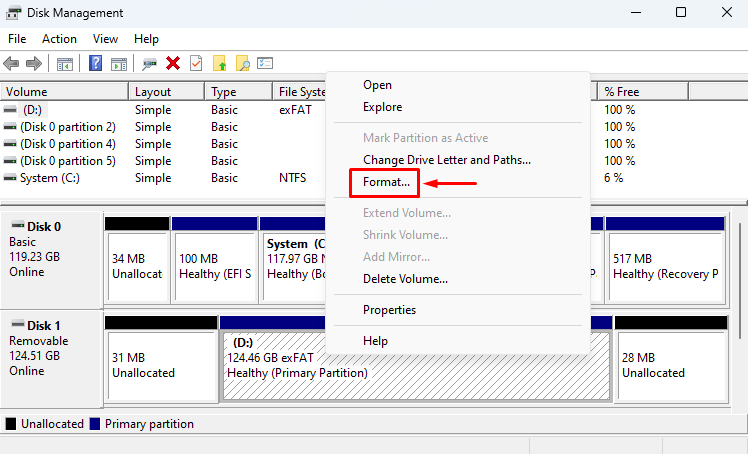
Step 2: Right-click on the removable disk and select Format:
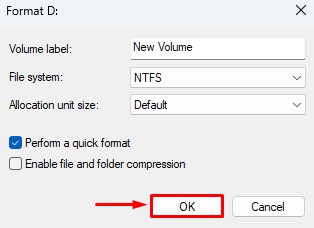
Step 3: Check the USB flash drive name in the Volume Label:
Step 4: Select the File System.
Step 5: Mark tick the Perform the quick format box and press Enter:
Method 3: Format a USB Flash Drive Using PowerShell
PowerShell is a Windows configuration management and automation tool. PowerShell can also format USB drive. To do so, check the mentioned steps.
Syntax
Here is the PowerShell syntax to format a USB drive:
According to the above code:
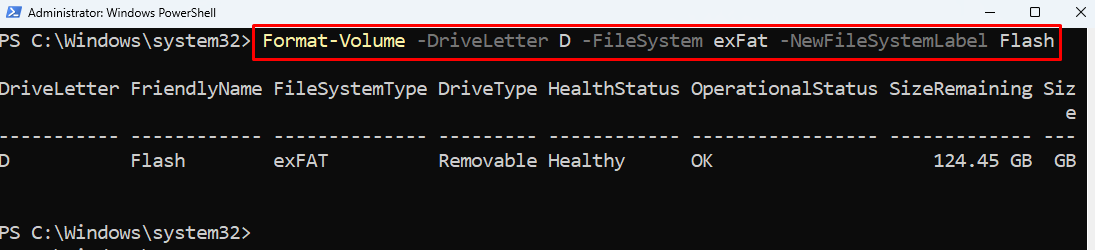
- First, specify the Format-Volume command to format USB.
- Then, use the -DriveLetter parameter and specify it as the USB drive letter.
- After that, use the –FileSystem parameter to specify the file system.
- Lastly, use the -NewFileSystemLabel parameter to specify the USB drive name.
Step 1: Open PowerShell as an administrator from the Start menu:
Step 2: Execute the following code to format the USB flash drive:
Method 4: Format a USB Flash Drive Using Command Prompt
A USB flash drive on Windows 10 can also be formatted using the Command Prompt application.
Syntax
Here is the CMD syntax to format the USB drive:
According to the above code:
- First, specify the format command and assign it the USB drive letter.
- After that use the /v: and specify the flash drive label name.
- Then, use the /fs: and specify the file system, and lastly, use /q to quickly format the USB drive.
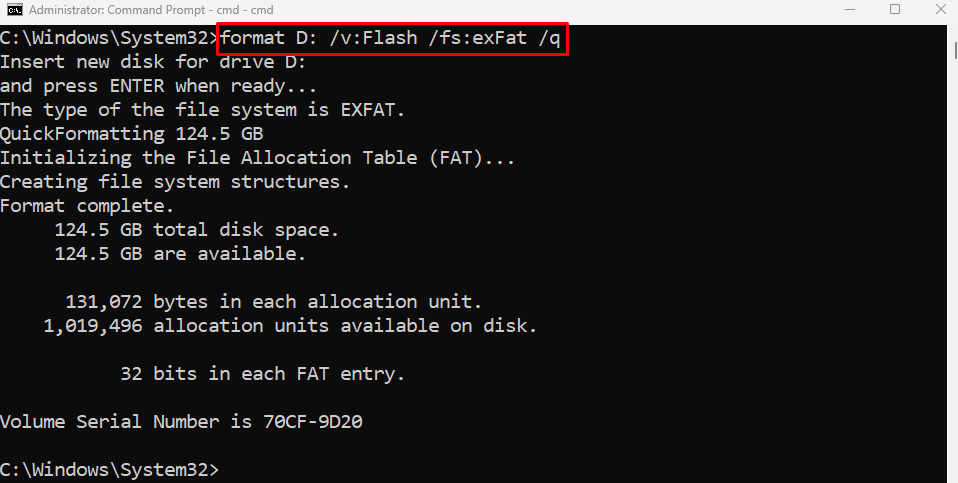
Step 1: Open Command Prompt as an administrator.
Step 2: Type the below-provided code and press Enter:
Conclusion
To format a USB flash drive, first, press Windows + E to open File Explorer. Then, move This PC window, right-click on the USB, and hit the Format button. Choose the File system, confirm the name in the volume label field, mark the Quick Format checkbox, and hit the Start button. Additionally, a USB flash drive can be formatted using Command Prompt, PowerShell, or Disk Management application. Read the above article to learn the various ways to format the USB flash drive in Windows.
Source: linuxhint.com