Form Validation Using HTML and JavaScript
Step 1: Setting up the HTML Document
Create a new HTML document and type in the following lines inside it to create a form:
<h1>This is an example of form validation</h1>
<form name="validityForm" onsubmit="return formSubmit()" method="post">
<br />
<p>Type in your First Name:</p>
<br />
<input type="text" name="name" id="nameField" />
<br />
<p>Type in your Email Address</p>
<input type="text" name="email" id="emailField" />
<br />
<p>Type in your Contact no#</p>
<input type="text" name="tele" id="teleField" />
<br />
<br />
<button type="submit">Submit!</button>
</form>
</center>
In the above lines:
- A <form> tag is used to create a form with the name set to validityForm and the method is set to “post”. Also, the onsubmit property is set to “return formSubmit()” which executes this method upon submission and only submits the form if that method returns true.
- After that, simply use <p> tags to prompt the user and <input> to take the input from the user. Remember that every input tag has a unique name.
- At the end of the form, create a button with the type set to “submit”.
If the HTML document is loaded in a web browser, it will show the following:

The webpage asks for the user’s first name, email address, and contact number.
Step 2: Setting up the JavaScript File
In JavaScript, start by creating the function formSubmit() with the following lines:
// All the next lines will be included within the body of this function
}
After that, create three variables and store the values from the three fields inside them using the following lines:
var conactNumber = document.forms.validityForm.email.value;
var emailAdr = document.forms.validityForm.tele.value;
In the above lines, the “document” object was used to get the “forms” attribute, which was further used with the name of the form validityForm to access the input tags with their names inside it.
After that, define the regular expressions for checking the validity of each field with the following lines:
var teleRegex = /^\d{10}$/;
var nameRegex = /\d+$/g;
In the above lines:
- emailRegex checks for a valid email address with @ including and even allows a dot “.” and a hyphen
- teleRegex checks for only numeric characters with maximum length of input set to 10
- nameRegex checks for any special characters or numbers inside the name field
After that, compare the three regular expressions with their respective text field values with the help of if statements, and if any field is invalid then simply return and alert the user, for all this use the following lines:
window.alert("Invalid First Name");
returnfalse;
}
if (emailAdr == "" || !emailRegex.test(emailAdr)) {
window.alert("Please enter a valid e-mail address.");
returnfalse;
}
if (conactNumber == "" || !teleRegex.test(conactNumber)) {
alert("Invalid Phone Number");
returnfalse;
}
After this, prompt the user for that the inputs were valid and return the value as true:
return true;
The complete JavaScript code is as:
var firstName = document.forms.validityForm.name.value;
var conactNumber = document.forms.validityForm.email.value;
var emailAdr = document.forms.validityForm.tele.value;
var emailRegex = /^\w+([\.-]?\w+)*@\w+([\.-]?\w+)*(\.\w{2,3})+$/g;
var teleRegex = /^\d{10}$/;
var nameRegex = /\d+$/g;
if (firstName == "" || nameRegex.test(firstName)) {
window.alert("Invalid First Name");
returnfalse;
}
if (emailAdr == "" || !emailRegex.test(emailAdr)) {
window.alert("Please enter a valid e-mail address.");
returnfalse;
}
if (conactNumber == "" || !teleRegex.test(conactNumber)) {
alert("Invalid Phone Number");
returnfalse;
}
alert("Form Submitted with Correct Information");
returntrue;
}
Step 3: Testing the Validation of the Form
Execute the working of the form validation by executing the HTML document and typing in data to the inputs fields. Provide an invalid name with special characters or numbers inside it
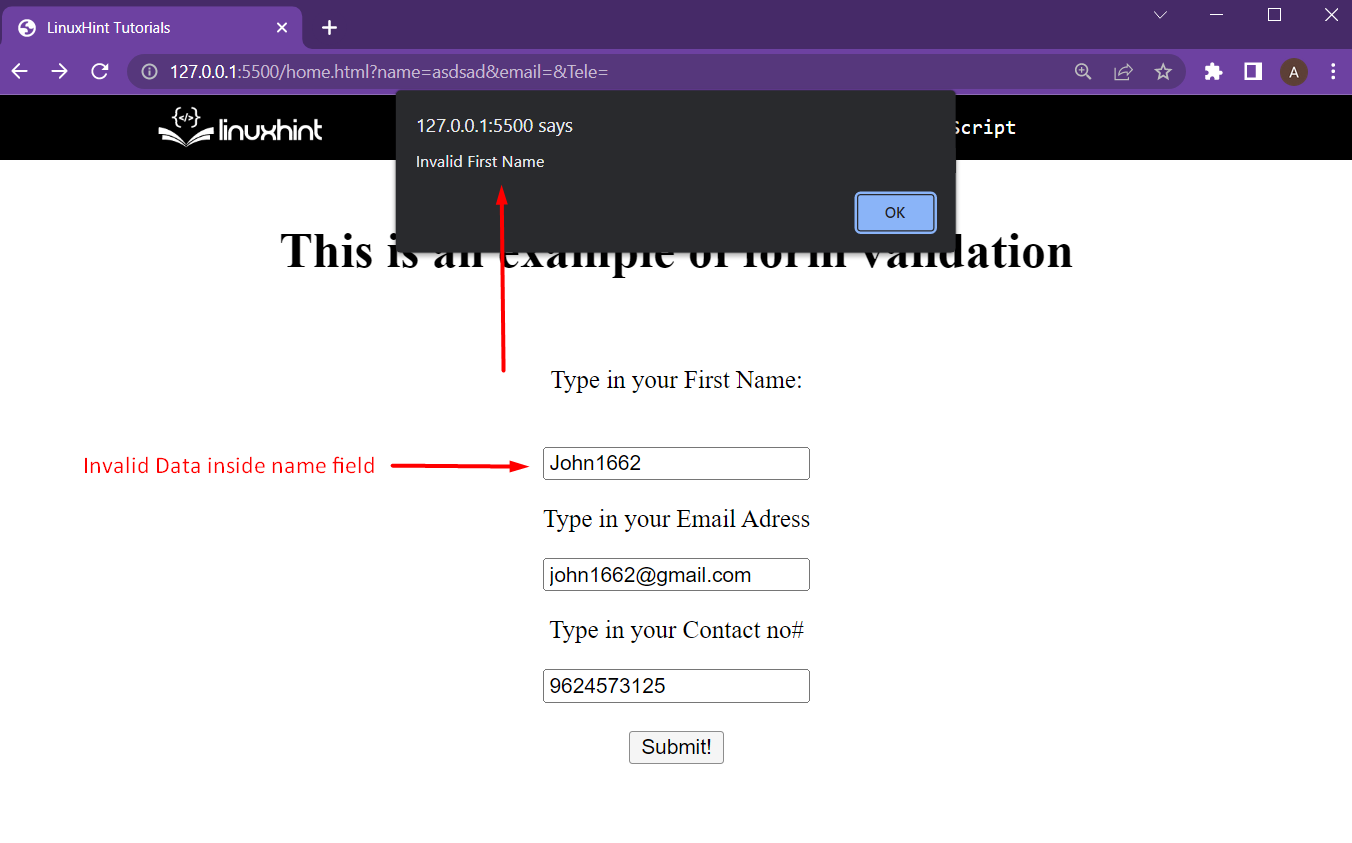
The webpage prompted the user that the name was invalid.
Try again with the correct name and incorrect email address:
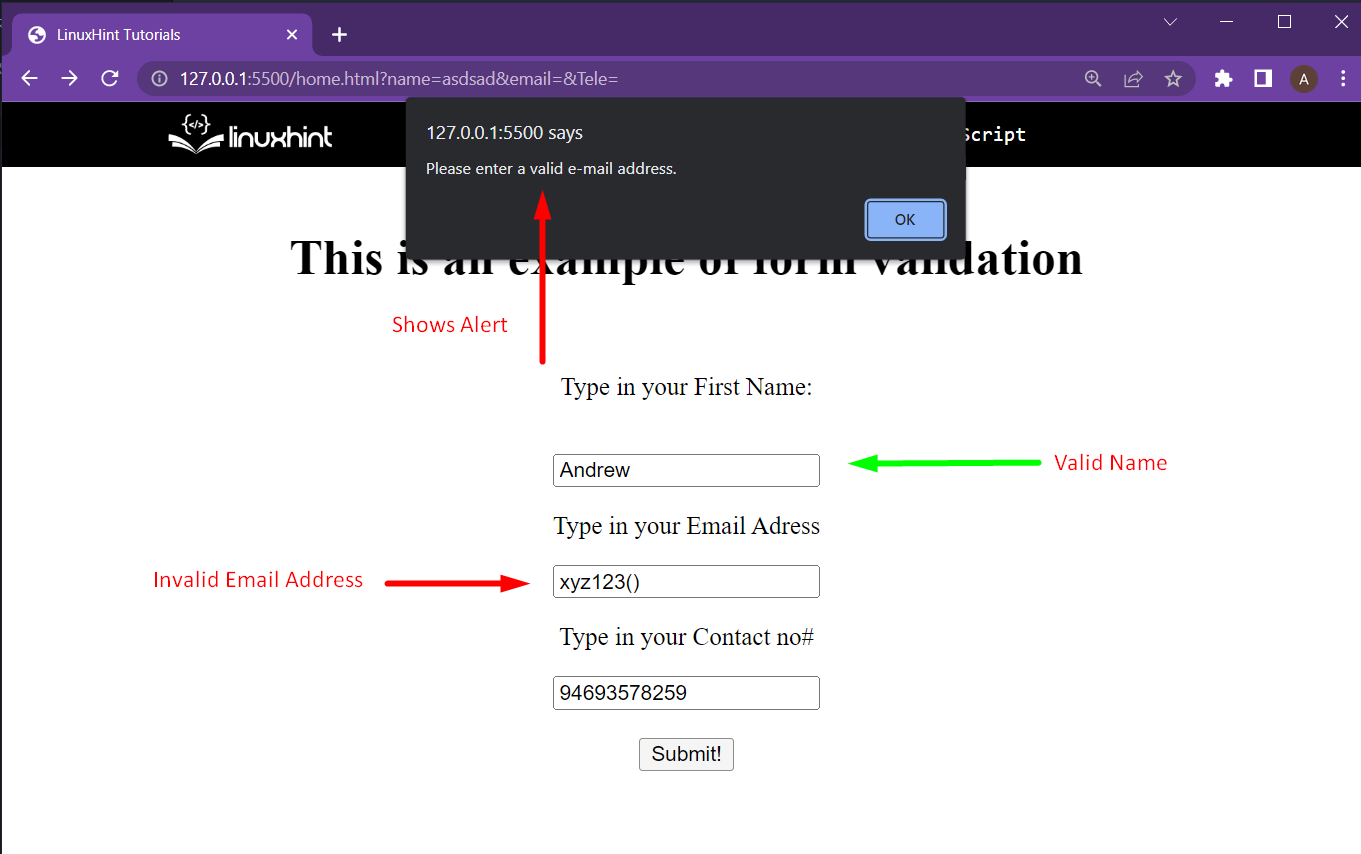
The user was alerted that the email address is not valid.
After that, try with a valid name and valid email address but with an invalid contact number like:
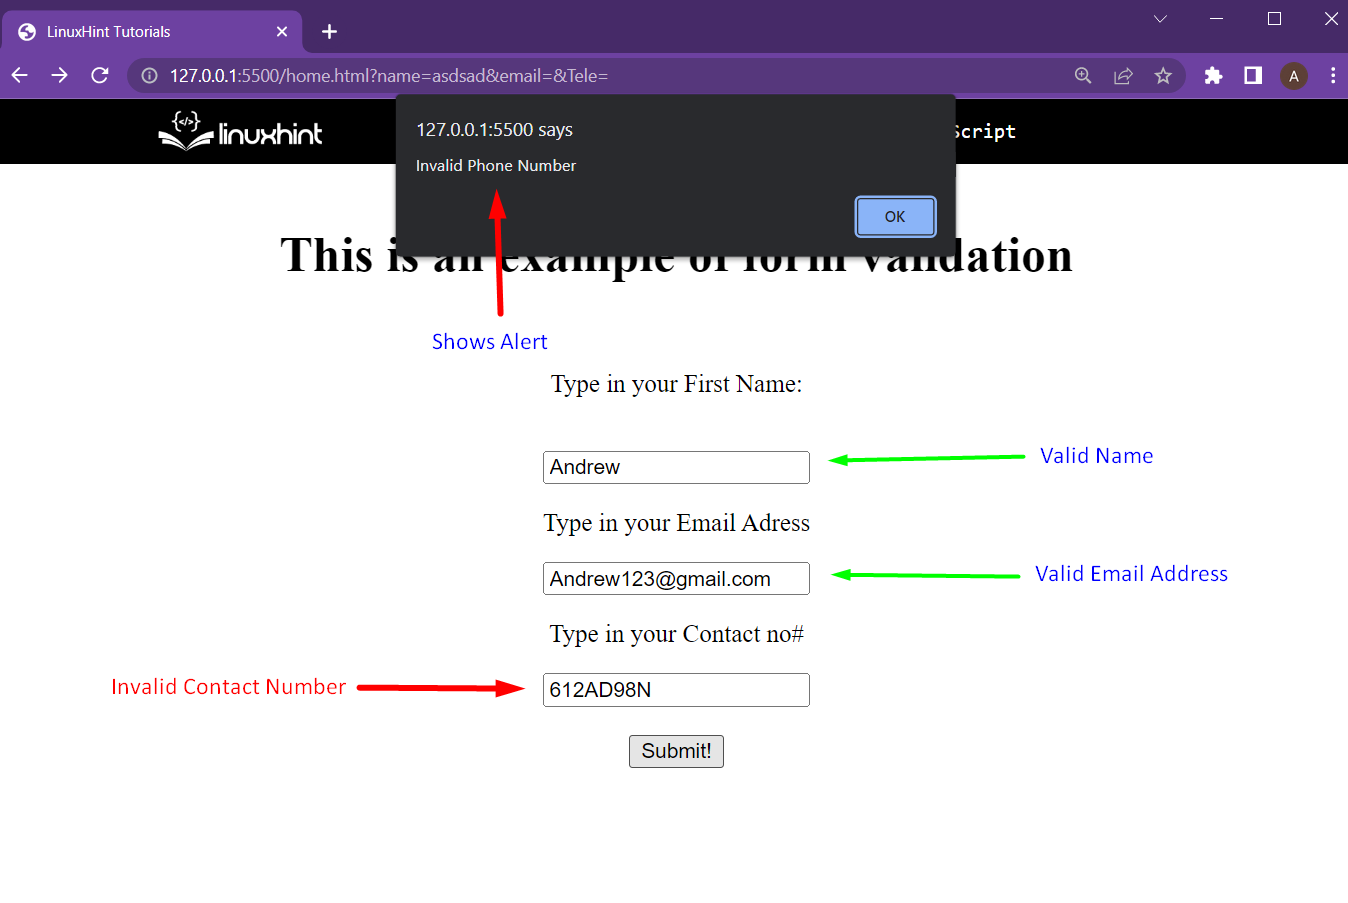
The webpage prompted the user that the contact number is not valid.
After that, for the final test, provide all the correct information like:

With all correct information provided, the form validation is successful and the web application can move forward.
Conclusion
Form Validation can be implemented on an HTML form with JavaScript, regular expressions, and a little bit of logic building. Regular expressions can define the correct accepted input for a field. After that, the regular expression can be matched against its respective input field’s value using the test() method. This goes for other types of input fields as well, may it be for Address, Postal Code, or Country name.
Source: linuxhint.com