Fixed: “Windows Cannot Connect to the Printer” Error Code
This write-up will discuss the multiple solutions of printer not connected error code.
How to Fix the “Windows Cannot Connect to the Printer” Error Code?
To fix the printer not connected error code, try the following fixes:
- Use the Printer Troubleshooter.
- Reboot the Print Spooler Service.
- Update the Printer’s Driver.
- Make the Printer your Default Printer.
- Update Windows.
Method 1: Use the Printer Troubleshooter
Troubleshooter is a built-in tool provided with Windows. This troubleshooter can solve basic and sometimes even some advanced problems. So, to use the printer troubleshooter, try the below-stated steps.
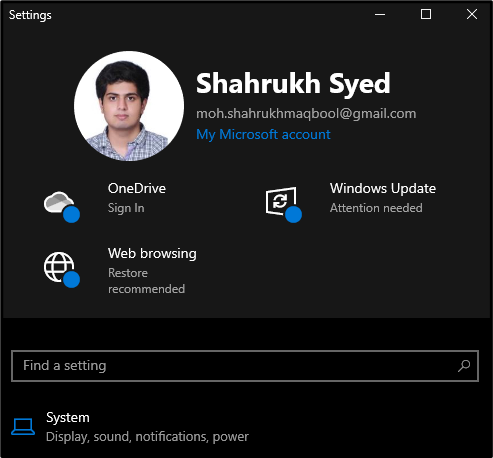
Step 1: Open Settings
Press the “Windows + I” buttons on your keyboard to open the “Settings” application:
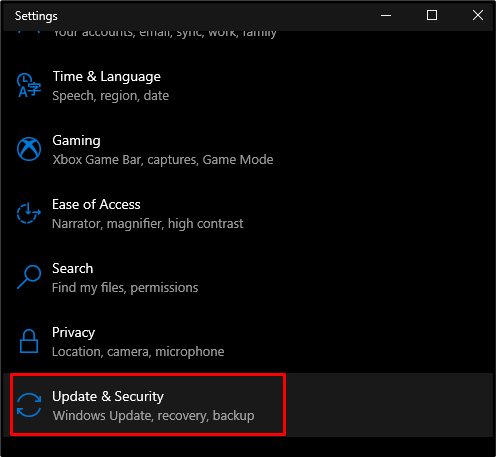
Step 2: Select “Update & Security”
Scroll down and select “Update & Security”:
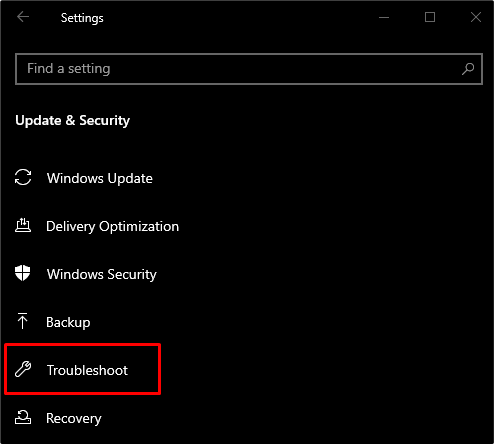
Step 3: Choose the “Troubleshoot” Option
Click on “Troubleshoot” from the left side panel as shown below:
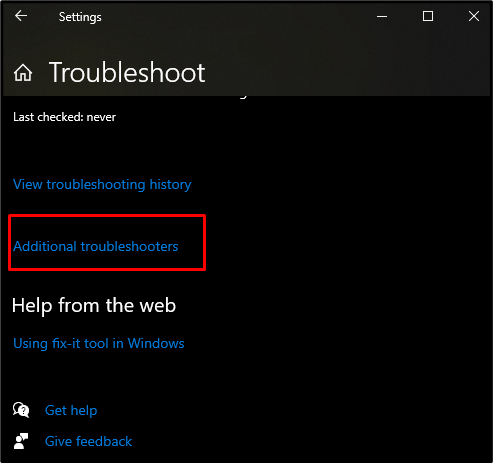
Step 4: See Additional Troubleshooters
To see all the Troubleshooters provided by Microsoft with Windows, press the “See Additional Troubleshooters” button:
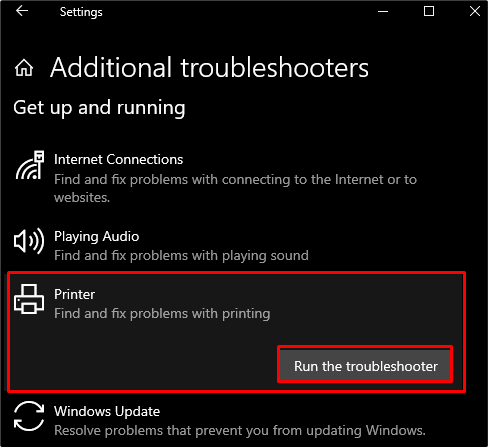
Step 5: Run Printer Troubleshooter
Underneath the “Get up and running” section, hit the “Printer” button, which will show the below-highlighted button. Click on it as shown below:
Method 2: Restart the Print Spooler Service
All the print jobs will be stored in the “Print Spooler” service till the printer prints them. Therefore, restarting this service can also assist in fixing the stated printer connection issue.
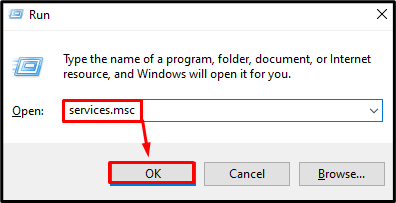
Step 1: Open Services
Open “Services” by typing “services.msc” in the input field of the “Run” box and press “Enter”:
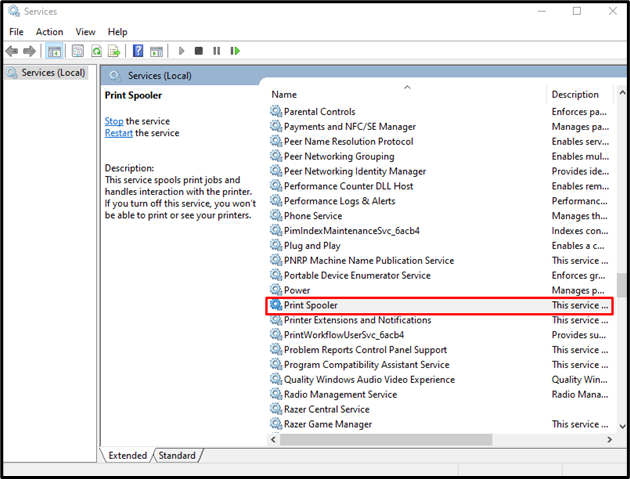
Step 2: Open Print Spooler Service Properties
Make search for “Print Spooler” service and hit on it to launch its “Properties”:
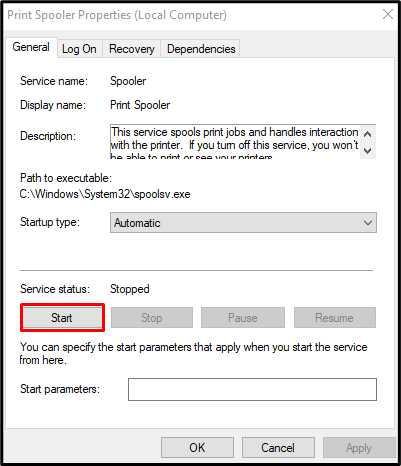
Step 3: Stop the Desired Service
Press the “Stop” button to stop the “Print Spooler” service:

Step 4: Start the Service
After stopping the service, wait 10 seconds and press the “Start” button to start the “Print Spooler” service again:
Method 3: Update the Printer’s Driver
Your printer’s driver might be outdated, which is causing this issue. Update your Printers driver by following the instructions provided below.
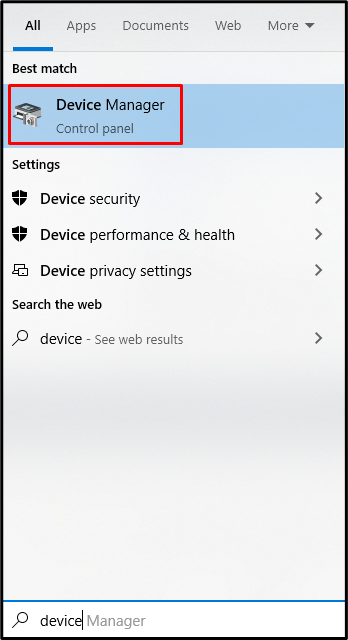
Step 1: Open “Device Manager”
Open “Device Manager” from the Startup menu:
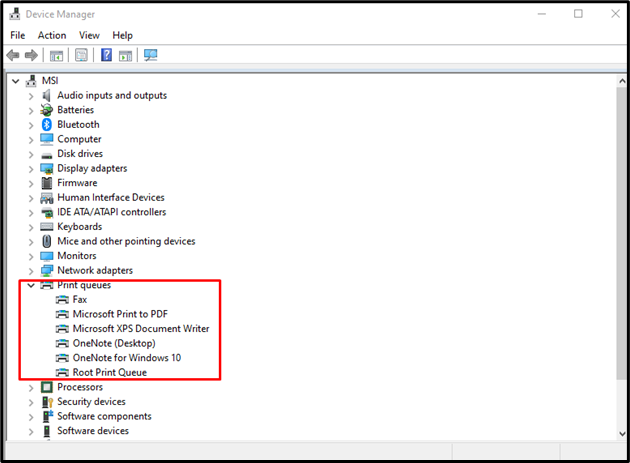
Step 2: Expand Print Queues
Click on “Print queues” from the list to expand it and see all installed printer devices:
Step 3: Update the Drivers
Right-click on the printer queues and choose the required option:

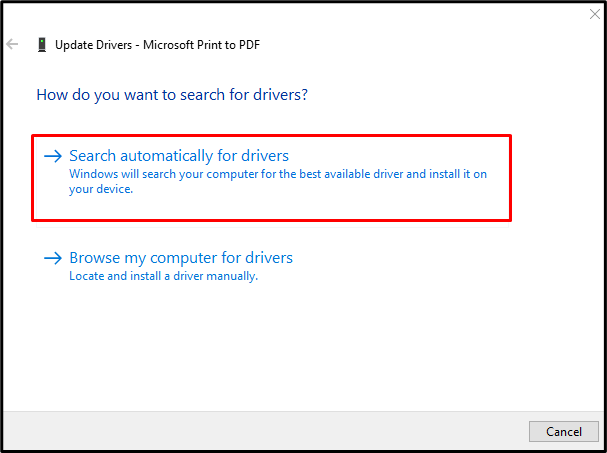
Step 4: Search Automatically for Drivers
Then, allow Windows to search for the latest version in Windows update by selecting “Search automatically for drivers”:
As a result, the printer driver will get updated.
Method 4: Make the Printer your Default Printer
If you have multiple printers installed, try making another printer the default printer.
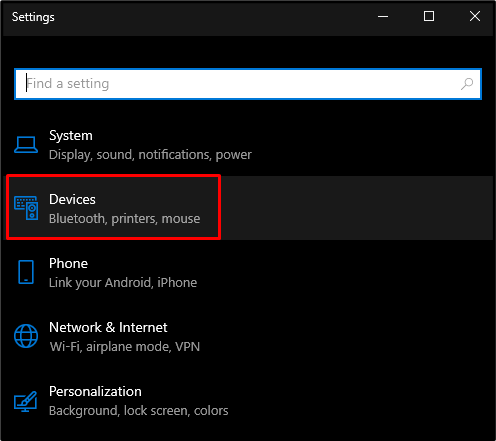
Step 1: Open “Devices”
To do so, open “Settings” and click on “Devices” to see all Bluetooth devices, printers, and mouse that has ever been connected to the system:
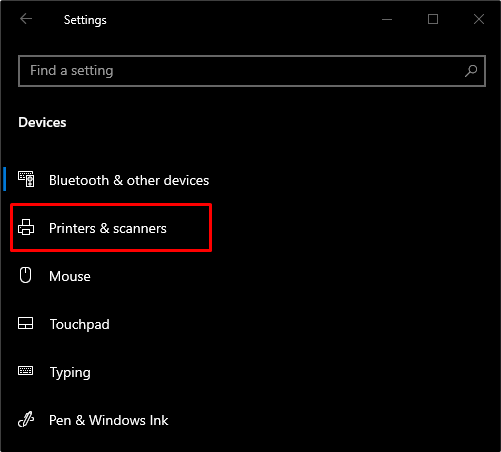
Step 2: Choose “Printers & Scanners”
Select the desired option from the left side of the opened panel:
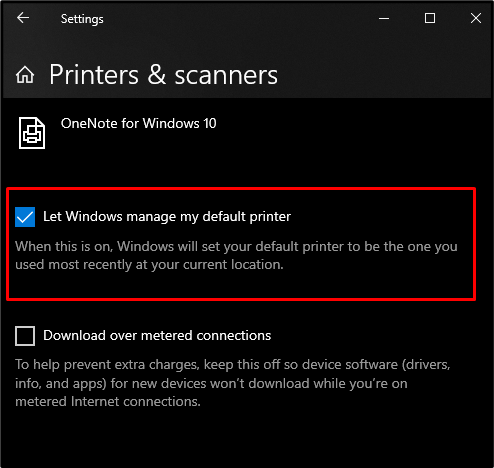
Step 3: Unmark “Let Windows Manage my Default Printer” Checkbox
Then, unmark the below selected option checkbox:
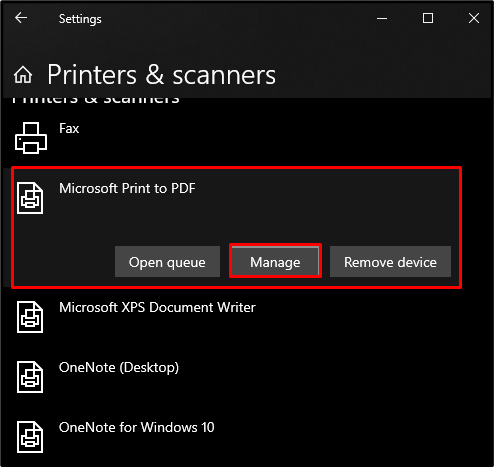
Step 4: Manage Your Printer
Click on the printer that needs to set as Windows default printer and press the “Manage” button:
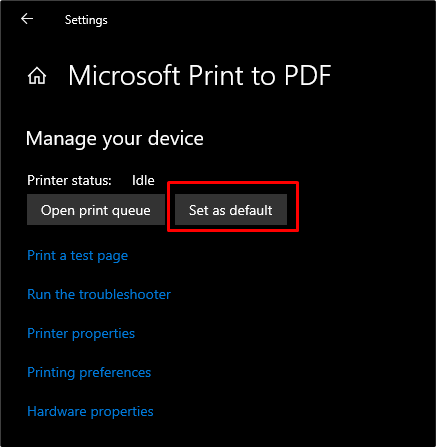
Step 5: Set as Default
Click on the “Set as Default” button as shown below:
Method 5: Update Windows
Microsoft might be aware of this issue and they might have released a Windows update that solves this issue. Update your Windows with the latest version by checking out the below-given steps.
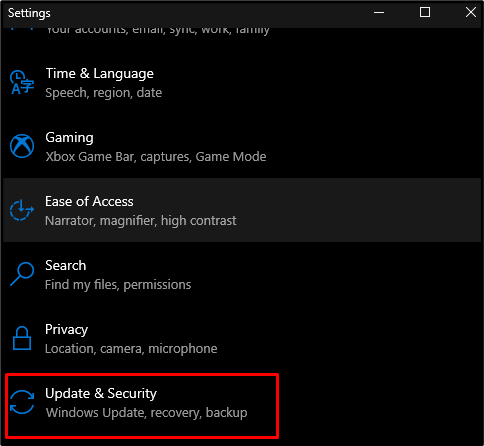
Step 1: Open Update & Security
Click on the “Update & Security” button to open it:
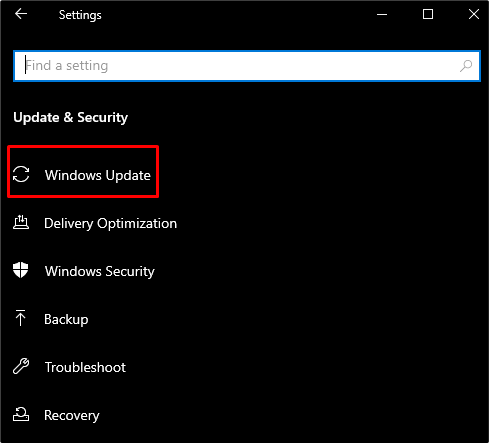
Step 2: Choose Windows Update
Hit on the “Windows Update” from opened panel as shown below:
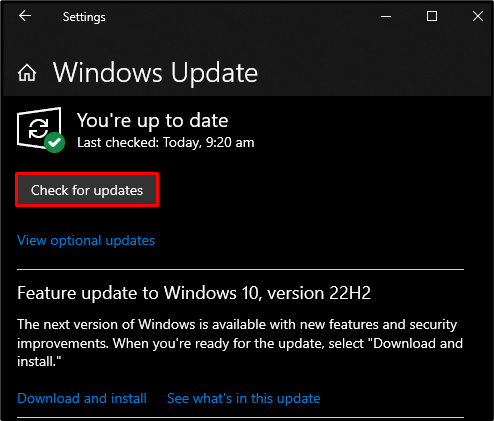
Step 3: Check for Updates
Press the “Check for updates” button:
After that, download and install all the available new updates and restart your computer system.
Conclusion
The “Windows cannot connect to the printer” error code can be fixed by following multiple different methods. These methods include using the printer troubleshooter, restarting the print spooler service, updating the printer’s driver, making the printer your default printer, and updating Windows.
Source: linuxhint.com