[Fixed] Windows 10 Slow Internet Issue
This guide will discuss the approaches to resolve the Slow Internet issue faced in Windows 10.
How to Fix Windows 10 Slow Internet Issue?
To resolve the “Slow Internet” issue in Windows 10, apply the following fixes:
- Execute the Network troubleshooter.
- Disable Peer-to-Peer Update.
- Disable Windows Auto-Tuning.
- Execute SFC Scan.
- Run DISM Scan.
- Configure Bandwidth Allocation.
- Update Driver.
Fix 1: Execute the Network Troubleshooter
The foremost action to perform upon encountering such an issue can be running the “Network Troubleshooter”. Let’s overview the below-given method to do so.
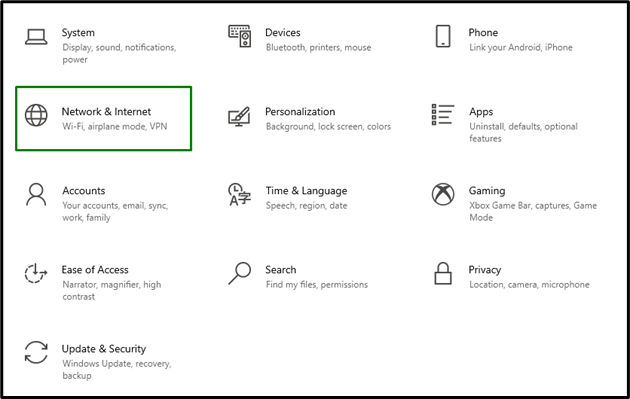
Step 1: Navigate to Network & Internet
Firstly, navigate to “Settings-> Network & Internet”:
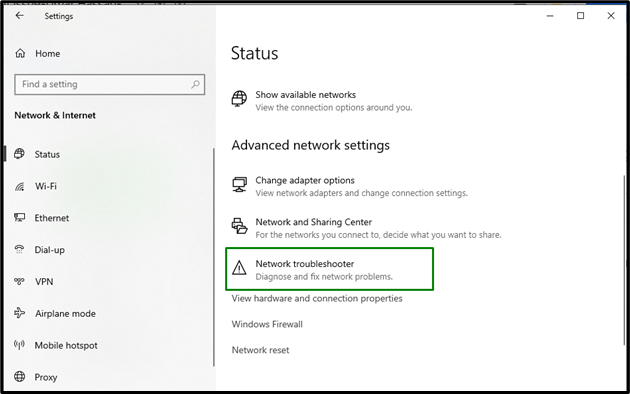
Step 2: Trigger Network troubleshooter
In the below-stated Window, double-click the highlighted option to initiate the “Network troubleshooter” to search for the issues:
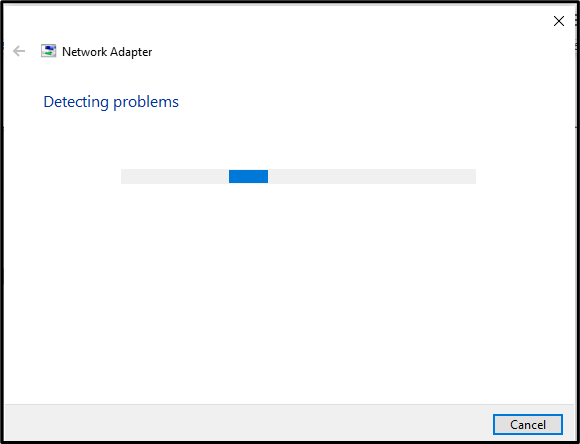
Upon doing so, the network problems will be detected and resolved:
Now, observe if your issue is resolved. If not, move on to another fix.
Fix 2: Disable Peer-to-Peer Update
“Peer-to-Peer Update” functionality allows the PC to share windows updates peer-to-peer with other PCs via the Internet, which affects the Internet connection. To overcome this issue, disable the Peer-to-Peer update on your Windows system.
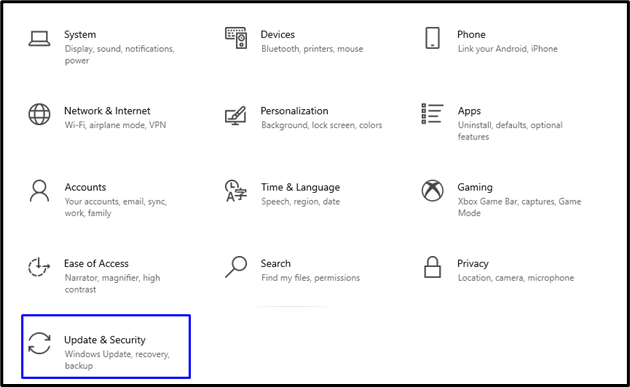
Step 1: Navigate to Update & Security
Firstly, open “Settings-> Update & Security”:
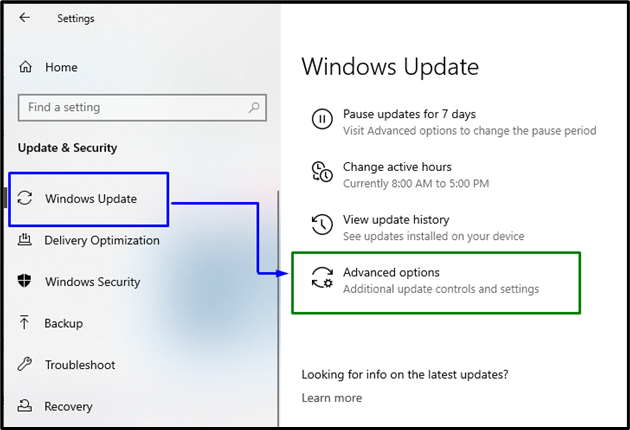
Step 2: Open Advanced Options
Now, select “Advanced Options” in the “Windows Update” Settings:
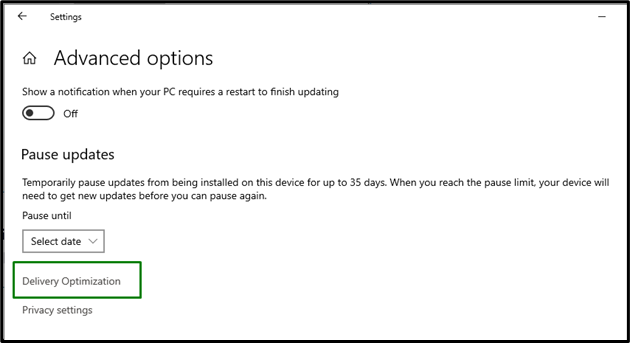
Step 3: Switch to Delivery Optimization
Now, click the “Delivery Optimization” option as follows:
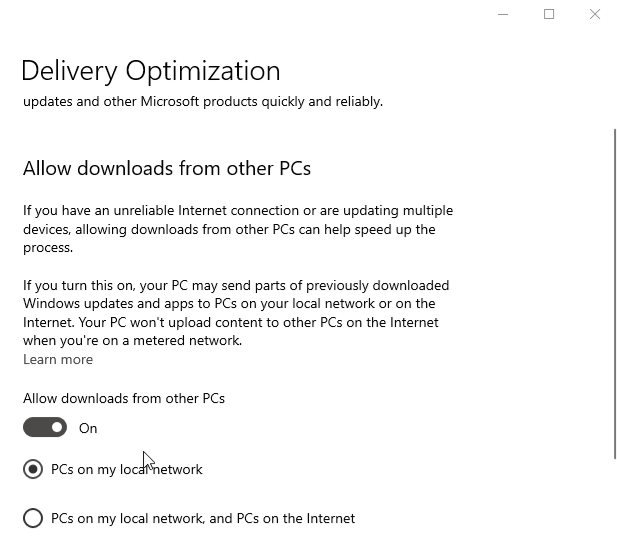
Step 4: Disallow Downloads for Other PCs
Here, turn off the “Allow downloads from other PCs” toggle:
Observe if this fix improved the internet speed.
Fix 3: Disable Windows Auto-Tuning
The “Auto-Tuning” functionality in Windows 10 assists in transferring the data effectively. But, in some scenarios, it can also interrupt network and connectivity. Therefore, in this scenario, disabling Windows Auto-tuning is a better fix.
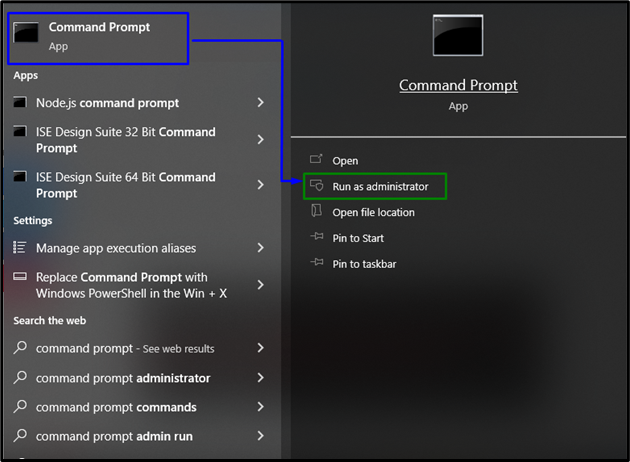
Step 1: Run Command Prompt
Run the Command Prompt as an “administrator”:
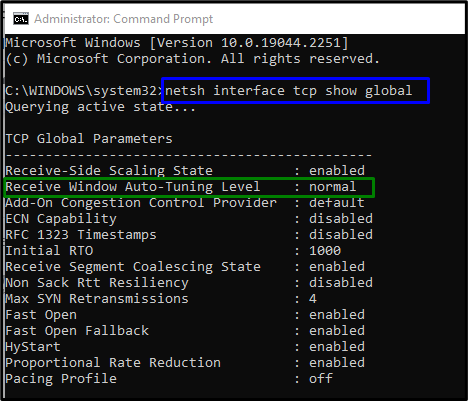
Step 2: Check Window Auto-Tuning Level
Now, enter the given “netsh” command to display “TCP Global Parameters”:
Verify if the value of “Receive Window Auto-Tuning Level” is allocated as “normal”:
Step 3: Disable the Auto Tuning Level
Now, disable the auto tuning level via the following command:

Fix 4: Execute SFC Scan
The SFC (System File Checker) scan locates the corrupted files and fixes them after scanning. To run this scan, type the following “sfc” command in the Command Prompt:

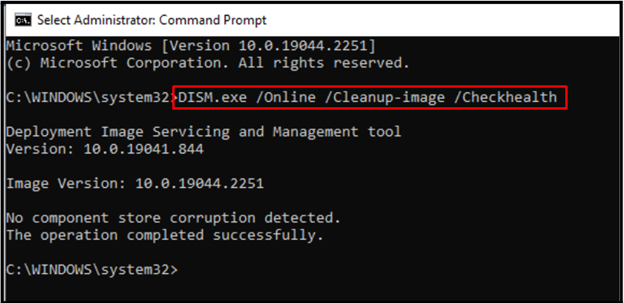
Fix 5: Run DISM Scan
Running “DISM” is also an alternative for users having issues with the SFC scan. To do so, firstly, verify the system image’s health:
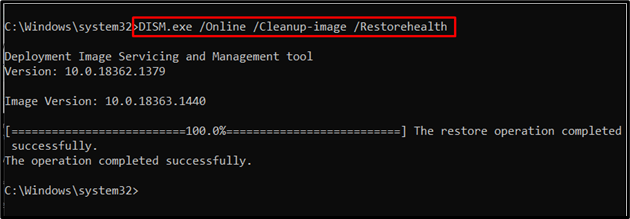
Then, scan the system image’s “health”:

Lastly, restore the system image health:
After finishing the scanning process, restart your PC and observe if the “Slow Internet” issue in Windows 10 is resolved.
Fix 6: Configure Bandwidth Allocation
A part of the bandwidth is allocated to the “Quality of Services(QoS) like Windows Update. So, allocating the bandwidth such that both the QoS functions and the internet function properly will do wonders. To do so, go through the below stated instructions.
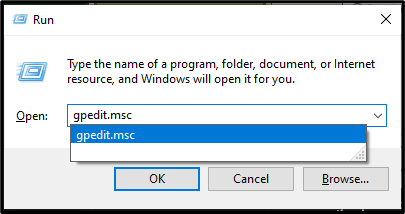
Step 1: Navigate to Group Policy Editor
Firstly, type “gpedit.msc” in the Run box to open the “Group Policy Editor”:
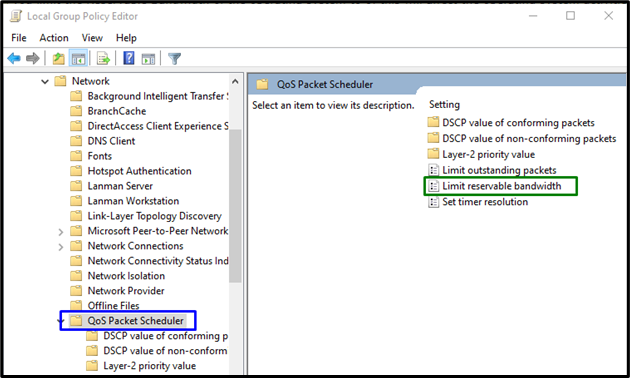
Step 2: Navigate to Limit Reservable Bandwidth
Redirect to the path “Computer Configuration > Administrative Templates > Network > QoS Packet Scheduler” and double-click “Limit reservable bandwidth”, as follows:
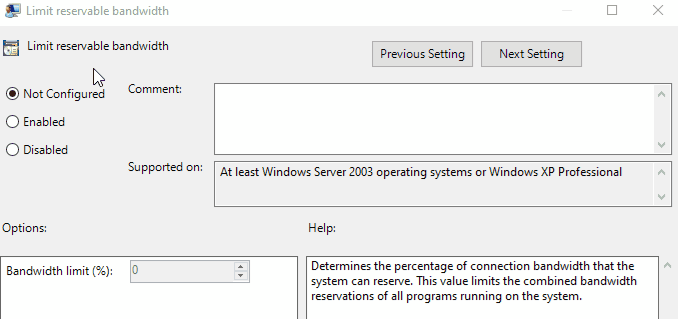
Step 3: Limit the Bandwidth
Now, click “Enabled” and change the Bandwidth limit to “0” or “10” to allocate a limited bandwidth:
After doing so, verify if the stated issue gets resolved or not.
Fix 7: Update Driver
The stated internet issue can also arise due to the outdated “WiFi driver”. Hence, updating the corresponding driver might resolve it to a great extent.
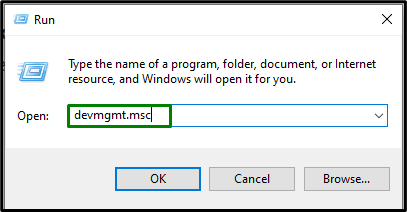
Step 1: Navigate to Device Manager
Firstly, enter “devmgmt.msc” in the Run box to open the “Device Manager”:
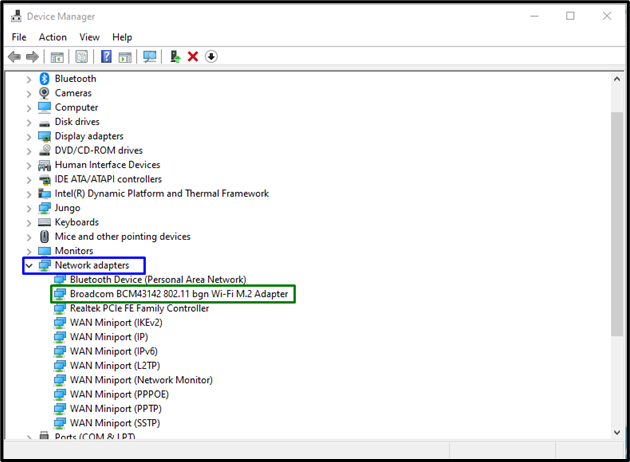
Step 2: Select Your Network Adapter
Now, expand the “Network Adapter” option and double-click your Wifi driver that needs to be updated:
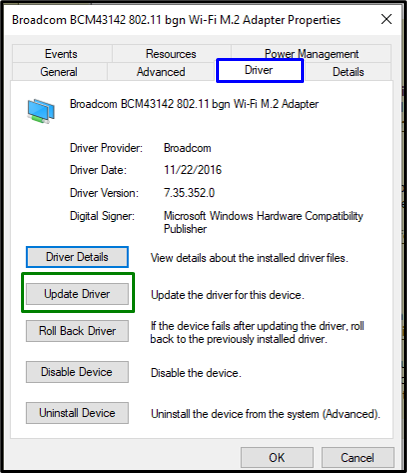
Step 3: Update Wi-Fi Adapter
In the below-stated window, switch to the “Driver” tab and trigger the “Update Driver” button:
After doing so, restart your PC and observe if the internet connection gets stable.
Conclusion
To resolve the Windows 10 “Slow Internet” issue, execute the Network Troubleshooter, disable Peer-to-Peer Update, disable Windows Auto-Tuning, execute SFC Scan, run DISM scan, configure Bandwidth Allocation, or update Driver. This write-up explained the approaches to resolve the Slow Internet Issue encountered in Windows 10.
Source: linuxhint.com