Fix Skype Can’t Access Sound Card Error in Windows 10
In this write-up, we will discuss multiple solutions to fix the discussed sound card access issue.
How to Fix the “Skype can’t access Sound Card” issue in Windows 10?
To fix/solve the mentioned issue in Windows 10, check out the stated fixes:
- Permits Skype to Access the Microphone
- Run/Execute the Troubleshooter
- Update Sound Card Drivers
- Reinstall Skype App
Method 1: Permits Skype to Access the Microphone
Sometimes the permissions for microphone usage are removed automatically after a Windows update. To allow Skype to access the microphone, follow the instructions provided below.
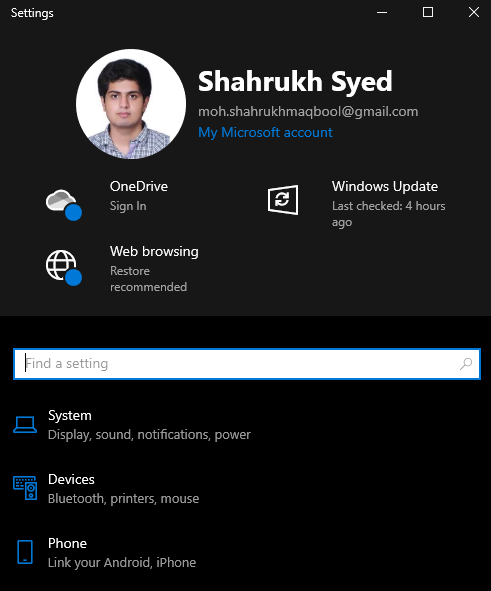
Step 1: Open Windows Settings
Press the “Windows+I” keys to open the System Settings:
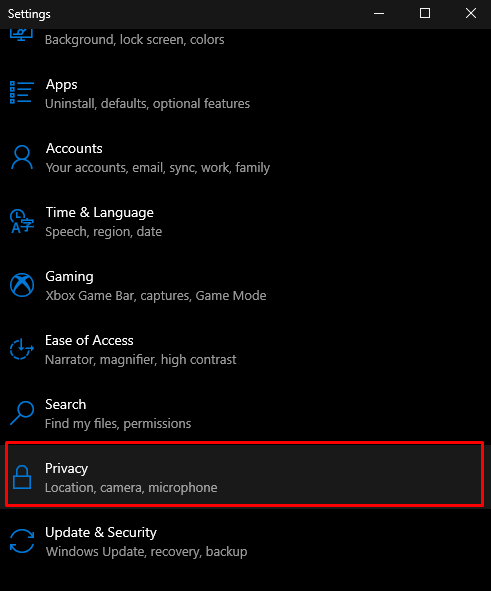
Step 2: Go to Privacy
Select “Privacy” as highlighted below:
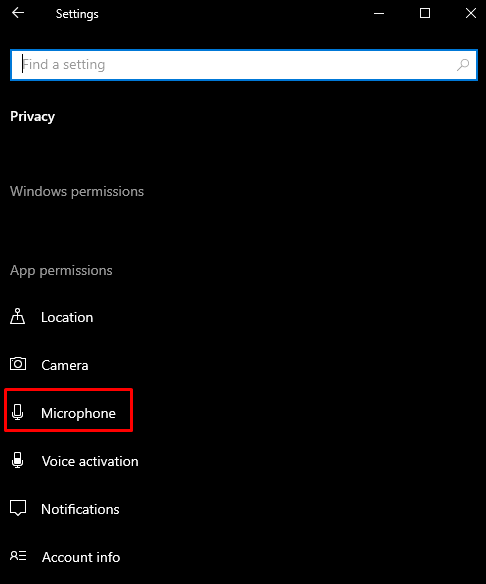
Step 3: Select the Microphone
In the app permissions settings, choose the “Microphone” option:
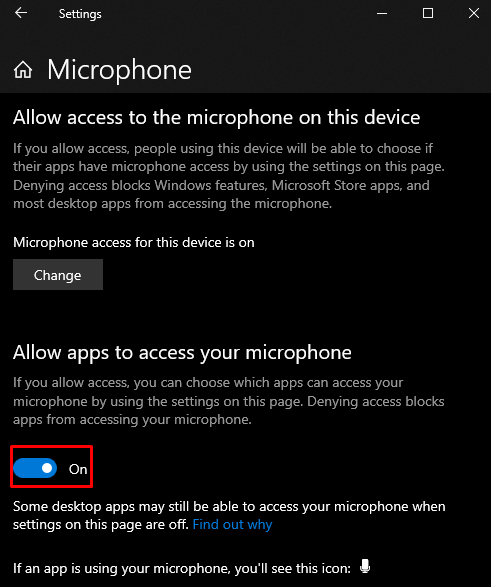
Step 4: Grant Permission Apps to Access Microphone
Now, turn on the toggle of “Allow apps to access your microphone”:
Method 2: Run/Execute the Troubleshooter
Troubleshooters come built-in with Windows to solve basic problems and issues that a user might face. More specifically, you can run the “Hardware and Devices” troubleshooter to fix this issue by following the instructions provided below.
Step 1: Open the Run box
Hit the “Windows + R” keys to open the Run box:

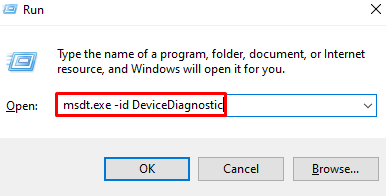
Step 2: Open Hardware and Devices Troubleshooter
In the Run box, insert “msdt.exe -id DeviceDiagnostic” and hit enter to access the “Hardware and Devices” troubleshooter:
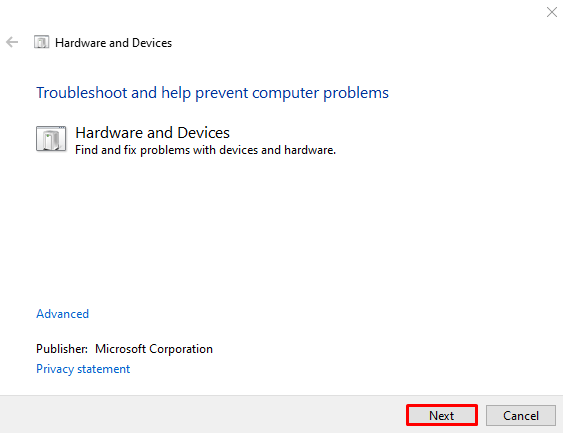
Step 3: Run the Troubleshooter
After that, press the “Next” button to launch the process of troubleshooting:
Method 3: Update Sound Card Drivers
Outdated drivers might be causing this issue. We can update the sound card drivers by following the steps below.
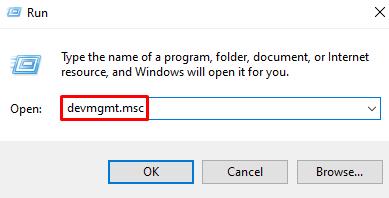
Step 1: Open Device Manager
Type “devmgmt.msc” in the run box and press enter to launch Device Manager:
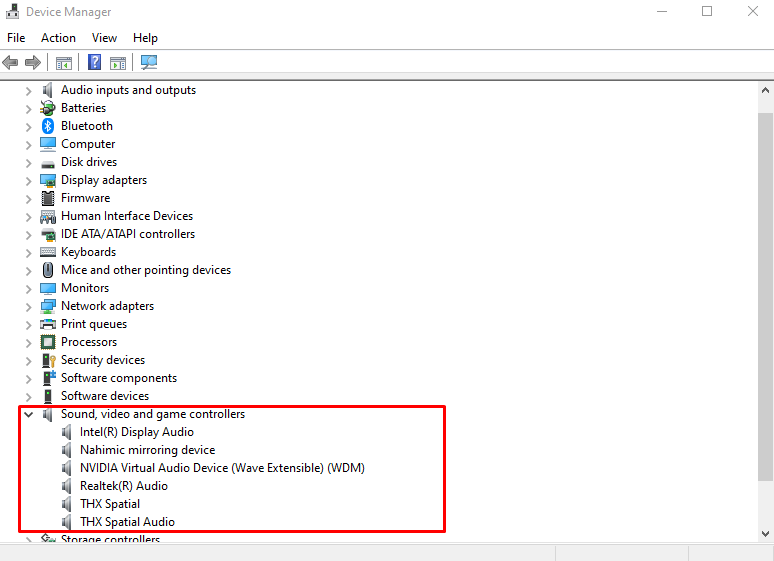
Step 2: See Sound Devices
Locate “Sound, video and game controllers” and click it to see all the sound, video, and game controllers installed on your system:
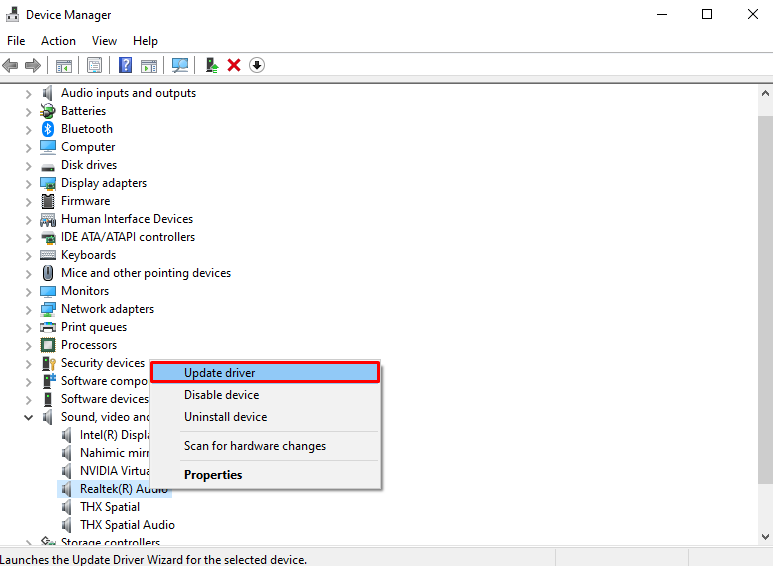
Step 3: Update the Drivers
Right-click the audio device and select “Update driver” as highlighted in the image below:
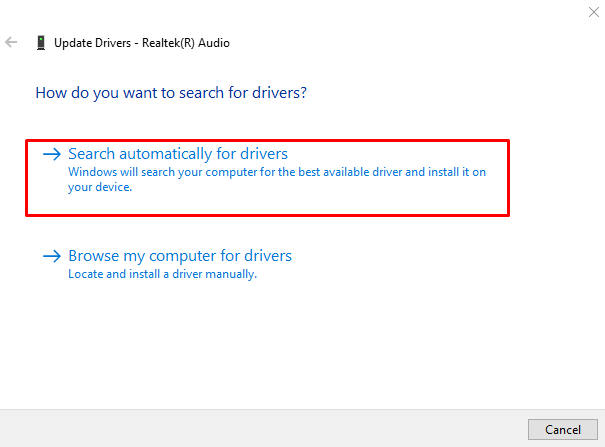
Step 4: Let Windows Look for the Driver
Select the “Search automatically for drivers” option which enables Windows to search for the best available driver for the device and install it:
Method 4: Reinstall Skype App
Maybe the Skype installation or some important file has been corrupted. In this case, you can remove or uninstall the Skype application, download it again by using its official website, and reinstall it.
For the corresponding purpose, here are the enlisted instructions.
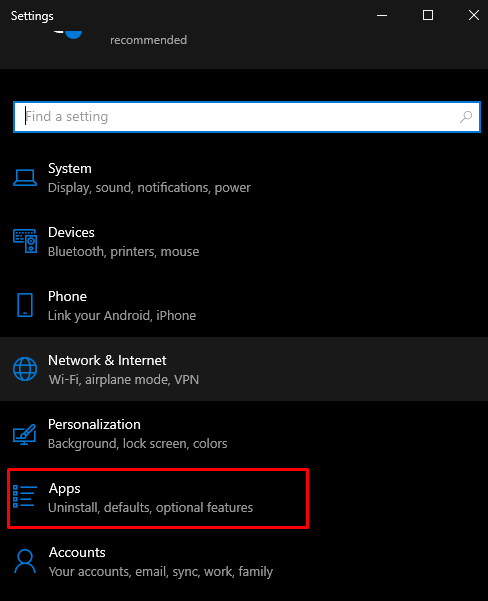
Step 1: Choose Apps
Click on “Apps” from the System Settings category:
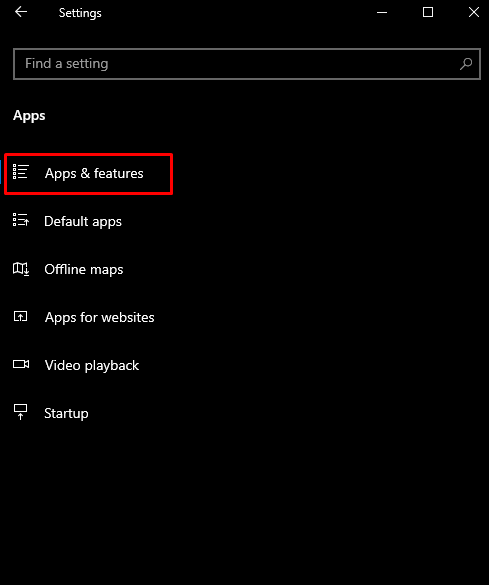
Step 2: Open “Apps & features”
Select “Apps & features” from the list:
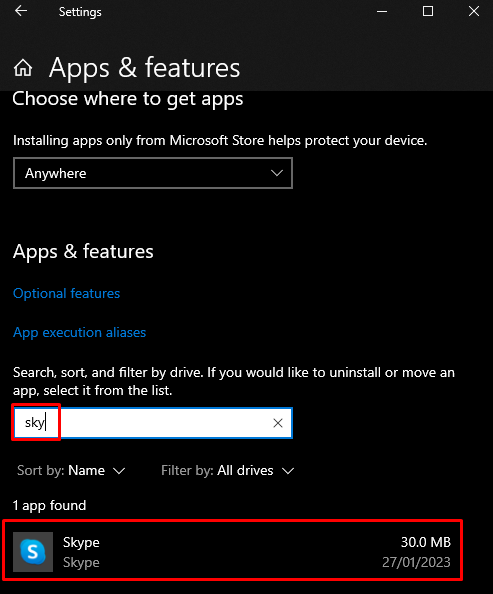
Step 3: Locate Skype
Type “Skype” in the search box to find Skype:
Step 4: Uninstall Skype
Click on “Skype” which will show the “Uninstall” button:

Step 5: Install Skype
After Skype has been removed from your system. Go to its official website to download it again:
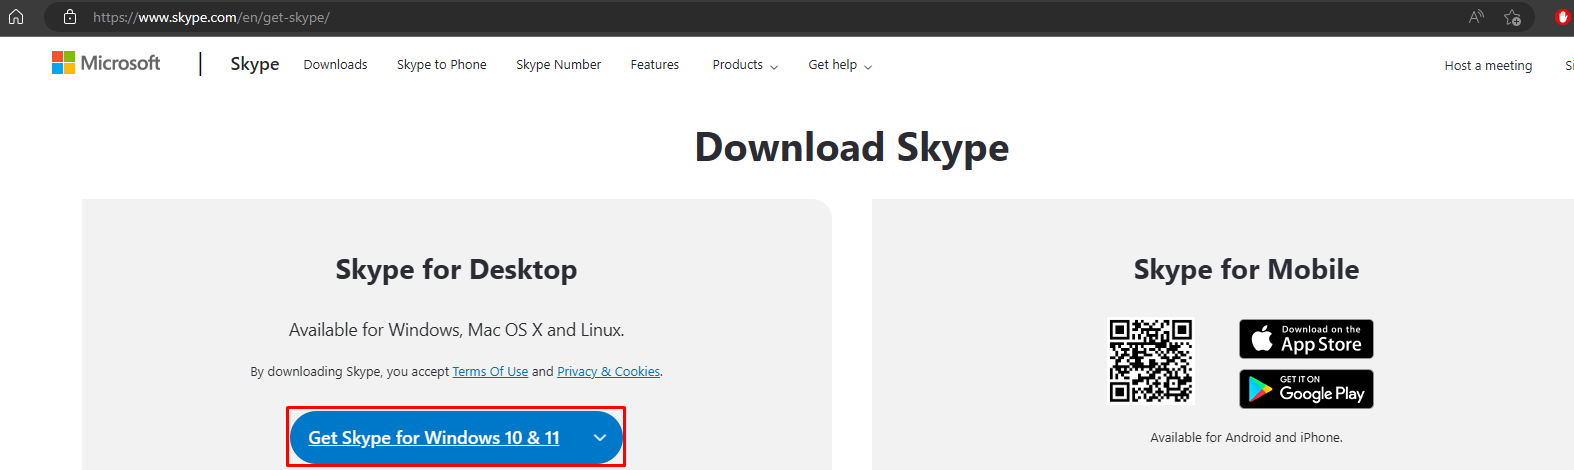
Try out the instructions available onscreen for completing the installation. As a result, the reinstalled Skype app will access the sound card.
Conclusion
The “Skype can’t access Sound Card” issue in Windows 10 can be fixed by following multiple different methods. These methods include allowing Skype to access the microphone, executing the hardware and devices troubleshooter, updating the sound card drivers, or installing the Skype app again. This post provided multiple solutions for fixing the sound card accessibility issue for Skype.
Source: linuxhint.com