Fix: “On-Screen Keyboard not working” Issue in Windows
In this write-up, we will discuss the multiple solutions to the discussed On-Screen keyboard issue in Windows.
How to Fix the “On-Screen Keyboard not working” Issue in Windows?
To fix the specified issue in Windows, try the following fixes:
- Enable On-screen Keyboard
- Start Touch Keyboard Service
- Create a Shortcut for On-screen Keyboard
- Open Keyboard from the Run box
- Open Keyboard from Start Menu
- Run SFC Command
Method 1: Enable On-screen Keyboard
The On-screen keyboard might be disabled which can be a reason behind its being stuck. To enable the onscreen keyboard, follow the instructions provided below.
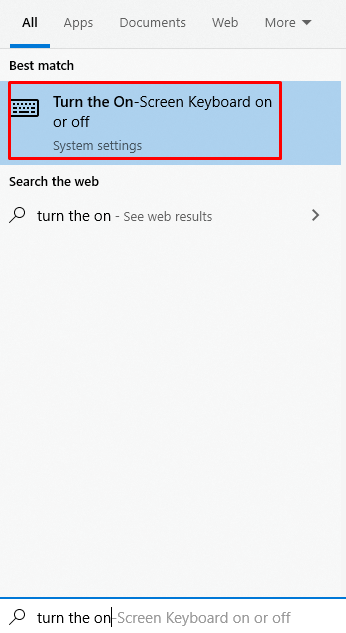
Step 1: Turn on the On-Screen Keyboard
In the Start menu’s search box, type “Turn the on” and press enter to launch the relevant keyboard settings:
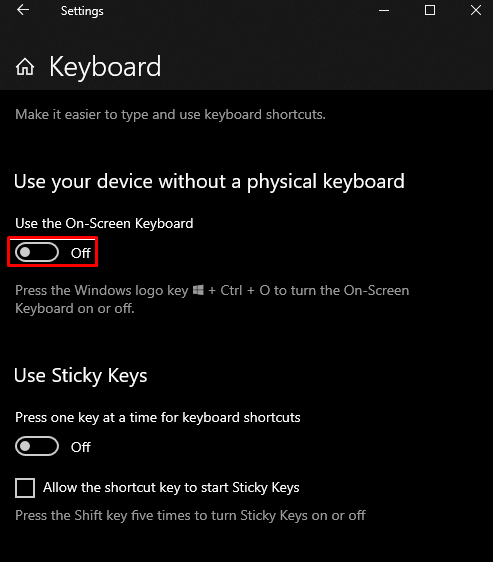
Step 2: Enable “Use the On-screen Keyboard” Toggle
Toggle on the “Use the On-Screen keyboard”:
Method 2: Start Touch Keyboard Service
The keyboard service might not be working, so you can start the touch keyboard and handwriting panel service by following the enlisted steps.
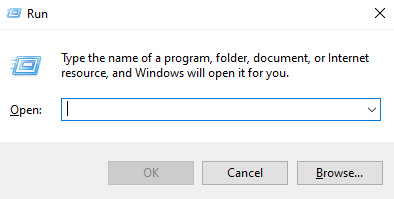
Step 1: Launch the Run box
Hit the “Windows + R” keys together to open the Run box:
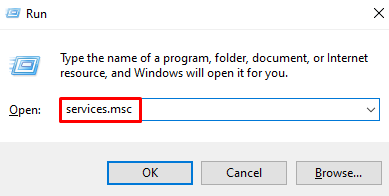
Step 2: Open Services
Type “services.msc” in the Run box and press enter to open “Services”:
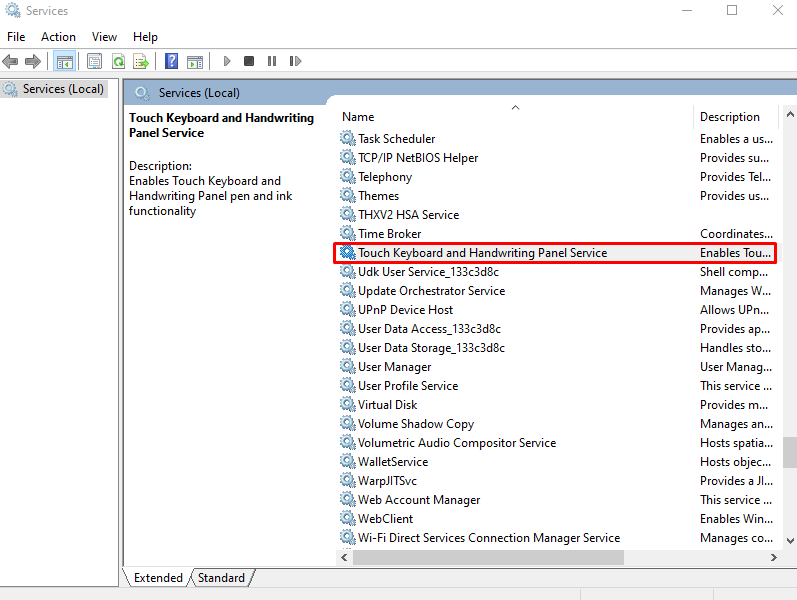
Step 3: Open Properties of Touch Keyboard and Handwriting Panel Service
Scroll down to search for the “Touch Keyboard and Handwriting Panel” service and double-click on it to launch its “Properties”:
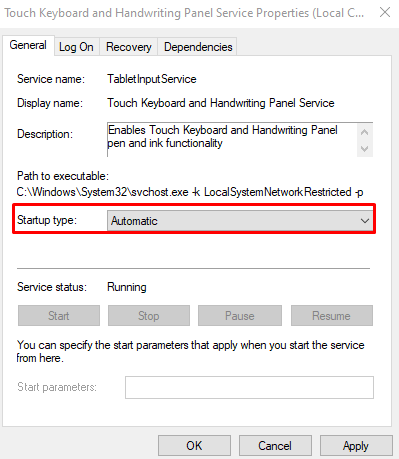
Step 4: Set Startup Type
Set its startup type to “Automatic” as follows:
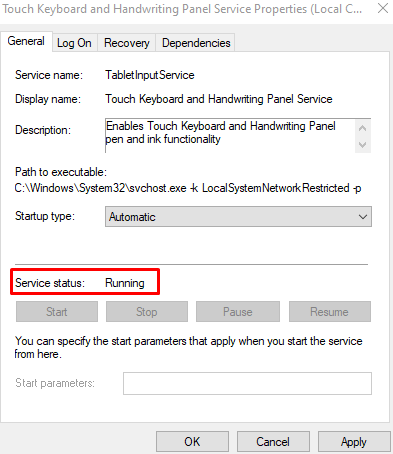
Step 5: Start the Service
Check the “Service status” which should be running as shown below. In case it isn’t running, click on the “Start” button:
Method 3: Create a Shortcut for On-Screen Keyboard
You can also create a shortcut for the On-Screen keyboard by following the given method.
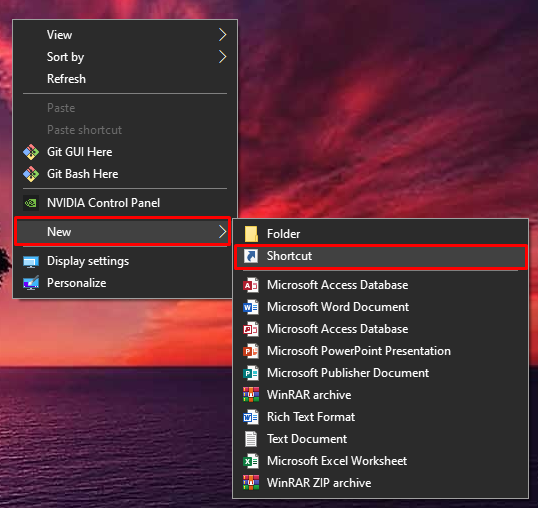
Step 1: Create a New Shortcut
Right-click on the desktop, hover your mouse over “New”, and choose “Shortcut” option:
Step 2: Enter the Location
Type “%windir%\System32\osk.exe” as the location of the item:
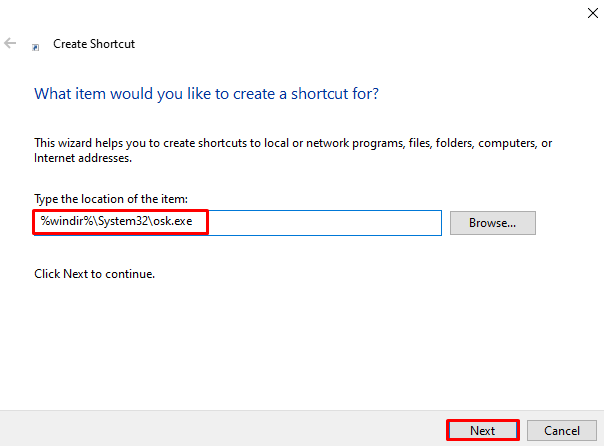
Step 3: Complete the Shortcut Creation Process
Click on “Next” and then “Finish” to complete the shortcut-making process:

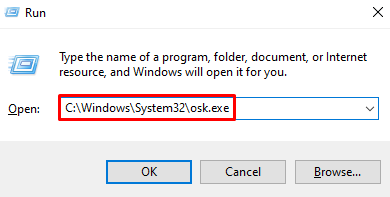
Method 4: Open Keyboard From the Run box
To launch the On-Screen keyboard from the Run box, type “C:\Windows\System32\osk.exe” in it and press “enter” to open the keyboard:
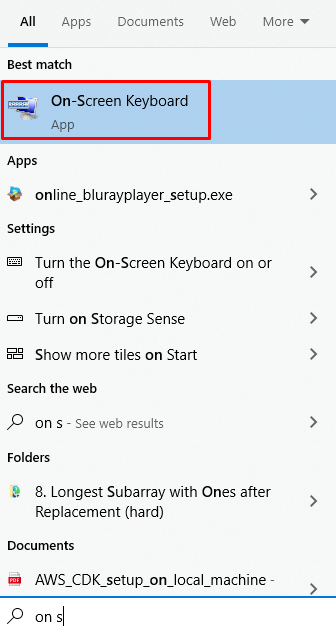
Method 5: Open Keyboard From Start Menu
Search for the “On-Screen keyboard” by typing it in the Startup menu’s search bar and press enter:
Method 6: Run the SFC Command
A system file checker is used to find and fix problematic and corrupted system files. Running the “sfc” command can also solve the On-Screen keyboard issue when the keyboard not working.
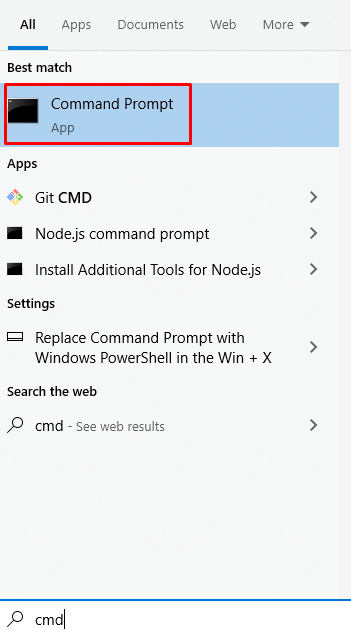
Step 1: Launch Command Prompt as Administrator
Start the “Command prompt” with administrative rights by typing it in the Startup menu’s search box and pressing the “CTRL+SHIFT+ENTER” keys simultaneously:
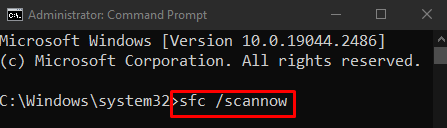
Step 2: Run the System File Checker Command
Execute the system file checker command given below in the terminal:
Lastly, reboot the system and check if the On-Screen keyboard starts working.
Conclusion
The “On-Screen Keyboard not working” issue in Windows can be fixed by following multiple different methods. These methods include enabling the On-Screen keyboard, starting the touch keyboard service, creating a shortcut for the On-Screen keyboard, opening the keyboard from the Run box, opening the keyboard from the Start menu, or running the SFC command. This post provided several solutions for fixing the On-Screen keyboard in Windows.
Source: linuxhint.com