Fix MsMpEng.exe High CPU Usage in Windows 10
“MsMpEng.exe High CPU Usage” can be caused when this tool scans its directory. Tweaking the settings of Windows Defender might solve this problem.
This write-up will discuss the multiple solutions to the “MsMpEng.exe High CPU Usage” problem in Windows 10.
How to Fix “MsMpEng.exe High CPU Usage” in Windows 10?
To fix the “MsMpEng.exe High CPU Usage” problem in Windows 10, try the following fixes:
- Uninstall third-party Antivirus Software.
- Slow the Scan by Lowering the Affinity.
- Disable Microsoft Defender through Group Policy Editor.
- Disable Sample Submission.
- Prevent Defender from Scanning its Directory.
Method 1: Uninstall Third-party Antivirus Software
If you have some third-party antivirus installed, it might interfere with the Windows Defender. To uninstall the third-party antivirus security software, follow the instructions below.
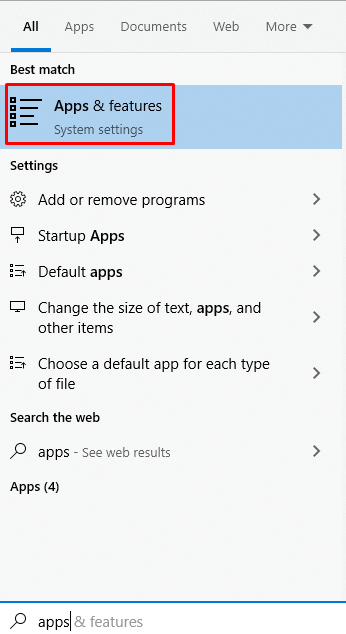
Step 1: Open “Apps & features”
Type “Apps & features” in the search box of the Startup menu and press “Enter” to open it:
Step 2: Remove Antivirus
Search the Antivirus program and hit on it. Click on the “Uninstall” button that showed up and follow the on-screen instructions to complete the uninstallation process:

Method 2: Slow the Scan by Lowering the Affinity
You can set a specific processor of your computer to handle the “MsMpEnd.exe” file. This will reduce the high CPU usage but run slower than usual. Therefore, slow the scan by lowering the Affinity from the “Task Manager” following the steps.
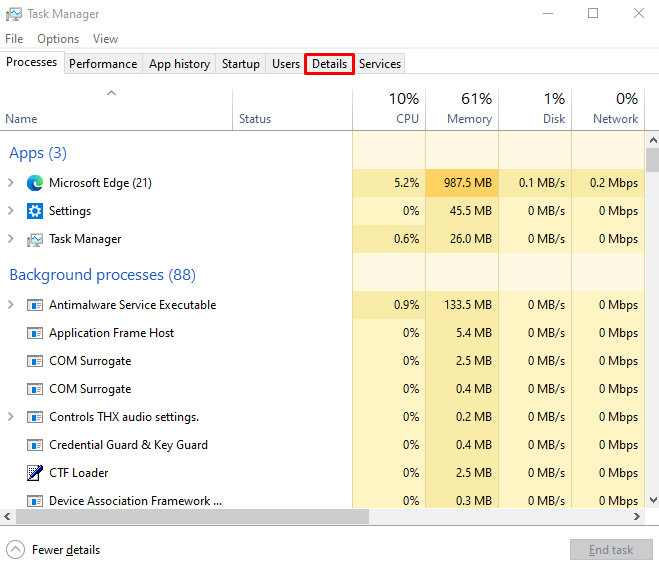
Step 1: Open Task Manager
Open the “Task Manager” by pressing the “CTRL+SHIFT+ESCAPE” buttons on your keyboard:

Step 2: Go to Details
Switch to the “Details” tab:
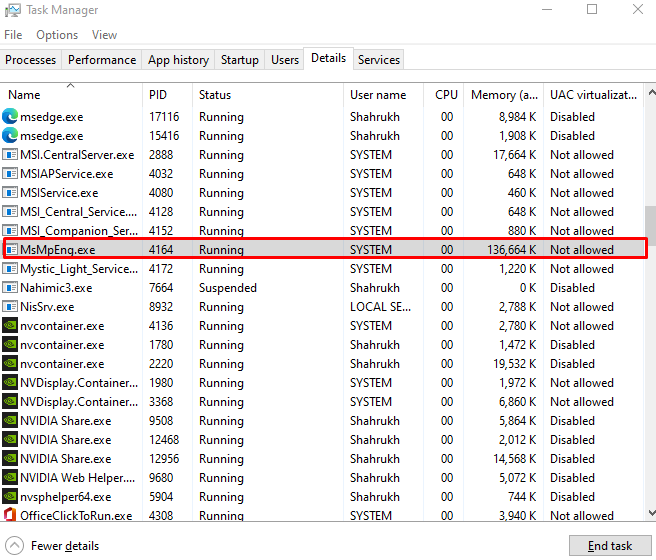
Step 3: Locate the Process
Locate the “MsMpEng.exe” process in the “Task Manager” under the “Details” tab:
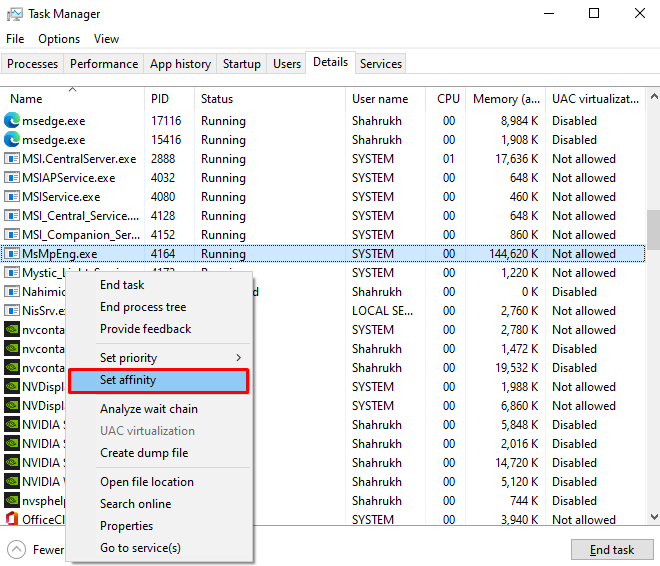
Step 4: Select “Set Affinity” Option
Right-click on it and select the “Set Affinity” option:
Method 3: Disable Microsoft Defender through Group Policy Editor
You can disable Microsoft Defender through the Group Policy Editor, but be careful because this will leave your system vulnerable to virus attacks. Follow the instructions below to disable Microsoft Defender using the Group Policy Editor.
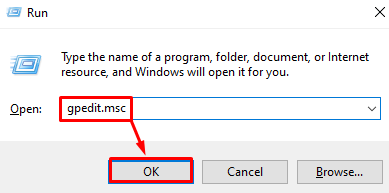
Step 1: Launch Group Policy Editor
Type “gpedit.msc” in the “Run” box and press “Enter”:
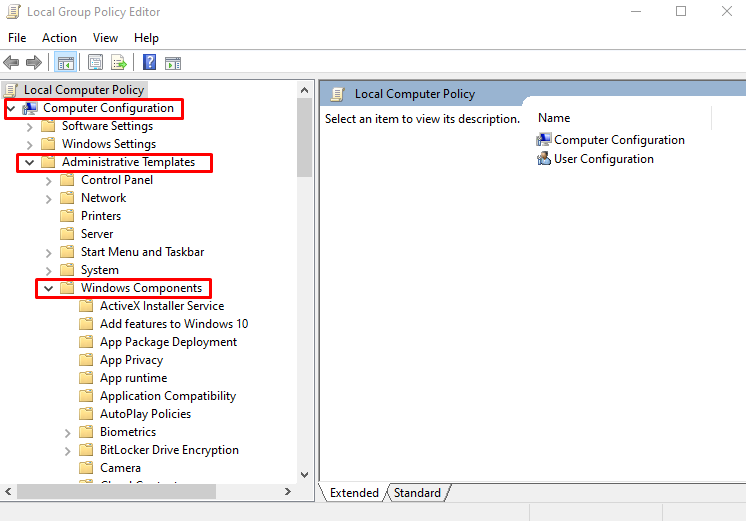
Step 2: Navigate to Microsoft Defender Antivirus
Navigate to “Computer Configuration” > “Administrative Templates” > “Windows Components” > “Microsoft Defender antivirus” path:
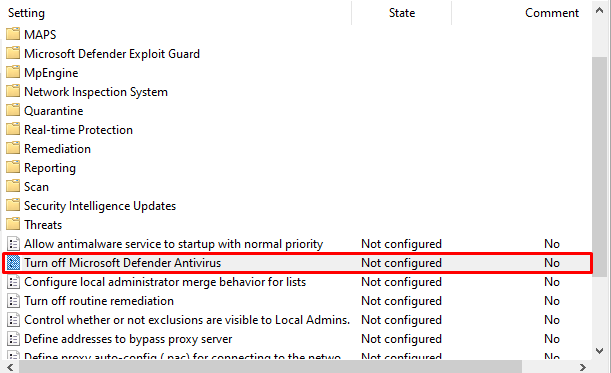
Step 3: Open “Turn off Microsoft Defender Antivirus” Properties
To open the “Properties” of “Turn off Microsoft Defender Antivirus”, double-click on it:
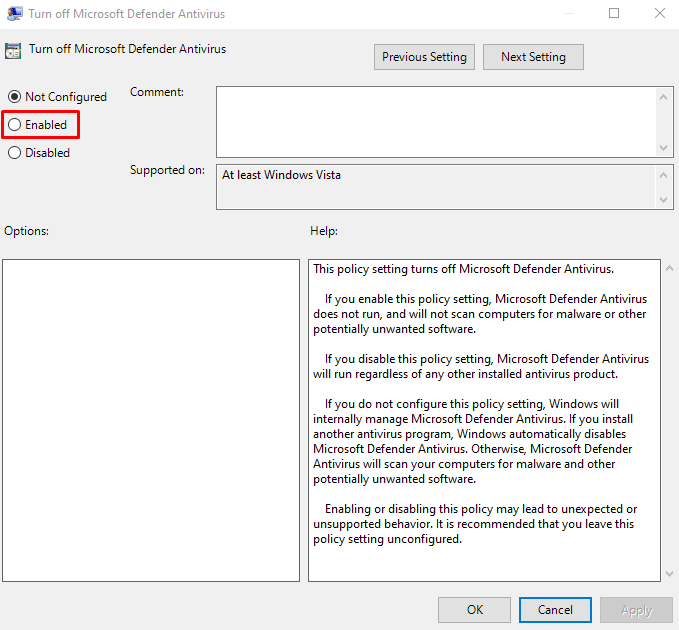
Step 4: Mark the “Enabled” Option
Press the below-highlighted radio button as shown in the below-given image:
Method 4: Disable Sample Submission
“Sample submission” sends sample data to Microsoft to help defend against viruses and malware. Moreover, disabling it will make our device vulnerable, which can be done by following the instructions provided below.
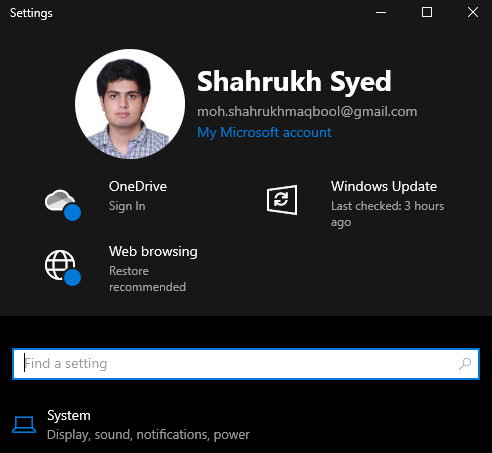
Step 1: Open Settings App
Hit the “Windows+I” keys to launch the “Settings” app:
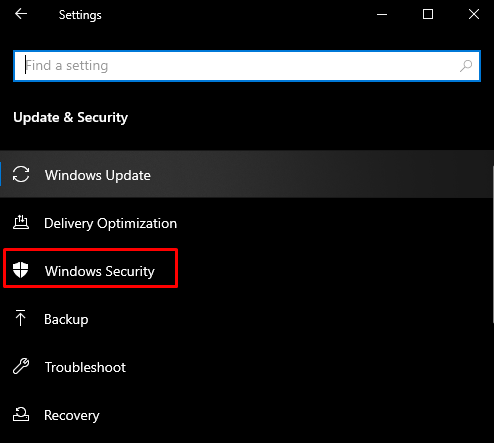
Step 2: Choose “Update & Security”
Scroll down the Setting window and select required option from the list:

Step 3: Go to Windows Security
Choose and navigate to the “Windows Security” from the left side panel as shown in the below screenshot:
Step 4: Go to “Virus & Threat Protection”
Under the “Protection Areas” section, choose “Virus & Threat protection”:

Step 5: Manage Settings
Then, hit the “Manage settings” option:

Step 6: Turn off “Automatic sample submission”
Turn off the “Automatic sample submission” toggle:

Method 5: Prevent Defender From Scanning its Directory
Defender might be scanning its files, which might cause this error. So, prevent Microsoft Defender from scanning its own directory by following the instructions provided below.
Step 1: Select “Manage settings”
Move to the “Virus & Threat protection” settings and hit the “Manage settings” button:

Step 2: Add or Remove Exclusions
Inside the “Exclusions” section, choose the below highlighted option:

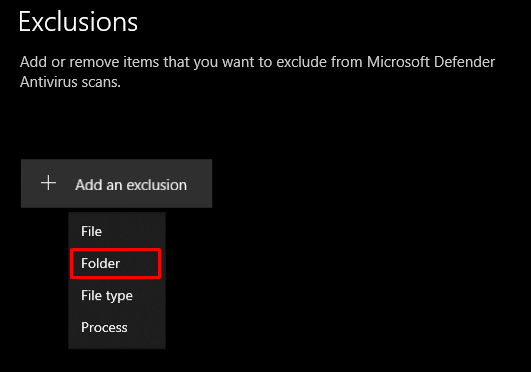
Step 3: Add an Exclusion
Click on “Add an exclusion” and a drop-down list will be displayed. Now, select “Folder” from this list as shown below:
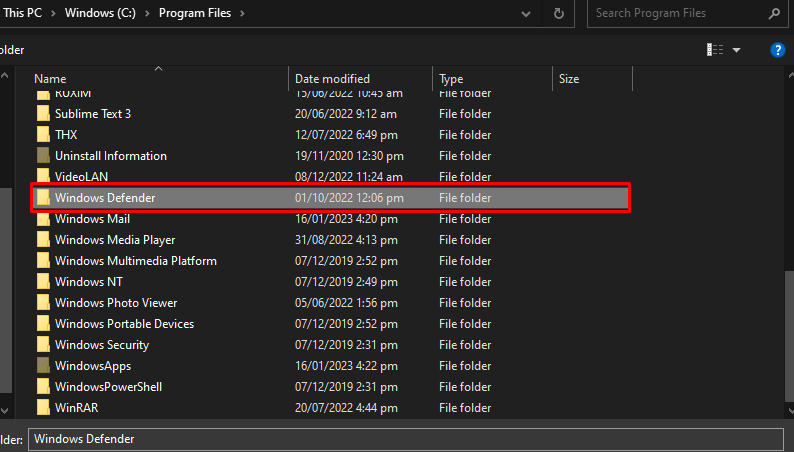
Step 4: Navigate to Window Defender Folder
Navigate to the “C:Program Files\Windows Defender” path and select this folder:
Step 4: Exclude the “Window Defender” Folder
As a result, the selected item will be excluded from the Microsoft Defender Antivirus scans:

The MsMpEng.exe CPU usage will become low after performing the required operation.
Conclusion
The “MsMpEng.exe High CPU Usage” problem in Windows 10 can be fixed by following multiple different methods. These methods include uninstalling any third-party Antivirus software, slowing the scan by lowering the affinity, disabling the Microsoft defender through the group policy editor, disabling sample submission, or preventing Defender from scanning its directory. This post was all about fixing the “MsMpEng.exe High CPU Usage” issue.
Source: linuxhint.com