Fancy Up Fonts in ImageMagick
Installing ImageMagick
We will need ImageMagick for this, so first let’s install it:
The Basics
Let us start:
Size – used to define the size of the canvas. This just sets the height and width of the canvas
Xc – used to set the background color, here, I have used khaki
Pointsize – used to set the size of the text
Fill – the color used to fill the text with; here I used purple
Annotate – annotate canvas with text

Fancying Things Up – Tiles
In the previous example, we use the fill switch to fill the word with the color purple. However, we do not have to use the fill switch. We can use the tile switch for example.
-tile filename
In this example, we are going to use a photo called photo33.png (the picture of a tree) on the tile switch.

Alternatively, you can also create gradients:

Transparent Background
In this case, to get a transparent background. We can set the background to none and the file format to png.

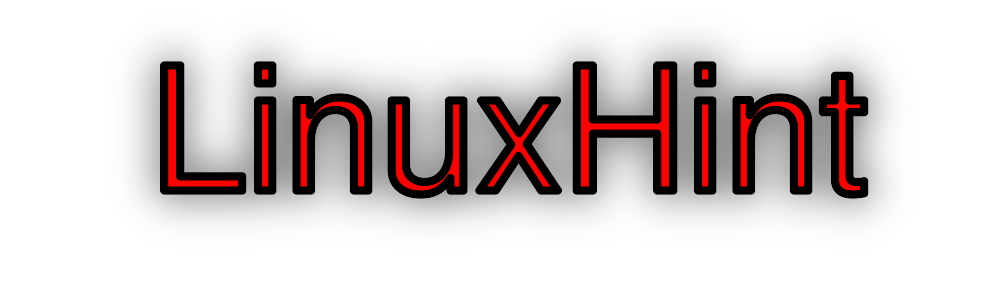
Outlining Text
You can choose to outline texts the hard way:
In other words, something like this:
-fill black -annotate +151+191 'LinuxHint' \
-annotate +152+192 'LinuxHint' \
-annotate +151+192 'LinuxHint' \
-annotate +152+191 'LinuxHint' \
-annotate +149+189 'LinuxHint' \
-annotate +148+188 'LinuxHint' \
-annotate +148+189 'LinuxHint' \
-annotate +149+188 'LinuxHint' \
-fill red -annotate +150+190 'LinuxHint' \
linuxhint_outline.png
Basically, here, make sure you cover all borders.

Now, let us make the outline thicker:
-fill black -annotate +151+191 ‘LinuxHint’
-annotate +152+192 ‘LinuxHint’
-annotate +151+192 ‘LinuxHint’
-annotate +152+191 ‘LinuxHint’
-annotate +149+189 ‘LinuxHint’
-annotate +148+188 ‘LinuxHint’
-annotate +148+189 ‘LinuxHint’
-annotate +149+188 ‘LinuxHint’
-annotate +147+187 ‘LinuxHint’
-annotate +146+186 ‘LinuxHint’
-annotate +153+193 ‘LinuxHint’
-fill red -annotate +150+190 ‘LinuxHint’ linuxhint_outline.png
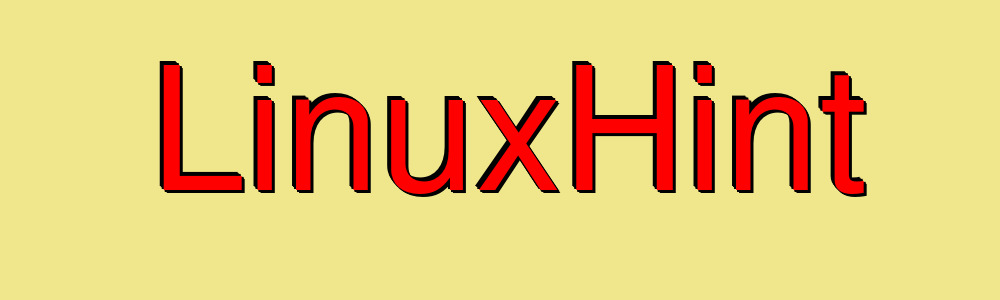
But writing a million lines just to create a border seems like too much. So, I will introduce you to an alternative:
-stroke color
-strokewidth value
So, let us write new code:
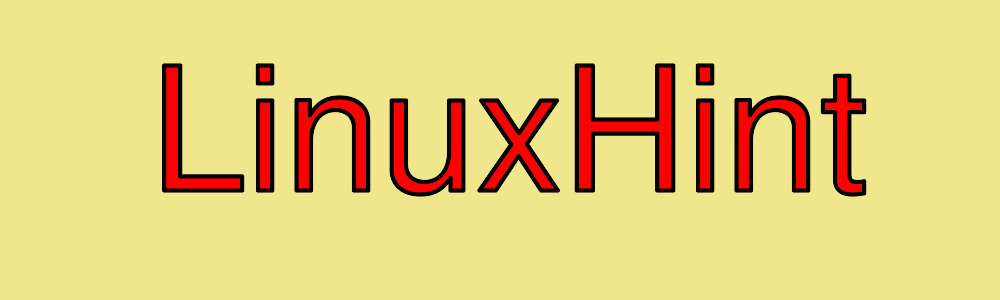
Then, you have the following:
Xc: background color
Pointsize: size of the font
Fill: fill the letters with a color
Stroke: the color to create the outline with
Strokewidth: the thickness of the outline
Annotate: annotate text onto canvas
Linuxhint_outline_stroke.jpg: name of the final result
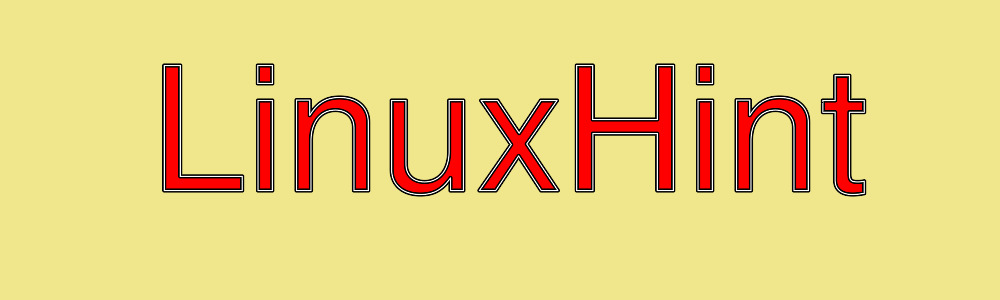
Double Lines
Now, let us see how to create a double line effect. Here, the strokewidth of the second stroke has to be of a different color and of a smaller width than the first one. Basically, it is like writing with a thick marker and then on top of it with a thinner and different colored marker. The latter would create the illusion of a double line.

Or
-fill red -stroke black -strokewidth 4 -annotate +150+190 'LinuxHint' \
-fill none -stroke white -strokewidth 1 -annotate +150+190 'LinuxHint' \
linuxhint_outline_stroke1.jpg
It looks like this if zoomed in:

A slightly different version of this is:
Or
-stroke black -strokewidth 35 -annotate +150+190 'LinuxHint' \
-stroke white -strokewidth 30 -annotate +150+190 'LinuxHint' \
-stroke black -strokewidth 25 -annotate +150+190 'LinuxHint' \
-stroke white -strokewidth 20 -annotate +150+190 'LinuxHint' \
-stroke black -strokewidth 15 -annotate +150+190 'LinuxHint' \
-stroke white -strokewidth 10 -annotate +150+190 'LinuxHint' \
-stroke black -strokewidth 5 -annotate +150+190 'LinuxHint' \
-stroke none -annotate +150+190 'LinuxHint' \
linuxhint_psychedelic.png

It would look like this if zoomed in:

In this case, it is the same principle as the first scenario. But the first line is very thick and black, the second is white and less thicker than the first, etc…
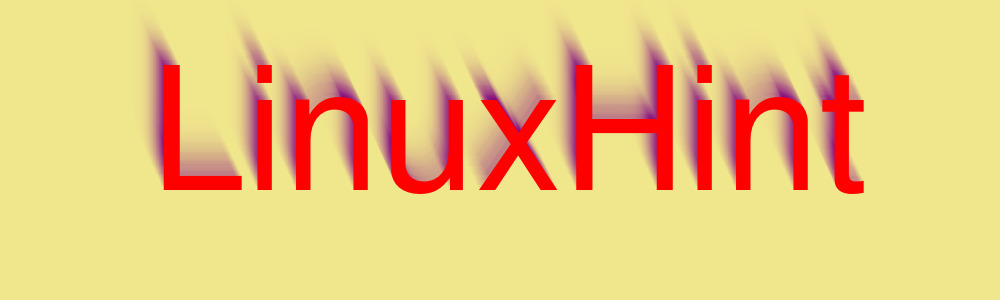
Shadow
Now, let us add some shadow:
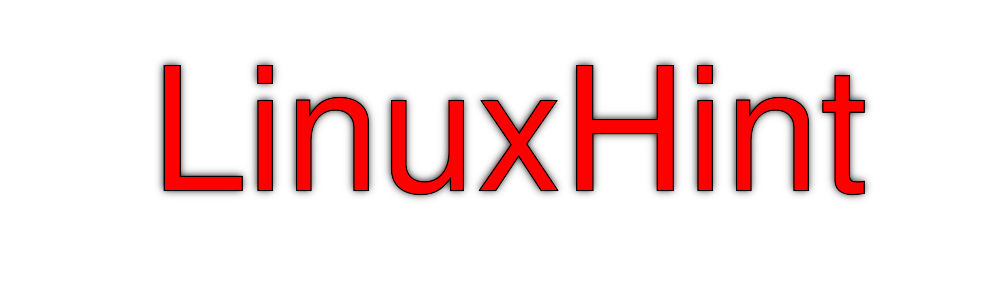
Now, let us try to create a soft outline with a blurred look.
Or
-fill none -stroke black -strokewidth 8 -annotate 0x0+150+190 'LinuxHint' -blur 0x20 \
-fill red -annotate 0x0+150+190 'LinuxHint' \
linuhint_reflection4.png
Here, we are using the blur switch. We are blurring the stroke.
-blur radius{xsigma}
Please note that the most important value here is the sigma value which will determine the extent of blurring.
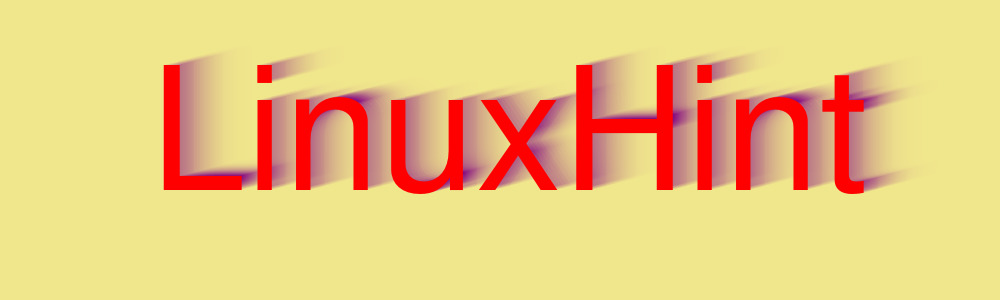
Now, let us look at motion blur.
-motion-blur radius{xsigma}+angle
The angle, in this case, is the angle towards which the blurring occurs.
Or
-fill purple -annotate +150+190 'LinuxHint' -motion-blur 0x25+65 \
-fill red -annotate 0x0+150+190 'LinuxHint' \
linuxhint_mb.jpg
Another example:
-fill purple -annotate +150+190 'LinuxHint' -motion-blur 0x25+165 \
-fill red -annotate 0x0+150+190 'LinuxHint' \
linuxhint_mb2.jpg
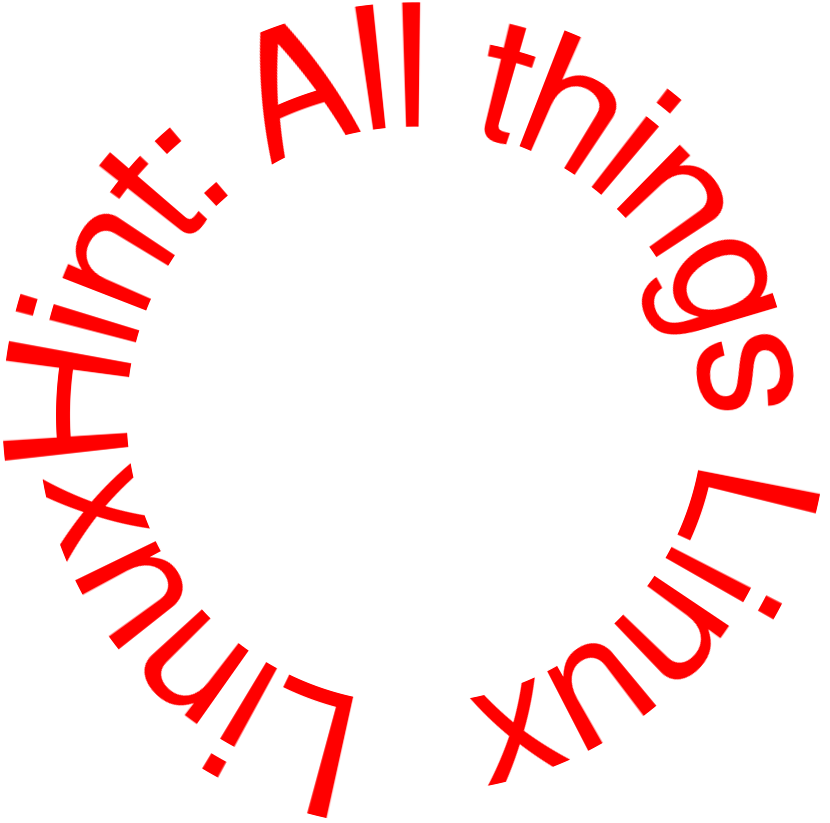
In a Circle
Now, let us put the text in a circle.
-distort method arguments
Use the distort method to distort the text. After the distort switch, specify the method (which in this case is arc that will arc the text) and then the arguments.
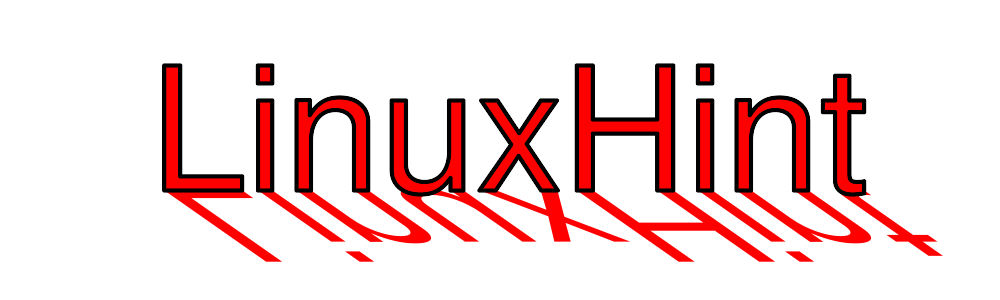
Reflections
The code for reflections is as follows:
Or
-fill red -annotate 0x125+150+190 'LinuxHint' \
-fill red -annotate 0x0+150+190 'LinuxHint' \
linuhint_reflection.png

Use the annotate switch.
Xdegrees and Ydegrees represent the shear on the text. Tx and ty are the offset.
Now, let us try something else:
Or
-fill red -annotate 0x125+150+190 'LinuxHint' \
-fill red -annotate 0x0+150+190 'LinuxHint' \
-fill none -stroke black -strokewidth 4 -annotate 0x0+150+190 'LinuxHint' \
linuhint_reflection2.png
Here, the options are innumerable and what you can do with this too.
Overlapping Characters
In order to write up a line with overlapping characters, you need to individually write and position each letter.
Or
-stroke black -strokewidth 4 -fill white \
-stroke black -annotate +150+190 L \
-stroke none -annotate +150+190 L \
-stroke black -annotate +200+170 i \
-stroke none -annotate +200+170 i \
-stroke black -annotate +220+170 n \
-stroke none -annotate +220+170 n \
-stroke black -annotate +300+170 u \
-stroke none -annotate +300+170 u \
-stroke black -annotate +390+170 x \
-stroke none -annotate +390+170 x \
linux_overlapping.png

And if you wanted to add some color:
Or
-stroke black -annotate +150+190 L \
-stroke none -annotate +150+190 L \
-stroke black -annotate +200+170 i \
-stroke none -annotate +200+170 i \
-stroke black -annotate +220+170 n \
-stroke none -annotate +220+170 n \
-stroke black -annotate +300+170 u \
-stroke none -annotate +300+170 u \
-stroke black -annotate +390+170 x \
-stroke none -annotate +390+170 x \
linux_overlapping_red.png

Now, the deal is that you can decide on the position of each and every letter.
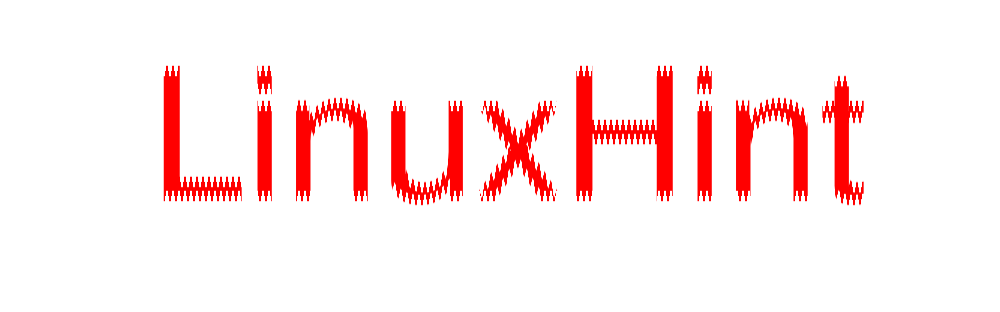
Wave
Now, let us look at the wave switch.
-wave amplitudexwavelength
The wave switch will shear it using a sine wave.
Or
-fill red -annotate 0x0+150+190 'LinuxHint' -wave 6x6 \
linuhint_wave.png
Colorful
Now, let us create a colorful piece.
-sparse-color method ‘x,y color ’…’
The method can be barycentric, bilineaanhattnoanhattantan, shepards, and inverse.

Mixing it up
You can also mix it all up, that is put a few of the effects together to make one whole.
So, let us put a few of the effects together:
Example #1:
In this case, we are putting tile and stroke together.

Example #2:
In this example, we are putting tile, stroke, and distort together.

Example #3:

Conclusion
Creating a fancy font is not too hard. You have to carefully think it out because one word out of place will change the entire effect. So, ensure to think out the entire process, write out little notes and then write the code, especially if it’s very complicated or very long.

Source: linuxhint.com