Enhance Audio Output in Linux with JamesDSP
Main Features of JamesDSP for Linux
JDSP4Linux comes with a lot of features for tweaking audio experience on your Linux system. Some of them include equalizer presets, automatic application of bass boost, loudness equalizer or dynamic range compressor, and user made presets.
JDSP4Linux GUI includes sliders for manipulating crossfeed, individual equalizer bands, reverberation effects, stereo widening effects, convolver effects, interpolation effects, analog modeling effects, and so on. Advance equalizer effects using ViPER-DDC files are also supported.
JDSP4Linux also includes support for EEL2 scripting language (.eel files). You can write your own audio enhancement effects using this scripting language and then apply them through JDSP4Linux GUI app.
Installing JDSP4Linux in Linux Distributions
JDSP4Linux packages are available in two flavors. One of the builds supports PulseAudio while the other one supports PipeWire.
To check if your Linux distribution is using PulseAudio by default, run the following command in terminal:
You may either get an error or blank output if PulseAudio is not enabled in your Linux system. If the output is “Server Name: pulseaudio”, it confirms that PulseAudio is enabled in your Linux distribution.
To check if your Linux distribution is using PipeWire by default, run the following command in terminal:
You may either get an error or blank output if PipeWire is not enabled in your Linux system. If the output is similar to the line below, it confirms that PipeWire is enabled in your Linux distribution:
For further help on finding the correct sound server, you can use the official guide available here.
Once you have ascertained the correct sound server installed in your Linux system, you can download the respective “deb” package for Ubuntu from the GitHub repository of JDSP4Linux. You can also install it in Ubuntu from a PPA by following instructions available here.
Packages for other Linux distributions and instructions for compiling it from source code are available here.
Using JDSP4Linux
Before manipulating audio output, you should go through a couple of steps to ensure that JDSP4Linux works correctly on your Linux system.
Firstly, check that JDSP4Linux has started processing audio output. To do so, launch the JDSP4Linux app from the main menu and click on the three dots icon in the bottom left corner.
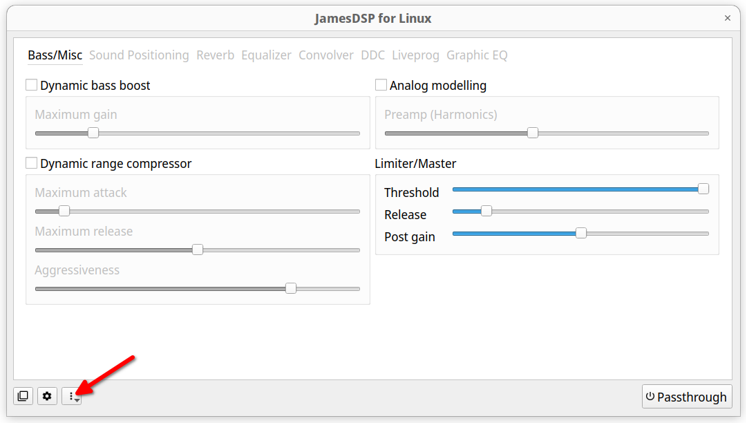
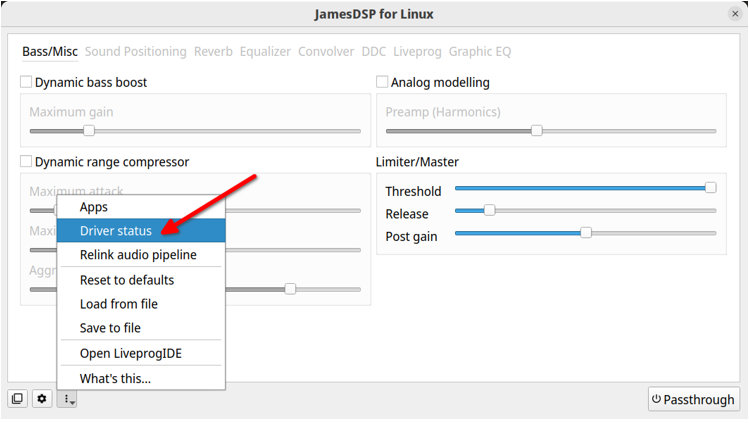
Next, click on the “Driver Status” entry in the popup menu.
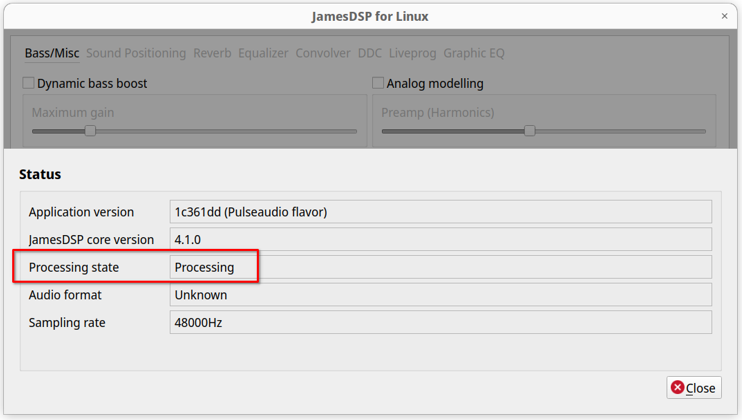
If JDSP4Linux is working correctly, a new popup window will show “Processing state” field as “Processing” (as shown in the screenshot below):
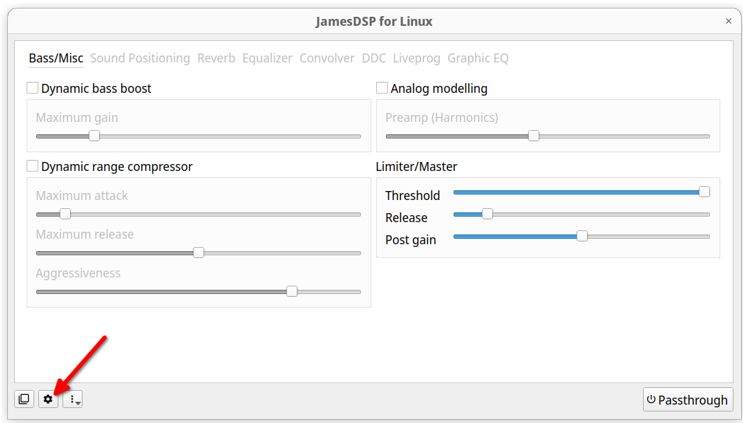
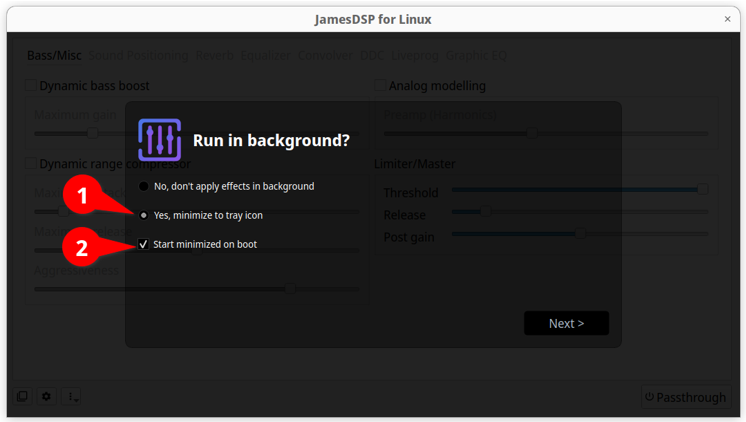
Secondly, you should run the setup wizard to ensure that it automatically starts on fresh boot and runs in background to process the audio output. To do so, click on the little cog icon in bottom left corner of the app, as shown in the screenshot below:
Next, click on “Run setup wizard” button, as shown in the screenshot below:

You will get a new overlay window with some new settings. Make sure that “Yes, minimize to tray icon” and “Start minimized on boot” options are checked.
You can now change audio effects using numerous tabs located on the top area of the app. If you want to know about what each option does, you can use the built-in help tool. To invoke it, click on the three dot menu located on the bottom left corner of the app:
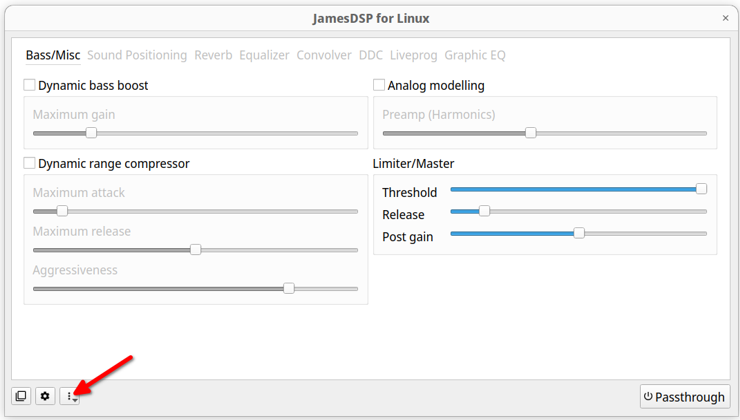
In the popup menu that appears next, click on “What’s this” menu entry.

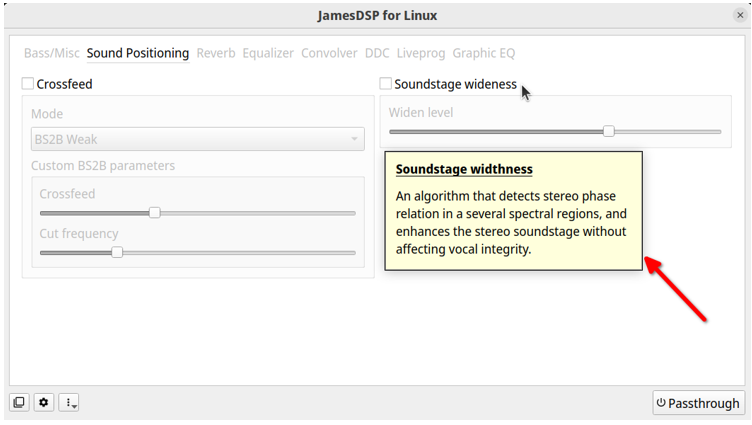
Now whenever you hover the mouse pointer on a valid option, the cursor will change into a question mark icon.
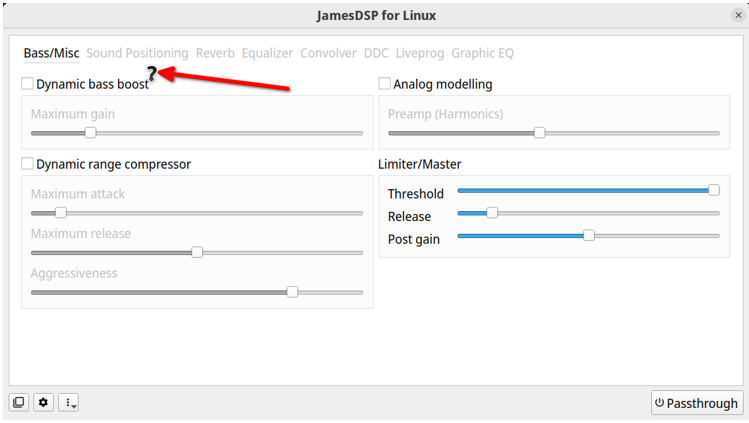
When the cursor has changed into a question mark icon, left click on the respective option to see a detailed tooltip.
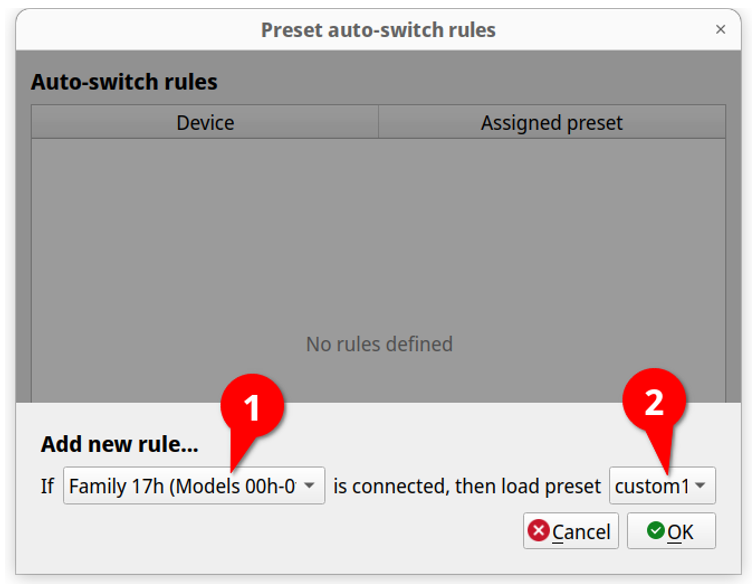
Lastly, you can save your tweaks to create custom presets. These presets can be mapped to individual sound output devices present in your Linux system. When the specified sound device is activated on fresh boot or when it is switched manually by the user or automatically by the operating system, the mapped preset will activate automatically and apply custom tweaks.
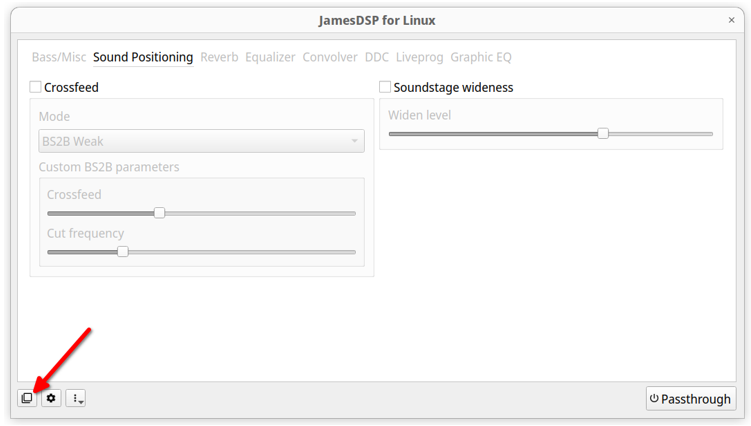
To save your custom settings to a preset, click on the rectangular icon in the lower left corner of the app:
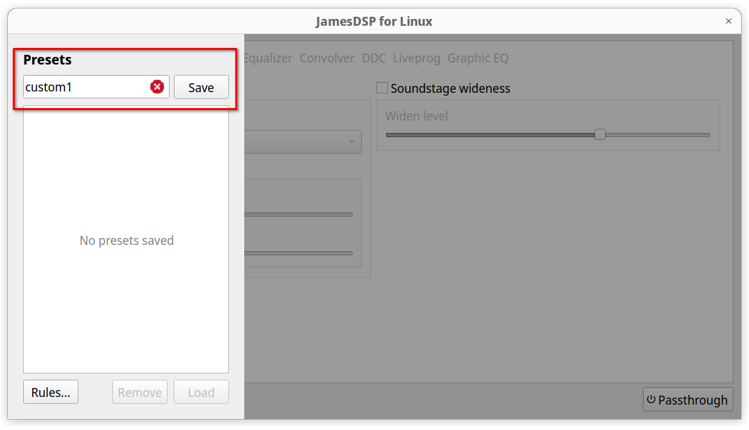
Next, input a name for your custom tweak and then click on the “Save” button.
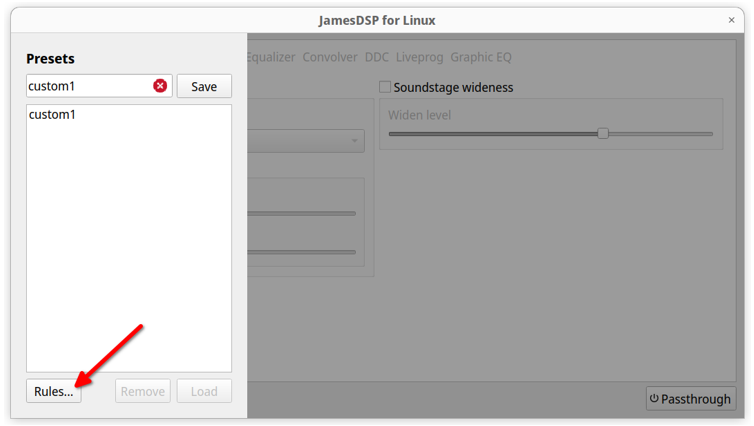
In the same popup window, click on the “Rules” button to start mapping your preset to a sound device:
In the next window, click on “Add new rule” button:
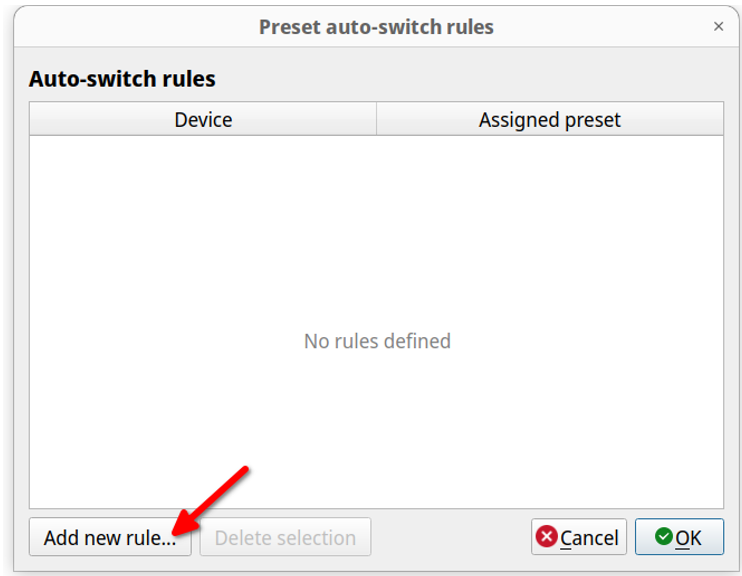
Select appropriate sound card / device present in your system and map a custom preset to it, as shown in the screenshot below:
Conclusion
JDSP4Linux includes numerous presets and manual configuration utilities for enhancing audio experience in Linux systems. With built-in support for a custom scripting language, you can write your own programmable audio effects to further improve the sound output and listening experience.
Source: linuxhint.com