Drag and Drop with Selenium
What is the DragandDrop Method in Selenium?
Selenium is used to assess web applications on a variety of operating systems and browsers. Numerous coding languages can be used to create Selenium test scripts. These include Java, Python, C#, and others. The process of moving a file from one folder to another in any kind of Web browser (Firefox, Google Chrome, Windows Explorer, Opera, etc.) with the help of the Drag and Drop method is carried out with a mouse. When a user drags (moves) a web element from one spot and subsequently drops it to another specific spot, this process is called Drag and Drop method.
Some web applications can automate the practice of drag and drop web objects. For example, moving them from one end to another end by dropping them on a specific spot or element through Selenium web Driver. Selenium Web driver can be used to control the drag and drop operations of such items.
Through this functionality of Selenium Web Driver, Web Developers can easily transfer data or any kind of Document through Drag and Drop method. We will also gain an understanding of the entire process through coding and some of the picture illustrations
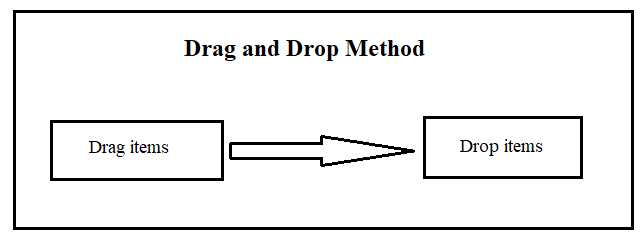
Here is a simple diagram to understand the method of Drag and Drop.
Methods of Drag and Drop Various Elements in Selenium:
There are several methods of Drag and Drop multiple elements in selenium. Here we will discuss some of them.
- In the first case scenario, we DragAndDrop (Source,Target).to build().perform();
- In the Second Case Scenario, we act clickAndHold(From). Build().perform(); act.
- In the Third Case Scenario, we act dragAndDropBy(Source, xoffset, yoffset).perform();
By using some of these scenarios, we can DragAndDrop multiple elements in Selenium.
The Difference Between dragAndDrop() and dragAndDropBy()
The only difference between dragAndDrop() and dragAndDropBy() is that in the dragAndDropBy() function, the cursor is moved to the target WebElement by an offset. Whereas, in the dragAndDrop() method, the pointer is moved directly to the WebElement.
The Difference Between Drag and Drop and Action Class Build
Selenium provides action.dragandDrop class to move items from one end to another.
The action make class, on the other hand, uses the element coordinates to move an element from one end to the other.
What is the Syntax for Drag and Drop Method in Selenium?
We will be using the following syntax for Drag and Drop method:
So, here, we will see how to pass these two parameters through the drag and drop method.
- Sourcelocater, the element is the first parameter that we will be dragging
- The “Destinationlocator,” element is the Second parameter on which the first element has to be dropped.
The Syntax that we will use is given below:
Example # 1:
Here, we are going to show you a pizza ordering system in which we will be talking about the drag and drop strategy. You can see the following figure first and then move to the code.
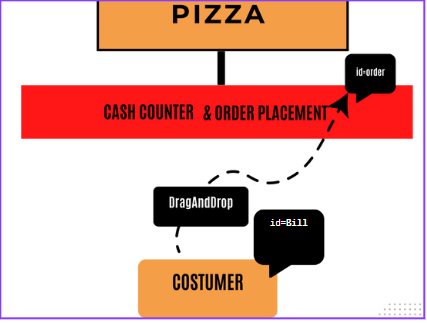
Let us try to understand the Drag and Drop method in Selenium from the above figure.
The BILL element is dragged and the Bill element is dropped on the specific side by the Drag and Drop method.
Below we have provided the complete code snippet that you can refer to for clear understanding.
import org.openqa.selenium.WebDriver;
import org.openqa.selenium.WebElement;
import org.openqa.selenium.chrome.ChromeDriver;
import org.openqa.selenium.interactions.Actions;
import org.testng.annotations.Test;
public class DragAndDrop {
WebDriver driver;
@Test
public void DragnDrop()
{
System.setProperty("webdriver.chrome.driver","E://Selenium//Selenium_Jars//chromedriver.exe”);
ddriver= new ChromeDriver();
ddriver.get("http://demo.webboxzone.com/test/drag_drop.html");
WebElement From=ddriver.findElement(By.xpath("//*Nid=lbill1/a"));
WebElement To=ddriver.findElement(By.xpath("//*Nid='orderl/li"));
Actions act1 =new Actions(ddriver);
act1.dragAndDrop(From, To).build().perform();
}
In the following section, we have given a proper explanation of the above code so you can understand it better.
We executed the code above in Chrome Browser and then dragged the BILL element. And drop it in the CASH COUNTER & ORDER PLACEMENT area through the drag and Drop method. Let us understand the code line by line.
In the first section, we loaded the required libraries. After that, a class Drag and Drop is created. Then, we started the browser and opened the webpage.
See the following piece of code. Here, we began by capturing the first element we need to drag into the variable “From.” As you can see, we target the element id=’bill’.
From=ddriver.findElement(By.xpath(“//*[@id=’bill’]/a”));
This section of the code will drag the id bill to the payment section.
After that, we target the 2nd element which is supposed to drop the first element in the variable called “to”. The code is given here. This will drop the id “bill” to the element id “order” in the payment section.
The code “Actions builder = new Actions(driver);” will create an object of the Actions class to build composite actions. The last line of the sample code will perform the drag and drop function.
Example # 2:
In this example program, we will be using the jqueryui.com website to explain the method of Drag and Drop.
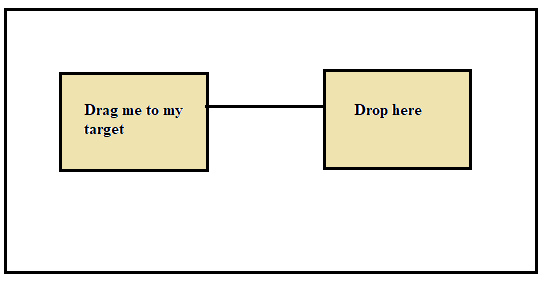
Above is the interface that we are using. We will drag the box named “Drag me to my target “to the box named “Drop here.” Selenium WebDriver coding will be used to do this.
Now, let us understand how to execute the following code:
ChromeDriver ddriver = new ChromeDriver();
ddriver.get("https://jqueryui.com/droppable/");
ddriver.manage().window().maximize();
WebElement frame1 = driver.findElement(By.xpoth("//*[@id=rcontentr]/iframe")); driver.switchTo().frame(frame1);
WebElement drag_me = ddriver.findElement(By.id("draggable"));
WebElement drop_me = ddriver.findElement(By.id("droppable"));
Actions action1 = new Actions(ddriver);
action1.dragAndDrop(drag_me, drop_me).perform();
Now, in this drag and drop method’s two arguments are passed on: one is WebElement drag and the other is a WebElement drop.
The following line of the code will target the Element Id named “draggable” to drag it from there.
In this following line of code, we target the Element Id named “droppable” to drop the first element on that.
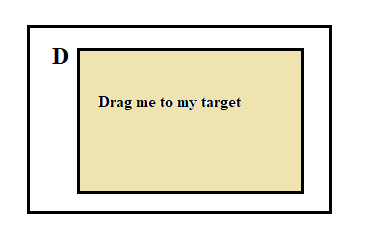
When we execute these lines of code, the first picture named “drag me to my target” move to the “drop here” box.
So, after writing the above line of code, we have this picture.
Conclusion
This article was about the drag and drop method in selenium. Firstly, we have to mention what exactly the drag-and-drop method is. After that, we helped you understand the method of drag and drop through two proper examples. So, in these examples (mentioned above), we used the Web driver’s action methods, and we demonstrate the drag-and-drop capability of the selenium web application. To drag and drop the element, we have been using the drag and drop function from the Actions class. These parameters are Sourcelocator and Destinationlocator. We understand the drag-and-drop procedure using the Sourcelocator, x-axis, and y-axis pixels of the Destinationlocator.
Source: linuxhint.com