Docker Installation on Ubuntu
A technology called Docker allows the users to bundle and run the programs inside the containers. They are identical to virtual machines in a way that they are solitary. Containers also tend to be more adaptable and resource-friendly. Docker uses the Docker daemon to handle the containers in an environment like Linux. This guide discusses two different methods to install Docker on Ubuntu and display its usage.
Remove the Previous Version of Docker
Before starting the installation of Docker on your Ubuntu system, make sure that it’s not yet installed via the version instructions. If it’s already installed, make sure to remove it along with its other dependencies.

After removing Docker from your system, make sure to update the system repositories to reflect the changes in a system through the “update” instructions.

1. Install Docker via the Developer Repository
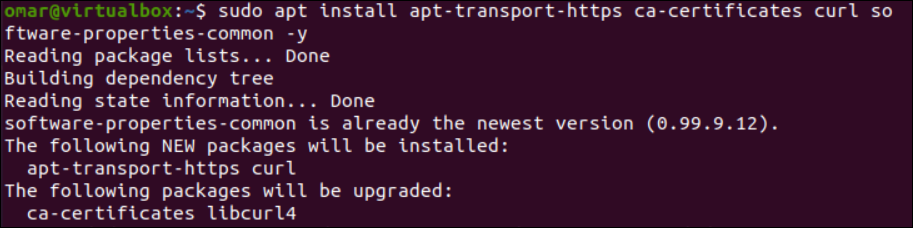
We will opt for the first method of using the developer repository to install Docker on the Ubuntu Linux system. After updating the Ubuntu system, we need to install the required prerequisites to install the Docker properly on Ubuntu. These packages include the “curl” repository that is necessary to fetch the required Docker packages from its developer site, and the ca-certificates package to smoothly install the Docker after accepting all the developer requirements.
Other than that, the “apt-transport-https” package is necessary for smooth transport between the Linux system and the developer site along with some other packages. The “install” instruction has been executed with Ubuntu’s “Apt” package for this purpose as displayed in the following:
Now, it’s time for the “curl” package to add the GPG key of Docker into our Ubuntu Linux system. The “-fsSL” option is used to get the GPG key from the official developer site of Docker using the URL that is displayed in the image and the “apt-key add” instruction.

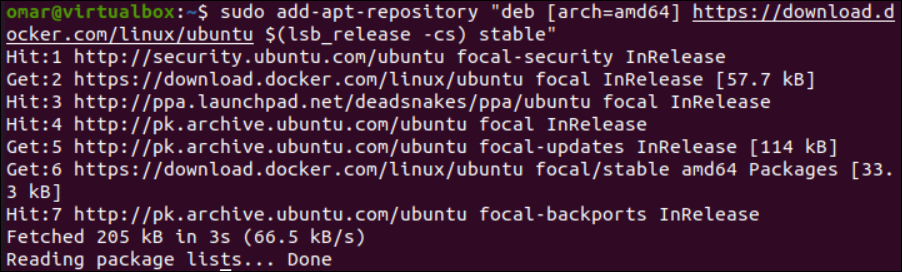
We need to get the Docker repository from the developer download page and add it to our system’s “apt” sources. For this, we use the “deb” instruction followed by the developer URL within the “add-apt-repository” instruction that is displayed in the following. The Docker repository is added to Ubuntu’s “apt” sources within a while.
There is a command that may be used to learn more about the “docker-ce” package, such as if it comes from the Docker repository rather than the Ubuntu repository. The “apt-cache” instruction is followed by the “policy” and “docker-ce” keywords that set the installation source.
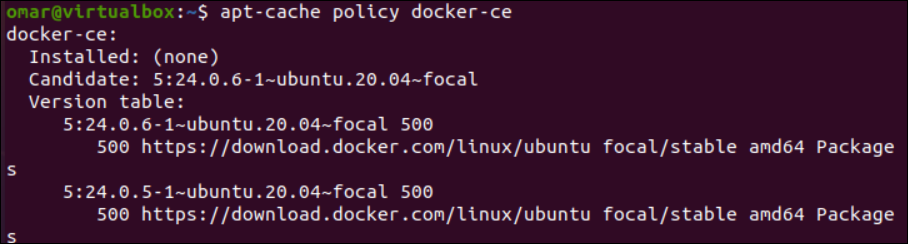
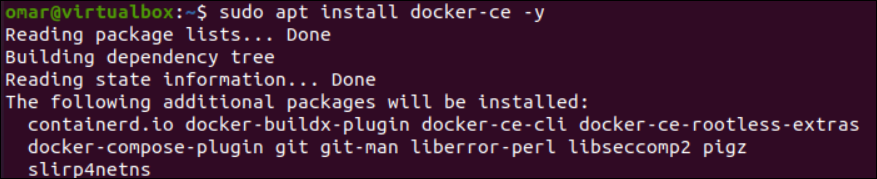
After confirming the latest version of the installation candidate, we will utilize the “install” instruction with the “Apt” repository” to install the “docker-ce” by force using the “-y” option. It displays the additional packages that will be installed along with the Docker.
The installation process of “docker-ce” requires your patience as it is a little lengthy and time-consuming process as shown in the following image:

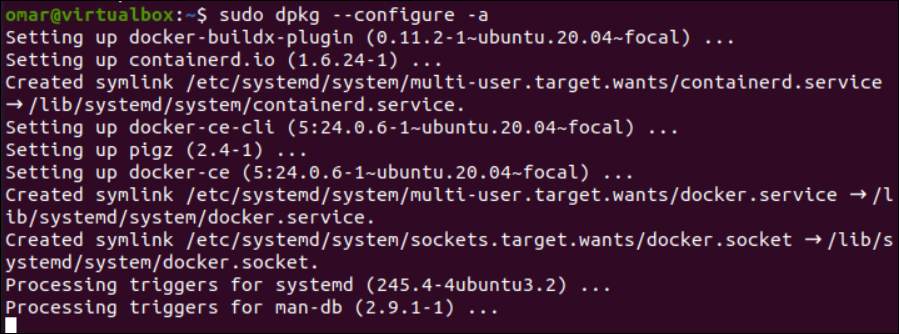
In case your installation gets interrupted, make sure to configure the remaining packages via the “dpkg” package as displayed in the instruction:
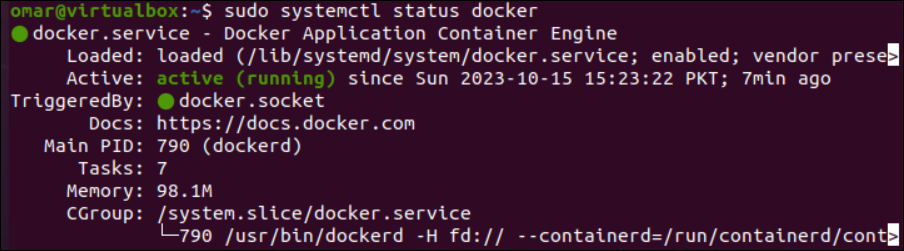
After the successful installation and configuration of Docker, you can look for its connectivity status via the “status” instruction using the “systemctl” utility as shown in the displayed image that the Docker is actively running.

The installed version of Docker can be found via the version instructions as follows:
![]()
2. Install Docker via Snap
Snap is the default repository of the Ubuntu system that can also be utilized to install many packages and applications just like the “apt” package. Before moving towards installing Docker through snap, make sure to update the system repository via the “apt” package as shown in the following “update” instruction. Add your account password to continue the update process as depicted in the following image:

It’s time to install Docker via the “snap” package that is used in the “install” instruction. The following command depicts the download and installation of the stable version for Docker using the “snap” package:

After a while, the latest Docker version will be successfully installed in your Ubuntu system as displayed in the following image:
![]()
Again, you can look for the status of the installed Docker via the “systemctl” instruction.
Docker Usage
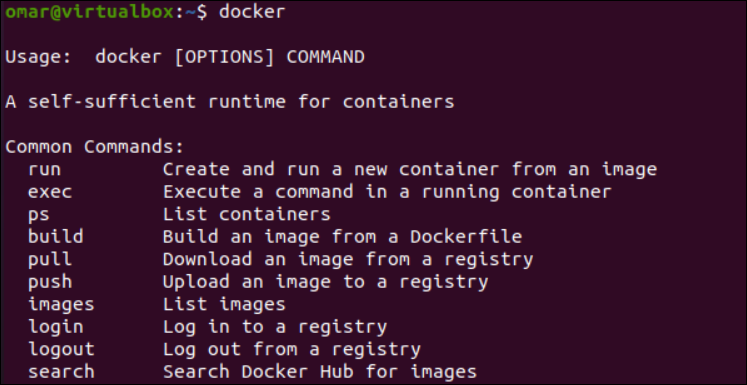
Let’s look at the use of Docker in the Ubuntu system. The most basic use of the “docker” instruction is to look for all the commands it provides for smooth use as displayed in the following:
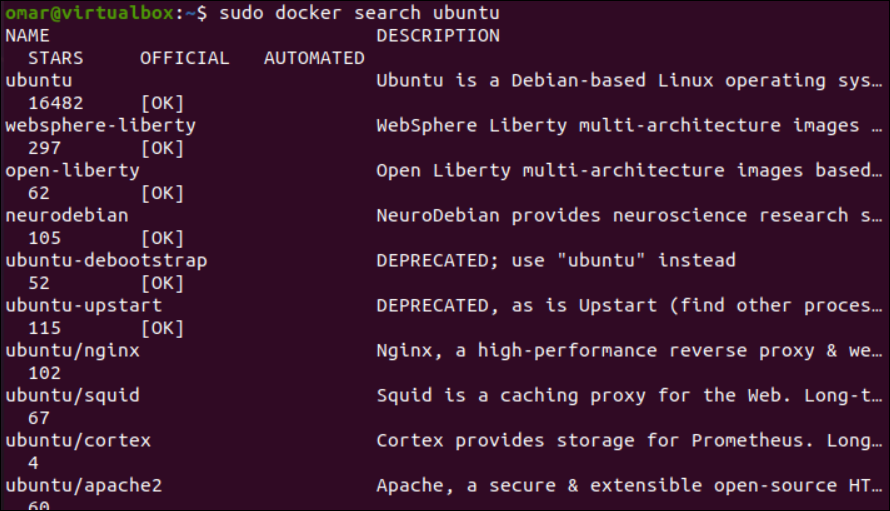
The Docker “search” instruction gives us the right to search for specific images related to particular environments. Since we installed Docker on our Ubuntu system, we will search the available Ubuntu images by utilizing the “ubuntu” keyword in the “docker search” instruction as depicted in the following:
Download the Docker Image
Now, we will get the official Ubuntu image for our system using the “docker” instruction followed by the “pull” option. The simple processing of this instruction displays the successful “pull” operation, i.e. image has been downloaded successfully.

List the Docker Images
It’s time to display all the downloaded Docker images within your Ubuntu system. The Docker instruction can be executed with the “images” option. The output of this instruction displays that we have a Docker image, “ubuntu”, and some of its information.

You can also download an image directly and run a container using the “docker” instruction with the “run” option followed by the image name, i.e. “hello-world”.
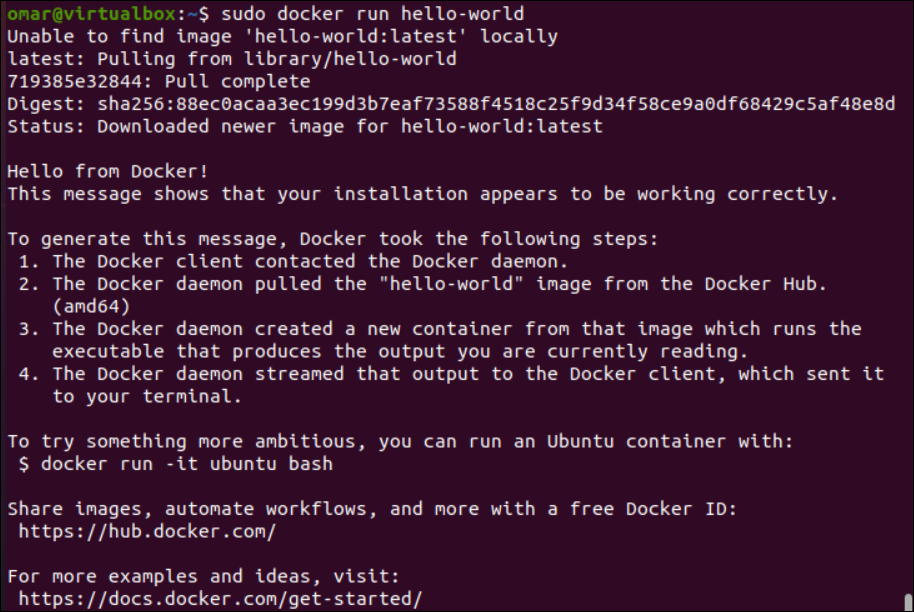
The “run” instruction only creates a non-interactive container. To initialize an interactive container, run the Docker “run” instruction with the “-it” option.
$ sudo docker run -it ubuntu

While the container is in interactive mode, the “ps” option in the “docker” instruction can display the active containers like Ubuntu.

Remove the Docker
To remove the Docker from the Ubuntu system, make use of the “Apt” command with the “Remove” option as follows:

Conclusion
This guide demonstrates the use of Docker in Linux-like systems. We covered two distinct yet easy ways to set up and install Docker on an Ubuntu Linux server. The use of Docker images and containers was demonstrated at the end.
Source: linuxhint.com