Docker Image Tags
Update System
The most important and first step to do before the installation of Docker is to update the Ubuntu 20.04 Linux system. This step is necessary to avoid inconvenience to have happened in the installation process. Therefore, you have to launch the Linux “console” application from its application area and wait a second. After its successful launch, you may try the “update” instruction within the instruction area with the “apt” package and “sudo” rights as shown below.

Install Prerequisites
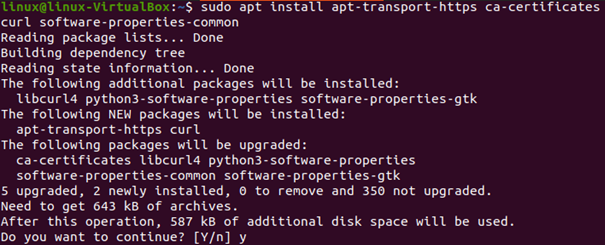
After the effective update of the Linux system, we have to install some very necessary prerequisites of Docker. So, we have been installing those necessary packages via the “apt” installation instruction shown below.
Add GPG Key for Docker
Before adding the docker repository to our system, add its GPG key via the shown query. It returns “OK” as output meaning, the key has been successfully added.
![]()
Now, it’s time to add up the “docker” deb package to the “Apt” official repository by using the below “URL” instruction on the shell.

Setup Docker Candidate
It’s time to set up the Docker candidate for the installation of Docker after that. So, we need to run the apt-cache instruction using the keyword “policy” followed by the keyword “docker-ce”.

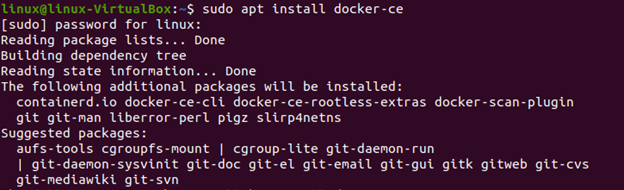
Install Docker
The installed version of the docker candidate would be displayed on the output screen. Now, we are ready to install the docker itself by the utilization of an “apt” repository in the “install” command. Use the “docker-ce” keyword for this installation.
After the installation, we are ready to check its activity status in our system. Therefore, we have to cast off the “systemctl” package in the “status” instruction along with the name of an application “docker”. The output is demonstrating that the docker is running actively right now.

Create Docker Group
Before performing anything, we need to add our currently logged-in user to a docker group. So that we will be able to connect with the docker root and restrict the access to the docker root. For this, we have to try out the groupadd instruction with the keyword “Linux”. The execution of this simple instruction to add a user to the docker group asks for the password to continue.
![]()
On using the “echo” query to display the value of the variable “USER”, we have the name of a user that has just been added to the docker group
![]()
To fully add the user “Linux” to the docker, we need to use the “gpasswd” instruction along with the option “-a”, variable “$USER, and the “docker” group. Make sure to use the “sudo” rights for this instruction execution. Now, the user “Linux” has been added to the “docker” group and we have restarted the docker service using the “service” instruction shown below.
![]()
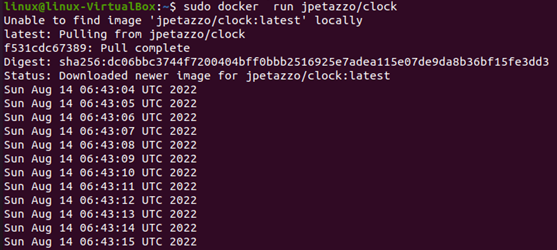
Run Base Docker Image
To execute our docker container, we must run its base docker image. Therefore, we have been using the busybox docker image in the “docker run” instruction to do so.

Similarly, you can utilize the same instruction to execute some containers in the background or the clock container to display the date and time.
Check Running Containers
On running the docker query with the “ps” option, we have displayed the running containers.

To stop running the specific container, use container ID in a “stop” instruction of docker.
![]()
Docker Images
You can display all the loaded docker images via the shown-below query.

To run an image, use its name within the docker “run” instruction with the “-it” option.


To check the status for the just started docker image, try using the “ps” docker query with the “-l” option.

To make a difference between your base image (busybox) and the just created container, try using the docker “diff” instruction with the first 3 characters of the newly created container. Whatever the difference is, it will be displayed in the output.
![]()
For saving the changes made to the latest container, use the docker commit query as shown below.
![]()
On running the docker images instruction again, we can find the newly saved container in it with the name “<none>”.

Docker tag
When you try the commit instruction to save the changes made to the “and” container image, it returns the Error response meaning there is No such container because the “abf” is its ID not name.
![]()
Therefore, we have to assign a name to the container of the shown specific image ID using the docker “tag” instruction. We have named it “Linux”.
![]()
After executing the same “docker images” query, we can see that the newly named container is displayed with a new name “Linux”.

You can also utilize the same docker tag instruction to rename the existing container using the first three characters of its Image ID and save it as a new container. So, we have tried to change the title of a container “Linux” to “linux1” as displayed below.
![]()
On the execution of the very same “docker image” query on the console, we have “Linux” titled and “linux1” titled images on the listed images.

Conclusion
This guide was all about the use of Docker in Ubuntu along with some of its basic and very useful features. We have discussed its installation and configuration in Ubuntu along with the loading or docker images to create containers. Meanwhile, we have seen how you can name an image container or rename it to create a new image with the same properties.
Source: linuxhint.com