Deploy and Use External DNS for Kubernetes
In this article, we will learn how to configure an external DNS in a Kubernetes cluster. The cluster has a controller for Kubernetes that is implemented as the external DNS. With numerous DNS service providers including Cloudflare, Google Cloud DNS, and many others, the external DNS can be used. By deploying in a cluster of Kubernetes and using this external DNS, we can quickly streamline the process of managing the DNS records for our application. Using the necessary commands, we will install the external DNS in our cluster. We will explain this topic with the help of examples and screenshots.
What Is External DNS in Kubernetes?
In Kubernetes, the External DNS is essentially a tool that lets us manage the DNS records for Kubernetes applications, and it is installed in Kubernetes. The External DNS is a third-party domain name server that may be accessed and updated by anybody with an internet connection.
Prerequisites:
Your system is running the most recent version of Ubuntu. The Windows user can also easily run the Ubuntu operating system in parallel with the help of a virtual machine. The user also ensures that the kubectl command line tool is running perfectly and has some knowledge of pods and containers. Here, we divide the explanation of the external DNS process into different parts or steps. Let’s start the process from the beginning.
Step 1: Start the Kubernetes Control Panel
At first, we run the cluster in the system. To start the cluster on a local machine, we run the following command:
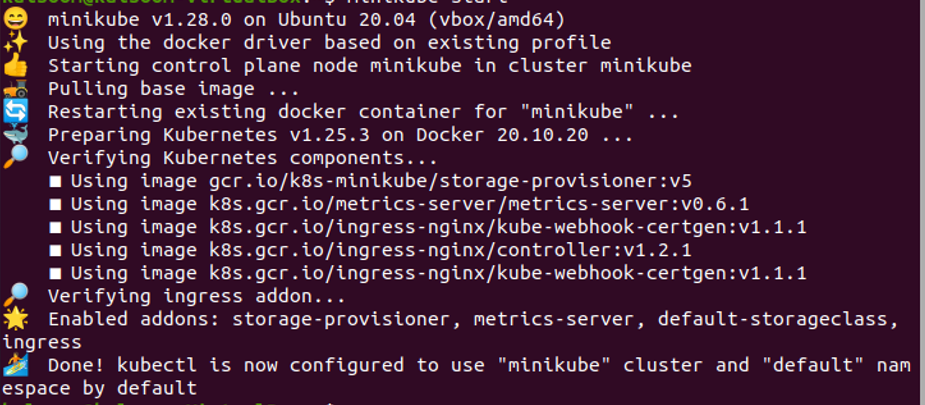
When the command is executed, a Minikube container is started in our system. The Minikube container is the cluster of Kubernetes in which we perform different operations.
Step 2: Create a Configuration File in Kubernetes
In this step, we define our requirements to install an external DNS server in the system by creating a YAML file in the Kubernetes cluster. We run the following command to create a file:
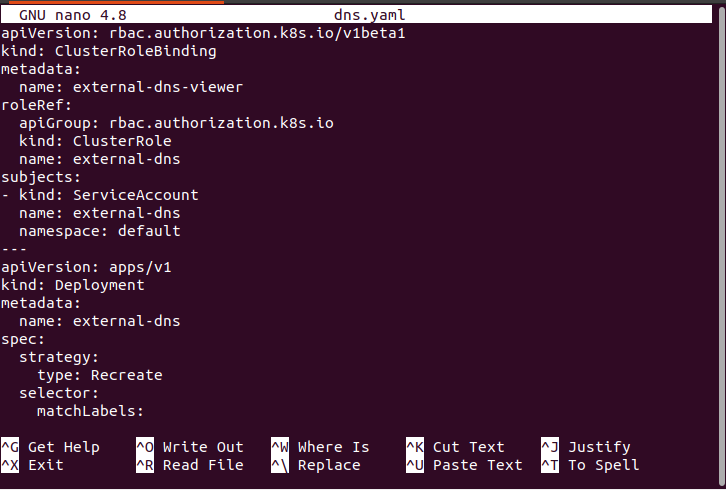
When we run this command, the system opens a dns.yaml file that contains the name of the pod and the type of this pod which is a service account. All specifications for this container can be found in the following screenshot. Read the rules related to external DNS carefully.

And now, we create a configuration file again for a pod whose kind is cluster role binding. The name of this pod is external-dns-viewer. Read the information in this pod as attached in the following:
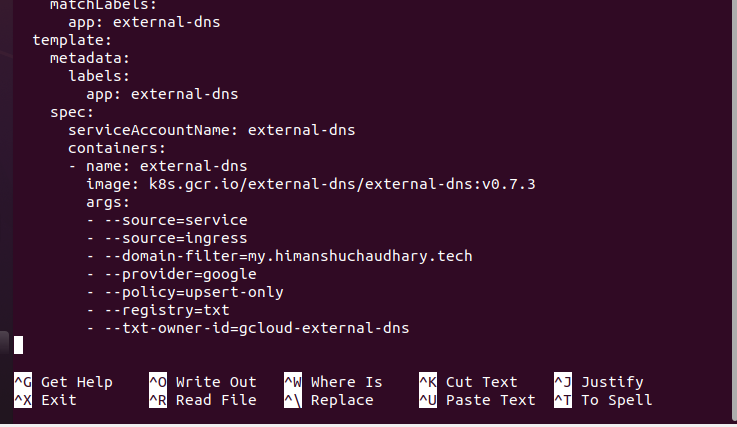
We also created a file for an external DNS label in Kubernetes. Also, carefully read the label pod’s specifications as shown in the following screenshot:
Step 3: Deploy this Configuration File in Kubernetes
In this step, we deploy these configuration files into our Kubernetes cluster. We install the external DNS controller in our cluster by running the manifest. The command is as follows:

When we run this command, we can see that in the service account, all resources are created successfully in our cluster.
Step 4: Enlist the Pods in Kubernetes
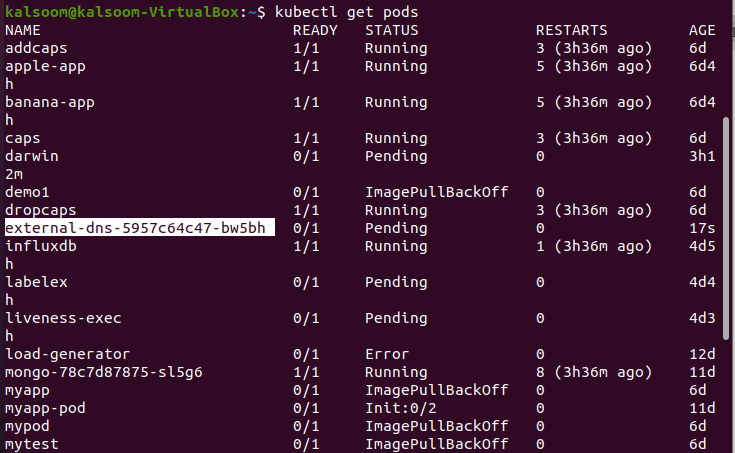
In this step, we get the list of all running pods in the Kubernetes cluster. We’ll see how the external DNS pod verification goes. We run the following command on the kubectl command-line tool:
The output of this command is attached in the provided screenshot. The command shows the details of pods like name, ready, status, restarts, and age.
Step 5: Fetch the Log of a Specific Pod in Kubernetes
In this step, we get the log of the external DNS pod whose name is “external-dns-5957cc64c47-bw3bh”.
By executing this command, we will see the logs or errors that occurred during installation.
Step 6: Create a Configuration File in the Kubernetes Cluster
In this step, we create a configuration file. We run the following command:
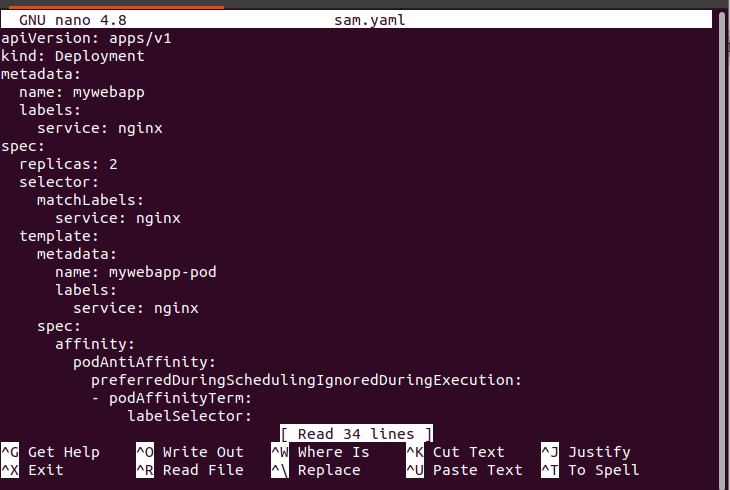
Upon the command execution, the configuration file is opened, as shown in the following attachment. This file contains a range of information including the meta-data and many other things.
Step 7: Deploy the External DNS in Kubernetes
In this step, we deploy the configuration file for external DNS in Kubernetes. We run the following command:
![]()
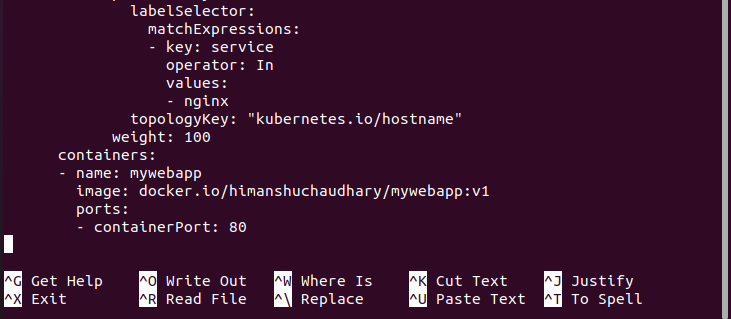
By executing the command, the mywebapp pod is deployed successfully.
Step 8: Create a Service Configuration File in Kubernetes
In this step, we create a service configuration file in the cluster. We run the following command:
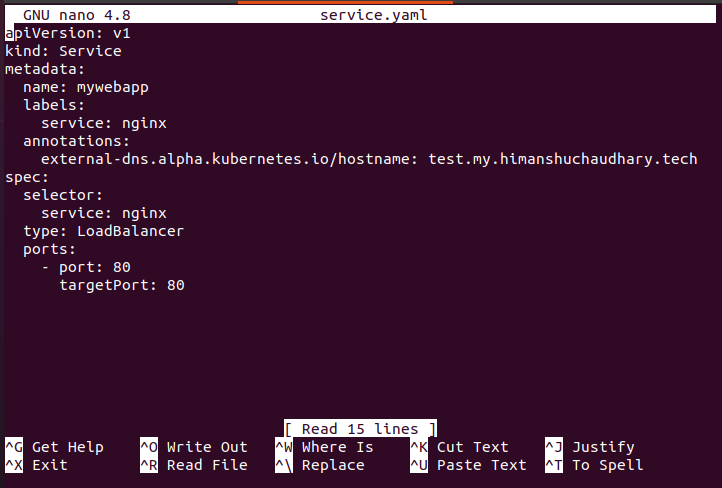
After the command execution, the “service.yaml” file is open in the Kubernetes cluster. This file contains kind, metadata, and selector where the name of the service is Nginx. The file screenshot is attached in the following:
Step 9: Deploy a Service File in Kubernetes
In this step, we deploy the service’s configuration file in Kubernetes. We run the following command:
![]()
When the command is executed, the service pod named “mywebapp” is deployed in Kubernetes.
Step 10: Enlist the Running Deployments in Kubernetes
In this step, we fetch the list of running deployments in Kubernetes. We run the following command on the kubectl terminal:

The external-DNS pod appears after the command execution, as shown in the provided screenshot.
Step 11: Get the Services in Kubernetes
In this step, we get the list of services that we recently deployed in Kubernetes. We run the following command:
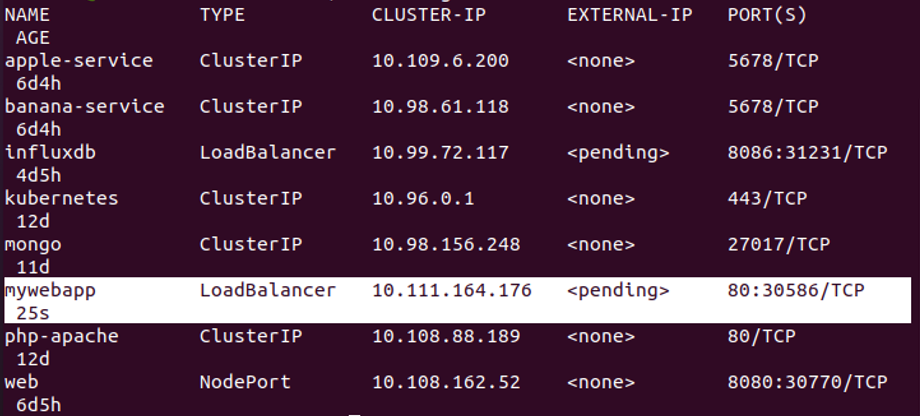
When the command is executed, a list of running services appears. Here, we can see that a service pod was recently shown in a list like mywebapp. We can also see the status of this service which is 80:30589/TCP. The status of this service is “pending”. Many more things are mentioned with this command.
Conclusion
We conclude that we could use the DNS server easily on the internet using the external DNS pod. Hopefully, you all understand how we can configure and use the external DNS in our Kubernetes application. The screenshots that we attached are just for your understanding. You could easily test all of these commands on your Kubernetes application.
Source: linuxhint.com