CSS User Select
Example 1
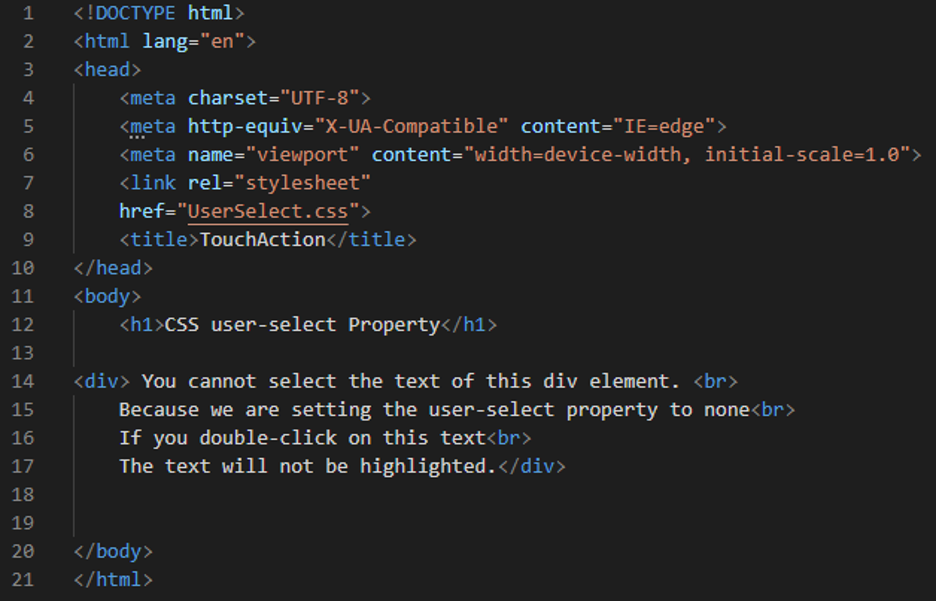
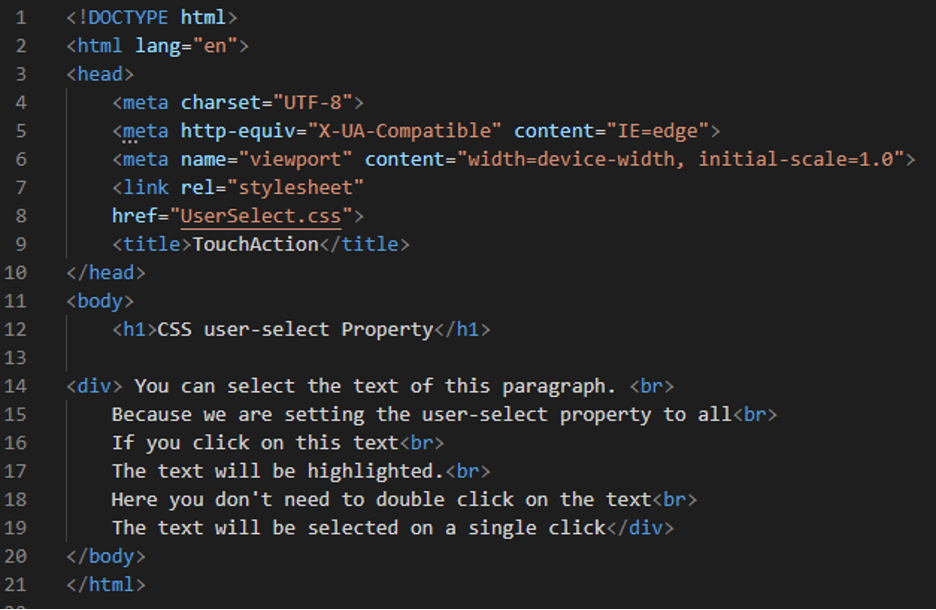
To begin with, we by create a new file in the software, which in this guide is Visual Studio Code. When we create a new file, we may choose the language and select HTML. The HTML code must then be created. Visual Studio Code allows us to instantly acquire the fundamental tags by entering “!” and then clicking “Enter”. So, we are taking advantage of this capability and collecting all these fundamental tags. We’ll utilize the user-select property in CSS and link this file to the CSS file by adding the “link” tag in the HTML head tag. We have a simple heading and a div in this HTML code. We also write some text inside the heading tag “h1” and also in the “div” tag. After completing this code, save it and proceed to the CSS file. Now, we will apply the “user-select” property to these texts in the CSS file.
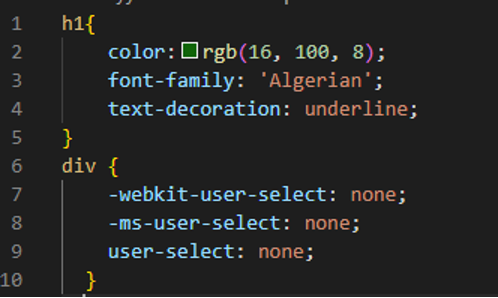
We are selecting “RGB” as the heading’s “color” and the values we are utilizing here are “rgb (16, 100, 8)” which represents the “green” shade color. Then, “Algerian” is selected as the “font-family” and we also decorate this heading by putting “underline” here. We add this “underline” by utilizing the “text-decoration” property. We will select this heading text by double-clicking on it because we don’t use any “user-select” property to this heading. The default value of this property is “auto”. We just set “none” as the value of this “user-select” property for the “div” element.
We are going to place the “webkit-user-select” property as chrome only supports this prefix and set its value to “none”. Then, we utilize the “ms-user-select” which is used for specifying the keyword value which is “none”. It means that the user will not be able to select the text which is written inside the div. We also use only the “user-select” property and set it to “none”. Now, when this div element appears on the screen then the user will not select the div element to the text.
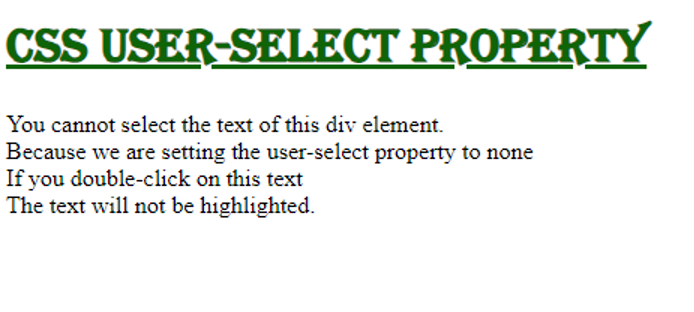
The output of this code shows that there is no selected text shown in this image as it doesn’t allow the user to select the text of the div. This is because of the “none” value of the “user-select” property.
Example 2
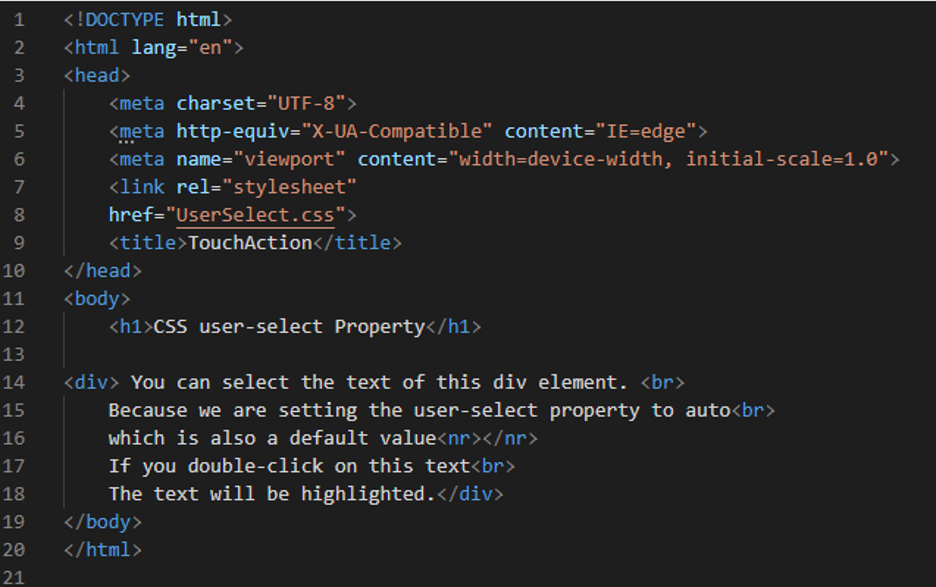
We have a simple heading and a div here. We also include some text in the “h1” heading tag as well as the “div” tag. Now, we will apply the “user-select” property on this div text.
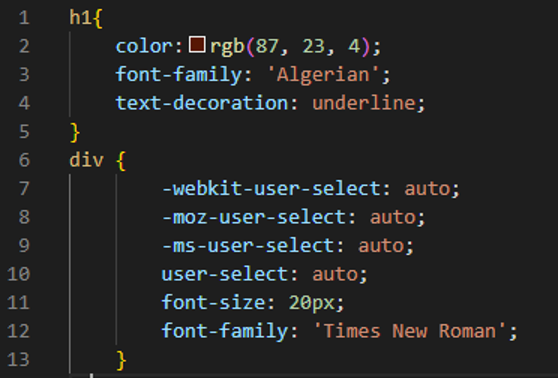
We have chosen “RGB” as the heading’s “color,” and the numbers we have chosen are “rgb (87, 23, 4),” which is the “brown” shade color. Then, we choose “Algerian” as the “font-family”, and we add “underline” to this heading as well. For the “div” element, we simply set the “user-select” property to “auto”. We are using the “webkit-user-select” property here because Chrome only allows this prefix and changes its value to “auto”.
Then, we use “ms-user-select” to specify the keyword value, which is “auto” in this case. We are also indicating that the user will be allowed to select the text by double-clicking on it which is put inside the div. We also set the “user-select” property to “auto”. When this div element appears on the screen, the user will select this text by double-clicking. Then, we are setting the “20px” value for the “font-size” of the “div” and “Times New Roman” as the “font-family”.
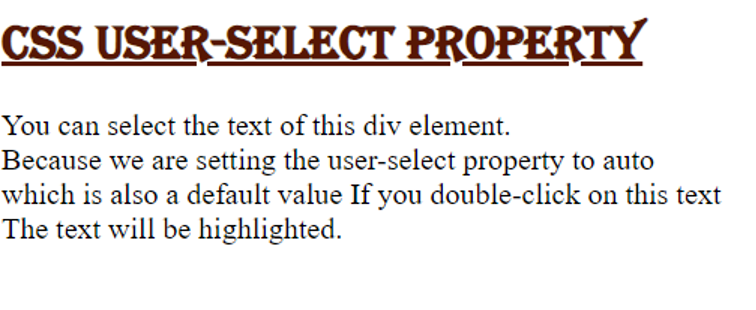
When the output of this code renders on the screen it looks like the first screenshot. We can select these texts by double-clicking on them as we have used the “auto” keyword as the value of the “user-select” property.
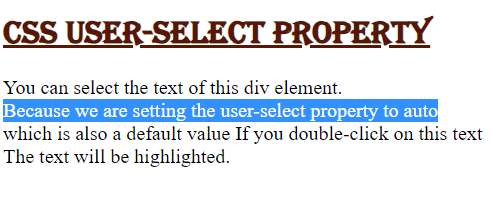
In the second screenshot, you can also see the selected text as we select the text by double-clicking on it. The selected text is highlighted in this screenshot.
Example 3
The HTML file is the same as above. We just replace the div element with the paragraph and change the text which is written inside this paragraph tag.
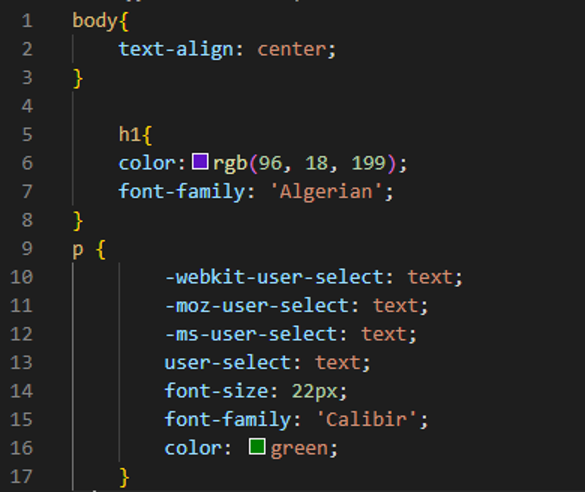
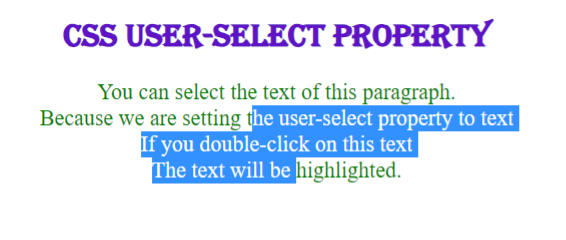
We align all “body” elements in the “center”. Then, use “rgb (96, 18, 199)” as the “color” of the heading and the “font-family” is the same as the above examples. As Chrome only accepts the “webkit” prefix, so we utilize the “webkit-user-select” property and set its value to “text”. The value of the “moz-user-select” is set to “text”. Then, we use “ms-user-select” to specify the keyword value, which is “text”. The “user-select” property is also set to “text” which means the user can select the text using this property. It does not hinder the user from selecting text. The “font-size” of this “p” is “22px” and “Calibri” is selected here as the “font-family”, and choose “green” as the text’s “color”.
The output shows that we select the text from anywhere we want as we set the value of the user-select property to “text” in this example.
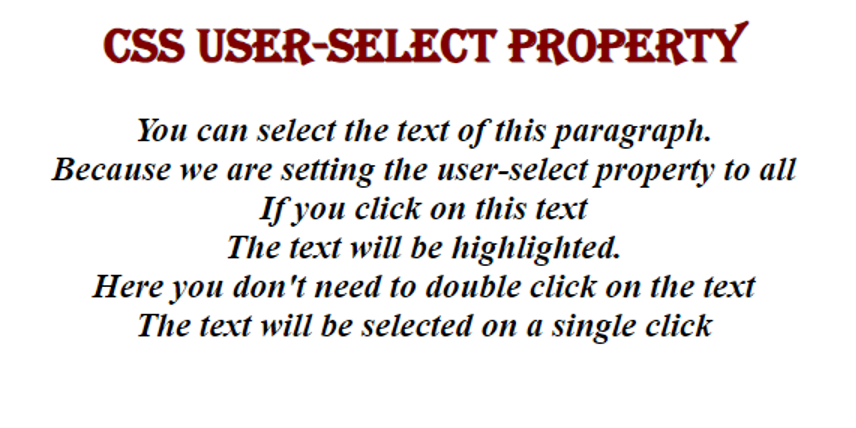
Example 4
In this code, we just change the text which is written inside the div container. Now, we will also apply the “user-select” property in this example but with a different value.
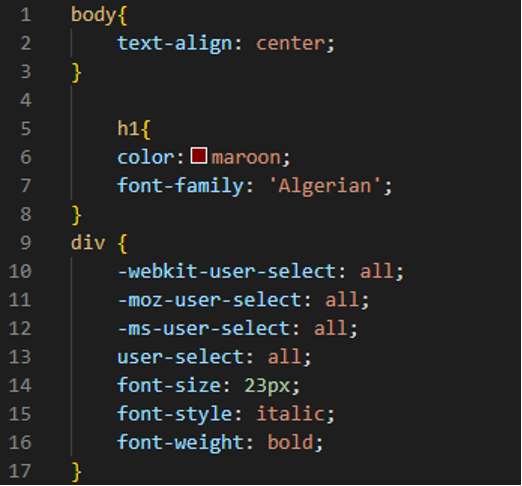
All “body” elements are aligned in the “center”. Then, use “maroon” as the heading’s “color”, and the “font-family” is the same as in the examples before. We set the keyword “all” for the value of “webkit-user-select”, “moz-user-select”, “ms-user-select”, and also for the standard syntax which is “user-select”. When we use “all” as the value of this “user-select” property, it will select the text with a single mouse click rather than a double-click. So, we will be able to select the div text with only one single click and we don’t need to double-click on it for selecting this text. We also utilize “23px” for the “font-size” and style this text in “italic” font-style, and “bold” this text with the help of the “font-weight” property.
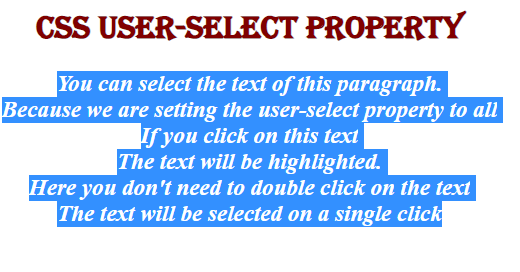
The output before the text selection is displayed in the first screenshot. We are providing the other screenshot in which we select the entire text with just a single mouse click.
In this screenshot, the text is selected. Or we can say that the text is highlighted when we use a single mouse click on this text. We don’t need to double-click on the text for selecting it because we use the “all” keyword and it also selects the entire text as you can see in the screenshot below.
Conclusion
This guide has been created to help you understand the CSS “user-select” property. We’ve gone over this topic in detail and looked at many examples of how we’ve used the “user-select” property in CSS code. We’ve already covered how to utilize the user-select property for controlling how the user selects the text or whether the user will select the text or not. We’ve also covered how to set the values for this property and have explained all values of this property in detail here. We’ve put together a comprehensive guide for you, in which we’ve included the code and detailed explanations of how to use it, as well as the results.
Source: linuxhint.com