CSS Tilde
In CSS, the tilde is a wase line symbol which is represented as “~”. It is also called “Subsequent-sibling Combinator”. We use this tilde or Subsequent-sibling Combinator for separating two compound selectors. To put it another way, we can say that the tilde selector chooses all element’s siblings of the specified element. In this tutorial, we will discuss the working of the tilde selector. We will use this tilde selector in our codes and will demonstrate to you how it works.
Example # 1:
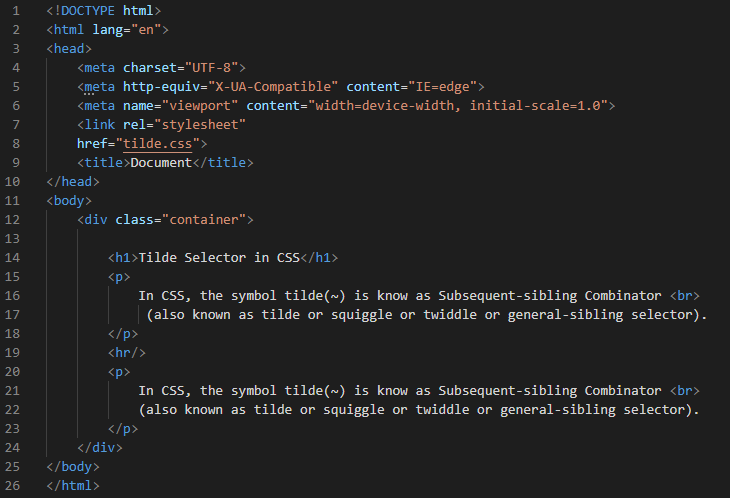
For using this tilde selector in CSS, we must create an HTML file first and link this file with our CSS file in which we will use the tilde selector. In this example, we are creating one div and in this div, we have a heading and two paragraphs and an “hr” tag between these two paragraphs. This “hr” tag is used for representing a thematic break between the paragraphs. Now, after the completion of this HTML code, we are going to move to the CSS file in which we utilize this tilde selector.
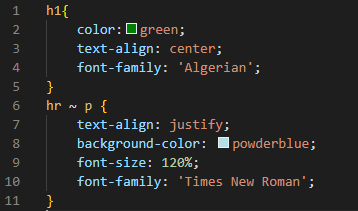
Below is our CSS code, in which we style the heading by changing its “color” to “green” and align it in the “center” by utilizing the “text-align” property. We also changed its “font-family” and set it to “Algerian”. After styling the heading, we are using the tilde selector. The first element is the “hr” and the second one is “p”. We are using this tilde selector for selecting all the paragraphs which are preceded by the “hr” and then applying some styling properties to these paragraphs. We align the text to “justify” and set the color of the background using the “background-color” property and use the “powder blue” for this. The “font-size” property is also utilized and gives the value of “120%” to this property. Then, “Algerian” is selected as the “font-family”. All these properties will apply to the paragraphs which are preceded by the “hr”.
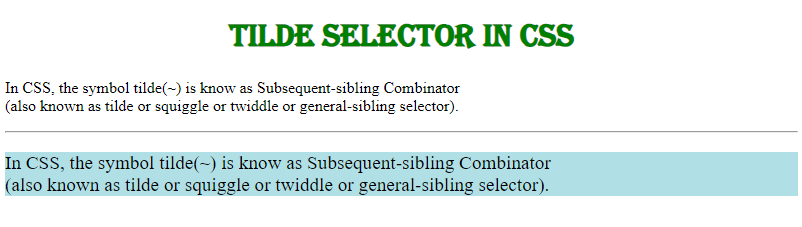
Look at the output below, all the properties we have used above in the CSS file are applied only to the paragraph which is preceded by the “hr”. The above paragraph remains unchanged but the second paragraph after the “hr” is changed and all styling is applied to this paragraph. This is just because of the tilde selector.
Example # 2:
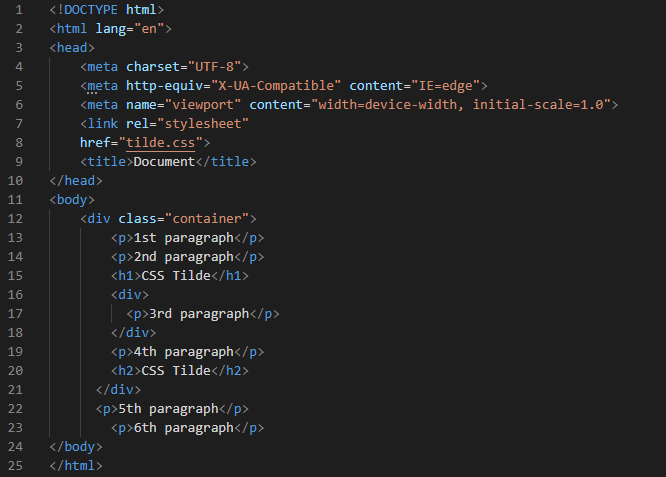
Here, we put one div. In this div, we put two paragraphs and one heading. After this, we place another div in this first div and put a paragraph and close this second div. Outside the second div, we are putting another paragraph and heading. Then closing the first div here. After closing the first div, again put two paragraphs. And then close the body tag.
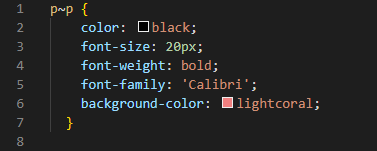
Here, we put the tilde selector and place “p” as the first element and also “p” as the second element then write it as “p~p”. It means the first “p” is preceded by the second “p”. It will select all the “p” which is followed by the first “p”. All the second “p” which is followed by the first “p” are styled accordingly. We use the “color” property which sets the color of the font of the paragraph and set to “black”. The size of the font we are setting here is “20px”. We are utilizing the “bold” keyword as the value of “font-weight”. And selecting the “Calibri” “font-family” for this. The “background-color” will appear in “light coral” because we are selecting this color here as the “background-color”.
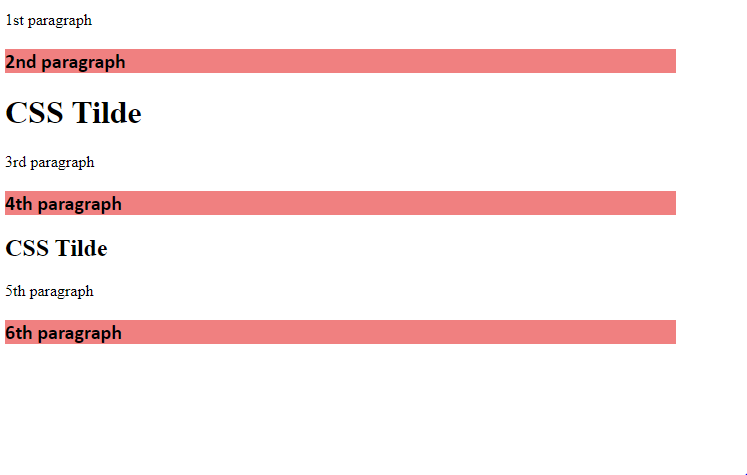
You can notice in the output below that all the second paragraphs which are followed by the first paragraph are styled as we have used the tilde selector for this. By utilizing the tilde selector, we select all the second paragraphs preceding the first paragraph.
Example # 3:
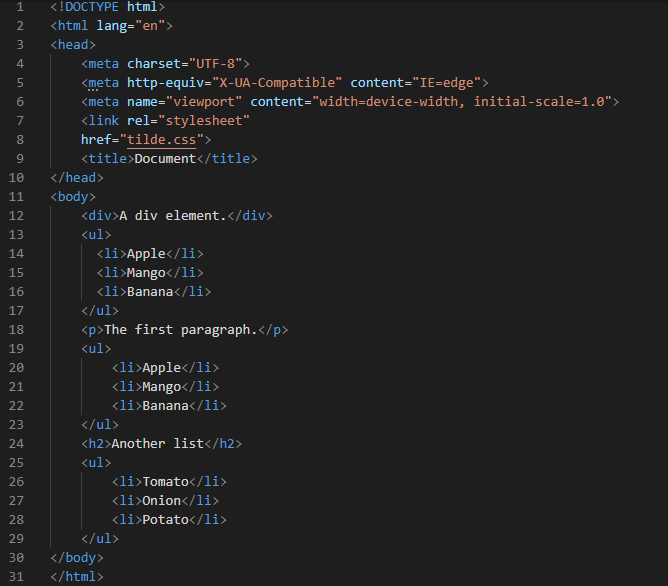
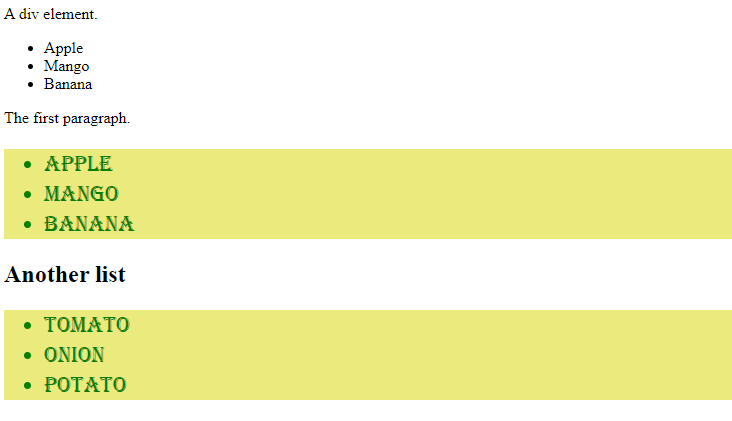
In this code, we have a div and then an unordered list outside the div. After closing this list, we write a paragraph using “p” tags and then create a second list below this paragraph. When this second list ends, we write one heading using “h2” tags. After this heading, we have another list. All lists are unordered lists here.
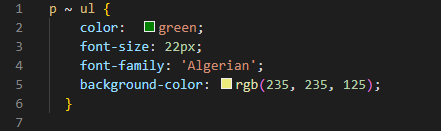
We are using “p” and then the tilde selector. After the tilde selector, we have “ul” which means it selects all the “ul” that is preceded by the “p”. We use some styling properties to give style to the “ul” for making the difference clear to you how this tilde selects elements and apply the given styling to the selected elements. We first use the “color” property and set “green” for the text color. So, the selected elements will render in a “green” color. We are also increasing the “font-size” to “22px” and setting the “font-family” to “Algerian”. We set the “background-color” in RGB form and set it as “rgb (235, 235, 125)” which looks like yellow color.
Here, the output shows that the first list Is simple and there is no change in the first listIIse it is not selected as it is present before the paragraph and is not preceded by the “p”. The other two lists are styled as both lists are preceded by the “p”. These two lists are present after the paragraph so, they are selected and then styled.
Example # 4:
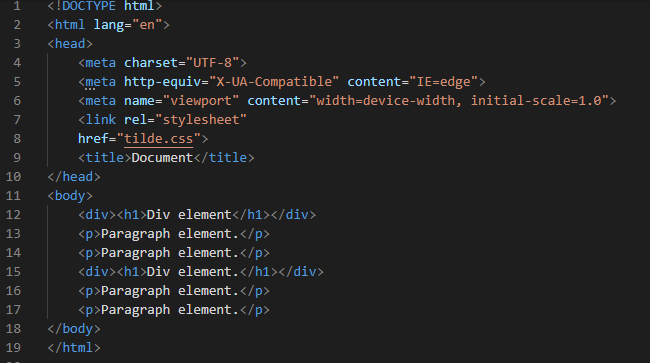
You can see here we have created one div and a heading inside this. Then two paragraphs outside this div. Below this, we have one more div and heading same as above and created two paragraphs.
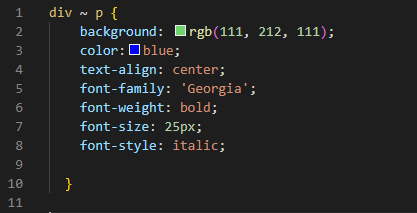
We use the “div” as the first selector and then tilde and then “p” as the second selector. It will take all the paragraphs which are followed by the div. The “background” we set here is “rgb (111, 212, 111)” which is a light green color. We utilize “blue” as the “color” so the text will appear “blue”. We also align it to the “center” of the line. And “Georgia” is its “font-family” as we have selected here. We also “bold” this text by using “bold” as the value of “font-weight”. The “font-size” is “25px” this time and it is also “italic” in “font-style”.
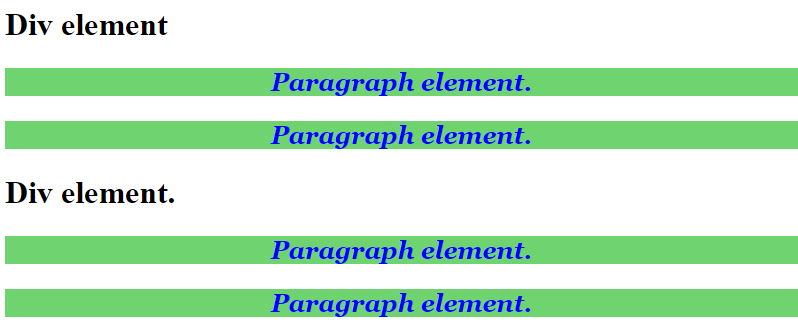
All paragraphs are selected in the output because all paragraphs are preceded by the div . So, it selects all the paragraphs, and we can see that all the properties which we have utilized are applied to these paragraphs. The tilde selector helps in selecting all paragraphs which are followed by the div and applying properties inside the curly braces of this.
Conclusion:
We have presented this tutorial for learning the tilde selector in CSS. Here, we have discussed what is tilde selector and how to use this tilde selector in CSS and how it works. We have placed the first selector and then the tilde selector and then the second selector. As we have explained that it selects the second selector which is followed by the first selector with the help of the tilde selector. We have demonstrated multiple examples here in this tutorial.
Source: linuxhint.com