CSS Table Cell Padding
Cell padding is defined as the space in the middle of the data of the cell and the border. When we put the data in the cells of the table then we must create space between the cell’s border and its data. This spacing is known as cell padding in CSS. We can set the cell’s left padding, right padding, top padding, and bottom padding separately as well as combined padding for all sides. If we don’t set this cell padding in our table cells, then it will be set by default according to the data of the cells. We have different properties in CSS for setting this cell padding.
By using the “padding” property it adjusts the padding on all four sides inside the cell. But if we want to set the padding only on one side then we have also the properties for setting this. In this guide, we will explore the cell padding property in CSS and will perform examples here in which we will use these properties.
Properties for Cell Padding in CSS:
- Padding: value.
- Padding-left: value.
- Padding-right: value.
- Padding-top: value.
- Padding-bottom: value.
Example # 1:
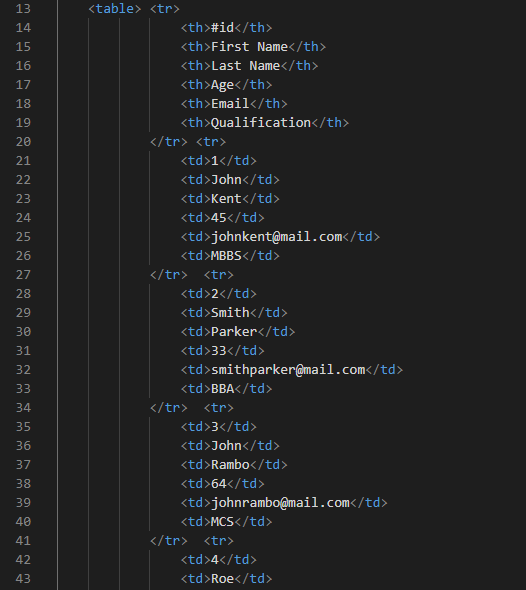
As we must apply the cell padding properties on our table cells, so we must construct the table. First, we will use these properties on it. We can create the table in HTML by adding some tags which are used for constructing the table. Here, we are going to construct a table in HTML by opening the file. After adding basic tags of the HTML, we start constructing the table in the body of the HTML code. We put the “<table>” tag. In this tag, we are going to create the heading row by using the “tr” and then the “th” tag. In the “th” tag we are adding some data here. Then, we again use “tr” for each row.
Then, we are using the “td” tag in this “tr” tag. And add data in this “td” so it will add data to the rows of the table. After completing this code, we must save it with the “.html” file extension and we must link this file with the CSS file inside the “head” of this HTML file. We will use this table in all examples in this guide but apply different cell padding properties in each example. Now, after saving this, we are going to move toward the CSS file in which we will use CSS properties. So, all these properties will apply here in this table.
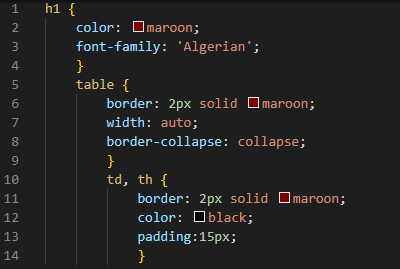
We have created one heading in HTML. So, here we are going to style it a little bit by using the “color” property. We set the font color to “maroon”. Then, we also set its “font-family” and use the “Algerian” as the value of this property. Then, apply the “2px” border on the entire table. The type is set here to “solid” and the color of the “border” is “maroon”.
Next, the “width” of the table is set. We put “auto” here so that the width will automatically adjust according to the data. After this, the “border-collapse” property is here, and it is “collapse”. So, the border of the table will be collapsed. Now, we need to create a border for every cell. So, for this, we are again utilizing the “border” property for “th” and “td”. The data which is written in these cells is set to the “black” color in the “color” property.
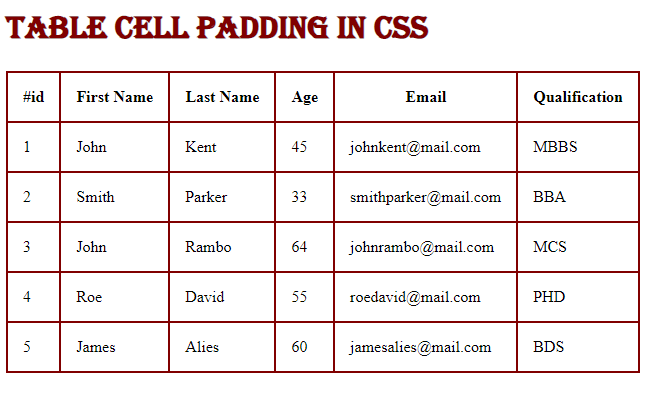
Now, we are setting the cell padding with the help of the “padding” property in CSS and set “15px” padding here. It will create a 15px space between the cell and the data from the top, left, bottom, and right sides. If we want to apply the same padding on all four sides, we use this “padding” property. This one property applies the padding on all sides.
In this output, notice that there is a space between the text which is written inside the cell and the border of this cell. The space from all four sides are equal. This is cell padding in CSS and this “padding” property sets equal padding on all sides.
Example # 2:
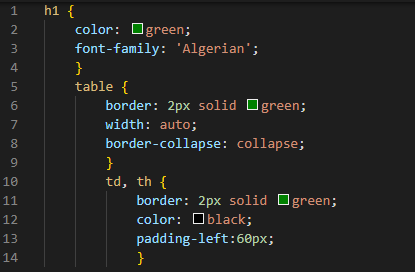
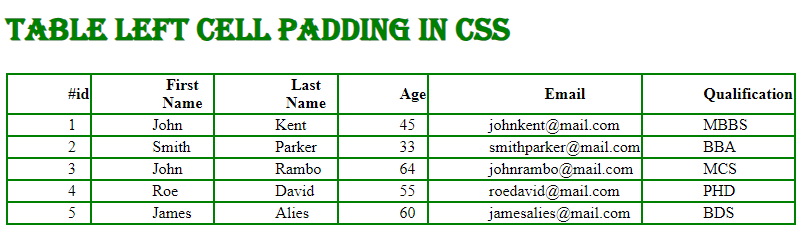
Here, the code is the same as we discussed in the first example. We just change the “color” of the heading and the color of the “border” of the cell to “green”. When we use this “padding-left” property, it will adjust the cell padding on the left side only. We set the value of “padding-left” to “60px”. It will create 60px space on the left side of the cell’s data and cell’s border.
In this output, there is a space on the left side between the data and the border of all cells. This is because we use the “padding-left” property here. So, it creates the desired space only on the left side and it doesn’t apply this padding on the remaining three sides.
Example # 3:
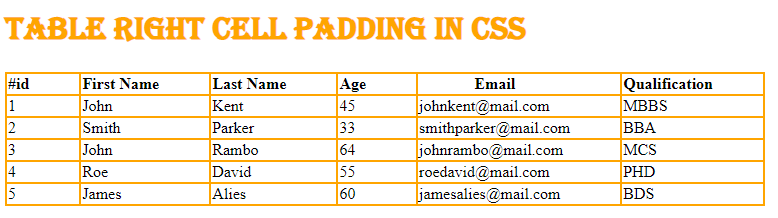
In this example, we simply change the “color” of the heading, the color of the cell’s “border,” and the table to “orange”. When we use the “padding-right” property, it only affects the padding of cells on the right side. It will make a space between the data that is present inside the cell and the cell’s right edge. The value of “padding-right” here is set to “50px.” It will leave a 50px gap between the cell’s data and the cell’s border on the right side.
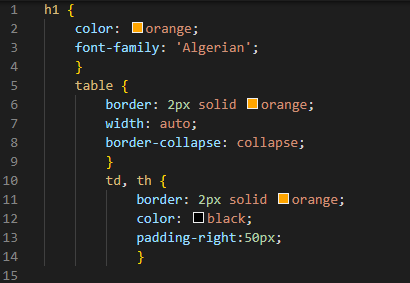
You can see that there is a space only on the right side between the data and the border of all cells. This is due to the “padding-right” property being used. As a result, it just creates the needed padding on the right side and ignores the remaining three sides.
Example # 4:
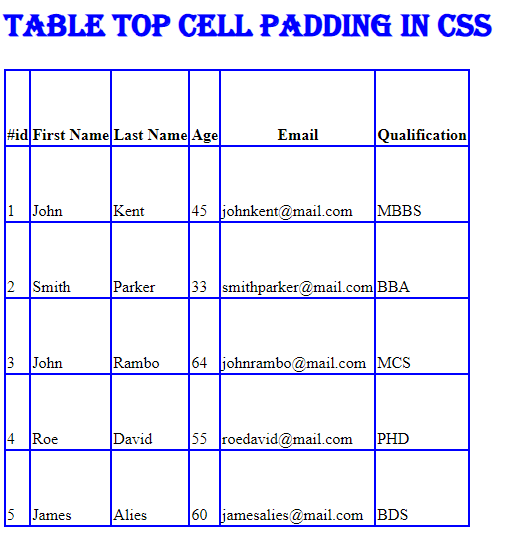
Here, we simply alter the “color” of the heading, the “border” of the cells and the table border to “blue”. We are utilizing the CSS property “padding-top” right now. The “padding-top” property only affects the padding of cells on the top when it is used. The “padding-top” is set to “55px” in this case. On the top, there will be a 55px gap between the cell’s data and the cell’s border.
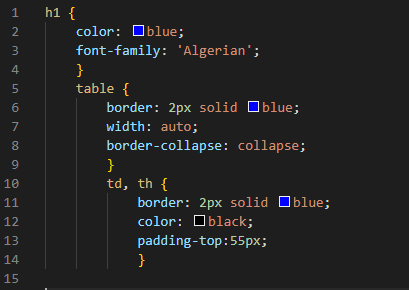
Here, on the top side of each cell there is a space between the data and the cell boundary. This is due to the use of the “padding-top” property. As a result, it only adds the necessary padding to the top side.
Example # 5:
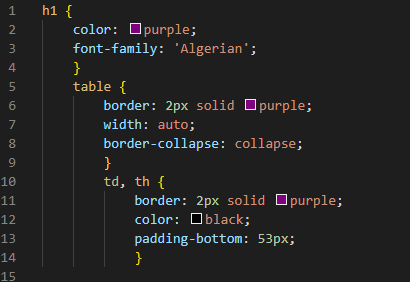
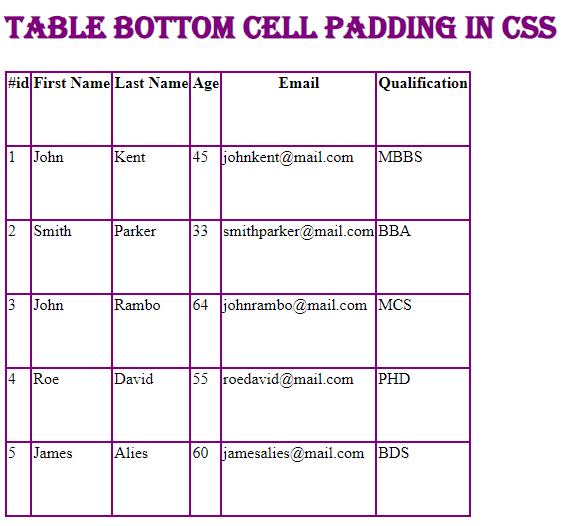
Now, we are changing the “color” of the heading, “border” of the cells, and table to “purple”. We’re using the CSS property, “padding-bottom”. When the “padding-bottom” attribute is applied, it only sets the padding of cells on the bottom. It will make a cell padding between the data inside the cell and the cell’s bottom border. In this scenario, the “padding-bottom” is set to “53px”.
Here, you can observe the space between the data inside the cell and the bottom border of the cell. As we use the “padding-bottom” property, it adds the cell padding only on the bottom of the cell.
Conclusion:
This guide has explained the cell padding concept in CSS in detail. We have discussed different padding properties here and we have utilized these properties in different CSS codes. We established that in CSS, we adjust the cell padding on all sides of the cell by using the “padding” property and apply padding on one side only by using different padding properties. We looked at a variety of codes in which we have used these properties as well as the effects of these properties on the table cell. You will set the cell padding after reading this guide thoroughly.
Source: linuxhint.com