CSS Remove Border
Example 01:
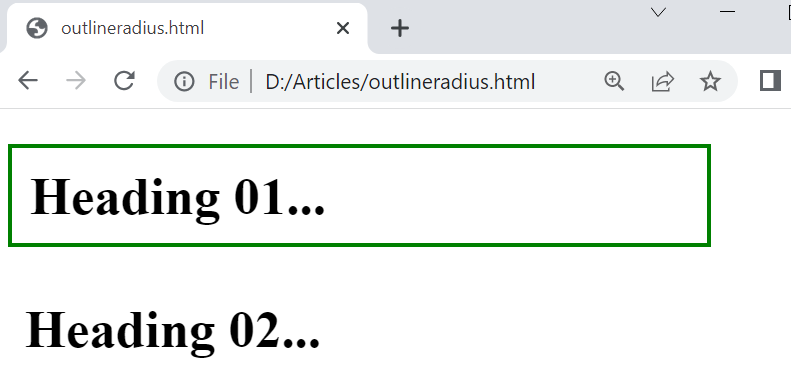
Let’s start with the most basic illustration of removing the border from specific elements of the HTML script. For this, we have been starting our code with the “html” main tag of the HTML script. Let’s discuss the “body” tag first as shown below. It utilizes two headings of the largest size, “1”. Both the headings are used here with different titles to differentiate them. Also, we have specified the classes “a” and “b” within the heading tags separately to use these classes within styling to separately style both headings.
Within the “style” tag, we have been separately styling both the headings with the use of their classes “a” and “b”. We have added the padding of 10 pixels and the width of 400 pixels for both the headings via the padding and width property. So, we have been assigning a 3-pixel solid green border to the first heading via the border property and for the second heading, the border property has been set to none. Let’s save this HTML script and run it within the Chrome browser.
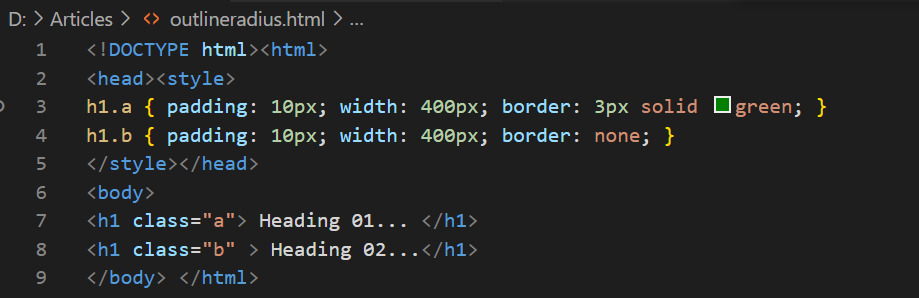
The output for this webpage has been displayed in the Chrome tab. The first heading has been displayed with a green solid border of 3 pixels. The 2nd heading has been displayed with no border, the same width, and some padding.
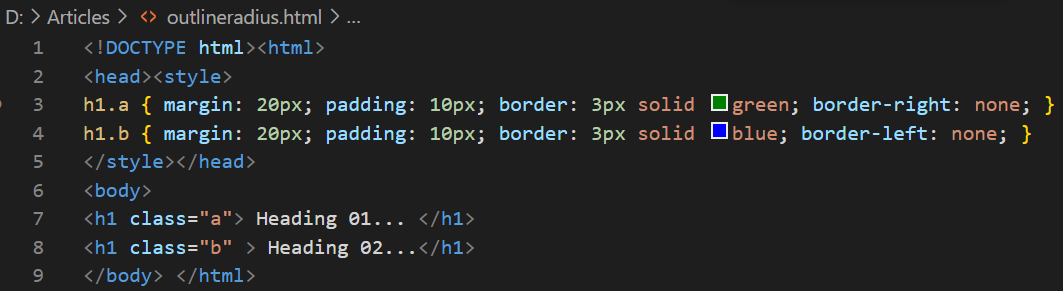
Let’s take a look at how one side of a border can be removed from the element using the enhanced border property. Thus, we have updated the above code as shown in the below image. We have been using the same body tag along with its inner tags or headings. Within the style tag of this HTML file, we have added margin and padding properties to uniformly spread the headings on the webpage. Then, we used the border property for both the headings separately. Each border of 3 pixels solid has been set for both. The first heading will contain a green color border and the second heading will contain a blue color border.
While the border-right and border-left properties of borders have been set to “none” for both the headings to remove the right and left side of heading 1 and heading 2 respectively. Let’s save and run this update.
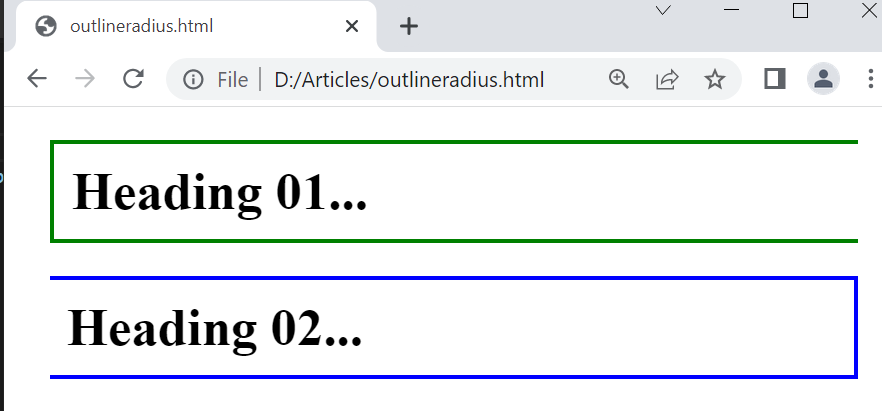
The output has been displaying two headings of green and blue borders. While the right side of the first border and left side of the second border is removed. This has happened because of the use of border-left and border-right property of borders after setting both to “none”.
Example 02:
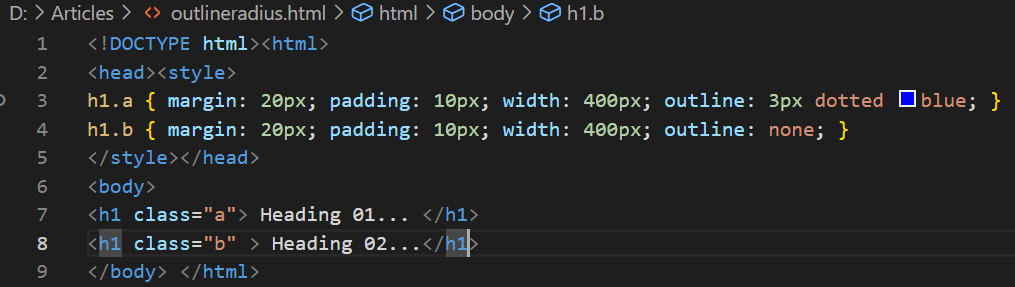
Along with the creation of a solid border, you can also create an outline for any specific element of an HTML webpage without using the border. Outline and borders are visibly looking similar but they are quite different in properties. Let’s use the outline property of HTML scripting language to create a dotted outline. We will be using the very same HTML file without changing much of its script. The same body with its tags and quite a similar styling has been used. The only change has been done within the style tag where we have been setting the CSS for both headings.
Here, we have been using the outline property for both headings. The outline for 1st heading would be of 3 pixels dotted in blue color while the other heading will not contain any heading as per the value “none” set for outline property. Let’s save and debug this HTML script to see the results via the Visual Studio code.
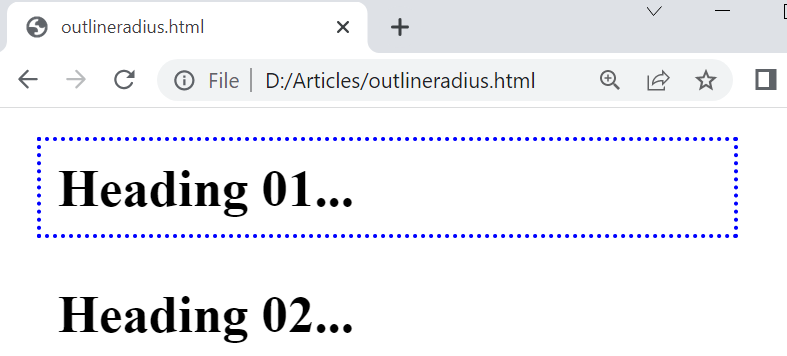
After debugging, we opened the HTML page in the Chrome browser and got the shown below result. The output HTML page is showing the first heading with a dotted outline and the second heading with no outline or border.
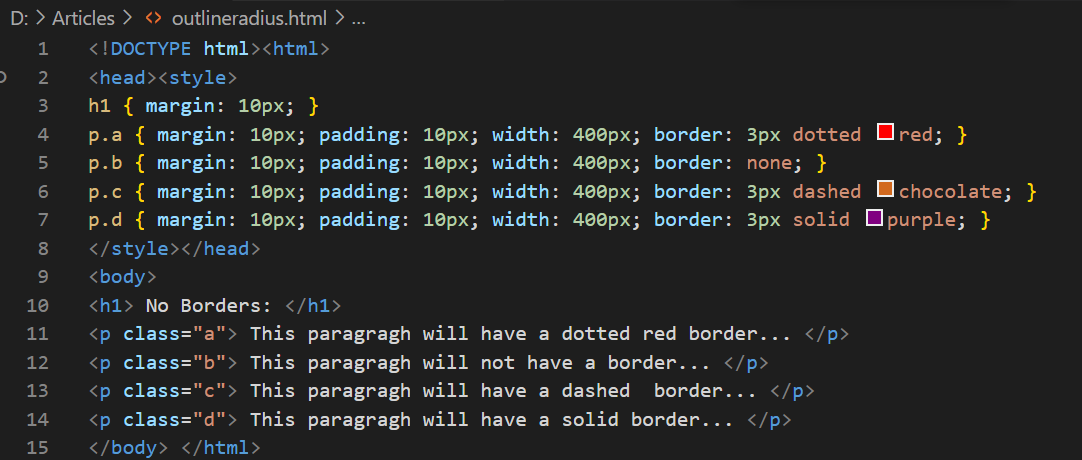
This was about the creation of an outline around the headings. Let’s create dashed, dotted, and solid outlines for headings within the HTML code. We have been using a total of 4 paragraphs in this webpage using the “p” tag in the body tag along with their specific classes that have been specified, a, b, c, and d. Within the style tag, we have been using the classes for paragraphs to separately style each paragraph. The property margin, padding, and width property are used with the same values for all three paragraphs. We have been utilizing the border property for the first paragraph to create a dotted paragraph of red color. The border property set to “none” has been used for the second paragraph to create a no border. The third border property within the “p.c” class paragraph has been used to set the 3-pixel dashed chocolate color border. In the last styling, we have been using the border property to add the 3-pixel solid border of purple color around the 4th heading of this page. Let’s save this code and run it to see the results.
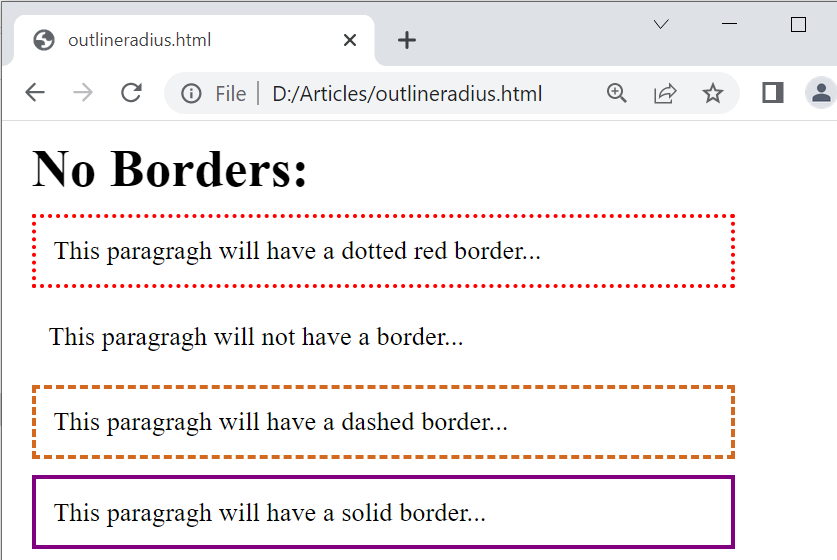
The output of this HTML program has been showing the display of one heading and 4 paragraphs. The first paragraph is surrounded by a dotted red border, the second one has no border, the third one has a dashed chocolate color border, and the last has a solid color border.
Example 03:
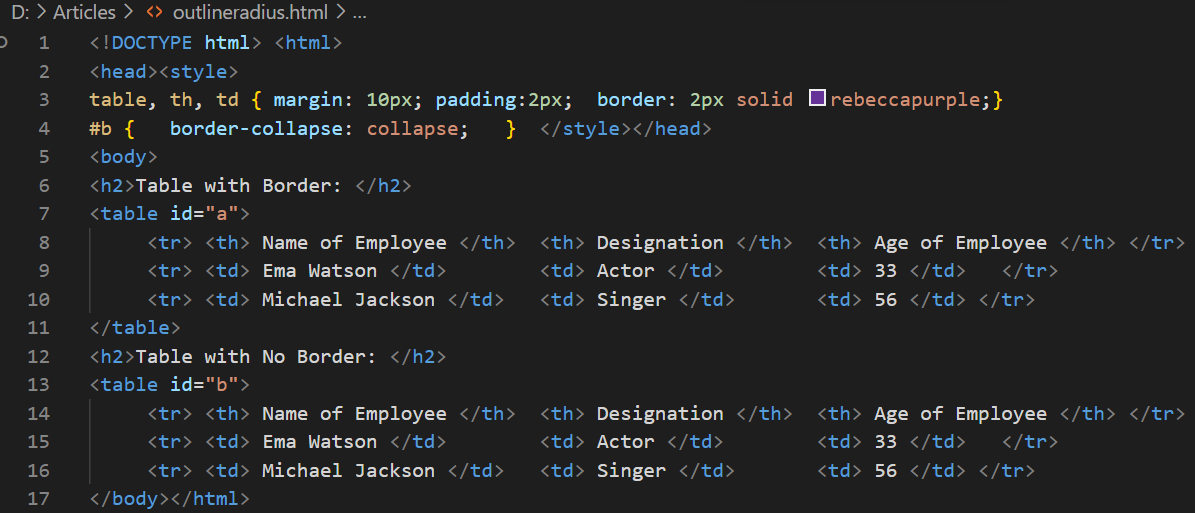
Let’s take a look at our last example to remove a border from the table surroundings. For this, we will be using two tables for comparison. Within the body tag of this HTML file, we have been using two separate table tags to create tables. Both tables have the same header columns and same data columns, 3 columns and 3 rows. We have been assigning different “id” to both the tables to differentiate them within the style tag, a and b.
Within the style tag, we have been using the same margin, padding, and border property for both tables. For the class “b” of table 2, we have been using the property border-collapse set to “collapse” to collapse the border of a table. Let’s save and run this code now.
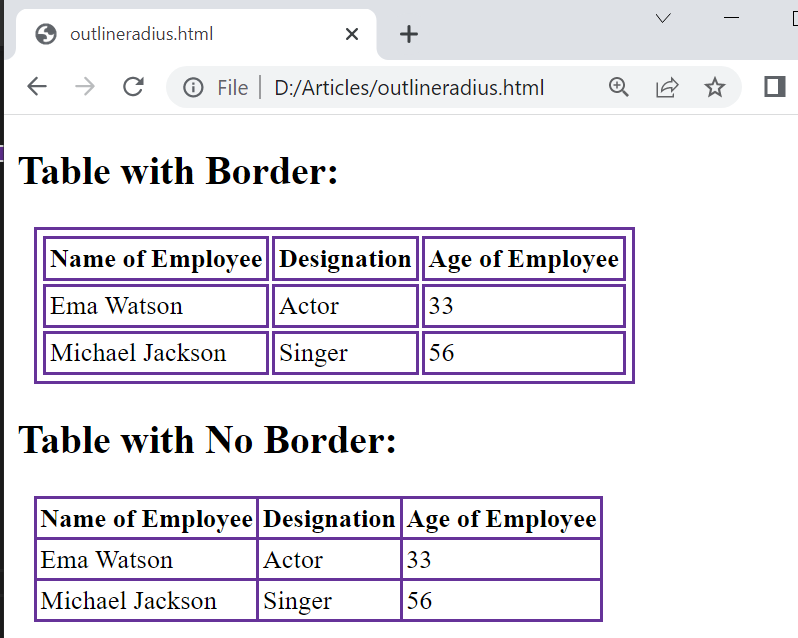
The output for this HTML code has been displaying two static tables. The first one is with the inner and outer border while the second one has its border collapsed.
Conclusion:
This article has been introducing the use of border property to remove one or more sides of borders around any element of an HTML webpage. We have discussed how border-left, border-right, border-top and border-bottom properties can be utilized for this purpose solely. We have also discussed the use of border and outline within these examples and discussed how a border-collapse property can be used for the removal of borders around the table element. We have added the simplest illustrations for readers to achieve the level of understandability.
Source: linuxhint.com