CSS Override Style
Introduction
You may have implemented the concept of precedence in many fields of life, i.e., prioritizing your work, home, and personal things. Within HTML programming, the browser needs to predict the priority of the elements or instructions to display accordingly. This concept is known as “CSS Override”. There seem to be various rules that decide whether one style supersedes another based on the selector type used to design a component. Using the overriding technique, we can prioritize the same type of elements with the same properties in the HTML file. So, if you’re new to CSS override styling, this article would greatly help you. Let’s look at some of the examples implemented on VS Code.
Example 1
Let’s start with the first example to illustrate the use of overriding for styling in HTML with the help of CSS. Within this example, we will look at the overriding precedence of the inline and external style sheet and the CSS used in the style tag. So, we have been initiating this illustration with the main “HTML” tag. The head tag contains the link and style tag within it. Start the explanation of this program from the main “body” tag. The body area includes five headings for five different sizes, i.e., largest to smallest.
After all the headings, the body tag has been closed, and the HTML closing follows it. Let’s have a glance at the “head” tag now. We have been using the “title” tag within it to title the HTML page as “Override Style”. After this, we have been using the “link” tag to reference the external stylesheet named “test.css” from the same folder using the “href” property. After this, we have a “Style” tag of type “text/CSS”. This tag has been utilized for the sake of styling the body area of this HTML file. Within it, we have been using h1, h3, and h5 headings and specifying property “color” to color them “maroon”. Here, the style and head tag are close.
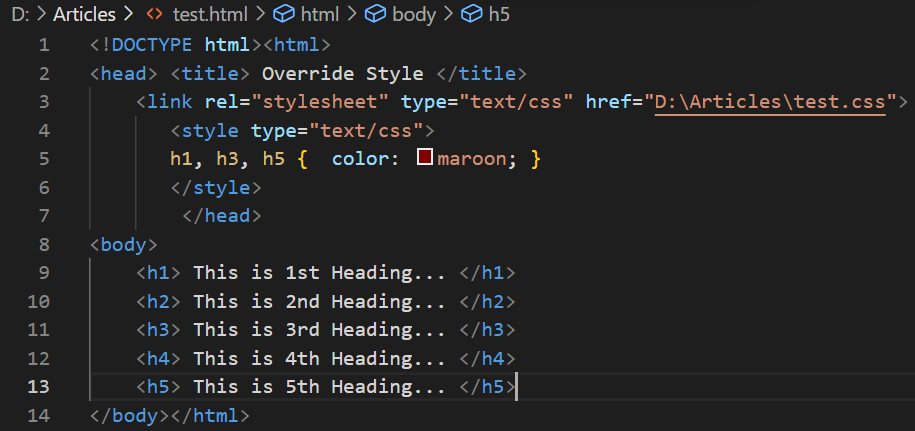
Now, look at the external CSS file, “test.css”. We have used the body element, h2, and h4 headings for styling. The property background color is used to assign a color to the HTML body. The color and margin-left property have been used to display the headings 1 and 4 in purple and set left margins of 10 pixels. The style tag in the HTML contains different colors for all headings, while this external file contains different colors for heading 2 and 4.

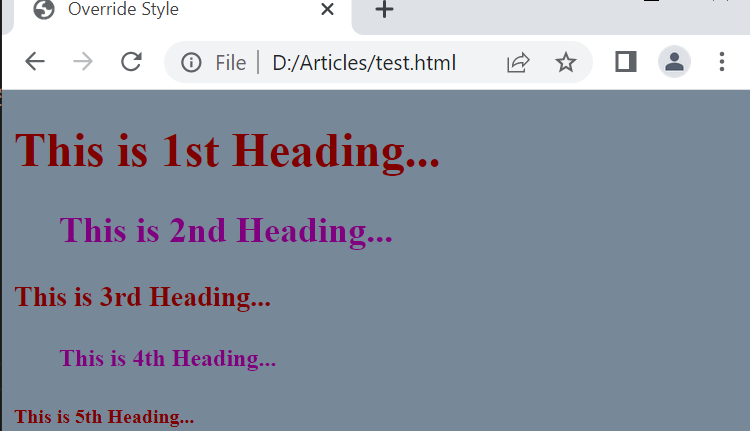
Let’s save the code and debug it using the “Run” menu button from the Visual Studio code taskbar. The output shows the HTML page with the “Override Style” title. The headings 1, 3, and 5 turn maroon, while the headings 4 and 5 turns purple. This is because the style tag styling got the first precedence and was overridden by the HTML instead of an external style sheet.
Let’s update the code once more. We have been updating the color for heading 1, 3, and 5 of this HTML file within the style tag in the head tag. The rest would be unchanged right now.
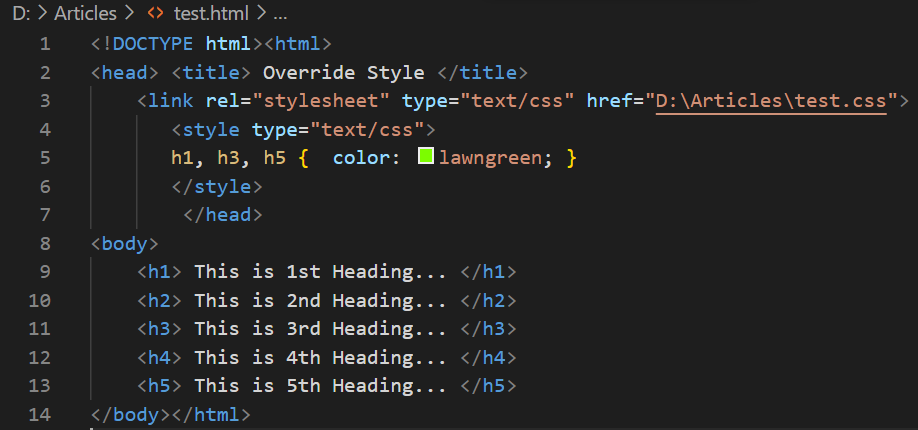
Within the external style sheet, we have been using all five headings for change in color and margin to purple and 30 pixels, respectively. Save this CSS file and rerun the code.

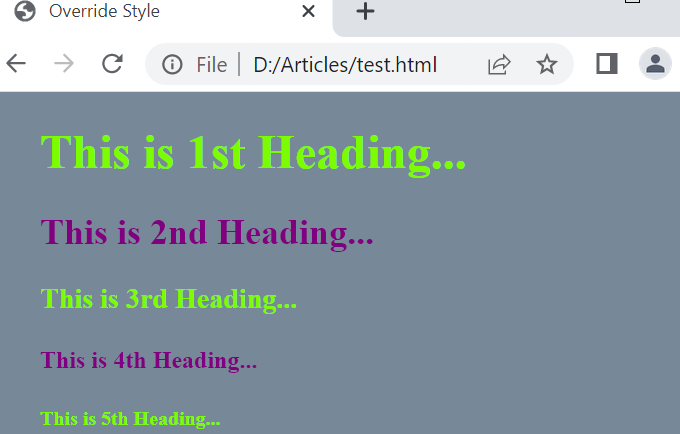
This time, only the headings 1, 3, and 5 got the “lawn green” color due to the use and precedence of within-file styling instead of an external CSS file.
Example 2
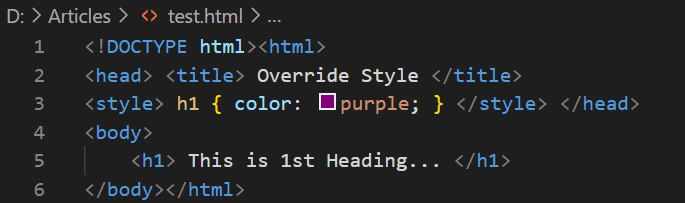
We have started this example with the HTML tag followed by the head and title tag. The body tag of this HTML file contains the single heading 1 to be displayed on the HTML webpage. The body and HTML main tag got closed here after using body elements. The style tag within the head tag contains the styling for heading 1, i.e., the color specified as “purple”. The style and head tag are close here. Let’s run this HTML code with the “Run” menu following the “Start Debugging” option.
The execution of this file displayed a simple heading of size 1 in purple at our Chrome browser new tab as displayed below:

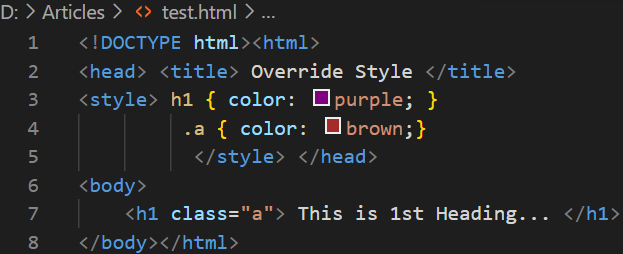
Let’s perform some overriding styles in this HTML file. So, we have specified class “A” for heading 1 within the h1 tag opening. Also, within the style tag, we have used this class “a” to color the heading brown, i.e., using the color property. Let’s save and run this code.
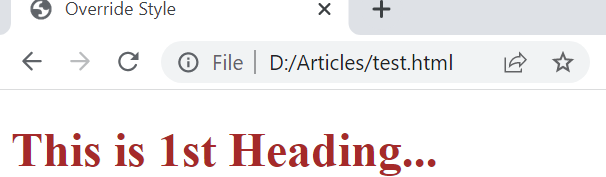
Now, the output shows that the color of the heading has been updated to brown. This means that the class element overrides the simple styling elements.
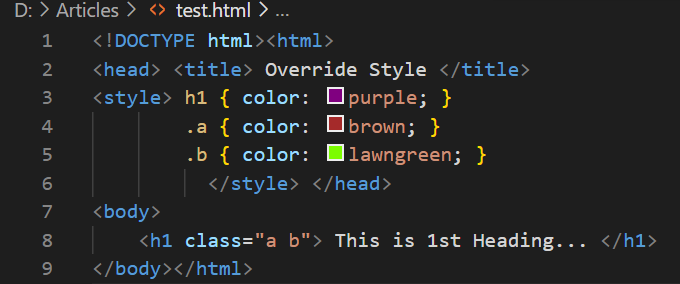
Now, we have been utilizing another class within the same h1 tag of the HTML body of this file. The class name has been specified as “b” after the class “a”. On the other hand, we have been using the class “b” to specify the color, “lawn green”, for heading 1.
After saving this HTML update script, we executed it and got the following output. The output shows that the color of heading 1 has been updated to “lawn green”. It’s proof that the class element can override another class element.
Let’s update the code again and use the “id” element within the h1 heading of the HTML code. This “id” can be used after and before the class elements, as we did below. After this, within the style tag, we have specified the color “blue” for heading 1 using the id “c”.
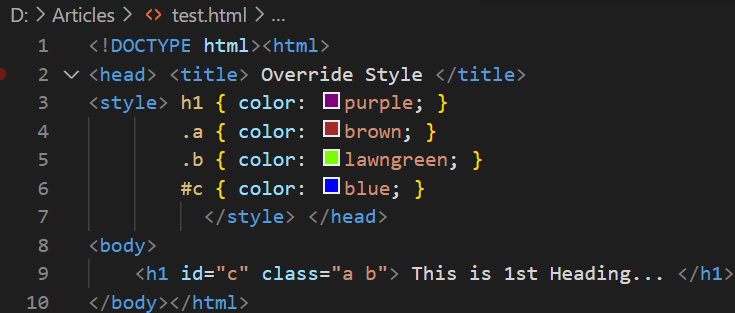
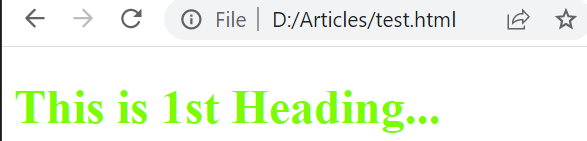
After executing this updated code, we got the updated HTML page. The color of heading 1 has been updated to blue from lawn green. This shows that the “id” element can override the “class” element styling.

Now, we will be using the inline styling for this HTML code and using the “color” property to turn heading 1 into a “hotpink” color without adding it to the external “style” tag. This inline style tag has been used before the “id” element of heading 1.
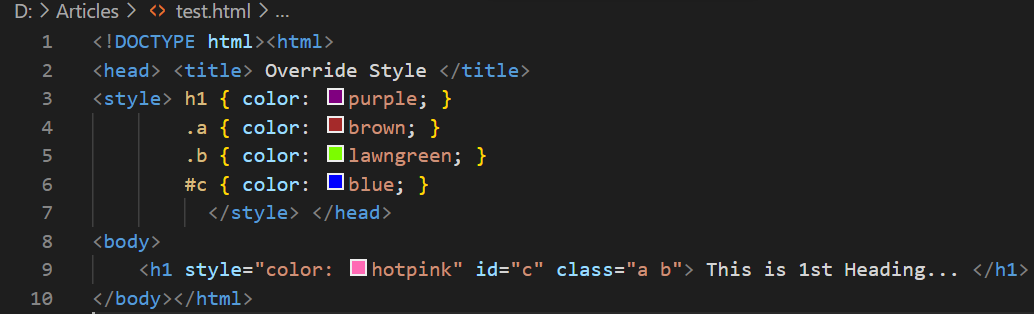
After running this updated HTML file, we have gotten the “hotpink” color for the heading that has been overriding the “id” element.

Using the “!important” attribute along with any property would give that property first precedence compared to other properties. We have used the “!important” attribute with the color property of heading 1 and saved it.
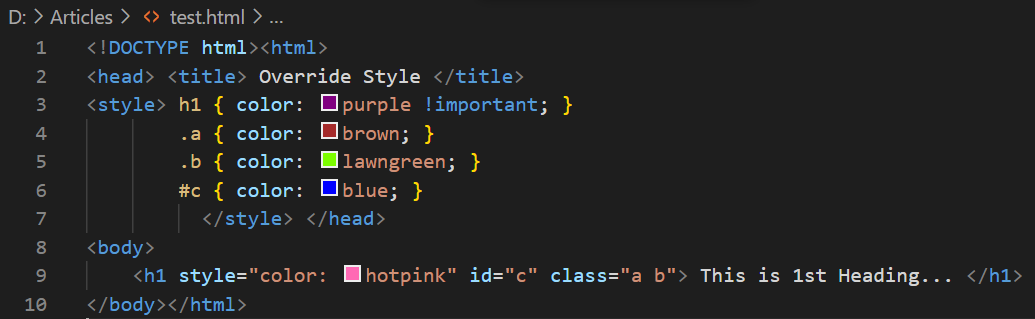
The precedence has been given to the “purple” color property specified for the “h1”.

Conclusion
This article explains the precedence of elements to demonstrate the CSS override style in HTML code. The introductory paragraph explains what is overriding and precedence and the use of style overriding for different selector types in detail using different styling techniques. For this, we have tried to implement different examples containing the inline, outline, and external stylesheet styling. We have tried different selector types of elements for mainly the same elements to perform override styling.
Source: linuxhint.com