CSS Align Button Right
Properties for Align Right Button in CSS
- Using text-align property.
- Using float property.
- Using justify-content property.
Example # 1: Align Button Right Using the Text-Align Property
Create your HTML file for creating the button, and for aligning this button, we have to create the CSS. We are going to elaborate on the given examples in our visual code studio. So, we have to generate the HTML file, and the code of this HTML file is pasted below in the image.
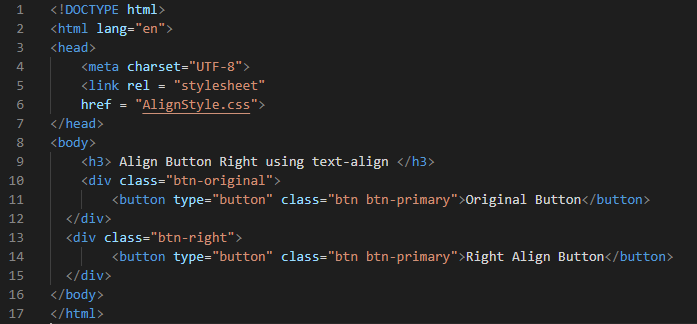
Here, we have created two different buttons and then want to align one button to the right so you can easily learn the difference between the original button and the right align button. So, for this alignment of buttons, we have to utilize the CSS text-align property. When we use this property on the button which we have created, then the button sets its position to the right side of the page. In the CSS file, you can see how to use this property.
CSS Code
Here, the CSS code is also given below. We use CSS to give style or giving alignment to our buttons. In this code, you can see that we are using the “text-align” property.
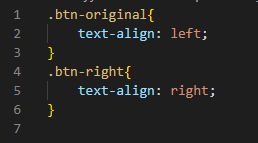
First, we use the “.” and the name of our first button, which is “btn-original” here, and inside the curly braces of this first button, we use the “text-align” property and set it to the “left.” We write the title of the second button, which is “btn-right,” by putting. “” again and inside the curly braces, we again use the same property, and this time we align the button to the “right” side of the page or screen.
Output:
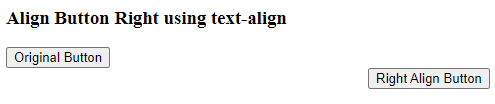
The output shows two buttons in which the original button is displayed on the left side, and then the button is shifted to the right side of the screen.
Example # 2: Align Button Right Using the Float Property
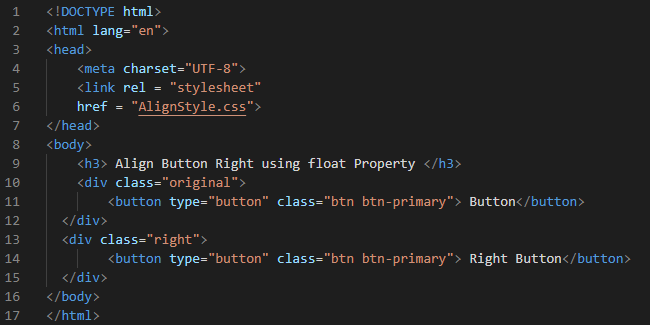
In this HTML file, we again design two buttons. The name of the first button is “Button” here, and the name of the second button is “Right Button.” In this example, we are going to use another property for aligning the button to the right. The property we use in the CSS of this code is the “float” property. It works the same as the “text-align” property does.
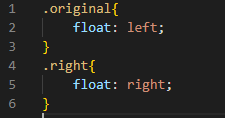
CSS Code
In this CSS file, we use the float property. The float property in CSS is used for floating the element or object or button to the right and left sides. The “.original” is used for applying design to the “original” button. Inside this, we apply the “float” property and set it to the “left,” so the original button is placed on the left corner of the screen. Inside the “.right” button, we set the “right” to the “float” property. This will place our second button on the right corner of the screen.
Output
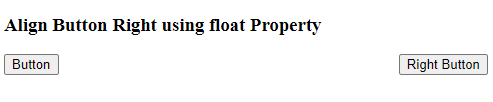
In the above image, the button is aligned to the right corner of the screen. Here, we have used the “float” property, and you can see it displays the output the same as the “text-align” property showed.
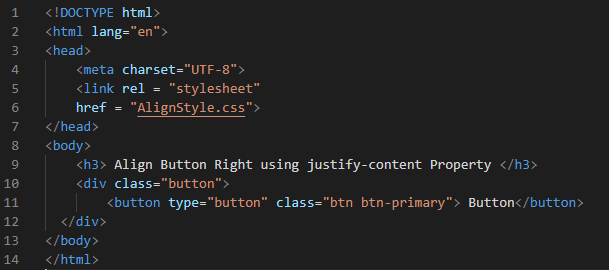
Example # 3: Align Button Right Using the Justify-Content Property
In the third example, we create only one button using the div class and then use the third property of CSS, which is the “justify-content” property. This property also aligns the button to the left or right, but we have to align the button only to the right
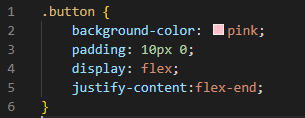
CSS Code
In this CSS file, we also change the “background” color to “pink” and set the “padding” to “10px” from top and bottom and “0” for the right and left. The “display” we use here is “flex,” and then use the third property of CSS that is “justify-content” and set it to “flex-end,” so this “flex-end” sets the button to the right end.
Output
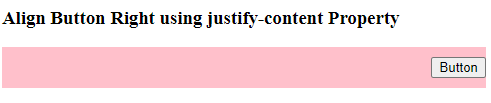
The background color is pink here, as we use “background-color” to “pink.” The button is at the right end as we use the “justify-content” property in our CSS file of this example.
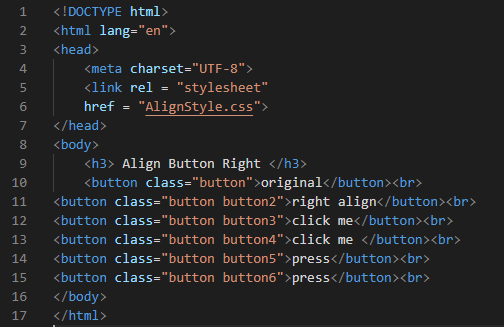
Example # 4
In this fourth example, we have created six different buttons using the button class in HTML. Now, we use different colors for all six buttons and align three buttons to the “right” using CSS property, and three are on the original place, which is “left,” where we don’t use any property.
CSS Code
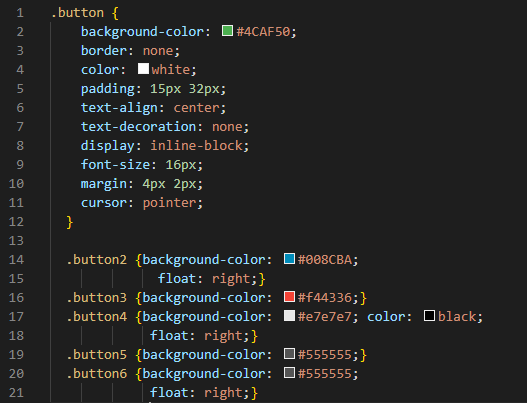
The color of the first button is “green,” and the code for this is “#4CAF50”. We don’t need any border, so the border is “none.” The “color” of the text written inside these buttons is “white.” The top and bottom paddings are “15px,” and the left and right paddings are “32px”. The “text-align” is centered, so the text inside the button appears in the center of the button. The “text-decoration” is also “none.” The “font-size” is set to “16px”. The top and bottom margins are “4px,” and the right and left margins are “2px”. The “pointer” is here to be used as a “cursor.”
Then we align this button to the right, so we have the “float” here, which is set to the “right.” Also, change the color of the next button and apply “red” here, and don’t use any property for aligning the button, so by default, this button will display on the left side. The fourth button, “background-color,” is white, so we also change the “color” of the text to “black” and float this fourth button to the right. After changing the color of the fifth and sixth buttons to grey, we again use “float: right” with the sixth button. Let’s check how it will show these buttons on the browser.
Output

In this output, we have six buttons in which three buttons are rendered on the right side where we use the property “float.” So, with the help of this property, three buttons float to the right side. And also, three buttons are on the left side, as we didn’t use any property for these three buttons. The colors of these buttons are also different.
Conclusion
This tutorial has discussed the three properties which the CSS provides for aligning the button to the right corner of the screen. We have explained all three properties of CSS in detail which are “text-align,” “float,” and “justify-content” properties. We have generated three different examples, and we have applied the alternative properties in each example and displayed the output of all the codes also, so you can easily get this point about how to align the button to the right. This tutorial will help you to align your button to the right side using the properties of CSS.
Source: linuxhint.com