CSS Absolute Position Center
Example # 1: Absolute Position Center Horizontally
We will do all these examples in visual studio code. We have to create the HTML file in our visual studio code and start writing the code on it. After completing the code which is given in the image, you have to save this file with the “.html” file extension as it is an “HTML” file.
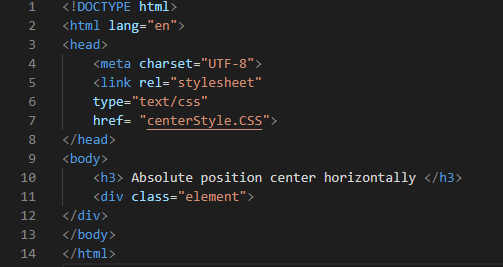
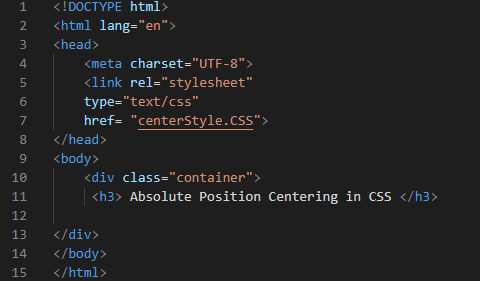
Mention the document type “html” as we know it’s an HTML code. Then, open “<html>” and “<head>”. The meta is defined below, which is “charset= UTF-8”, which allows accessing different characters. We also link this current file with the CSS file in which we do some styling and use the absolute position property. For describing association, “rel” is here; the type is “text/css” and the “href” in which we pass the name of the file. We link the “centerStyle.css” with this current file. Now, after closing the “</head>” we are going to use the “<body>”. We have a heading in the body and a “div” class with the name “element”. At last, we have to close all the tags in sequence. First, close “div”, “body”, and then the “html” tags.
CSS Code
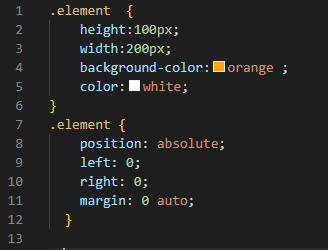
Here is the CSS file. When you create this file, you use the “.css” file extension as it is our CSS file. Must remember that you saved this file with the same name which you have mentioned in your HTML file. Now here, we are going to style this element class using different properties. Place “.” and write “element” as it is the name of the “div” class. We adjust the “height” and “width” as “100px” and “200px” respectively. Place “orange” as a background color. And white for the font color. Now, we are going to use the “absolute position” property. Set “position” as “absolute”. From the “left” it is “0” and from the “right” it is set as “0”. Here, the top and bottom margins are “0” and the left; right margins are “auto”. This left and right auto margin is used, so it takes the automatic margin to give the width of the object.
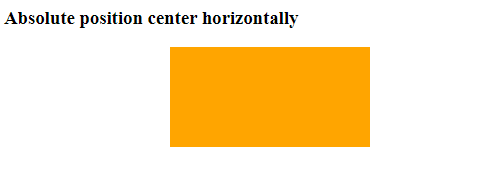
The output is displayed on the browser. Press “ALT+ B” on the HTML file to show the output. We also paste the output of the above HTML and CSS code below.
Output
Example # 2: Absolute Position Center Vertically
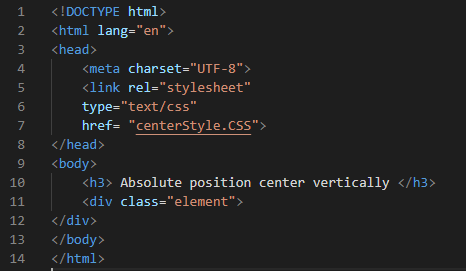
In this example, we are using the same HTML file which we have created in the previous example. Just change the heading from “absolute position center horizontally” to “absolute position center vertically”.
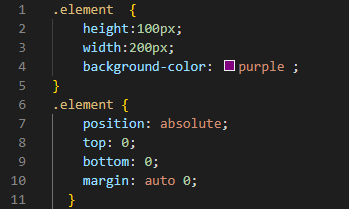
Here, we set the color of the background to “purple”. When we have to set the absolute position vertically centered, then we put the position to “absolute” and here mention “top: 0” and “bottom: 0”. We also set the margin for this “auto” for “top” and “bottom”. The value “0” is set for “left” and “right”. You can also check the output of this example, which we have pasted below.
Output
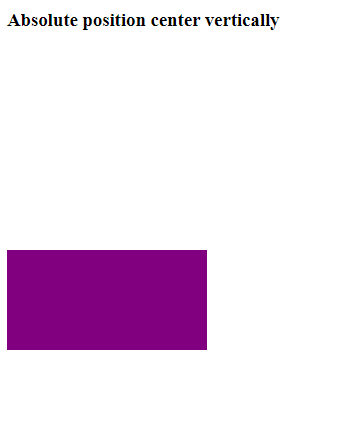
In this output, the box is placed vertically center using the absolute position property. In this image, the space between the text and the box shows that it is placed at the center in the vertical position.
Example # 3: Absolute Position Center Both Horizontally and Vertically
In our third example, we are going to set the object at the absolute center position. Here, the object is centered from the vertical and also from the horizontal position. Let’s try this third example.

Here, from the start, the code is the same as we have discussed in our previous example. We just changed the code from the “<body>” tag a little bit. We create a class of “div” by using “container” as the name of the class. Before closing this “div” tag, we create another “div class” and this time, the name is “data”. Create a heading using the “<h3>” tag and also write a paragraph inside the “<p></p>” tags. Then use the closing tags for both “<div>” tags.
CSS Code
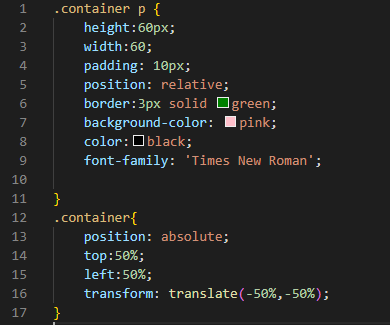
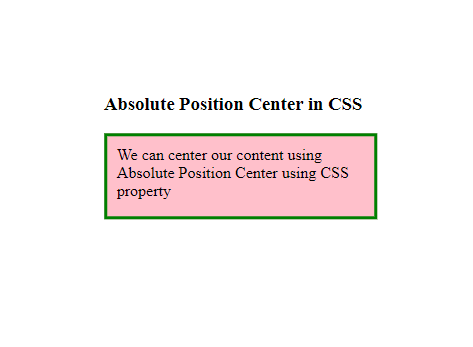
In the CSS code, first, open the brackets for the paragraph which is written inside the container class. The “height” of this container is “60px” and the “width” is also “60px”. We apply padding here as “10px” so it will generate a “10px” space between the content and the border. Here the text position is “relative”. We want to draw the border around the container or box, so we are using the “border” property for this. We set the “border” width as “3px”, the border type is “solid”, and the color of this border is “green”. So, when we display this on the browser, the border will be of green color, solid, and also of “3px” width. We use “pink” as its background color. And select “black” for the font. So, the font or text will display in “black” color. Now, here we use the “absolute position center” property, and it will set the object and heading to the center of the screen.
Output
Example # 4
Here, we paste the code of HTML below for this example. We use the above code and create minor changes in it. We just remove the paragraph and div data class in this example and create another CSS file for this example.
CSS Code
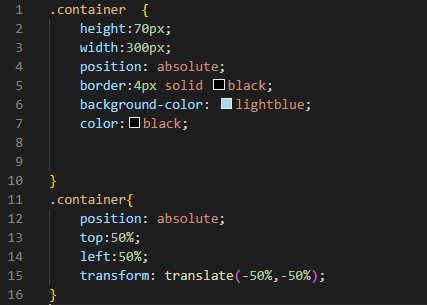
The “height” of the container in this example is “70px” and “the width” is “300px”. Use the “position” as “absolute”. Now, we are drawing the border in which we set its “width” equal to “4px”, the border will display “solid”, as the type of this border is selected as “solid”. The color is “black”. Then, set the inside background color to “white”. The text color we are using here is “black”. Now, we place the absolute position property. Our top margin is “50%” and also the same for the “left” margin. It sets the object “50%” from the top and also from the left. We are going to use the last property, and this is the “transform” property. It transforms the object backward, half of its width and also of the height. It will act relative to the body of the object. It will reverse the object “50%” reverse half of its width and “50%” reverse half of its height.
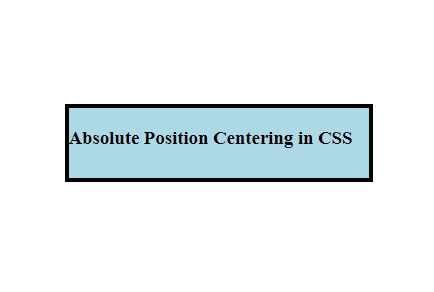
Output
Conclusion
In this tutorial, we have covered the concept of the absolute position center in CSS. We have explained how to center the object vertically and horizontally in separate examples, and then we have provided two other examples in which we have centered the object both vertically and horizontally at the same time. We have discussed four examples here in this tutorial. We have performed all examples and have pasted the output screenshots also. You will easily learn this absolute position center in CSS after the thorough study of this tutorial, and I hope it will be very useful for you when you try it by yourself.
Source: linuxhint.com