Creating a Batch File and PowerShell Script “Batch File to Run PowerShell Script
Example 1: Run a PowerShell Script: A Beginner’s Guide
Let’s get ready to look into the world of automation and scripting on our Windows computer. If we are beginners who are looking to simplify our tasks and make our computers work smarter for us, we are in the right place. This beginner’s guide explores a practical example of using a batch file to run a PowerShell script. We’ll keep things simple and easy, so we don’t need to worry even if we are new to this.
To understand the batch files and PowerShell, before we do our practical example, let’s briefly understand what batch files and PowerShell are. A batch file is like a digital instructor for our computer. It’s a text file with a set of instructions that our computer runs one at a time. Batch files are convenient for automating the tasks and making our computer do things without us typing every command.
Microsoft created the robust scripting language and command-line shell known as PowerShell. Think of it as our computer’s super assistant. It can perform a wide range of tasks, from simple tasks like renaming files to complex operations like managing the server environments.
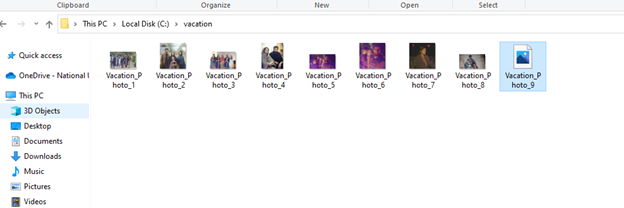
To rename the files in our practical example, let’s say we have a folder filled with vacation photos and all the files are named something generic like “IMG001”, “IMG002”, and so on. We want to rename these files to something more descriptive like “Sunflower”, “Sunset”, and so on. Doing this manually for each file would be tedious and time-consuming.
Here’s where our batch file and PowerShell script come to the rescue.
Let’s start by writing a PowerShell script to perform the actual renaming. We are not required to be coding experts for this as the commands are so straightforward. Open the Notepad on our computer and paste the following lines into a new document:
$files = Get-ChildItem "C:"
# Set a counter to keep track of file names
$i = 1
# Loop through each file
foreach ($file in $files) {
# Define the new file name
$newName = "Vacation_Photo_$i.jpg"
# Rename the file
Rename-Item -Path $file.FullName -NewName $newName
# Increment the counter
$i++
}
Replace “C:\” with the actual path to our photos’ folder. This script does the following:
It obtains a list of all the files located in the chosen folder. It creates a counter ($i) to record the newly created file names. It goes through each file, assigns a new name (e.g., “vacation_Photo_1.jpg”), and renames the file accordingly. It also saves the file to our computer with a “.ps1” extension like “RenamePhotos.ps1”. This is our PowerShell script ready to work its magic.

Now, let’s create the batch file that runs our PowerShell script with a simple double-click. Open the Notepad again and paste the following lines into a new document:
PowerShell.exe -ExecutionPolicy Bypass -File "C:\Users\HP\Rename\RenamePhotos.ps1"
pause
In this batch file:
The @echo off is used to turn off the command echoing, making our script look cleaner.
The PowerShell.exe -ExecutionPolicy Bypass -File ” C:\Users\HP\Rename\RenamePhotos.ps1″ runs the PowerShell script that we created earlier. Be watchful to substitute the correct location of our PowerShell script for the path. Pause keeps the command prompt window open after the script finishes so that we can see any potential errors.
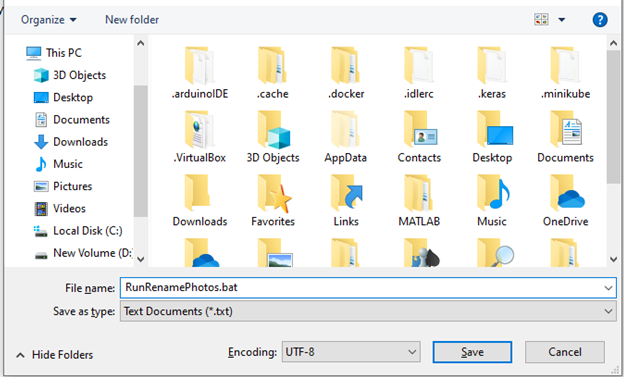
Save this batch file with a “.bat” extension like “RunRenamePhotos.bat”.
With both files ready to run our batch file, navigate to the folder that contains our sunset photos and place the batch file (RunRenamePhotos.bat) there. Now, all we need to do is double-click on “RunRenamePhotos.bat” and watch how it works.

Our batch file executes the PowerShell script, renaming all our files to more descriptive names. It’s a great method to save time by having our computer perform the tedious tasks for us.
If we encounter any issues or errors while running the batch file, here are some common troubleshooting tips:
- Check the file paths to ensure that the paths in both our batch file and PowerShell script are correct.
- Execution Policy: If we encounter an execution policy error, we might need to change our PowerShell execution policy. We can do this by running the PowerShell as an administrator and using the “Set-ExecutionPolicy RemoteSigned” command. Be cautious with execution policies, and only change them if we understand the security implications.
- Script Errors: If our PowerShell script contains errors, such as syntax mistakes, the batch file will not work correctly. We can always double check our script for any issues.
Example 2: Simplify the Data Backup with Batch Files and PowerShell
Imagine that we are running a small business and we want to ensure that our critical data is regularly backed up to an external drive. Doing this manually every day is time-consuming and is prone to errors. That’s where a batch file and PowerShell come to help. In this beginner’s guide, we’ll walk through a practical example on how to create a batch file to run a PowerShell script that automates the data backup.
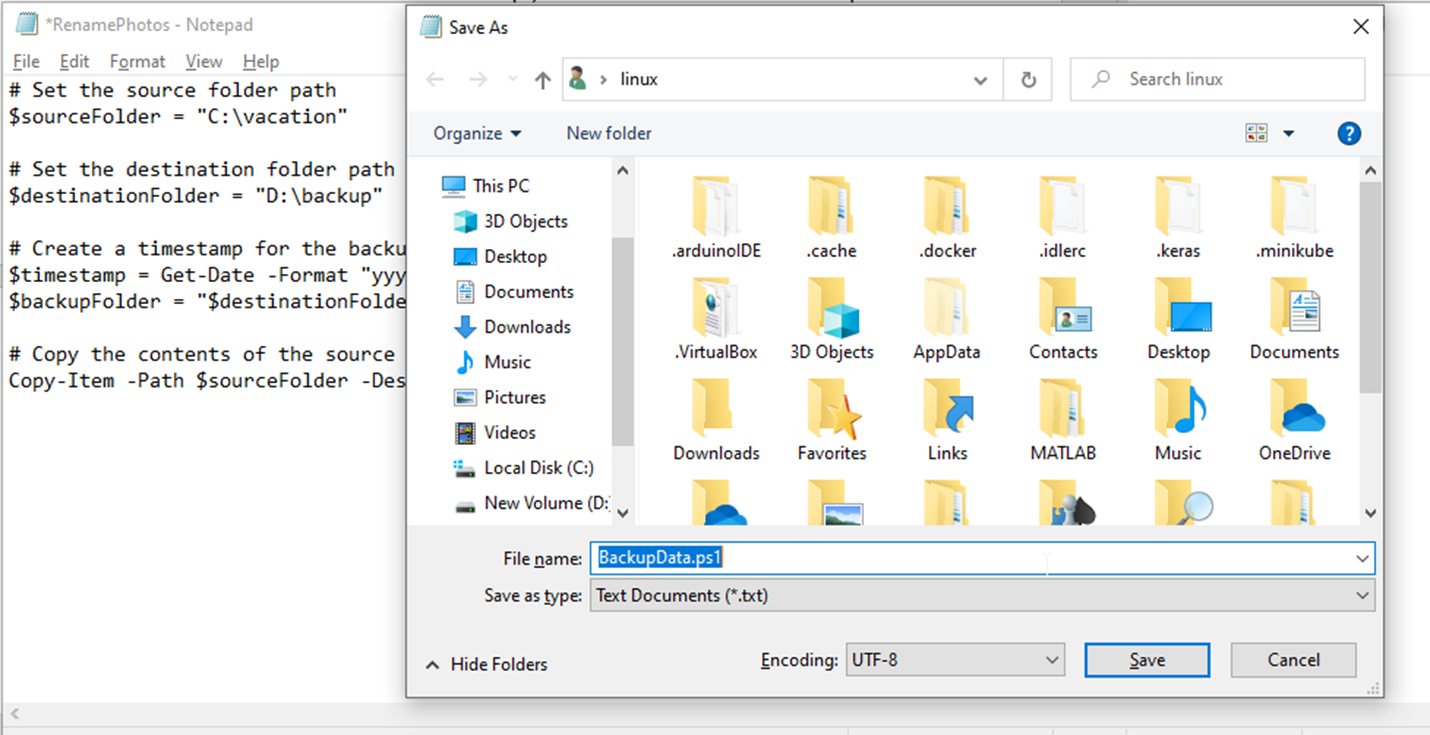
We have a folder on our computer where we keep all our business documents, invoices, and customer records. To prevent a data loss, we want to back up this folder to an external USB drive every day at a specific time. This work is made simpler by establishing a batch file and a PowerShell script. Let’s begin by creating a PowerShell script that copies the contents of our important folder to our external USB drive. Open the Notepad and paste the following lines into a new document:
$sourceFolder = "C:\vacation"
# Set the destination folder path (external USB drive)
$destinationFolder = "D:\backup"
# Create a timestamp for the backup folder
$timestamp = Get-Date -Format "yyyyMMddHHmmss"
$backupFolder = "$destinationFolder\Backup_$timestamp"
Copy-Item -Path $sourceFolder -Destination $backupFolder –Recurse
Make sure to replace “C:\” with the actual path to our important folder and “D:\Backup” with the path to your external USB drive. This script does the following:
It specifies the source folder that contains our important data. It sets the destination folder on the external USB drive and creates a unique time stamped backup folder. The backup folder on the USB device receives a copy of the source folder’s entire contents.
This file should be saved to our PC with the “extension.ps1” such as “BackupData.ps1”. This is our PowerShell script ready for action.
Now, let’s create the batch file that runs our PowerShell script at a scheduled time. Open the Notepad again and paste the following lines into a new document:
PowerShell.exe -ExecutionPolicy Bypass -File "C:\Path\To\Your\Script\BackupData.ps1"
In this batch file:
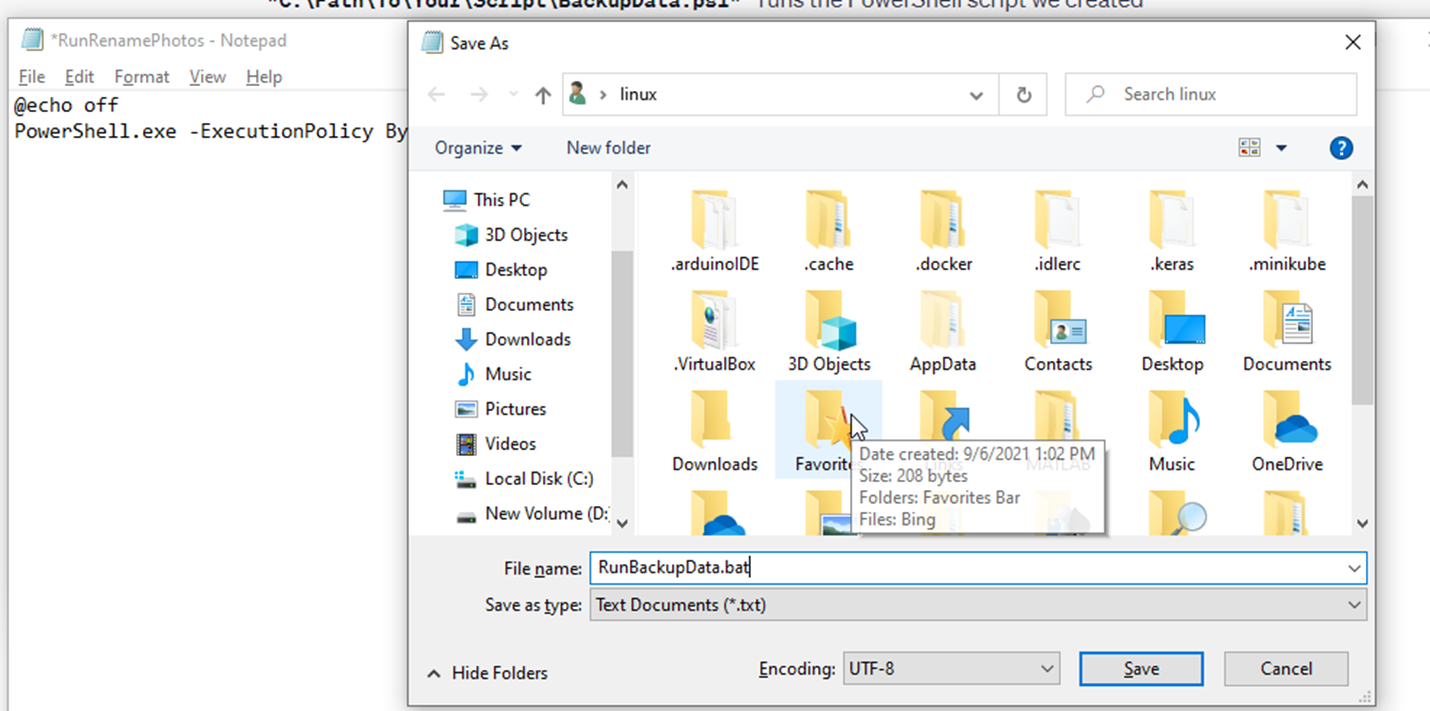
The @echo off turns off the command echoing for a cleaner output. The PowerShell.exe -ExecutionPolicy Bypass -File “C:\ path to the script” runs the PowerShell script that we created earlier. Be careful to substitute the correct location of our PowerShell script for the path. Save this batch file with a “.bat” extension like “RunBackupData.bat”.
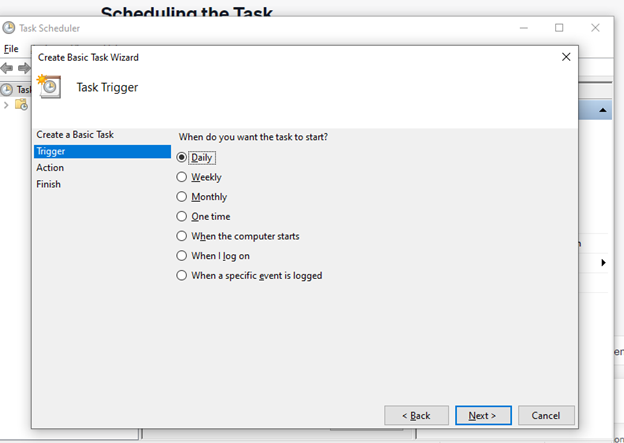
The Windows Task Scheduler can be managed to schedule a daily backup procedure. This is how to do it:
Open the “Task Scheduler” program by typing its name into the Windows Start menu.

In the “Task Scheduler” box, choose “Create Basic Task” from the right-hand menu. Follow the wizard to give our task a name and description.

Choose “Daily” as the trigger and specify when the backup will run.
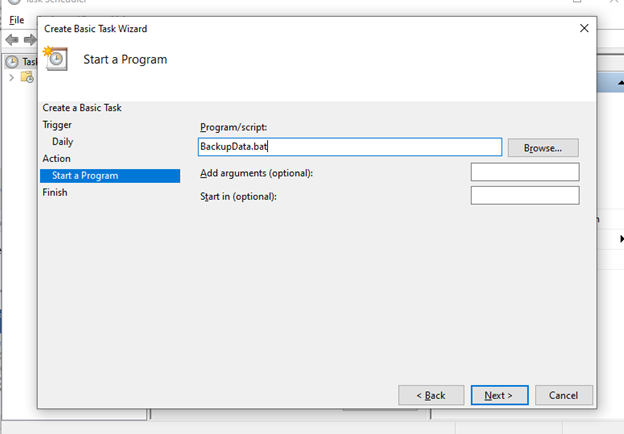
Go to our batch file (RunBackupData.bat) and choose “Start a Program” as the action.

We review our settings. If everything looks good, click on “Finish” to schedule the task.
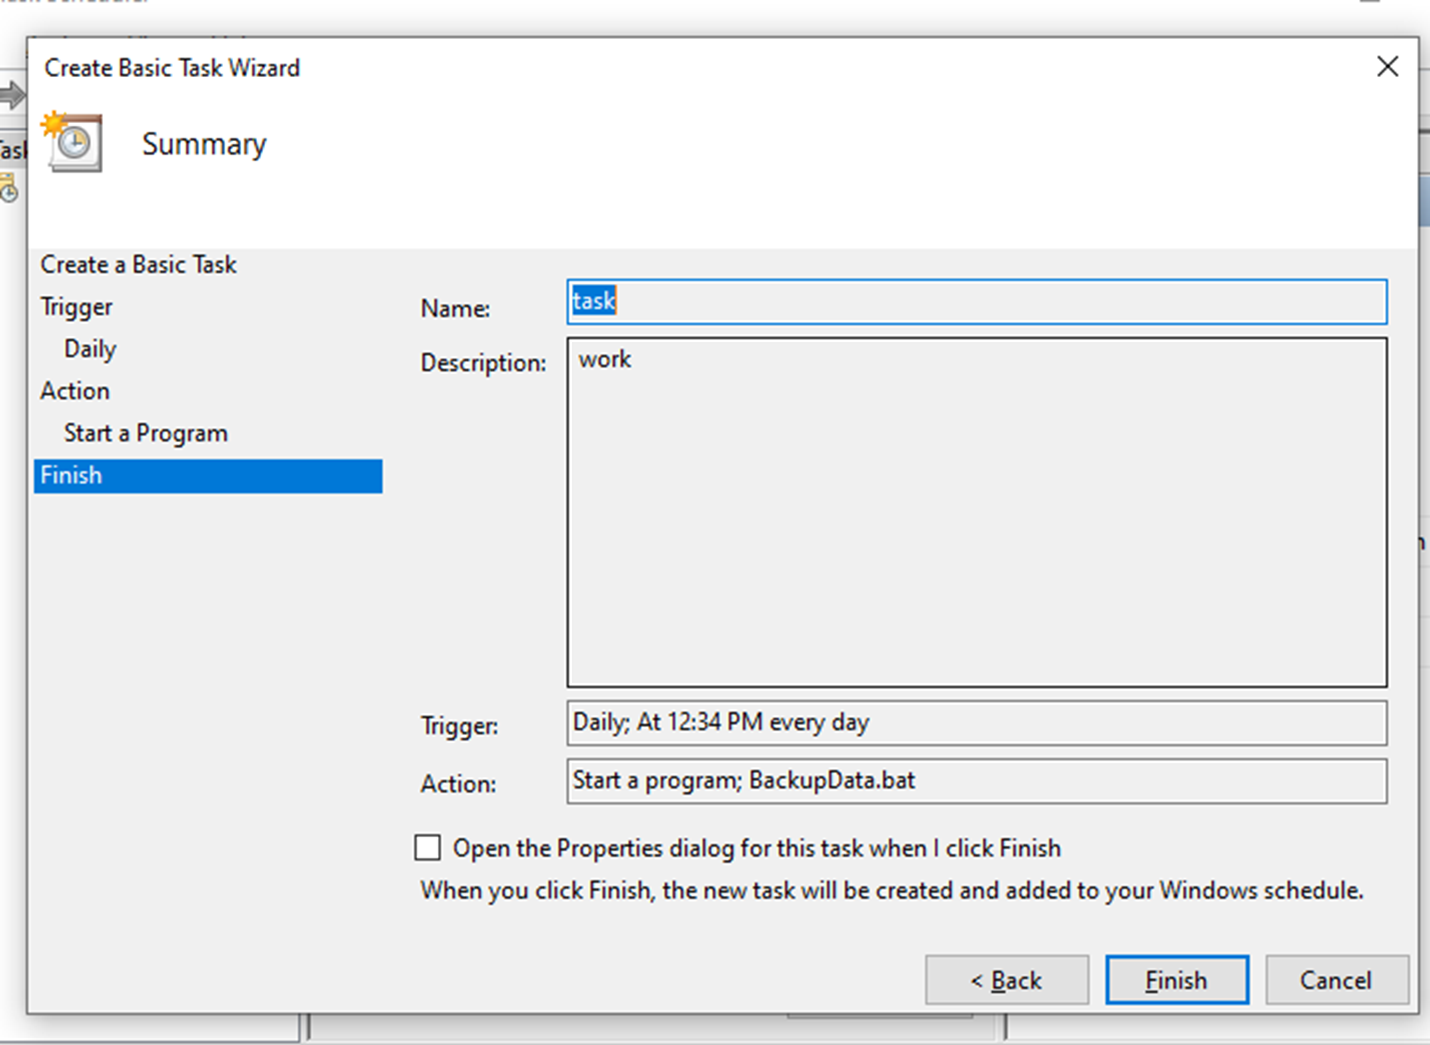
Our data is automatically backed up to the external drive every day at the specified time without manual intervention.
Conclusion
We created a batch file to run a PowerShell script and used it to automate the process of renaming the files in a folder. This is just the beginning of the new world of wonders regarding what we can do with batch files and PowerShell. As we become more comfortable, we can explore more complex tasks and create custom automation solutions according to our needs. Experiment with different tasks and scripts to unlock the full potential of automation on our Windows computer.
Source: linuxhint.com