Create First Spring Boot Application
To create a spring boot application, there are several tools such as:
- Spring Initializer
- Spring Tools Suits
- Eclipse
- IntelliJ IDEA
All these tools are used by the developers to create the spring applications.
Since the Spring Initializer is a mostly used tool, we will start with this first and then we will discuss the other tools in our next articles.
We will use the Eclipse for the development/coding. Eclipse is an IDE that is primarily used to create the java-based applications.
If you are not familiar with Eclipse, don’t worry because it’s a simple code editor. We will help you understand it in this article. To get it, visit the official site https://www.eclipse.org/downloads/ and install it to your local system.
Prerequisites:
Before starting further, make sure that you have the following tools installed in your local system:
- Java must be installed in your system. Java 11 LTS or Java 17 LTS is recommended.
- Eclipse must be installed before starting as this is the main IDE/Editor.
Now, let’s get started in this step-by-step learning.
Step1: Open the Spring Initializer Tool
To open this tool, visit the https://start.spring.io/ URL. This is the official web-based tool provided by Spring itself to create the spring boot application.
At first glance, it looks like the following image:

It asks for a couple of options before creating the project. For example:
The first is project type which refers to what type of project you want to create. It gives two choices: either Maven or Gradle, which are basically the project dependency management tools.
We selected Maven and Java as the main programming language. After that, we selected the spring boot version. It shows all the available versions. We selected the version 2.7.1 which is one of the stable versions to start with.
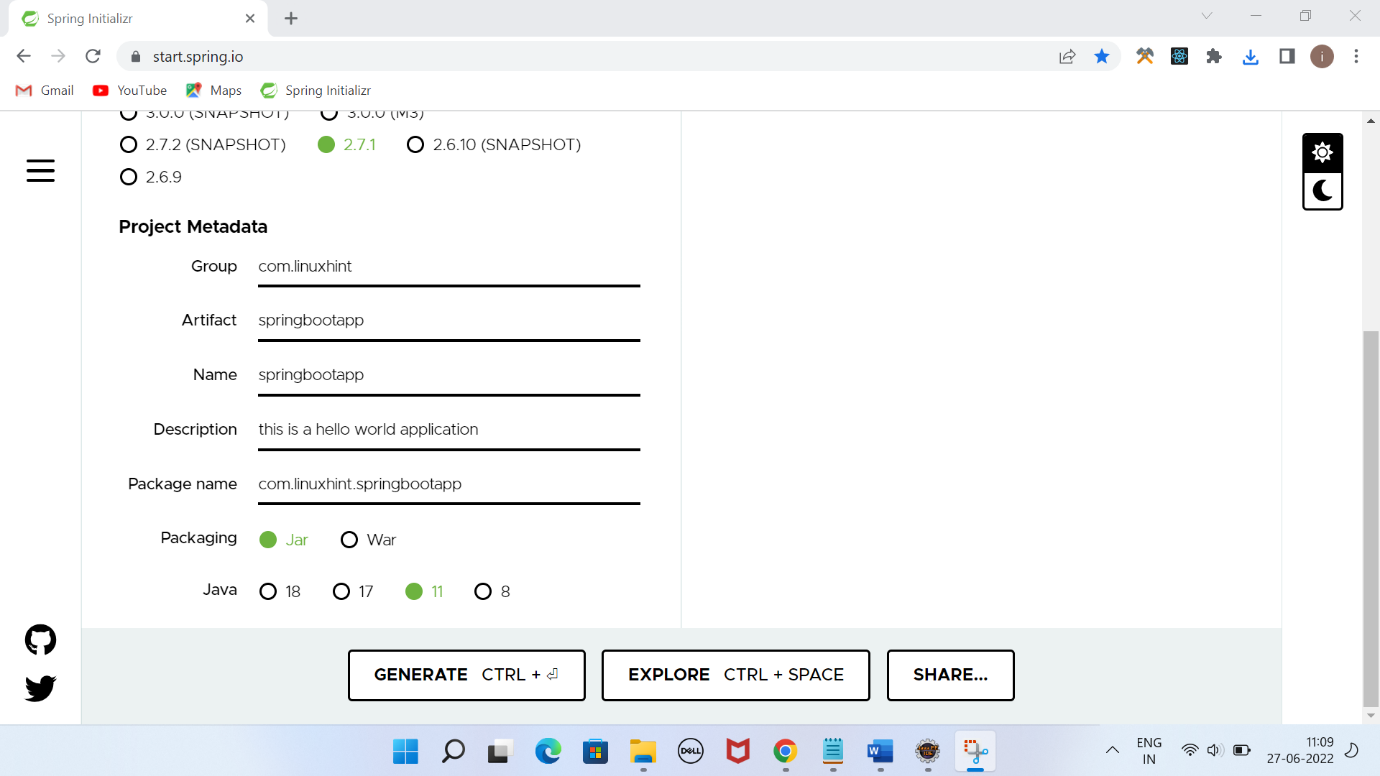
Project Metadata comprises several steps:
Group: It is a name that should be unique and is used to group all the files. It follows the reverse domain name and the java package name concept.
Artifact: It is a sub-package name under the group name and used as a part of name of the JAR file while building the project.
Name: It is the name of the application that you wish to have.
Description: It is a short description of your project.
Packaging: It specifies the type of package for the application while building. JAR is used for creating libraries and plugins while WAR is used for building the Web Applications.
In our case, we selected JAR as we are not creating a web application.
Java Version: It specifies the Java version that will be used for creating the application. In our case, we used the Java 11.
Dependency: This specifies the dependencies that we want to include in our application such as Web, JDBC, Thymeleaf, etc.
Since we are just creating a simple application, it does not require any dependency for now. We will learn this more in our next articles while creating more functional applications.
Now, click on the GENERATE button to download this project.
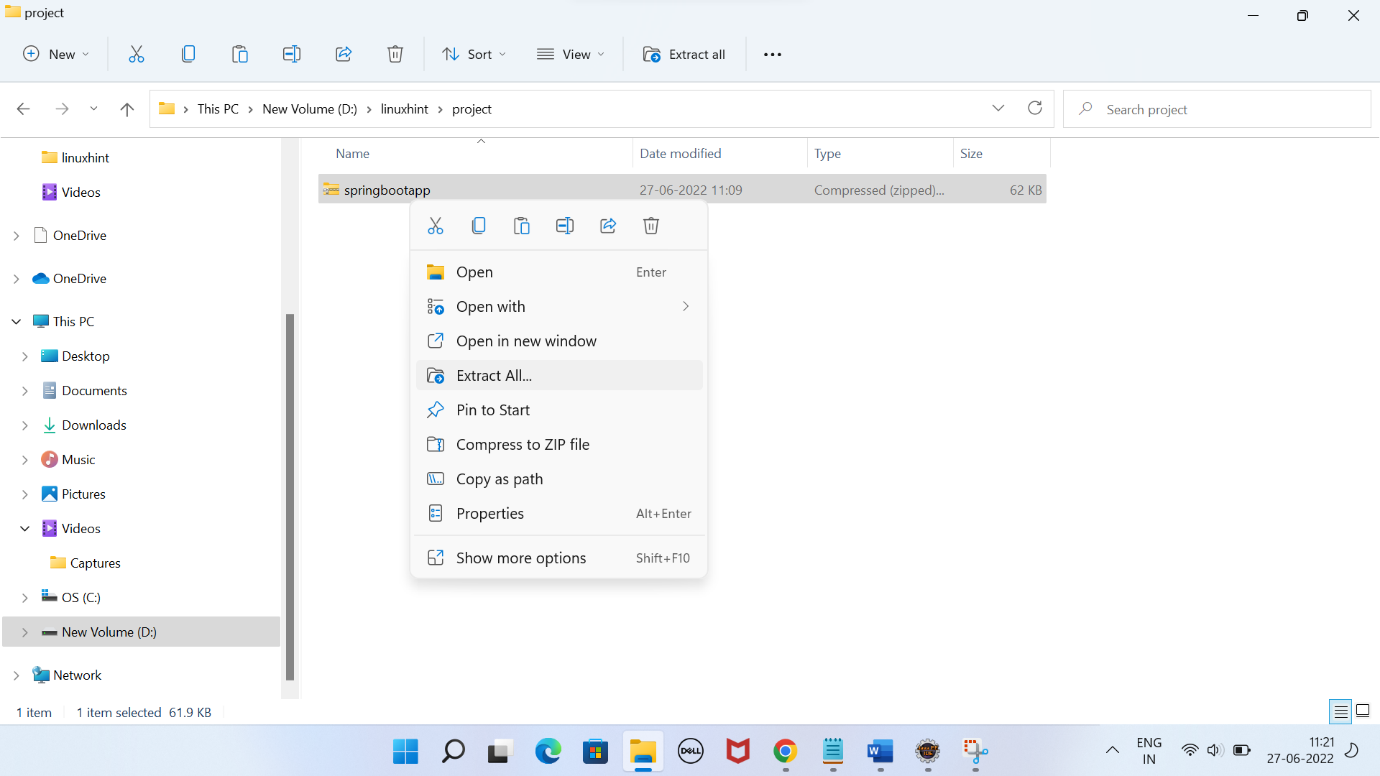
Step 2: Extract the Application
After downloading the project, extract it first since the project is a zip file.
Step 3: Import Project to the Eclipse
After extracting the zip project, open the eclipse IDE and import this project. For this, just click on the “File” menu and select the import option like the following:
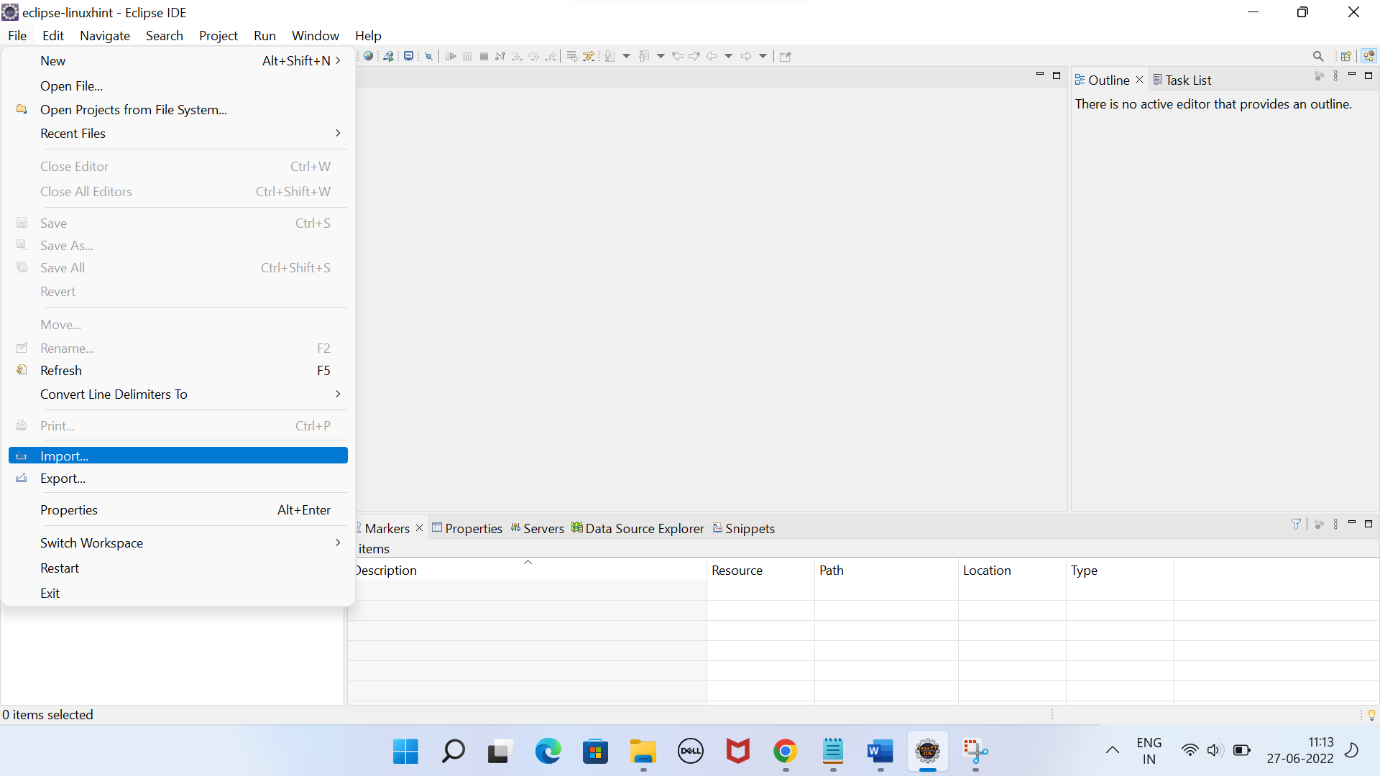
File -> Import -> Existing Maven Project -> Next -> Browse -> Select the project -> Finish
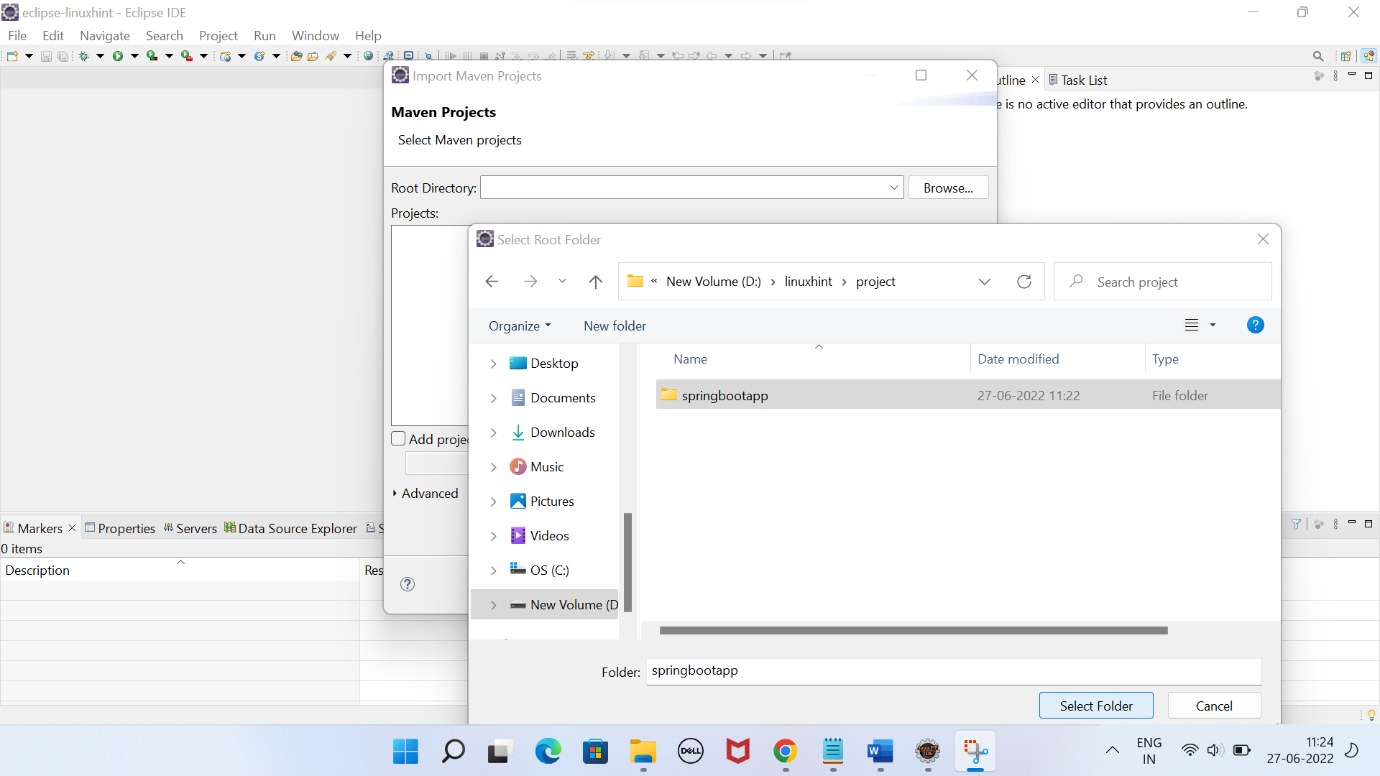
This opens a sub-window like in the following image. Choose the existing Maven project and click next.
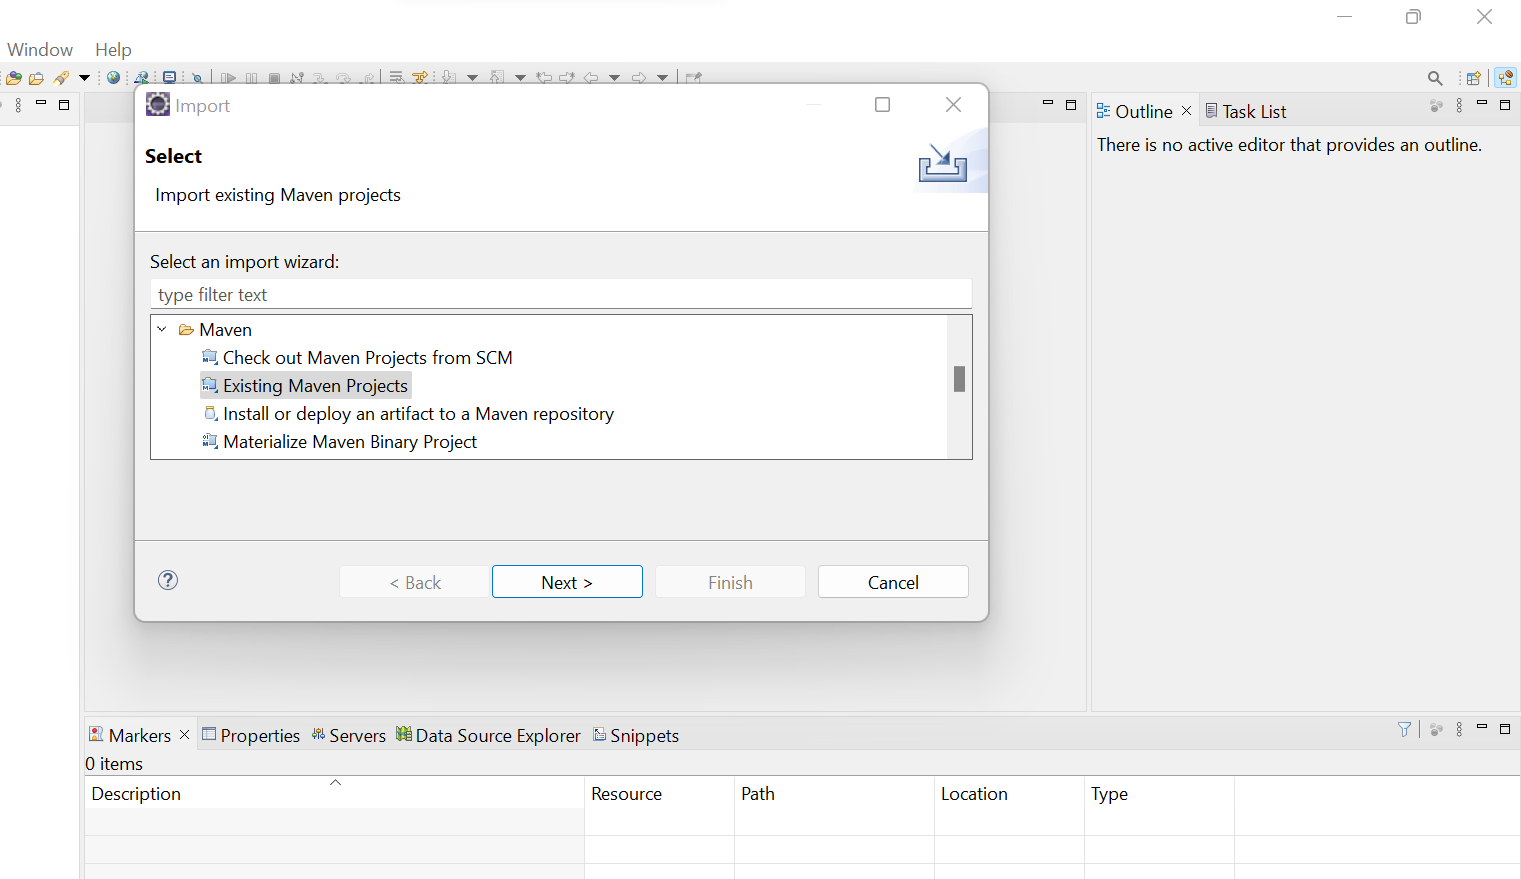
Locate the location in the application folder and select it.
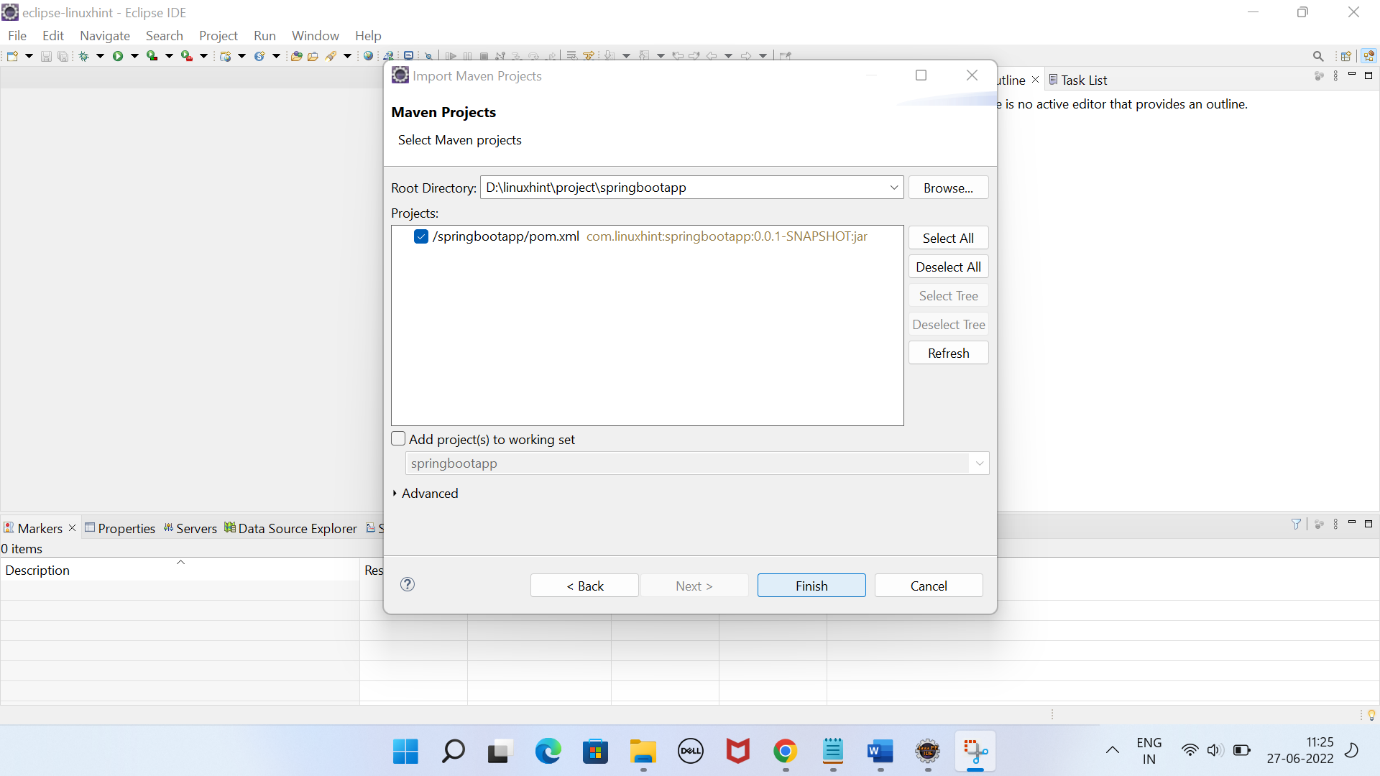
If all is good, it should look like the following image. Click on the finish button.
After importing, it takes a couple of minutes to set up the project and download all the project dependencies. If your computer network speed is good, it should load faster. Otherwise, have patience and wait for a while.
Step 4: Project the Explorer
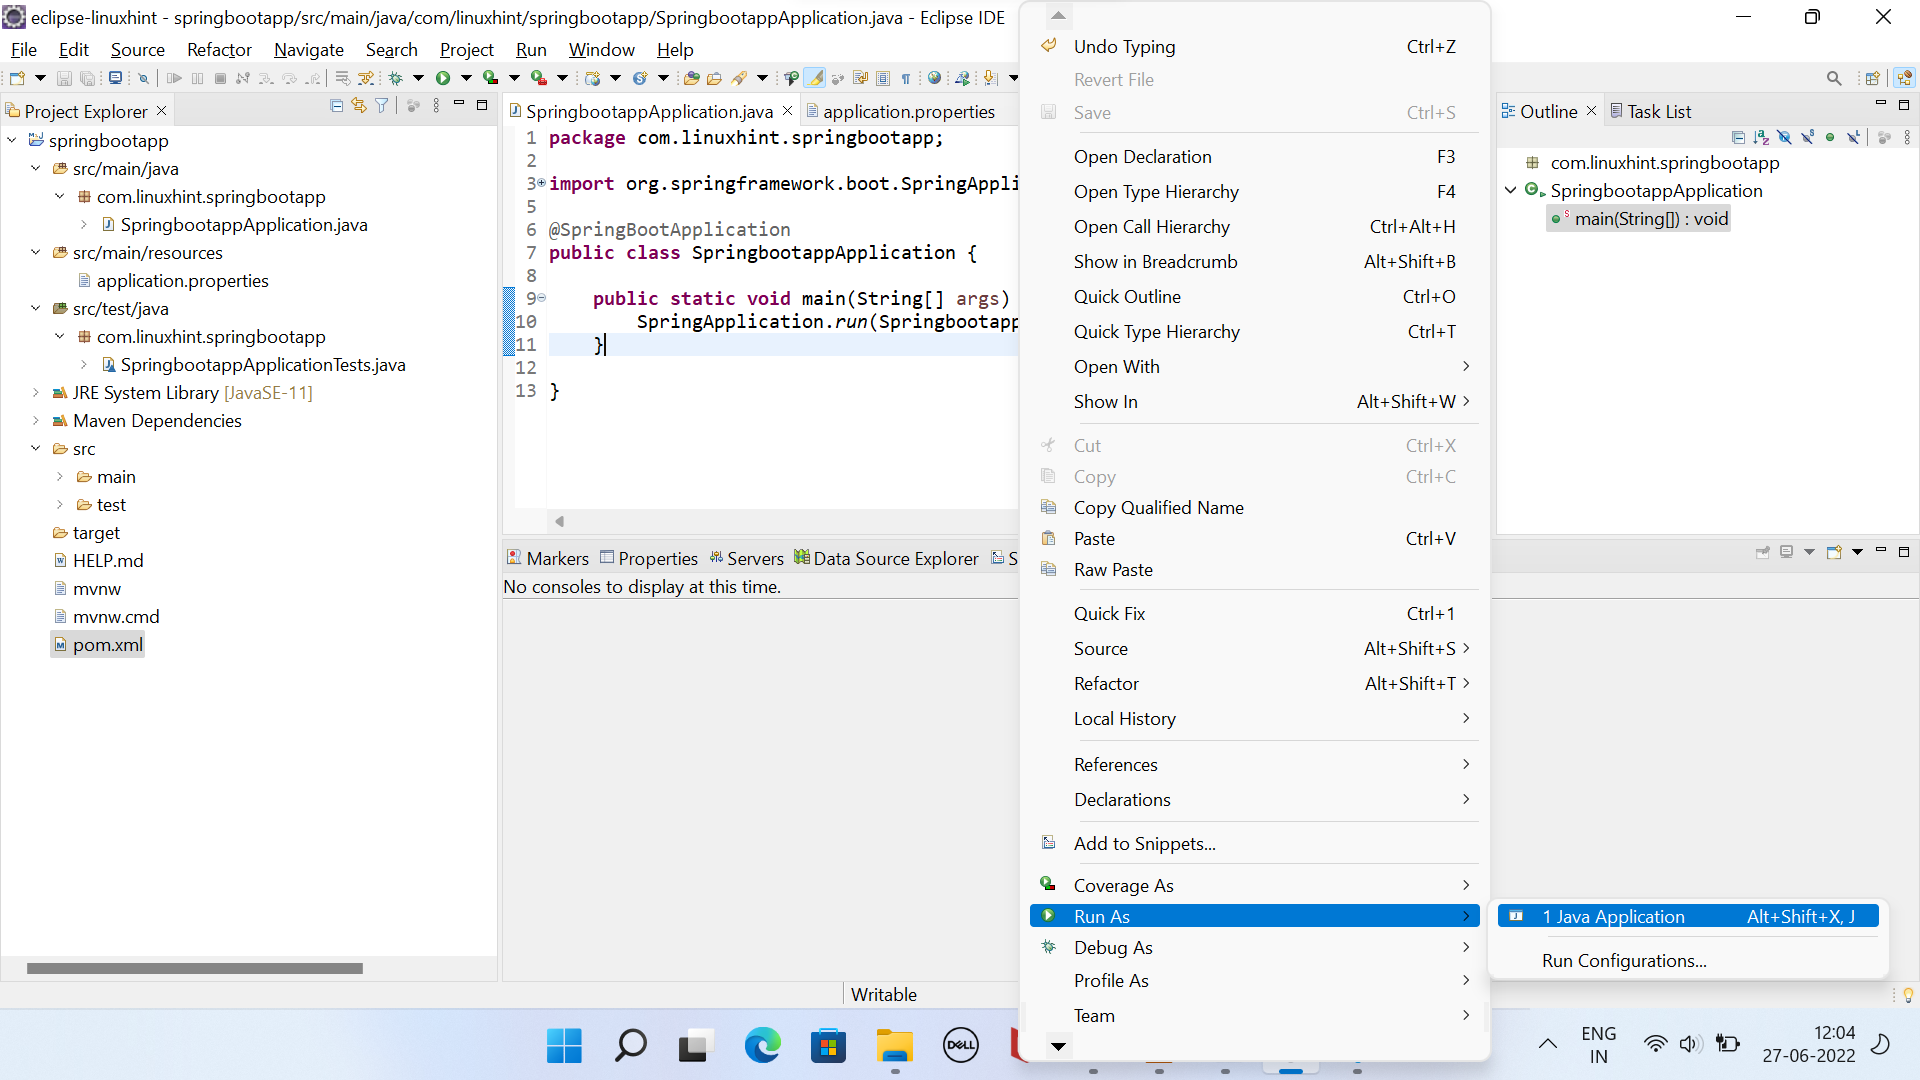
After downloading all the dependencies, set up the project. It looks like the following:

This project contains some default files such as:
- SpringbootappApplication.java
- SpringbootappApplicationTests.java
- Application.properties
- Pom.xml
Let’s understand the uses of these files one by one.
This is the main application file that contains the main() method. This method calls the run() method to run the application.
This class uses the @SpringBootApplication which specifies this application as a spring boot application. This annotation is a combination of @EnableAutoConfiguration, @Configuration, and @ComponentScan annotations. We will learn more about these annotations in our next detailed articles.
import org.springframework.boot.SpringApplication;
import org.springframework.boot.autoconfigure.SpringBootApplication;
@SpringBootApplication
public class SpringbootappApplication {
public static void main(String[] args) {
SpringApplication.run(SpringbootappApplication.class, args);
}
}
// pom.xml
This is another important file that is basically an XML file containing the entries of all the project dependencies and configurations.
Since we did not add any dependency while creating the project, it contains the default configurations and dependencies.
<project xmlns="http://maven.apache.org/POM/4.0.0" xmlns:xsi="http://www.w3.org/2001/XMLSchema-instance"
xsi:schemaLocation="http://maven.apache.org/POM/4.0.0 https://maven.apache.org/xsd/maven-4.0.0.xsd">
<modelVersion>4.0.0</modelVersion>
<parent>
<groupId>org.springframework.boot</groupId>
<artifactId>spring–boot–starter–parent</artifactId>
<version>2.7.1</version>
<relativePath/> <!– lookup parent from repository –>
</parent>
<groupId>com.linuxhint</groupId>
<artifactId>springbootapp</artifactId>
<version>0.0.1–SNAPSHOT</version>
<name>springbootapp</name>
<description>this is a hello world application </description>
<properties>
<java.version>11</java.version>
</properties>
<dependencies>
<dependency>
<groupId>org.springframework.boot</groupId>
<artifactId>spring–boot–starter</artifactId>
</dependency>
<dependency>
<groupId>org.springframework.boot</groupId>
<artifactId>spring–boot–starter–test</artifactId>
<scope>test</scope>
</dependency>
</dependencies>
<build>
<plugins>
<plugin>
<groupId>org.springframework.boot</groupId>
<artifactId>spring–boot–maven–plugin</artifactId>
</plugin>
</plugins>
</build>
</project>
// application.poperties
This file is used to set the global properties for the application such as database connection, server port number, view files path, etc. Initially, this file is empty.
This file is used to create the test cases for testing the application by using the Junit library. Initially, it does not have any test case.
import org.junit.jupiter.api.Test;
import org.springframework.boot.test.context.SpringBootTest;
@SpringBootTest
class SpringbootappApplicationTests {
@Test
void contextLoads() {
}
}
Step 5: Run the Application
Now, let’s run the application by selecting the main class (SpringbootappApplication.java). Right click, choose “run as” and then click the java application like this:
Right-click -> Run as -> Java application
It starts executing the code and you can see the output in the console.
You can see the status of the running application in the console tab which means that the application is started.
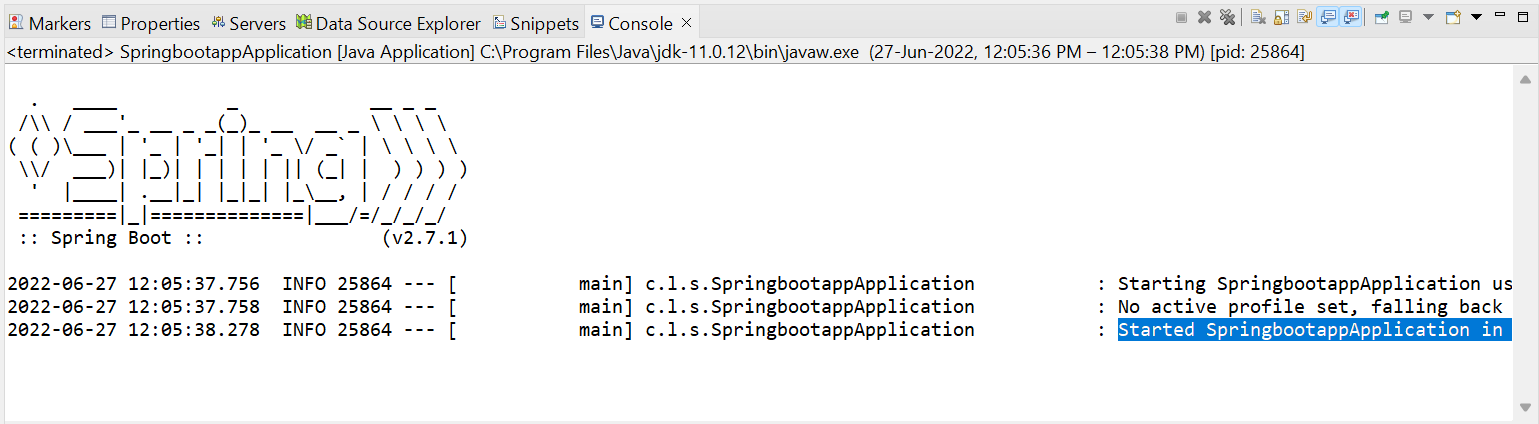
We have successfully created and run our first spring boot application.
Step 6: Display the Hello World Message
By default, the spring boot application does not display any message to the console.
If you wish to display a Hello World message to the console, simply update the main class by adding this print statement:
The new updated file looks like this:
import org.springframework.boot.SpringApplication;
import org.springframework.boot.autoconfigure.SpringBootApplication;
@SpringBootApplication
public class SpringbootappApplication {
public static void main(String[] args) {
SpringApplication.run(SpringbootappApplication.class, args);
System.out.println("Hello World!");
}
}
Run the application again and see the output console.
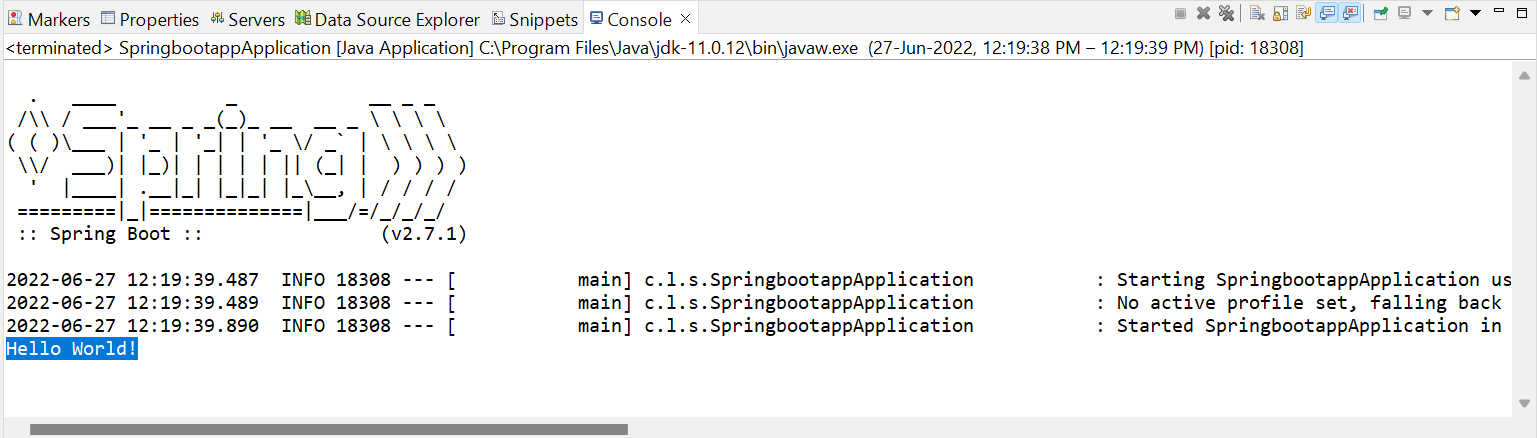
This time, it shows the Hello World message to the console.
Conclusion
This article comprises the steps for creating a simple spring boot application. We used the Spring Initializer tool and Eclipse for editing and running the application. Spring boot uses its own in-built server to run the application, although we can set up an external server as well. In the following articles, we will learn to add more dependencies to the project to create a more functional and web-based applications.
Source: linuxhint.com