Connect to the Strongest WiFi Network in ESP32 Using WiFiMulti Function
ESP32 with WiFiMulti Function
ESP32 can connect to multiple networks if we have access to more than one network, we just need to define their SSID and password inside the code. It will search for the available network and connect to the strongest Wi-Fi network we define in code.
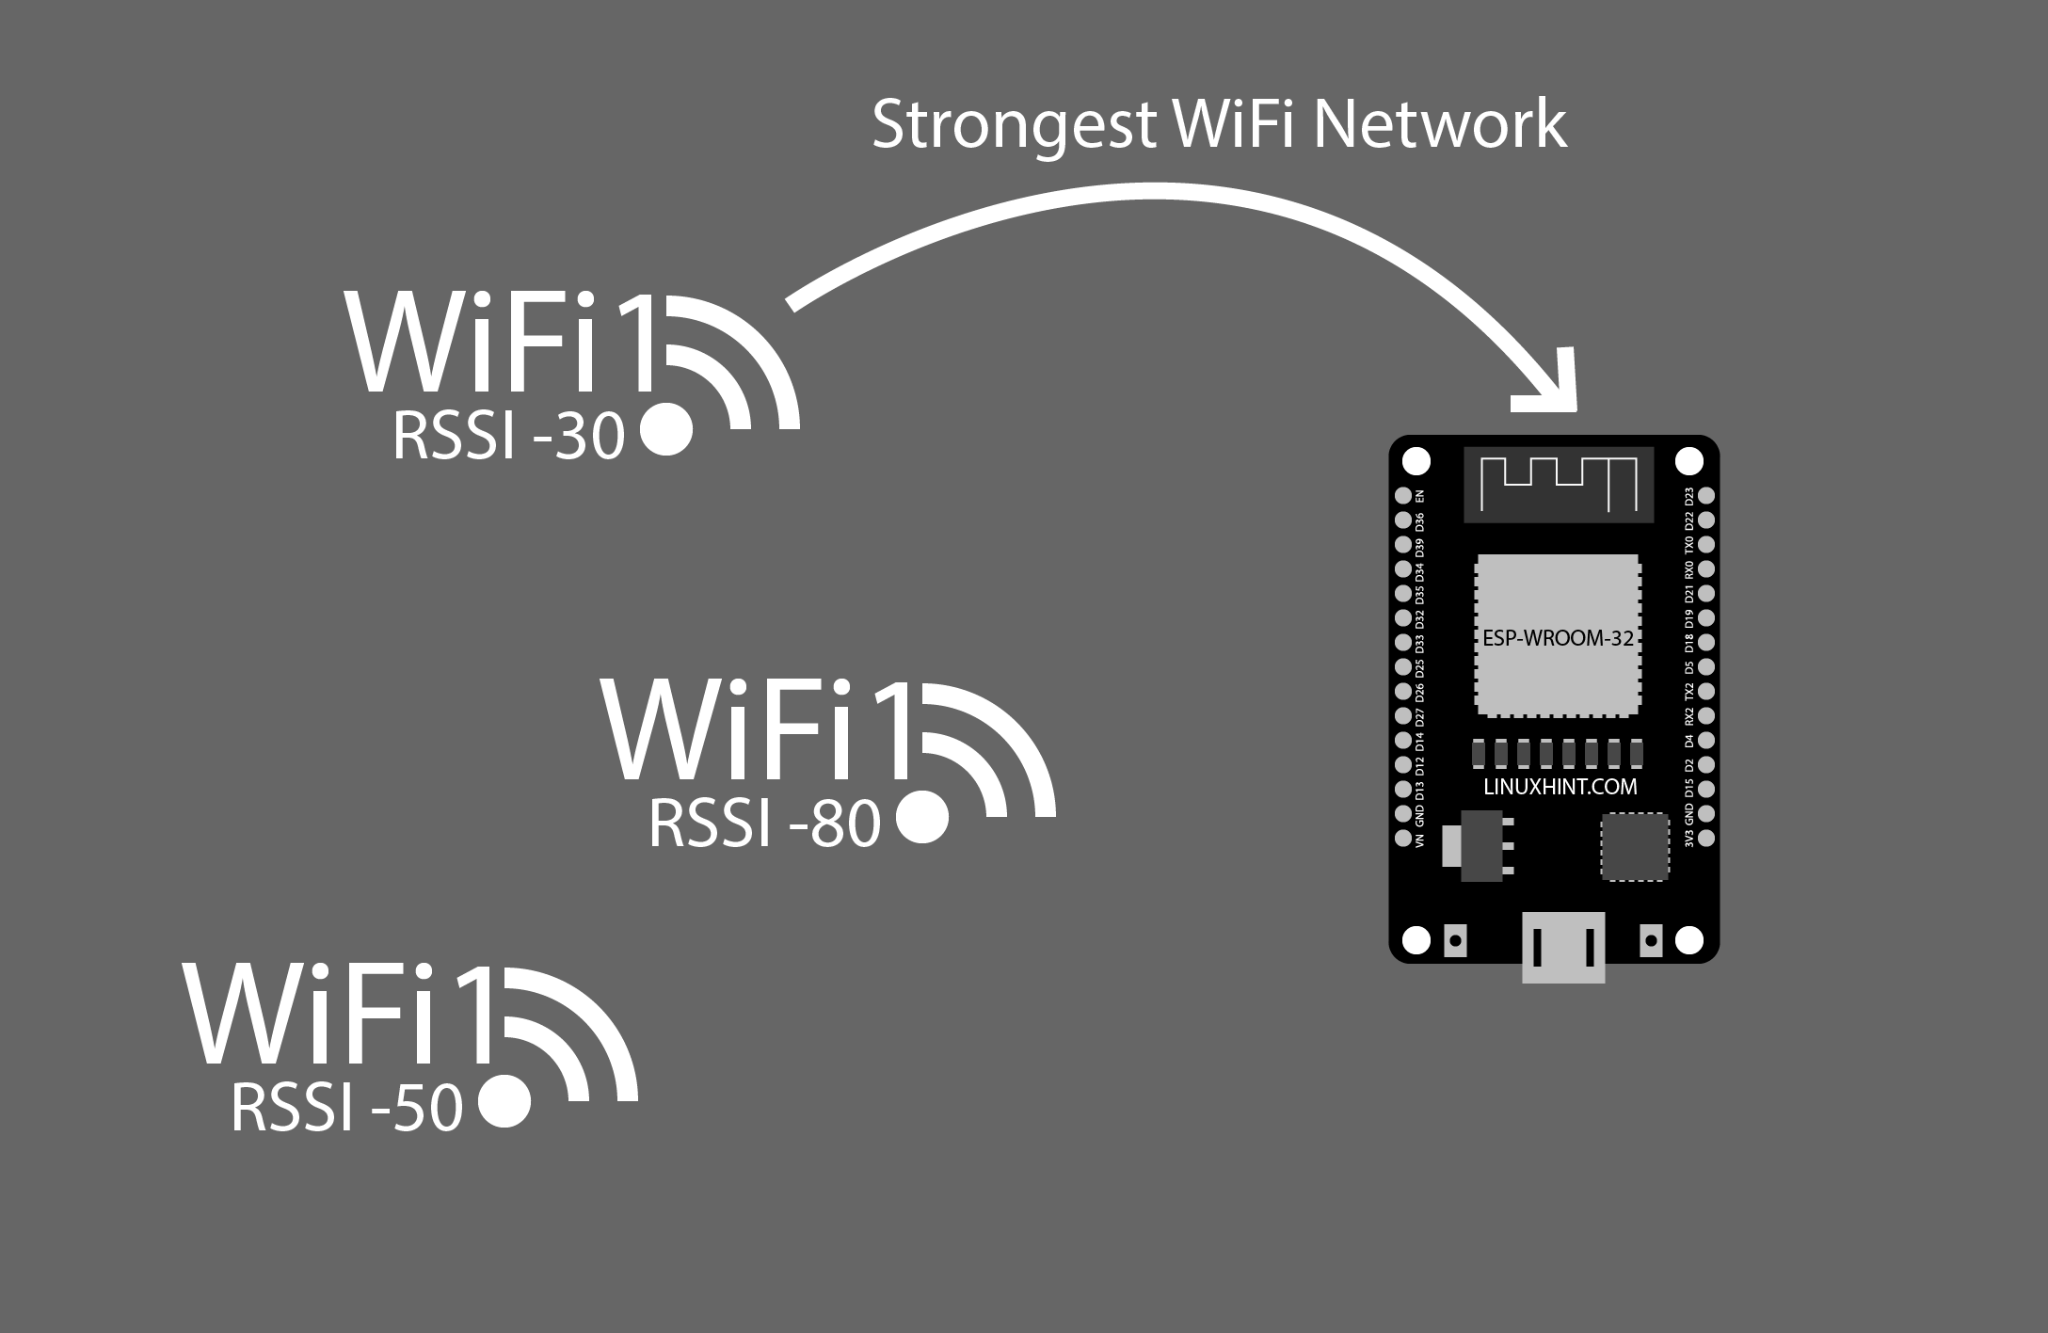
Note: Remember it will connect to one network at a time if the connection to that network is lost then ESP32 will connect to other available WiFi networks.
We can open WiFiMulti example in Arduino IDE:
Go to: File > Examples > WiFi > WifiMulti

How to Add Multiple WiFi Networks in ESP32
To add multiple WiFi networks in the ESP32 board. We will use the WifiMulti function with addAP(). The addAP() function can accept multiple SSIDs and passwords as an argument. To add multiple networks their SSID and passwords should be defined separately. Following is the syntax to add more than one network using WifiMulti function with addAP():
wifiMulti.addAP("SSID Network2", " Password2");
wifiMulti.addAP("SSID Network3", " Password3");
How to Connect to Strongest WiFi Network in ESP32
To connect ESP32 with the strongest available network we will combine the ESP32 WiFi scan and WiFi multi example. We will write a code in Arduino IDE that will do the following steps:
- Scan for the available networks
- Print their RSSI (Signal Strength) on serial monitor. So, we can check the strongest available network
- Automatically connects to the strongest network
- If it loses connection, it will automatically connect to the next available strongest network
To test the code, we will be using a Smartphone hotspot and a WiFi network. Always assign a simple name to the mobile hotspot network to avoid any error.
Now upload the code given in ESP32 board using Arduino IDE.
Code
Open Arduino IDE and upload code in ESP32. Remember to select COM port.
#include <WiFiMulti.h> /*Multi WIFI library included*/
WiFiMulti wifiMulti;
/*Per AP connect time. Increase when ESP32 take more time for connection*/
const uint32_t connectTimeoutMs = 10000;
void setup(){
Serial.begin(115200); /*Serial communication begins*/
delay(10);
WiFi.mode(WIFI_STA); /*ESP32 WIFI initialized as Station*/
/*Type all known SSID and their passwords*/
wifiMulti.addAP("YOUR SSID", "PASSWORD"); /*Network 1 we want to connect*/
wifiMulti.addAP("phone"); /*Network 2 we want to connect*/
// WiFi.scanNetworks will give total networks
int n = WiFi.scanNetworks(); /*Scan for available network*/
Serial.println("scan done");
if (n == 0) {
Serial.println("No Available Networks"); /*Prints if no network found*/
}
else {
Serial.print(n);
Serial.println(" Networks found"); /*Prints if network found*/
for (int i = 0; i < n; ++i) {
Serial.print(i + 1); /*Print the SSID and RSSI of available network*/
Serial.print(": ");
Serial.print(WiFi.SSID(i));
Serial.print(" (");
Serial.print(WiFi.RSSI(i));
Serial.print(")");
Serial.println((WiFi.encryptionType(i) == WIFI_AUTH_OPEN)?" ":"*");
delay(10);
}
}
/*Connects to strongest available defined network with SSID and Password available*/
Serial.println("Connecting to Wifi…");
if(wifiMulti.run() == WL_CONNECTED) {
Serial.println("");
Serial.println("Connected to WIFI Network");
Serial.println("IP address of Connected Network: ");
Serial.println(WiFi.localIP()); /*Prints IP address of connected network*/
}
}
void loop(){
if (wifiMulti.run(connectTimeoutMs) == WL_CONNECTED) { /*if the connection lost it will connect to next network*/
Serial.print("WiFi connected: ");
Serial.print(WiFi.SSID());
Serial.print(" ");
Serial.println(WiFi.RSSI());
}
else {
Serial.println("WiFi not connected!"); /*if all conditions fail print this*/
}
delay(1000);
}
Code started by defining WiFi libraries for ESP32, then we created a WiFiMulti object. Next, in the setup part we added two networks. One is a WiFi network that is password encrypted so we have to provide a password while the second network which is a smartphone hotspot is open, so we don’t need any password just typed the network SSID.
Next, using wifiMulti.run() command ESP32 will connect to the available strongest network. Once the WiFi is connected code will print the connected network SSID, IP address and RSSI.

Output
After uploading code to ESP32 first it will scan for the available network then it will connect to the strongest available network. Here we can see RSSI value for each network a lower RSSI means stronger is the network.
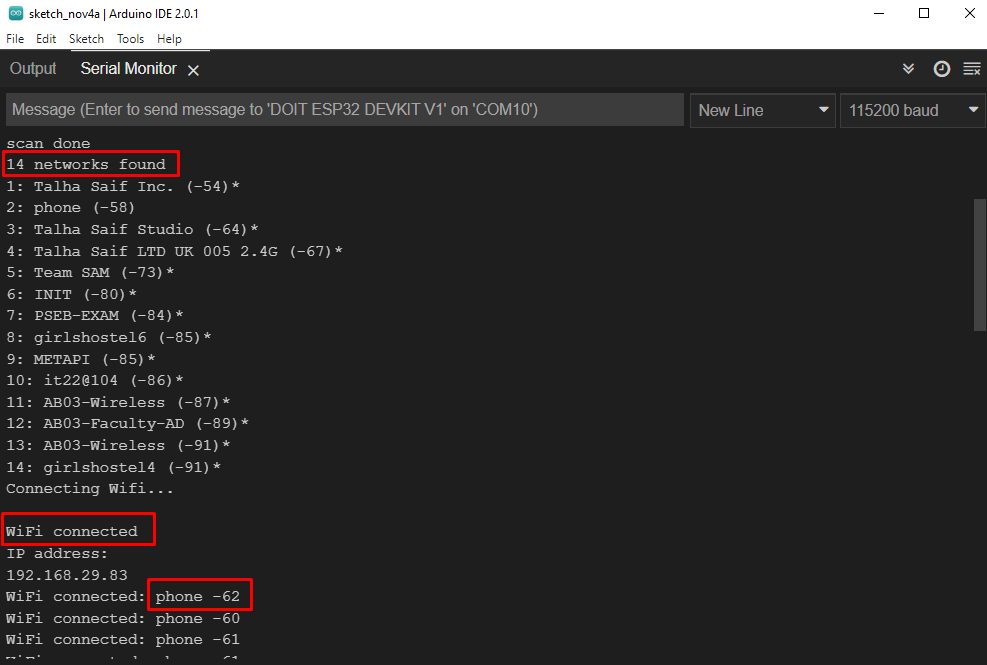
We can see that ESP32 is connected to the phone network because it has an RSSI value of -62 and the other network whose SSID and password is defined is Team SAM whose value is -73. Here the mobile hotspot network has an RSSI value closer to zero means a stronger connection.
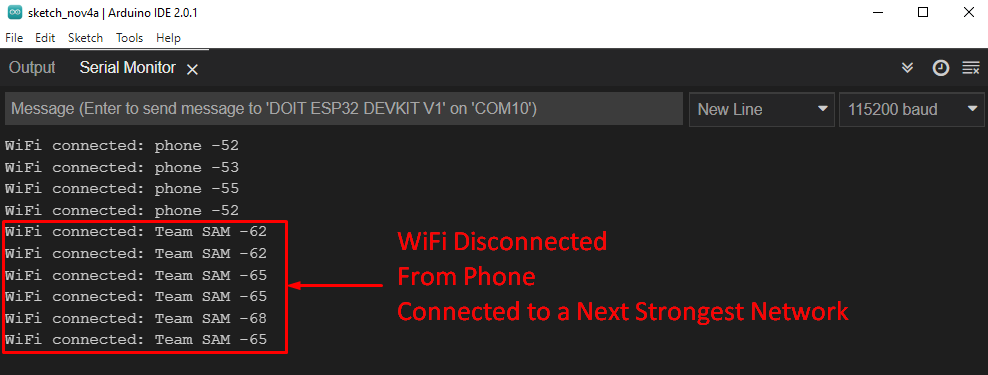
Now disconnect the Smartphone hotspot. ESP32 will connect itself to other stronger available networks. As in output we can see ESP32 is now connected to the next strongest available network. Network to which it is connected is Team SAM having RSSI value 0f -65.
Conclusion
ESP32 can connect to the strongest network available in its circle. We just need to define multiple networks SSID and password inside code. Using the WiFiMulti function ESP32 will scan for available networks and when connection is lost it will connect to other available networks inside ESP32 range.
Source: linuxhint.com