Connect to Oracle DB via JDBC Driver Using Java
This post will demonstrate how to connect to the Oracle database via JDBC driver using Java.
Connect to Oracle DB via JDBC Driver Using Java
Before beginning with this post, make sure that Java is installed in your system. For this purpose, type the below command in the Command Prompt:
Output
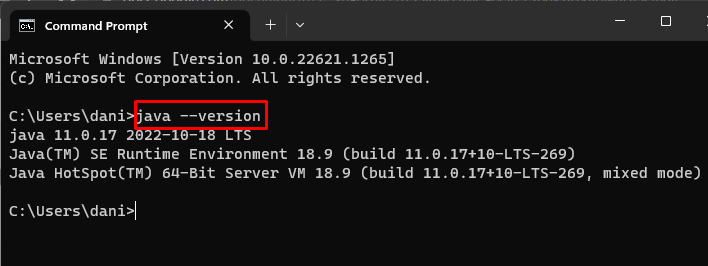
The output displays the currently installed version of java.
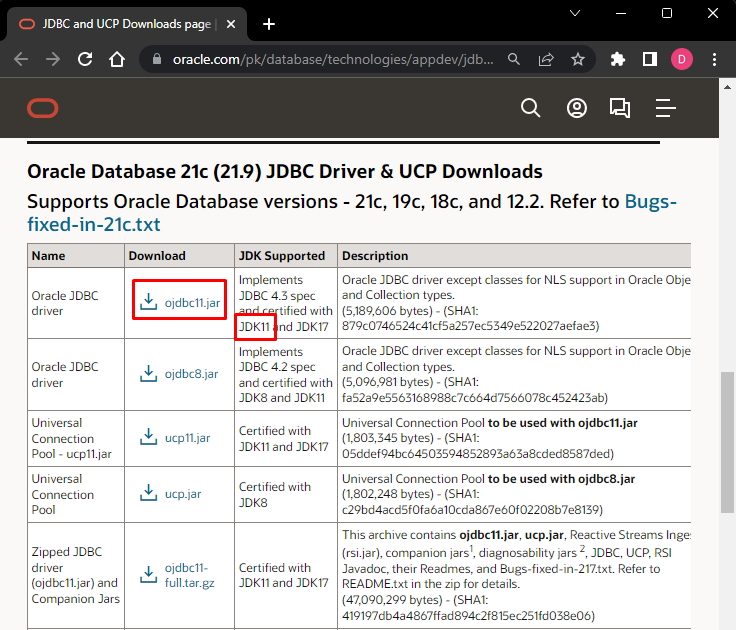
Step 1: Download JDBC Driver
Download the JDBC driver (jar file) according to the version of your database. For that purpose, visit the Oracle database JDBC driver and companion jars downloads page and select the JDBC driver accordingly:
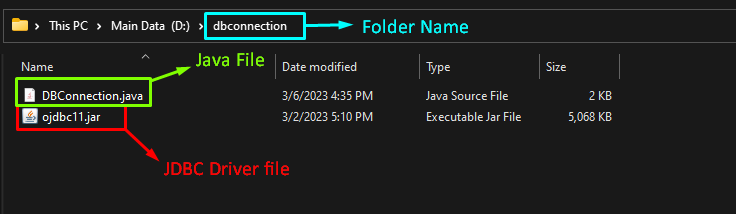
Step 2: Connect to Oracle Database Using Java
Create a new folder named “dbconnection” and paste the downloaded JDBC driver (jar file) into the folder. Next, create a new Java file named “DBConnection.java” in the selected folder:
Open the “DBConnection.java” file in any code editor and type this code to import all the necessary libraries for connecting Oracle database using Java:
import java.sql.DriverManager;
import java.sql.SQLException;
Create and initialize a connection variable:
Provide the connection details, such as “connection string”, “username” and “password” of your Oracle database in the “try” block. Establish the connection using the “getConnection()” function. Confirm the connection using the “if” statement as given below:
String connString = "jdbc:oracle:thin:@//localhost:1521/xe";
String username = "c##md";
String password = "md1234";
conn = DriverManager.getConnection(connString, username, password);
if (conn != null) {
System.out.println("Connected to Oracle database successfully!");
} else {
System.out.println("Failed to connect to Oracle database.");
}
}
Type the following code for the “catch” block to catch any exception (error):
The “finally” block closes the connection if no error occurs in the code:
if (conn != null) {
try {
conn.close();
} catch (SQLException e) {
System.out.println("SQL Exception: " + e.getMessage());
}
}
}
Review the complete code as given below. Save and exit this Java file:
import java.sql.DriverManager;
import java.sql.SQLException;
publicclassDBConnection{
publicstaticvoidmain(String[] args) {
Connection conn = null;
try {
String connString = "jdbc:oracle:thin:@//localhost:1521/xe";
String username = "c##md";
String password = "md1234";
conn = DriverManager.getConnection(connString, username, password);
if (conn != null) {
System.out.println("Connected to Oracle database successfully!");
} else {
System.out.println("Failed to connect to Oracle database.");
}
} catch (SQLException e) {
System.out.println("SQL Exception: " + e.getMessage());
} finally {
if (conn != null) {
try {
conn.close();
} catch (SQLException e) {
System.out.println("SQL Exception: " + e.getMessage());
}
}
}
}
}
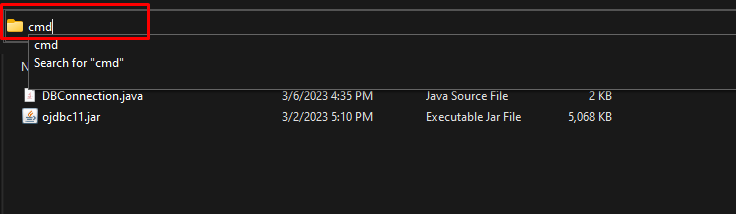
Open the Command Prompt in this folder location by typing “CMD” in the address bar:
Type the command given below to run the Java file “DBConnection.java” through the JDBC driver:
Output
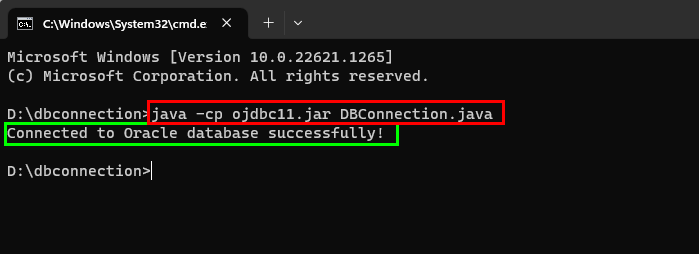
The output displays that the Oracle database is connected through the JDBC driver using Java.
Conclusion
Download the JDBC driver and paste the JDBC jar file into a new folder. Create a Java file inside the newly created folder and open it with any code editor. Provide the credentials according to your Oracle database and save the file. Open the Command Prompt in the folder where JDBC is located and run the Java file through the JDBC driver. This post demonstrated a practical guide on how to connect to the Oracle database via JDBC driver using Java.
Source: linuxhint.com