Configuring SASL on Linux
You can install SASL using the tarball installation method or the UNIX package installation methods. Again, there is an array of mechanisms that SASL can support.
You can choose to support plaintext mechanisms such as LOGIN and PLAIN mechanisms. You can also opt for any type of shared secret mechanism. Shared secret mechanisms include CRAM-MD5, SCRAM, or DIGEST-MD5. Finally, Kerberos authentication protocol users may also choose GSSAPI for Kerberos 5 or KERBEROS_V4 for Kerberos version 4.
This article is specific and will discuss the SASL installation using the shared secret mechanism (CRAM-MD5). Again, this article will use the LDAP protocol. Thus, only attempt going through this guide once you have LDAP-SASL properly running in your systems.”
Let us get into the step-by-step guide!
Step 1: Download and Install the Berkeley DB
Firstly, you will need to download the SleepyCat 4.2.52. Proceed to compile and unpack the bundle manually into your systems. Once done with the downloading process, follow the instructions listed in the docs/index.html file within the directory from which you unpacked the .tar.gz packages. Since we are using an auxprop plugin, we will use the Berkley DB.
You can run the following commands after you unpack the packages;

Step 2: Download Cyrus SASL 2.1.17
With the first step done, the next step will be to download SASL. Proceed to unpack it and follow the instructions on the doc/install.html in the directory from which you unpacked the .tar.gz file. Ensure that you use the environmental parameters when running the configuration of SASL, as shown in the figure below.

Ensure that the LDFLAGS and CPPFLAGS env parameters lib and include directories on which you installed the Berkley DB files. Once you ascertain this, you can run these commands;

Step 3: Install and Configure OpenLDAP 2.2.5
This step is one of the most critical steps in this guide since we will use LDAP as the protocol. Of course, you can use a module of your choice here. Download OpenLDAP and install it by using the directions provided in the document. Proceed to configure it the same way you configured SASL.
This command should help;

Once done with that, go ahead and run these commands;

Step 4: Create the SASL User Database
Use the below command to create a user database;
![]()
When run successfully, the above command prompts you for a password. Your user name at this point should not be a distinguished name (DN). Note that it is also the same password you will use for your admin entry.
Step 5: Set the sasl-regexp Directive
It is time to set up the sasl-regexp Directive, which is available in the slapd.conf file. Ensure that you do this before starting or running the SLAPD and testing any authentication processes. You will find the slapd.conf file in the /usr/local/etc/openldap, and this command will help.
![]()
Of course, the above parameter exists in the
uid=<username>,cn=<realm>,cn=<mech>,cn=auth format.
Take the user name from SASL and insert it in the LDAP search string where you see kenhint. Again, your realm should be your fully qualified domain name or FQDN. You can use the following command to find your realm;

We will use linhint.com as our realm, and a fully qualified name should have at least a single dot. Thus, our credentials will look like this;
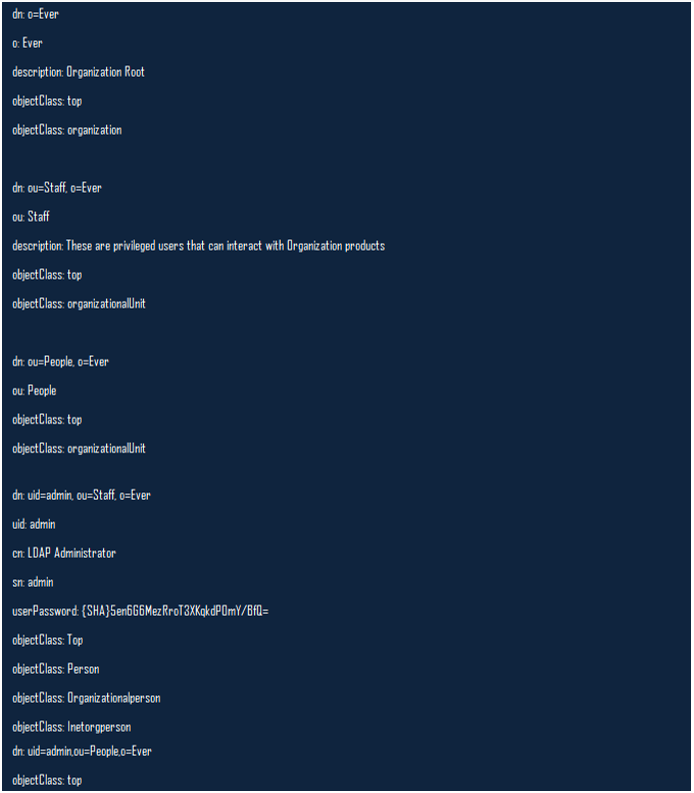
You can continue to add entries into your LDAP directory using this command;
![]()
Step 6: Start the slapd Daemon
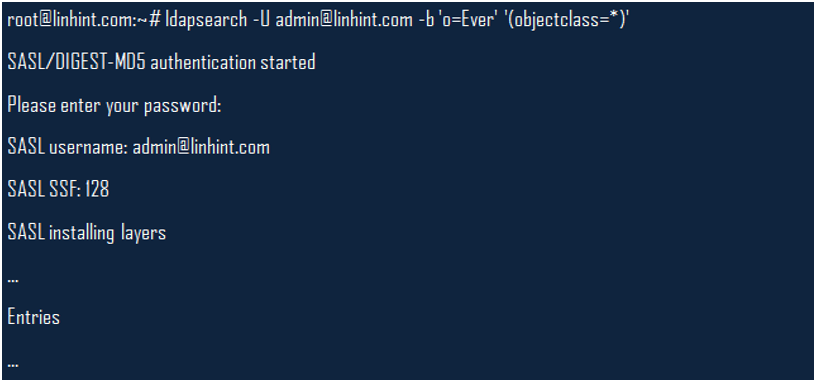
Finally, start the slapd daemon as this is your final stage of configuring SASL to use DIGEST-MD5. You can then use the ldapsearch command to query your system as in the example below;
Conclusion
This article highlighted how to configure SASL to work with LDAP and on a DIGEST-MD5 mechanism. Other variations exist on how to use SASL with other protocols and various SASL mechanisms. Hopefully, you can now go through this process without any serious challenges.
Sources
-
- https://access.redhat.com/documentation/en-us/red_hat_enterprise_linux/6/html/security_guide/sect-security_guide-securing_postfix-configuring_postfix_to_use_sasl
- https://www.linuxtopia.org/online_books/mail_systems/postfix_documentation/SASL_README_008.html
- https://www.oreilly.com/learning-paths/linux-foundation-certified/9780134840710/9780134774015-LFCE_04_14_06
- https://www.linkedin.com/learning/linux-email-services/configure-sasl
- https://www.linuxtopia.org/HowToGuides/how_to_configure_LDAP/sasl.html
- https://www.cyrusimap.org/sasl/sasl/installation.html
- https://tldp.org/HOWTO/LDAP-HOWTO/sasl.html
- https://docs.confluent.io/platform/current/kafka/authentication_sasl/authentication_sasl_plain.html
Source: linuxhint.com