Complete Guide About Streaming in Discord Nitro
Nowadays, many applications provide the facility of live streaming to share some golden moments with your friends and family members. Discord is also considered in the list as it also provides this facility to its users to go live and start live streaming with like-minded people, the business community, and so others. More significantly, it is easy to manage Live streaming in Discord. If you like to know more about launching live streaming, then follow this post.
This post stated:
How to Make a Call in Discord Nitro?
Before starting a stream in Discord, you have to make a call first. To do so, try the instructions given below.
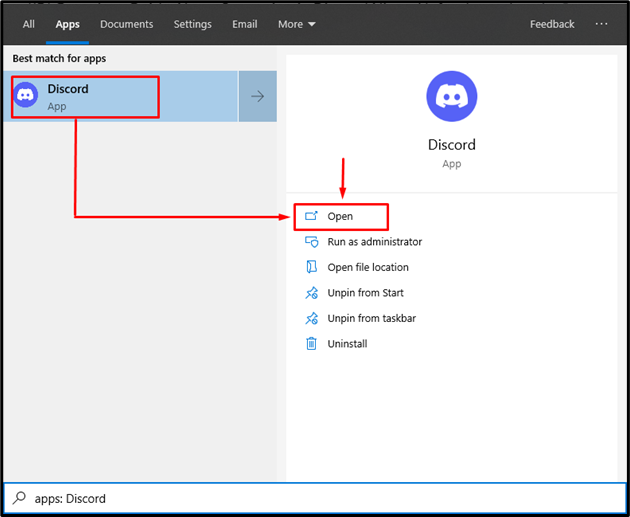
Step 1: Launch Discord
Initially, search for the Discord app from the start menu, click on “Open”, and launch Discord on your system:
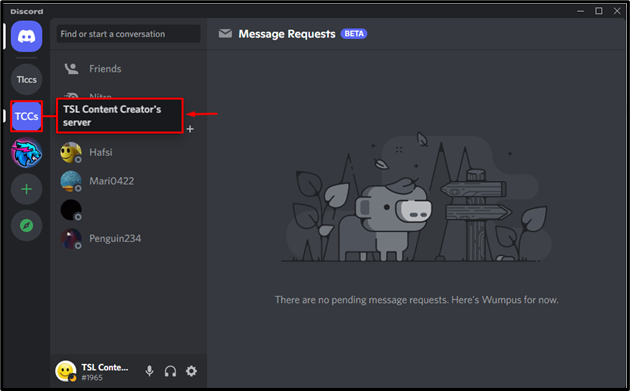
Step 2: Navigate to Discord Server
Next, navigate to your private Discord server. For this purpose, we will choose “TSL Content Creator’s server”:
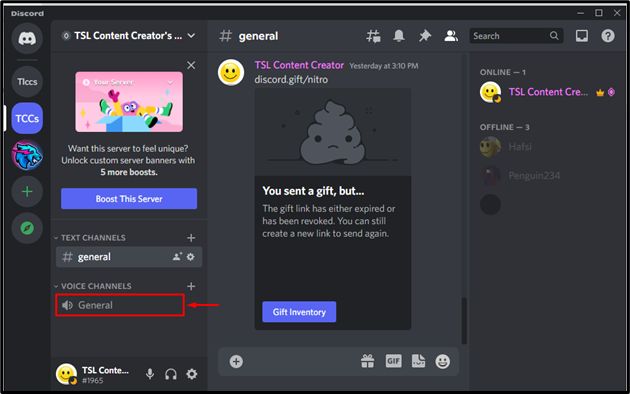
Step 3: Make a Call
Next, click on “General” from the voice channels list to make a call:
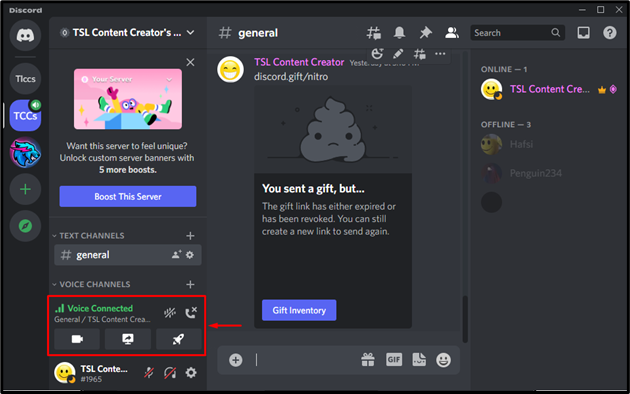
As a result, the voice call is connected to “TSL Content Creator’s server” members:
Now, let’s head towards starting the activity.
How to Start Activity in Discord Nitro?
To start activity in Discord Nitro, firstly move to the “Discord > Discord Server > General Voice Channel”. Then, try out the provided instructions.
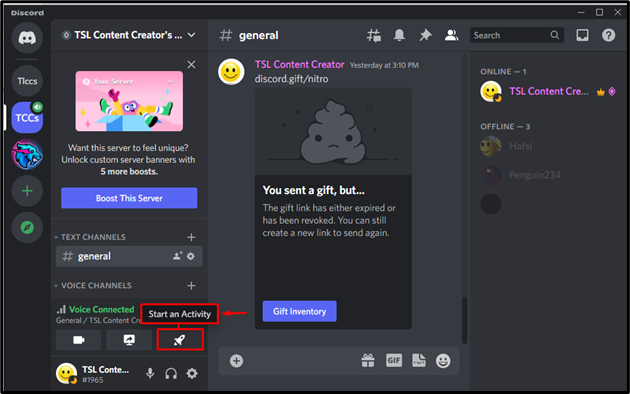
Step 1: Start an Activity
Click on the highlighted booster icon to start an activity:
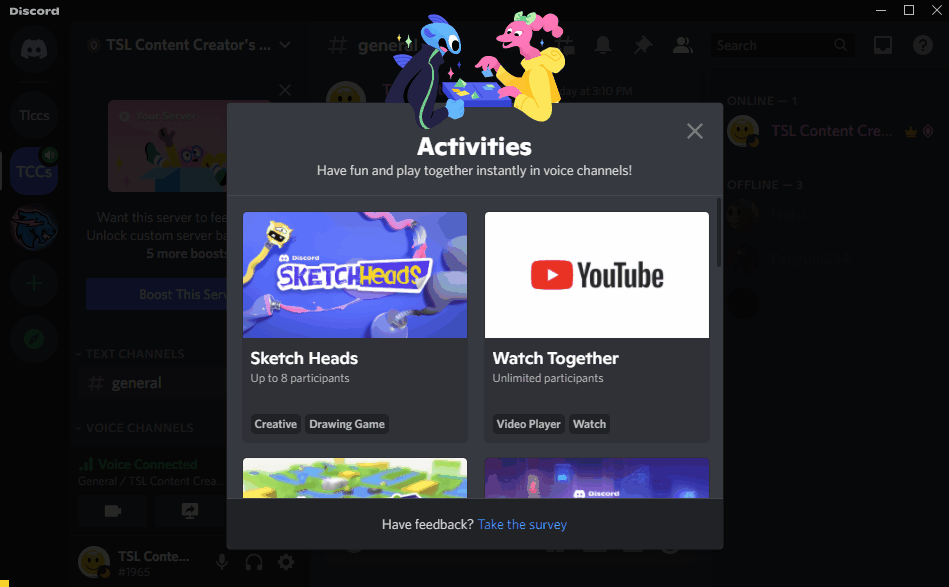
Step 2: Select an Activity
As a result, you will see different available activities as follows:
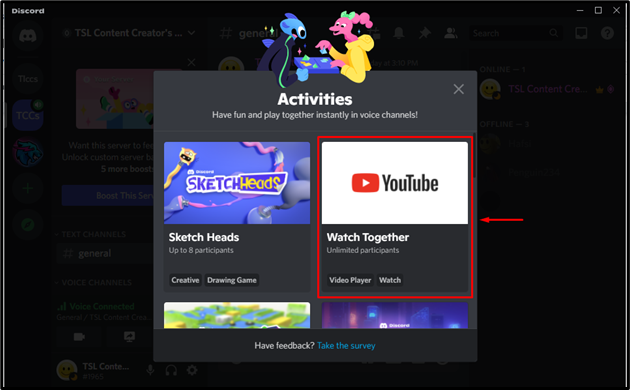
Select any activity of your choice to start. To do so, we will select the “Watch Together” activity:
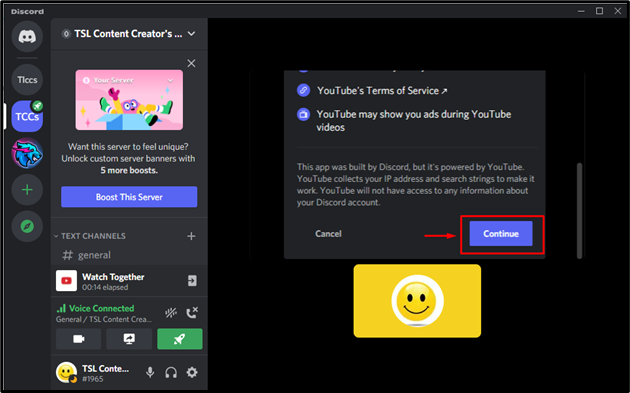
Press the “Continue” button for further processing:
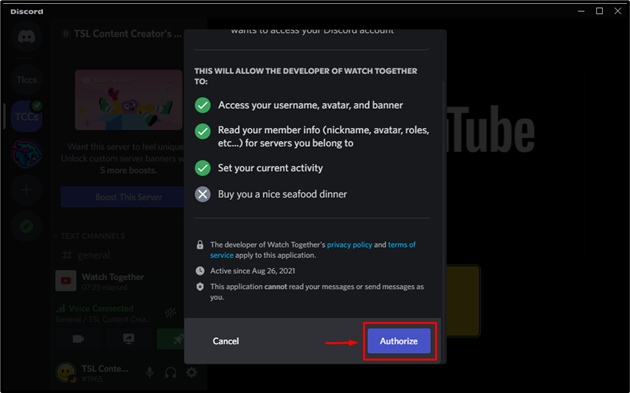
Step 3: Authorize Access
Now, grant permissions to access the Discord account by clicking on “Authorize”:
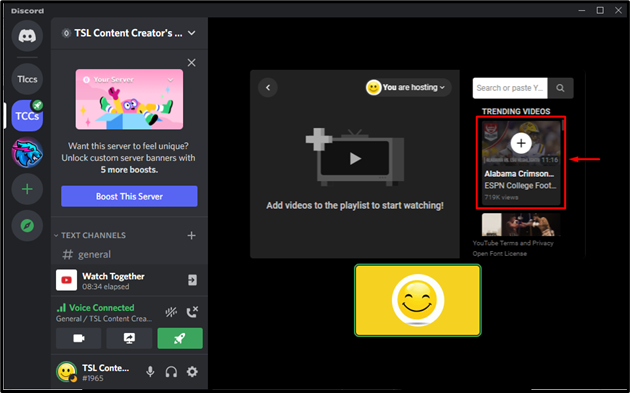
Step 4: Stream Video
Select the video that you want to stream:
It can be seen that the live stream has been started successfully:
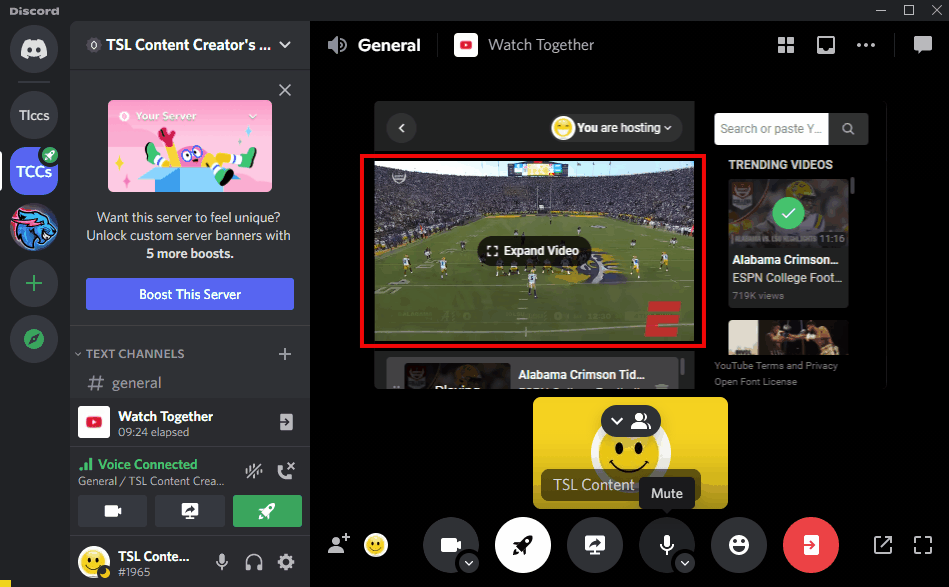
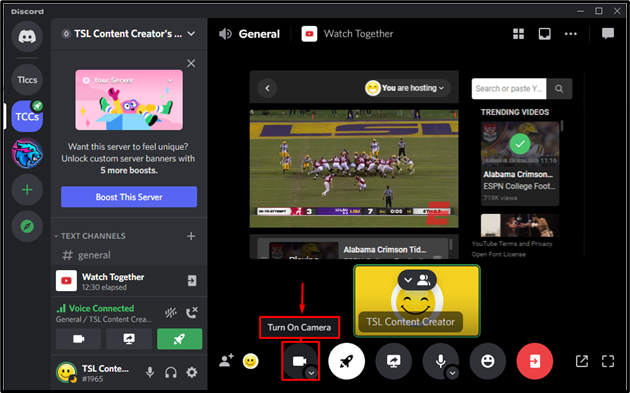
Meanwhile, you can also turn on your camera by clicking on the “Video Camera” icon:
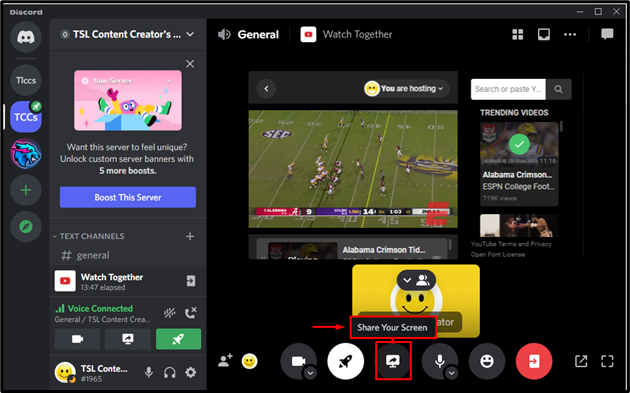
Step 5: Share Screen
To share the screen, press the “Share Your Screen” option:
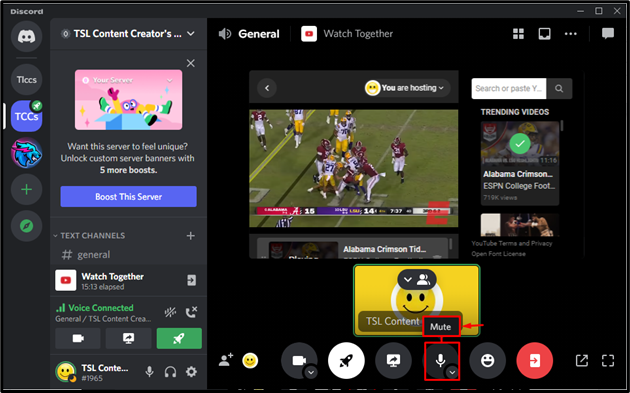
Step 6: Mute Audio
Users can also mute the microphone to stop sharing the system audio:
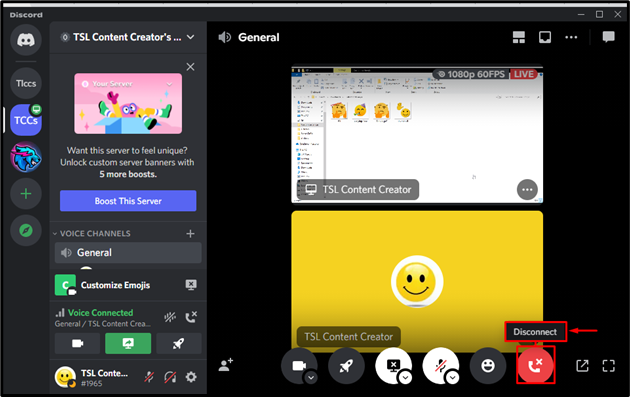
Step 7: Stop Activity
If you want to stop sharing activity and end the call, then hit the “Disconnect” option:
How to Share Screen in Discord Nitro?
To share the screen in Discord Nitro, open Discord, and go to the voice channel of your favorite server. After doing so, check out the mentioned procedure.
Step 1: Start Voice Call
Click on the “General Voice Channel” to make a voice call:

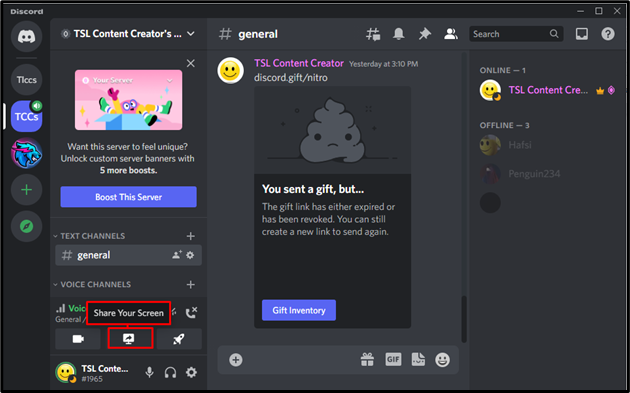
Step 2: Share Screen
After making a voice call, press the “Share Your Screen” icon:
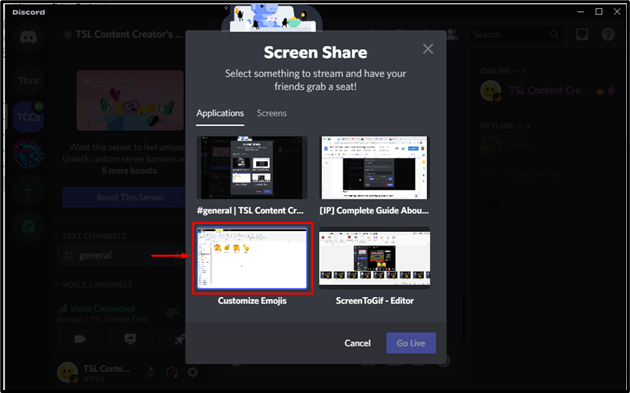
Step 3: Select Screen
Here, we will select the screen that is required to share in the “TSL Content Creator’s server” voice channel:
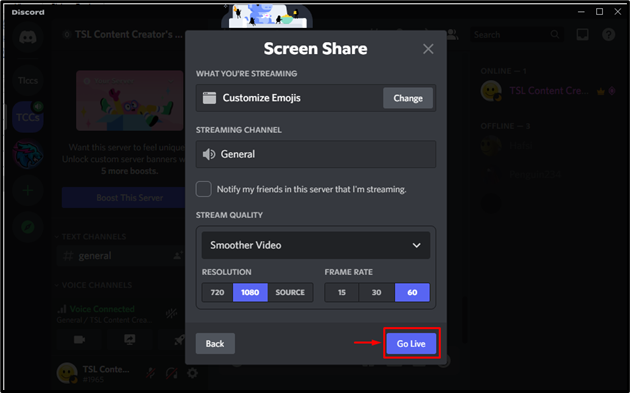
Step 4: Go Live
After selecting the screen, set stream quality or resolution, and click on the “Go live” button:
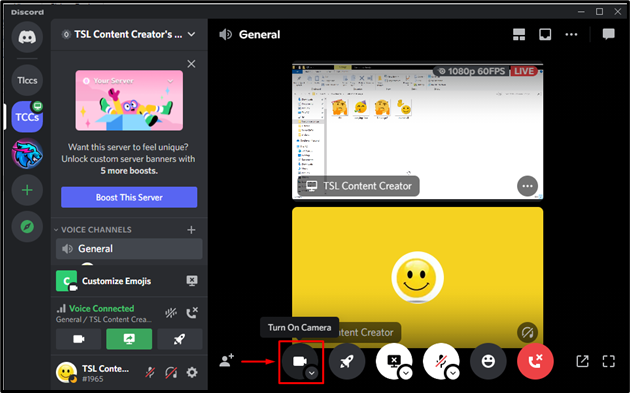
As a result, you can see that the system screen is shared in the Discord server:

Users can also turn on the camera during screen sharing:
We have provided the information related to making calls, starting an activity, and sharing the screen in Discord Nitro.
Conclusion
To start live streaming in Discord Nitro, users must launch the Discord app and go to the required Discord server. Click on the “#General” voice channel to start the call, then share the screen, turn on the camera or add an activity in the call for streaming. This post stated the completed guide about streaming in Discord nitro.
Source: linuxhint.com