Can Arduino Run 12V Relay?
Can Arduino Run a 12V Relay?
Yes, Arduino can run a 12V relay, but not directly. If a 12V relay is connected to Arduino, it can damage the Arduino board. It can be done by using a transistor as a switch between Arduino and relay, a resistor to protect the transistor, and a diode to protect the Arduino.
Arduino is designed to operate on 5V, and it can handle a current of 20mA normally. So, to set up a 12V relay in Arduino, we need to amplify the current to deal with the 12V relay. Similarly, we need to have an extra power supply of 12V to energize the relay.
To set up a 12V relay with Arduino, you need to have the following.
Software Requirements
- Arduino IDE
Hardware Requirements
- Arduino Board
- 12V Relay Module
- An NPN Transistor (Preferably BC 548 or 2N2222)
- A Diode (Preferably 1N4007)
- A Resistor
- Light Bulb
- Breadboard
- Connecting Wires
Calculations for the Required Resistance
Consult the datasheet of the 12V relay to note its resistance.
Let us suppose that a 12V relay has a coil resistance of 4000 Ω.
The current flowing will be

For this value of current and β= 190 for transistor 2N222, the base current of the transistor will be:

Now, using Ohm’s Law,

So, you need to connect almost 30 kΩ between the transistor and Arduino.
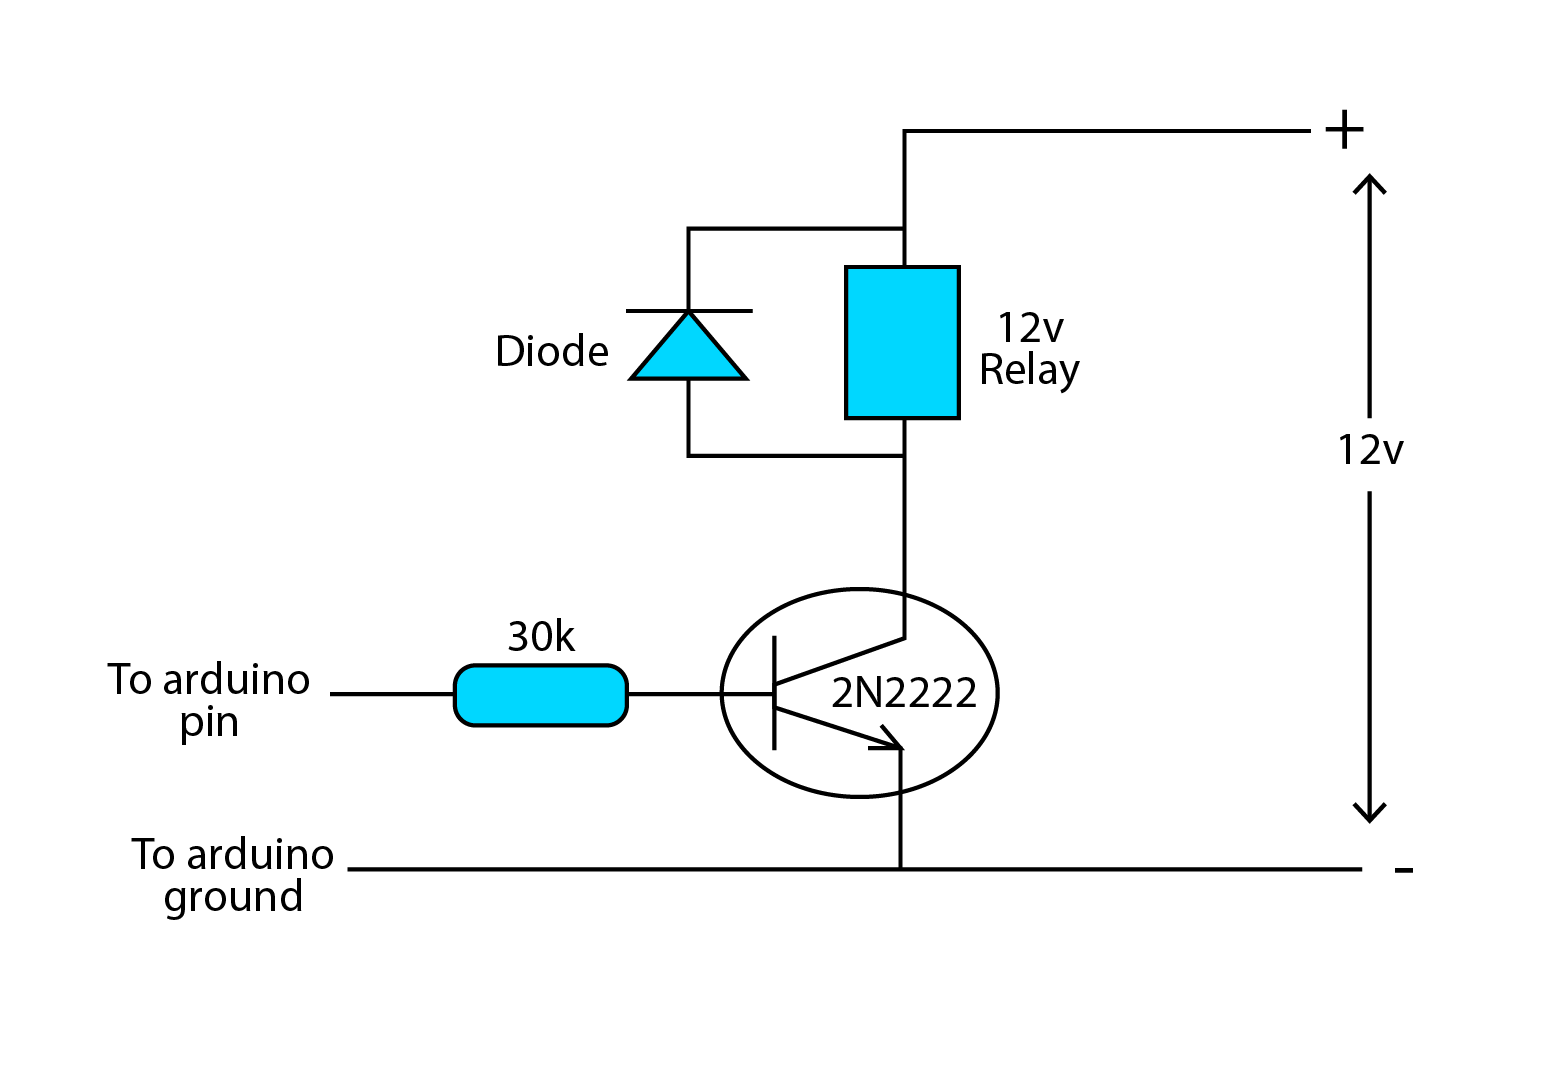
Circuit Diagram
Make connections as explained below:
1. Relay Connections
COM: Connect COM to 12V power supply
NO: Connect Bulb’s positive terminal to the relay’s NO and negative terminal to the 12V power supply
On the coil side of the relay, connect one end to the 12V power supply and the other to the collector of the transistor.
2. Transistor connections
Base: Connect the base of the transistor to the output pin 8 of Arduino through a resistor of 30 kΩ
Emitter: Ground the emitter of the transistor
Collector: Connect the collector of the transistor to one end of the relay coil
3. Diode Connections
The Diode is to be connected across the relay coil, and the p-side of the diode is connected to the collector terminal of the transistor.
After completing the circuit, upload the following code in Arduino and run the circuit.
void setup()
{
pinMode(Relayinput, OUTPUT); //Initialize Relay input as output of Arduino
}
void loop()
{// You can add an if condition here according to your requirement
digitalWrite(Relayinput, HIGH);// Relay trips when it receives HIGH signal
delay(10000);// Relay remains ON for 10 seconds
digitalWrite(Relayinput, LOW);// Relay is deactivated when receives LOW signal
delay(10000);// Relay remains OFF for 10 seconds
}
When the circuit runs, the transistor operates as a switch between Arduino and the 12V relay. When the supply is turned ON, and base current is supplied to the transistor, current starts to flow from collector to emitter. The transistor gets ON and when the switch is ON, it operates the relay. The bulb connected across the coil of the relay will brighten for 10 seconds and, as the code suggests, after 10 seconds the bulb will be OFF for 10 seconds.
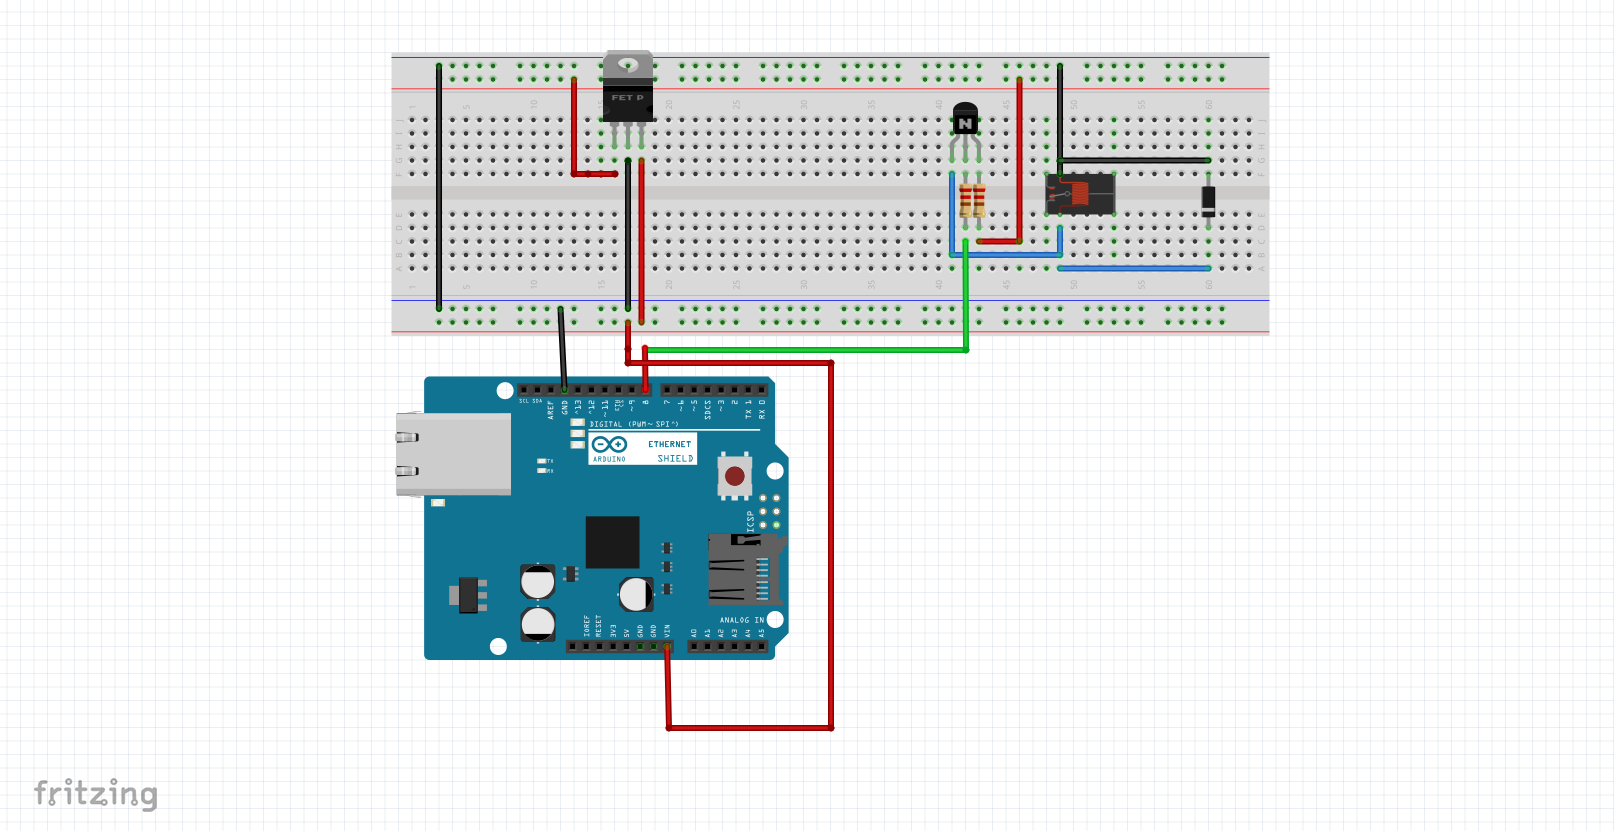
Hardware Circuit
Given below is the hardware circuit that controls the 12V relay with the Arduino. The connections are made as explained above. When the Arduino board is powered through USB serial cable. The transistor is turned ON and the relay operates. Any appliance can be operated using the relay.
The components used in this hardware are
- Breadboard
- Arduino UNO board
- Two resistors
- One Diode
- One Relay Module
- One BJT Transistor and One FET Transistor
- Connecting Wires
Conclusion
A 12 V relay can be operated using Arduino by using a transistor, resistor, and diode. The most important benefit of using a 12V relay with Arduino is that all appliances that have a 12V rating can be operated easily through Arduino.
Source: linuxhint.com