Calculated Field in Tableau
Calculated fields are created using formulas and expressions that use operators, functions, and references to other fields or data elements. These formulas can perform various calculations such as mathematical operations, string manipulations, logical comparisons, and aggregations.
Calculated fields can be used to generate new measures or dimensions, apply conditional logic, perform data transformations, and create complex calculations. They provide flexibility and enable the users to derive meaningful insights from their data by performing custom calculations that are not directly available in the original dataset.
Step-by-Step Guide on How to Create a Calculated Field in Tableau
The following steps will help you to create a calculated field in Tableau:
Step 1: Connect to Your Data Source
Launch the Tableau Desktop and click on “Connect to Data” or select the “File” > “Connect to Data” to connect to your desired data source. Choose the appropriate connection method based on your data source type (e.g., Excel, CSV, database). Let us use the available World Indicators data when you install Tableau.
Step 2: Choose a Worksheet
After connecting to your data source, Tableau opens a new worksheet by default. If you’re already on a different worksheet, click the “Sheet” tab at the bottom of the screen to switch to the desired worksheet.
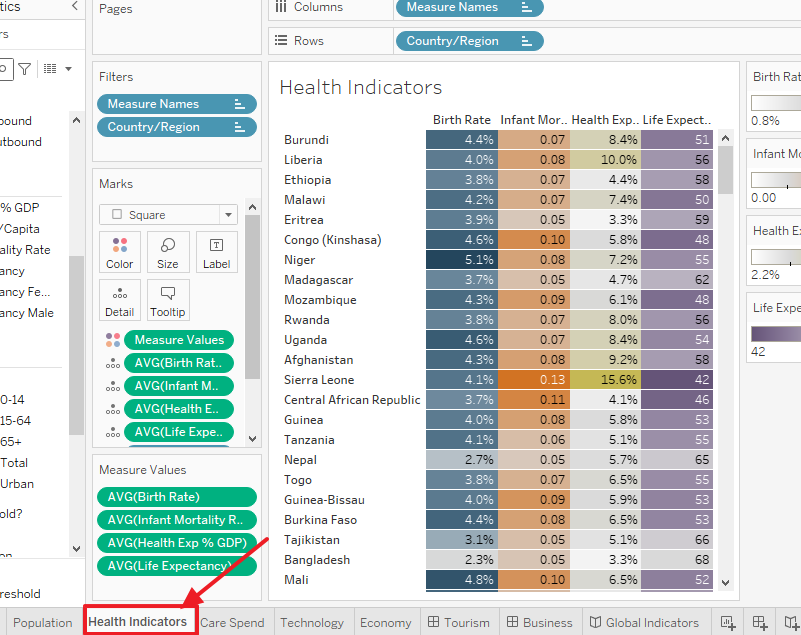
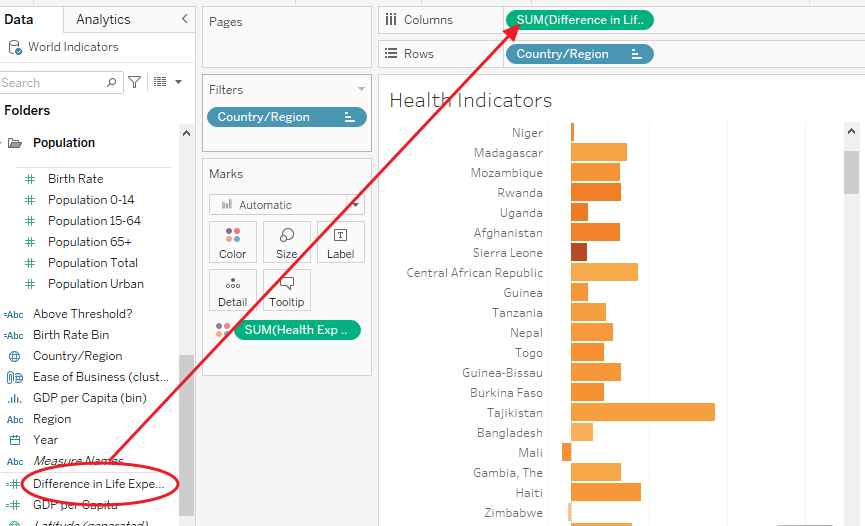
Let us use the Health Indicators sheet for this illustration. Other worksheets such as Care Spend, Economy, Technology, Business, Tourism, and Global Indicators are at the bottom. You can choose to use any of them.
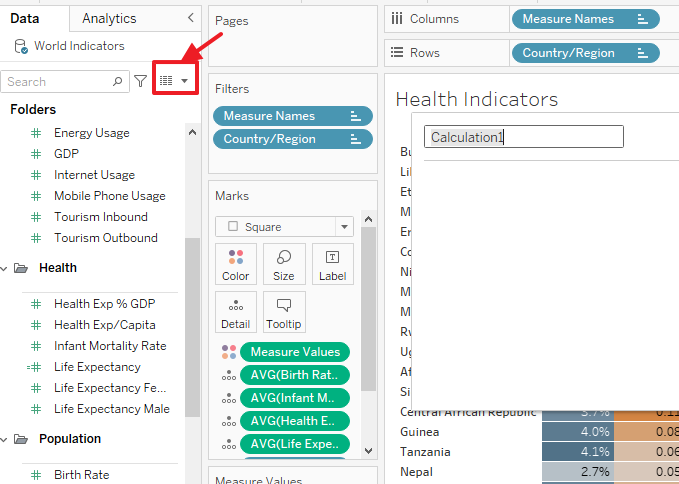
Step 3: Access the Calculated Field Dialog Box
In the Data pane on the left side of the screen, right-click the arrow to open a context menu. Choose “Create Calculated Field” from the context menu. A calculation workspace will appear.
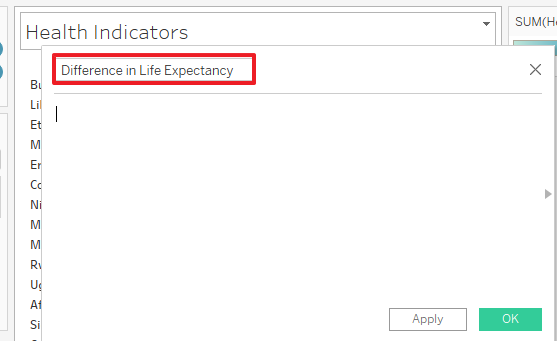
Step 4: Provide a Name for the Calculated Field
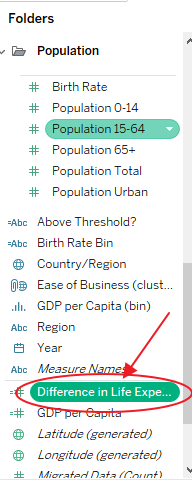
The calculated field dialog box will appear. Enter a descriptive name for your calculated field in the “Name” field at the top. For example, we create a calculated field that finds the difference in life expectancy between males and females. So, we name the calculated field as shown in the following:
Step 5: Write the Formula for Your Calculated Field
In the “Formula” field within the “calculated field” dialog box, you can type your formula directly or use the available functions and operators. You can use the field names, operators (such as +, -, *, /), functions (such as SUM(), IF(), LEFT()), and constants (such as numbers or text) to create your formula.
Tableau provides autocomplete suggestions and syntax highlighting to assist you as you type. Our formula for this calculation is:
[Life Expectancy Female] – [Life Expectancy Male]
It is entered as shown in the following:
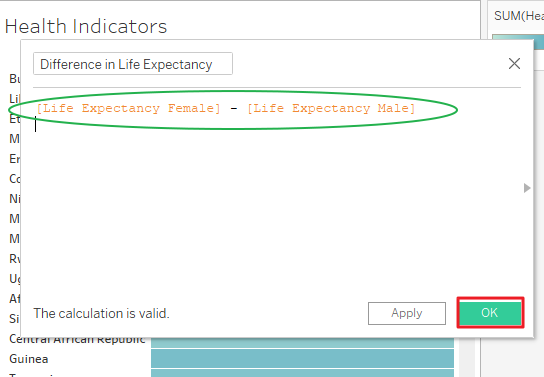
Step 6: Review and Finalize the Formula
After writing your formula, review it for accuracy and ensure that it meets your calculation requirements. If needed, make adjustments to the formula until it produces the desired result. Tableau will alert you if your formula has any issues.
Click the “OK” button in the “calculated field” dialog box to save the calculated field.
Step 7: Utilize the Calculated Field in Your Visualization
The newly created calculated field will now appear in the “Dimensions” or “Measures” pane with the name that you provided.
Drag and drop the calculated field onto your worksheet to use it in visualizations, filters, sorting, and grouping.
That’s it! You successfully created a calculated field in Tableau. Repeat these steps as necessary to create the additional calculated fields. Remember that you can always edit or modify the calculated field by right-clicking on its name in the “Dimensions” or “Measures” pane and selecting “Edit Calculated Field” from the context menu.
Conclusion
Once created, the calculated fields can be used like any other fields in Tableau such as in visualizations, filters, sorting, and grouping. They can greatly enhance the analytical capabilities of Tableau and enable the users to perform the advanced data analysis and create insightful visualizations.
Source: linuxhint.com