Boosting Your Terminal Productivity: Oh My Zsh Plugins that You Need
In this tutorial, we will show you how you make your terminal usage to a power user level by taking advantage of Oh My Zsh and its powerful plugins.
Oh My Zsh is a popular open-source framework to manage your Zsh configuration. It comes with a plethora of plugins and themes that can supercharge your terminal experience.
Prerequisites:
Before we dive into the world of Oh My Zsh plugins, ensure that you have the following prerequisites in place:
- Installed Zsh – You should already have Zsh installed on your system. If not, you can install it using your system’s package manager.
- Installed Oh My Zsh – If you haven’t already installed Oh My Zsh, you can follow the installation instructions on the official Oh My Zsh GitHub repository.
- Basic Zsh Configuration – You should have a basic understanding of Zsh and know how to configure it. If not, you can start with a minimal “~/.zshrc” configuration file.
Now that we have the prerequisites covered, let’s get started.
Git Plugin
The Git plugin provides powerful shortcuts and information about all your Git repositories right in your prompt. This is useful if you work with multiple codebases and are constantly switching between them
To enable the Git plugin, open your “~/.zshrc” file and add “git” to the list of plugins:
With the Git plugin enabled, you can use a variety of helpful Git-related commands and information.
For example, to show the current branch in the prompt, we can navigate to the repository directory:
Once we navigate to the benchmark repository, the prompt will change to reflect the repository name and the current branch as follows:
Use the following command to check the status of the Git repository:
Syntax Highlighting Plugin
Syntax highlighting is a must-have feature for any code editing in your terminal. To enable the syntax highlighting in Zsh commands, we can add and enable the syntax highlighting plugin.
This can help you to spot and quickly fix the errors in a command as well as differentiating the different types of files.
The syntax highlighting plugin adds color to your commands, making it easier to spot the errors and distinguish the different types of files.
To install it, clone the Git repository and add “zsh-syntax-highlighting” to the “~/.zshrc” plugins list:
Edit the Zsh config file and add the plugin:
Once you saved the changes, reload the configuration file or launch a new terminal sessions.
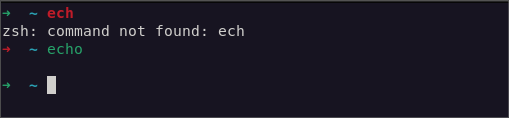
As you type your commands, Zsh will show you whether it is a valid or invalid command by highlighting it in green and red, respectively.
Auto-Suggestions Plugin
The second and most powerful plugin in the Oh My Zsh ecosystem is the auto-suggestions plugin.
As the name implies, this plugins helps to automatically suggest the commands of your type. This is based on your previous command history.
To install the plugin, start by cloning the repository as shown in the following command:
Next, edit the Zsh configuration file and the plugin name as follows:
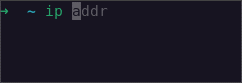
Once enabled, you can start typing the commands as the plugin will suggest an autofill for the previously executed commands. You can press the tab to accept the suggestions.
Zsh History Plugin
The history plugin adds an additional functionality to manage your command history.
To install it, add “history” to the “~/.zshrc” plugins list as follows:
Once enabled, we can use various commands to interact with the command history.
For example, use the following to view the command history:
Use the following to execute a specific command from the history:
Use the following to search for a command in the history:
Fuzzy Finder Plugin (fzf)
Next on the list is the Fuzzy Finder, also known as fzf plugin. This plugin allows us to search and interactively select the files, process, and more using a fuzzy search engine.
To install it, clone the repository into the Oh My Zsh plugin directory:
Edit the Zsh configuration file and add the plugin as follows:
Once enabled, reload the Zsh configuration or launch a new shell.
You can then use the plugin by running the “fzf” command.
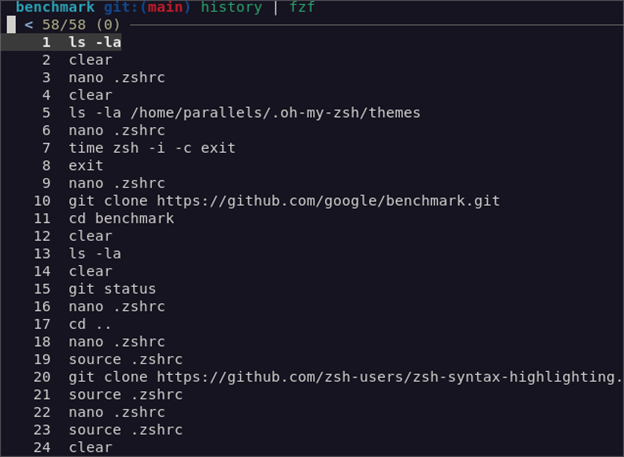
Use the following command to search through the command history:
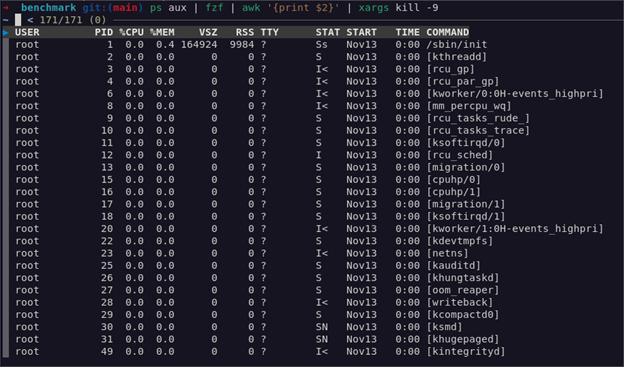
You can also perform more complex tasks such as fuzzy search to run the processes and kill them:
From there, you can select the command that you wish to kill.
SSH Agent Plugin
The SSH Agent plugin automatically loads the available SSH keys when the shell session is started. This makes it very easy when you need to interact with a wide variety of remote machines.
To enable it, add the “ssh-agent” plugin name to the “~/.zshrc” plugins list:
With the SSH Agent plugin enabled, Zsh will automatically load the SSH keys on launch. Therefore, you can use SSH without needing to enter the passphrase every time.
Extract Plugin
The extract plugin provides a quick way to extract various archive formats such as zip, tar, and gzip.
The plugin defines a function called “extract” which extracts the archive file that you pass in it and it supports a wide variety of archive filetypes.
This way, you don’t have to know what specific command extracts a file; you just extract the <filename> and the function takes care of the rest.
Add it to enable it.
Add the plugin name to the “~/.zshrc” plugins list:
Colored Man Pages Plugin
Man pages are incredible tools for all of us. However, they are kind of boring with black and white text. To make them more interesting and more readable, enable the Colored Man Pages plugin.
This plugin adds a syntax highlighting to the man pages, making them easier to read and navigate.
Edit the Zsh configuration file and add the plugin name as follows:
The Command-Not-Found Plugin
Are you constanly annoyed by the “command not found” errors and having to manually search for which tools are missing? Worry no more.
The command-not-found plugin uses the command-not-found package for Zsh to provide the suggested packages to be installed if a command cannot be found.
Enable it by adding it to the list:
Example Usage:
The program ‘ifconfig’ can be found in the following packages:
* net-tools
Try: sudo apt install <selected package>
There you have it!
Conclusion
In this extensive tutorial, we explored a variety of Oh My Zsh plugins that can enhance your terminal productivity.
Source: linuxhint.com