Arduino Timer Library for Delaying
The timer is one of the key components of Arduino to handle time-sensitive tasks. Arduino’s timers usually use the delay() function to provide a delay or pause execution for small intervals of time. However, a special library for delaying functions is required for multitasking.
This guide will cover various Arduino timer libraries for delaying with brief descriptions. Before that let’s understand the limitation of the Arduino delay() function.
Limitations of delay()
The delay() function cannot be used if you want to perform different tasks simultaneously, as it is a blocking function. It means that whenever the delay() function is used to pause the execution of a task, it does not allow any other function to execute in the meantime. Therefore, when someone wants to stop one program while running others, delay() cannot be used.
Then what to do?
Arduino Timer Library for Delaying Function Calls
To solve this issue, you should use special libraries designed for performing delay. These libraries allow you to pause some of the functions in the program for some time and run others in the meantime. These libraries are timer libraries that do not block multitasking. They can be utilized to call functions as and when required.
How to Include Arduino Timer Library in Arduino Code
To include the timer library first we have to add the zip file by going to the Include Library section in Arduino IDE. For a detailed description of adding Arduino libraries, you can read the article on how to install Library in Arduino IDE.
Step 1
First, you will have to download the Arduino timer library.
Step 2
After downloading the timer library, open Arduino IDE and go to Sketch then Include Library, and then click on Add ZIP Library.
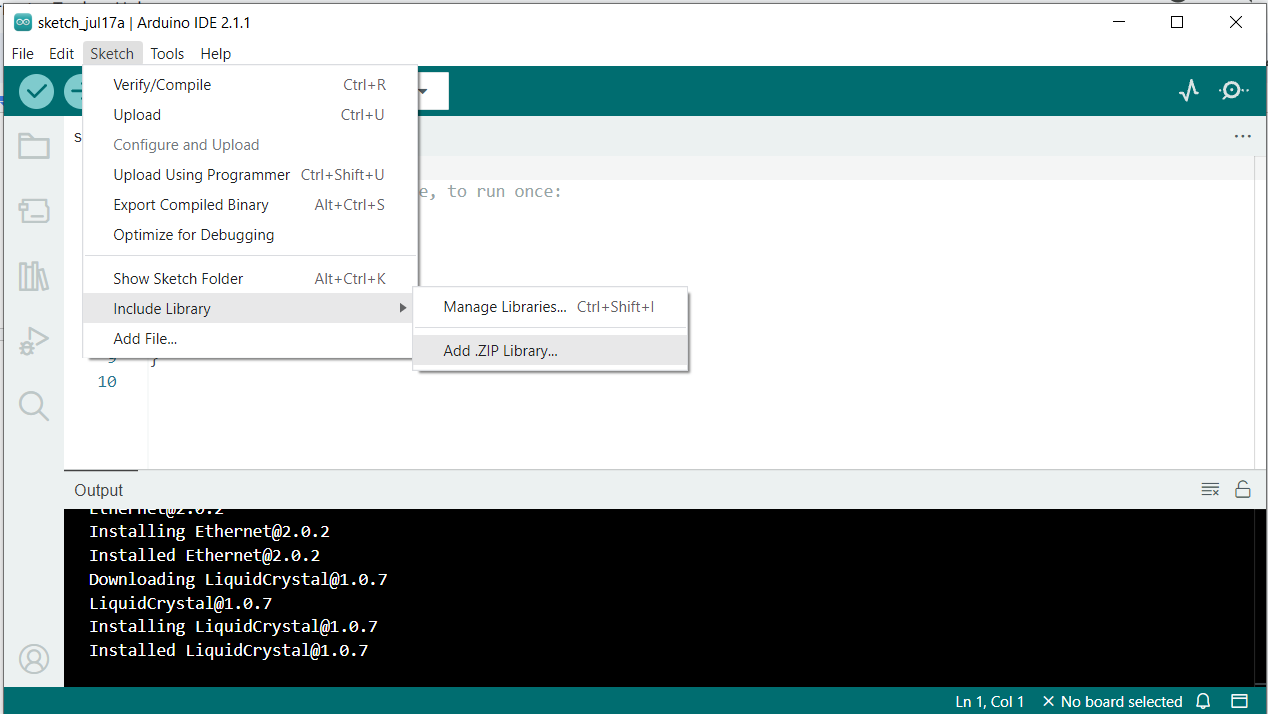
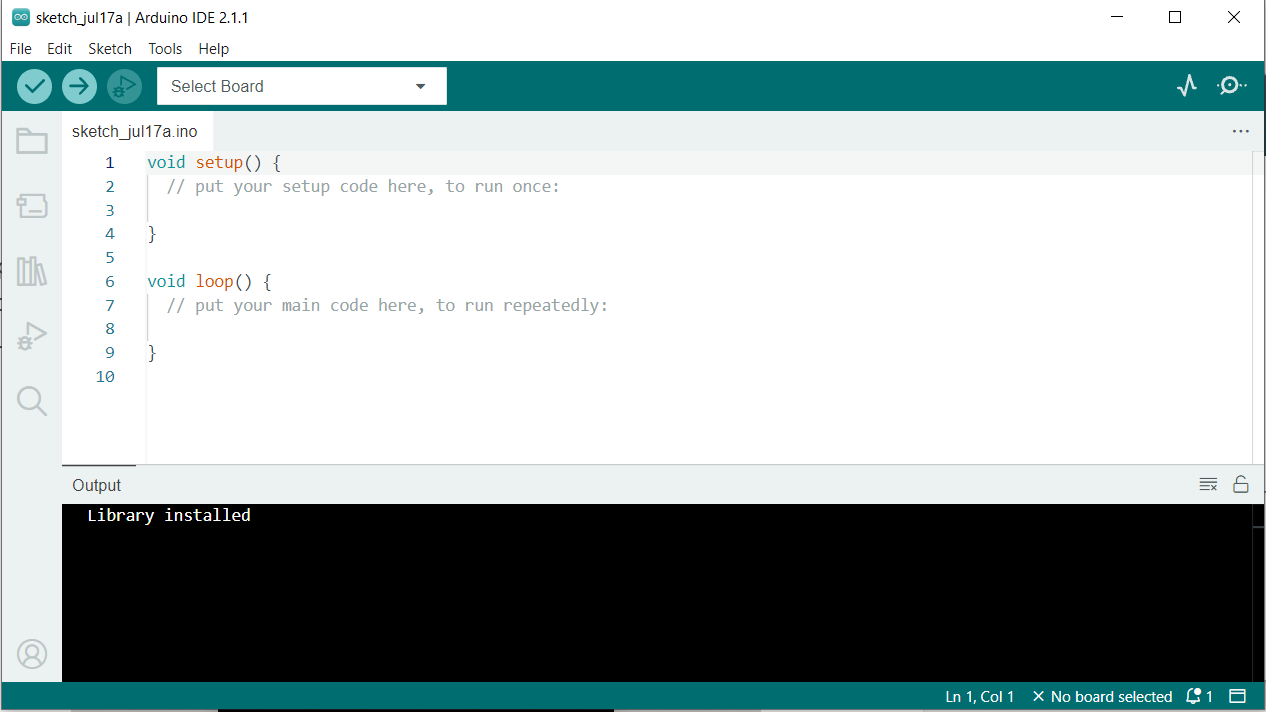
Arduino will display ‘Library Installed’ in the output.
Step 3
After you have added the ZIP library to Arduino IDE, it will appear in the drop-down list of Include Library options in Arduino IDE. From here include Timer library.
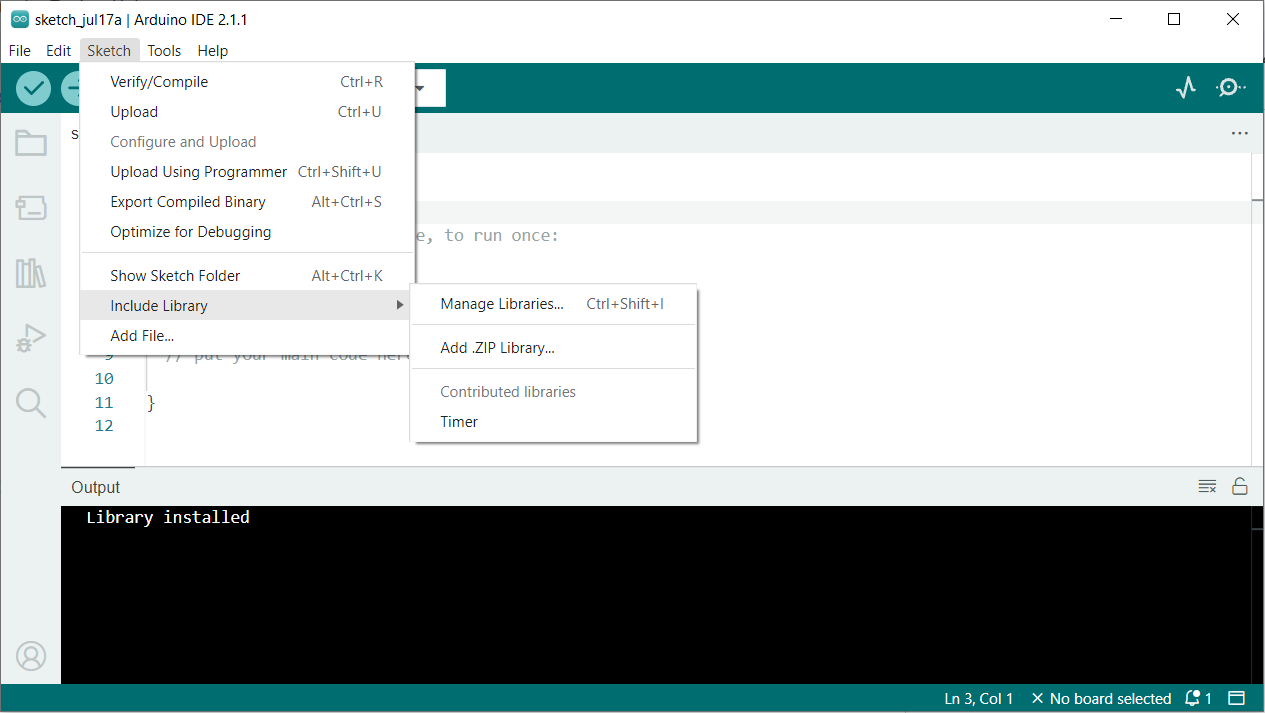
When you include the ‘Timer’ library, the preprocessor directive will appear on the sketch. Otherwise, you can follow step 4 to manually include the library.
Step 4
To include the Arduino Timer Library in the Arduino code, you need to use the #include directive along with the (.h) extension timer library name and then create a timer as shown below.
auto timer = timer_create_default();
After creating a timer, you need to make a function to call that timer. You may need to call the timer at a specified instant of time, after a short delay, or after an interval of time. Examples to call timers in such conditions are given below.
In Case You Want a Short Delay
timer.in(delay, function_to_call, argument); // or with an optional argument for function_to_call
In this case, we can use the timer.in() function to introduce a delay before calling a specific function. The delay parameter represents the time in milliseconds that we want to wait before executing the code.
After the specified delay, the function_to_call will be used. An argument can also be defined to pass to the function at the time of the call.
In Case You Want to Call the Timer at a Specific Time
This function sets up a timer to execute a specific function at a particular time. The time parameter specifies the time at which the function should be called. It could be a specific timestamp or a delay value in milliseconds. The function_to_call is the parameter of the function that is to be executed after the expiration of the timer.
timer.at(time, function_to_call, argument); // with argument
timer.at(time, function_to_call, argument) function can pass an argument to the function being called. The argument parameter will be the value that is to be passed in the function.
In Case You Want to Call Timer After an Interval of Time
In this case, you can use the timer.every() function to repeatedly call a function after a specific interval of time. The interval parameter shows time in milliseconds between executable intervals of time.
Specify the desired interval and the function_to_call will be used repeatedly after that interval. Like the previous cases, you can include an optional argument to be passed to the function when it is called.
timer.every(interval, function_to_call, argument); // Write your interval here
You can learn further detail about this method of using a timer library for delaying function calls through the link Arduino Timer Library For Delaying Functions.
Some Other Libraries for Delay in Arduino
The link given below will take you to Arduino’s timer libraries, where you can install the timer libraries for delaying function calls.
Timer Library by Michael Contreras
There is also an author who has provided his own created non-blocking Arduino timer library for delaying function calls. He has used inbuilt functions of Arduino like millis() and micros() to perform delaying functions without blocking. A link to his library is given below:
MichaelUray Arduino Timer Library
Conclusion
Although the delay() function is already present in Arduino, it cannot be used to perform multiple tasks simultaneously. To execute multiple tasks at the same time, non-blocking timer libraries have been created by the Arduino community that can be used as and when required.
Source: linuxhint.com