Arduino Serial.read() and Serial.write()
Arduino Serial.read()
In Arduino programming the function Serial.read() reads the incoming serial data on the serial port of arduino. The data is stored using an int data type. Serial.read() function reads the data in bytes and returns a negative number -1 when no data is available at the serial port of Arduino. Read data is stored in the form of bytes and 1 byte = 8 bits.
When data is input to an Arduino board the UART will assemble each of 8 bits into a single byte and store that data bytes inside the Arduino serial buffer. Upto 64 bytes of data can be stored inside the serial receive buffer.
Syntax
Syntax used in Arduino programming for Serial.read() is:
Parameters
Serial: It signifies the port of Arduino. At least one serial port is present in all Arduino boards. Check the data sheet for the respective Arduino board to get more info.
Return Value
Serial.read() functions return the first byte of received serial data. In case if no data is received at serial port function will return -1. Returned data type is int.
Note: Serial.read() will not return any char if the data is not there it will simply return -1.
Example Code
Let’s look at an example for better understanding:
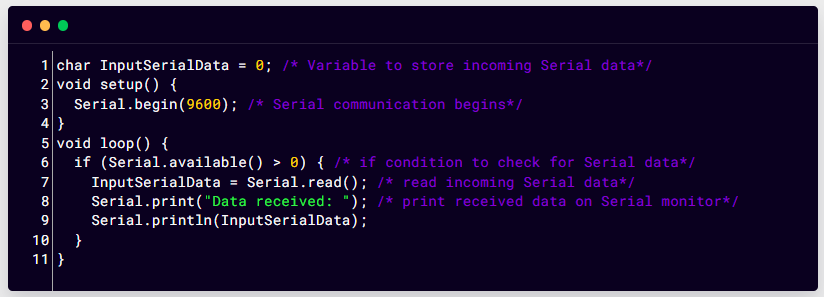
void setup() {
Serial.begin(9600); /* Serial communication begins*/
}
void loop() {
if (Serial.available() > 0) { /* if condition to check for Serial data*/
InputSerialData = Serial.read(); /* read incoming Serial data*/
Serial.print("Data received: "); /* print received data on Serial monitor*/
Serial.println(InputSerialData);
}
}
In the above code first we have initialized a variable to store serial data then in loop() section, the program will check for the serial data at serial port if the data is available it will be printed on serial monitor which can be seen on output terminal.
Output
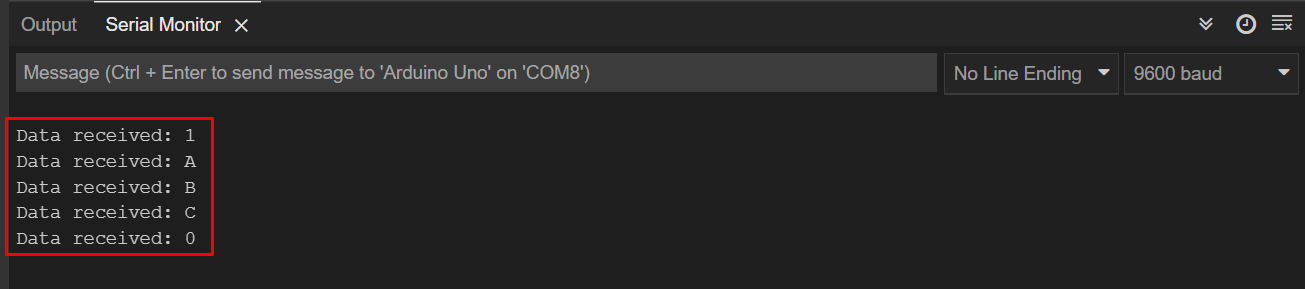
The output can be seen on the output terminal. Here we have sent different characters to the Arduino serial port:
Arduino Serial.write()
Serial.write() function writes the binary data to the Arduino serial port. Data is transferred in a series of bytes. In case if we want to transfer or write the digits of numbers which are represented by characters, we will use Serial.print() instead of Serial.write() function.
Syntax
Following is the syntax followed while writing data serially.
The below syntax represents when we have to write a value serially:
When we need to send a string following syntax will be followed:
To send specific number of bytes from a string below syntax will be followed:
Parameters
Following is the list of parameters Serial.write() function takes:
Serial: Serial port of Arduino board.
val: A value that will be set as a single byte.
str: When we send a string serially as a series of bytes.
buf: To send an array as a series of bytes.
len: Specific number of bytes sent from array serially.
Return Value
It returns the number of bytes written and the returned data type is size_t.
Example Code
Following example shows the working of Serial.write() function:
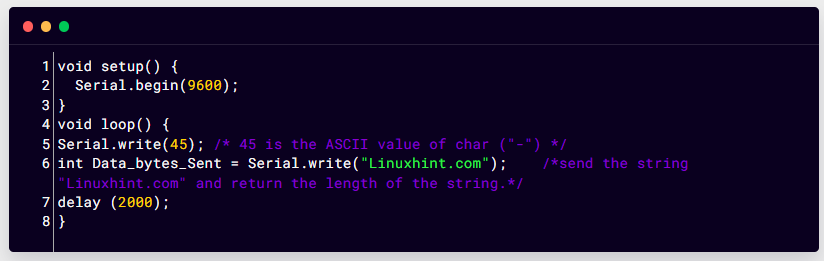
Serial.begin(9600);
}
void loop() {
Serial.write(45); /* 45 is the ASCII value of char ("-") */
int Data_bytes_Sent = Serial.write("Linuxhint.com"); /*send the string "Linuxhint.com" and return string length*/
delay (2000);
}
Here in this code, we initialized serial communication so we can transmit data using serial communication. First using Serial.write() and ASCII value of character dash “-” will be printed every time. Next a string will be serially sent using the Serial.write() function. A delay is given to read output easily:
Output
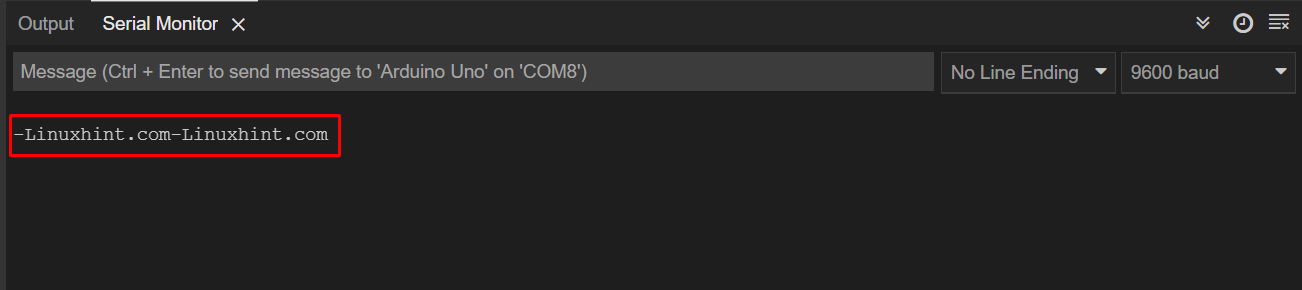
String “Linuxhint.com” is serially printed using the Serial.write() function. Serial monitor displays output.
Difference between Arduino Serial.write() and Serial.print()
Serial.write() function is simple and fast. It is made to deal in binary meaning one byte at a time. The data written in binary is sent as a byte or series of bytes.
Serial.print() function on the other hand is more versatile, the data is printed on serial monitor as human readable ASCII text. First the input data is converted from ASCII to binary. It can also convert data to BIN, HEX, OCT, and DEC but we have to specify it in the second argument of function.
Serial.print() function can take many forms such as:
- ASCII characters are used to print each digit of a number.
- Floats printed as ASCII digits, by default up to two decimal places.
- Bytes sent in the form of single characters.
- Characters and strings are sent without any changes.
Conclusion
The Arduino board uses serial communication to transmit and receive data with its peripherals. Arduino has a list of Serial functions available that assist Arduino in serial communication. Among them Serial.read() and Serial.write() are two functions, Serial.read() reads data available at serial receive buffer and Serial.write() writes data to Arduino serial port as a single byte or series of bytes. This write-up will help to learn more about them.
Source: linuxhint.com