APT-GET in Ubuntu
Apt-get source and Apt-get build-dep
Apt-get source <package>
When you are dealing with open-source packages or source code, programmers typically want to study the source code and/or fix bugs to the source code. This is where source comes in. Source is used to grab the source package.
In order for this to work, point the deb-src entry in /etc/apt/sources.list at unstable (it should also be uncommented). And run an update once the sources.list file has been altered.
nano sources.list
Then, uncomment the deb-src lines.
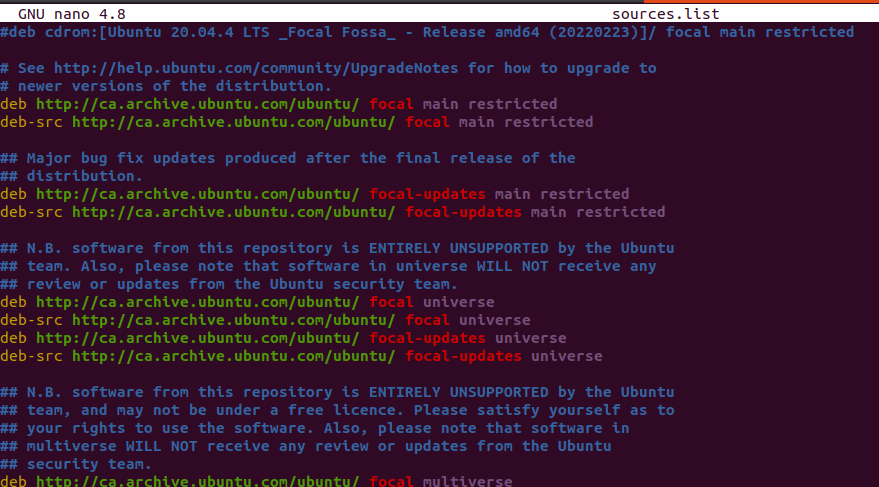
Then, perform an update:
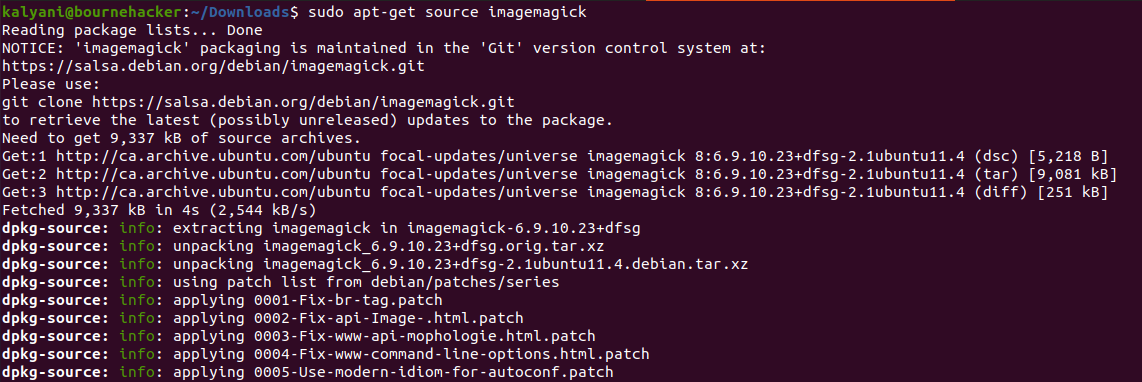
Download the source package:
cd Downloads
mkdir imagemagick_source
cd imagemagick_source
sudo apt-get source imagemagick
This is what is found in the imagemagick_source folder:

The latter is used to install all the dependencies for a particular package that will permit it to be built. In other words, dependencies are libraries/programs that are required to compile the package. And the latter will get the dependencies for you.
Sudo apt-get install <package>
This is the command that most people are forced to use and therefore the most well-known and well-used. It downloads and installs any given package of your choice. So, let us take a look at what it does:
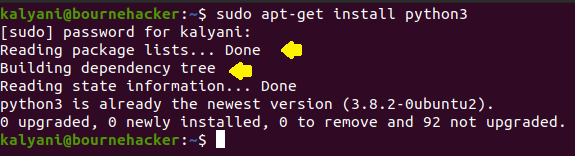
In this case, I chose to install a package that I already have on my system. But what you have to note are the first two lines.
“Reading package lists… Done” – went through the software repository and checked all the packages that are available.
“Building dependency tree” – here, apt-get is building the other required packages in order to run the package of interest.
APT will retrieve all the requirements and install them too. /etc/apt/sources.list is utilized to pinpoint the packages. In order to install a specific version of a package, you can write:
If on the other hand, you just wanted to download the package but not install it, then you can do so by adding the d switch. The latter will download the file and place it in /var/cache/apt/archives.

You can simulate an install also using the s switch (-s, –simulate, –just-print, –dry-run, –recon, –no-act)
The latter does not change the system in any way, shape, or form but rather simulates an install. If and when a non-root user simulates an install, it might look distorted because of the lack of access to a certain configurations.
The next one we are going to look at is the fix-broken (-f, –fix-broken):
In this case, it will attempt to fix broken dependencies.
Sudo apt-get clean
This command – clean – is used to clean out the local repository of packages. It removes everything from /var/cache/apt/archives which basically frees up some space on the system.
Autoclean, on the other hand, is used to remove useless files.
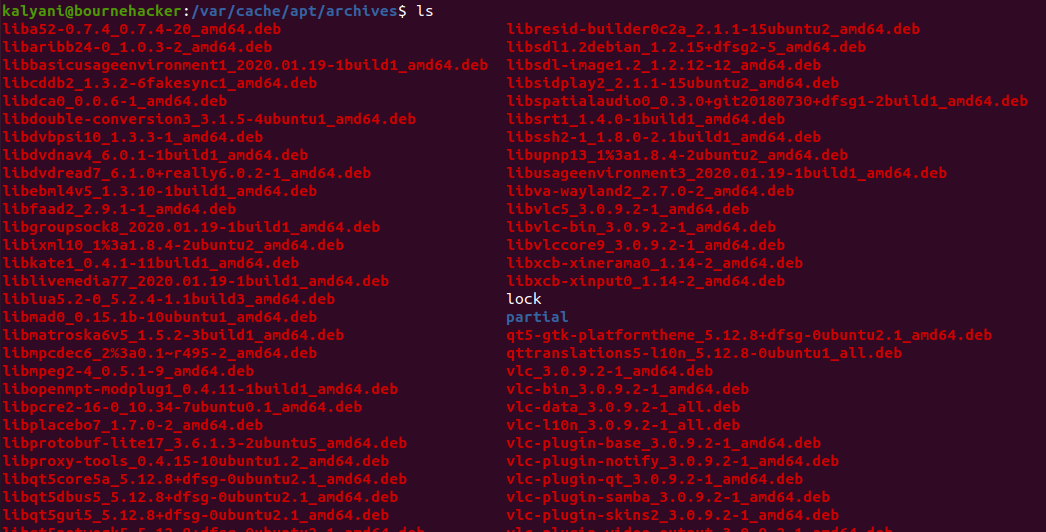
Suppose that I download VLC (and only download it) using the command sudo apt-get -d install vlc. This is what /var/cache/apt/archives looks like:
Now let us use autoclean:
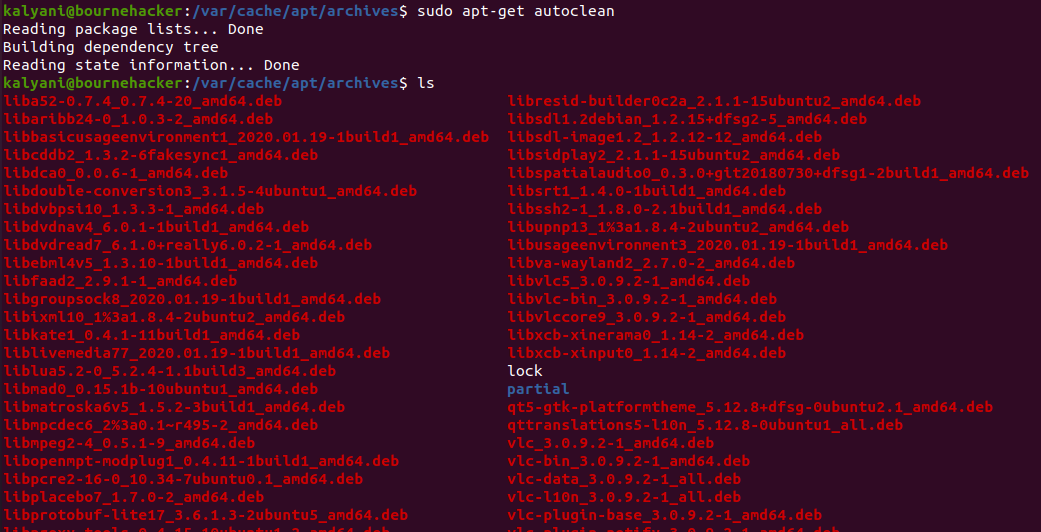
And now let us clean:

By now, it is assumed that you figured what clean does and what it does not do.
Sudo apt-get –purge remove <package>
Here, to remove a package using APT, you can use either purge or remove or both. Remove is used to remove the package but NOT the configuration files. Purge will remove all configuration files as well.
Sudo apt-get autoremove <package>
Whenever you install a particular package, all of its dependencies are also automatically installed. When you remove the package, on the other hand, the package is removed but the dependencies remain. This is where apt-get autoremove comes in. Autoremove will remove not only the installed package but also the dependencies that were installed.

Sudo apt-get update
As the term states, this command is used to update. Now, what does it update and what does the command do? In this case, the /etc/apt/sources.list file is consulted and the database of packages that are available to the user is updated. If the sources.list file is ever changed, you certainly have to run this command.
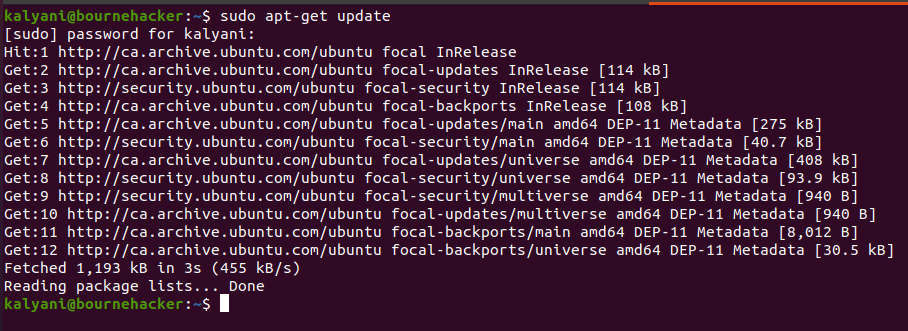
So here, in the previous image, I ran the update command and we can see that it chucks out a few lines. These lines say “Hit”, “Get”, or “Ign”.
Hit: No changes in package version
Get: new version is available and APT is getting it for you
Ign: Ignore the package
APT update will not download and install all the newly available packages. But you can type the following to see which ones have a newly available version:
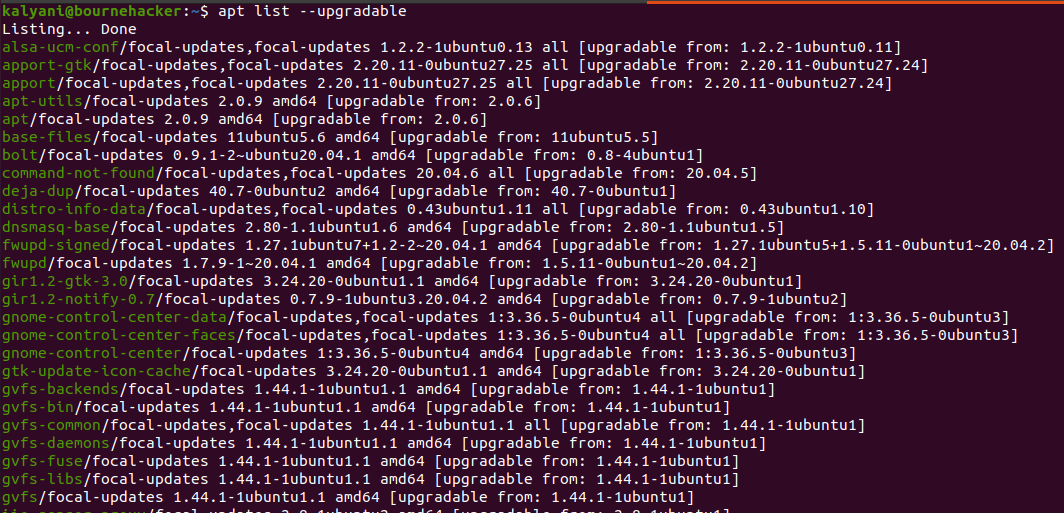
Here, as you can see, it will display the current version (on your system) you have and the new version available.
Sudo apt-get upgrade
The next command which is similar to the update command is the upgrade command. The latter command (upgrade) is used to upgrade or install newer versions of all the various packages that are install already on the system. It gets the newest versions from the sources that are in the etc/apt/sources.list file. Packages already installed on a system are NEVER removed and new not currently installed packages are never installed. But rather the “upgrade” is for ALL the packages that are currently installed on the system. If and when a package cannot be upgraded without altering the status of another package is left UN-UPGRADED (not upgraded). Typically, the upgrade command is preceeded by the update command. This is to ensure that APT knows that there are in fact new packages out there.
Sudo apt-get dist-upgrade
This particular command is used to update the system to a new release. In this case, some of the packages may be removed. The distinction between the upgrade and the dist-upgrade commands are that in the dist-upgrade, there is removal of certain packages. But for the upgrade, there is no removal of the packages.
Sudo apt-get download <package>
This is similar to the -d install. Apt-get -d install will download the file into the /var/cache/apt/archives while apt-get download will download the deb file into the current working directory. Apt-get download will download the deb file but not the dependencies. Further, apt-get download will not install the package.
Sudo apt-get check <package>
Sudo apt-get check is used to update the package cache as well as checks for broken dependencies.
For more information and more options, please type:
Conclusion
The APT-GET commands are very powerful and yet very basic too. In this tutorial, we learned about how to use the APT-GET commands: source, build-dep, install, clean, autoclean, purge, remove, autoremove, update, upgrade, dist-upgrade, download, and check were covered in this tutorial.
Source: linuxhint.com