Advanced Linux Networks Command
After reading this tutorial and reproducing all examples as exercises, the user will dominate the most relevant networking commands under Linux. These commands allow the user to diagnose the networking problems, transfer files through different methods, scanning and opening ports, and more.
The following content is valid for all Linux distributions. All examples described contain screenshots, making it easy for all readers to understand how the commands are applied and their outputs or results:
- Transferring Files with SFTP (Secure File Transfer Protocol)
- Transferring Files Using SCP (Secure Copy Protocol)
- The “rsync” Command
- The “whois” Command
- The “nslookup” Command
- The “traceroute” Command
- Opening Ports and Transferring Files with Netcat
- Basic and Advanced Nmap Commands
- Reverse Proxy
- Network Monitoring
- Setup VPN
- UFW (Uncomplicated Firewall)
The SFTP Protocol and How It Works
Historically, a protocol called FTP was the main method to share files, by uploading and downloading them from FTP servers. FTP servers store the files and depending on the assigned permissions, users can read and write in the specified directories.
For security reasons, FTP is currently unused and was replaced with two other protocols: SFTP (Secure File Transference Protocol) and SCP (Secure Copy Protocol). Both of them are explained in this tutorial.
SFTP (Secure File Transference Protocol) is the replacement of the FTP protocol, which suffered important vulnerabilities.
With this protocol, you can upload, download, and remove files and directories both through single commands or interactive interface. This section covers both methods.
Before getting started with SFTP, a good practice for small networks is to replace the password authentication method with key authentication.
The security of the SFTP protocol is provided by the SSH (Secure Shell) protocol. To change the authentication method, the user needs to edit the /etc/ssh/sshd_config file on the SFTP server.
The server is the device which stores the files to which the other devices upload files or from which they download them.
To enable the key authentication on the server computer, open the /etc/ssh/sshd_config file with privileges and find the line containing PubkeyAuthentication no. Replace it with PubkeyAuthentication yes (Replace the “no” with “yes”).
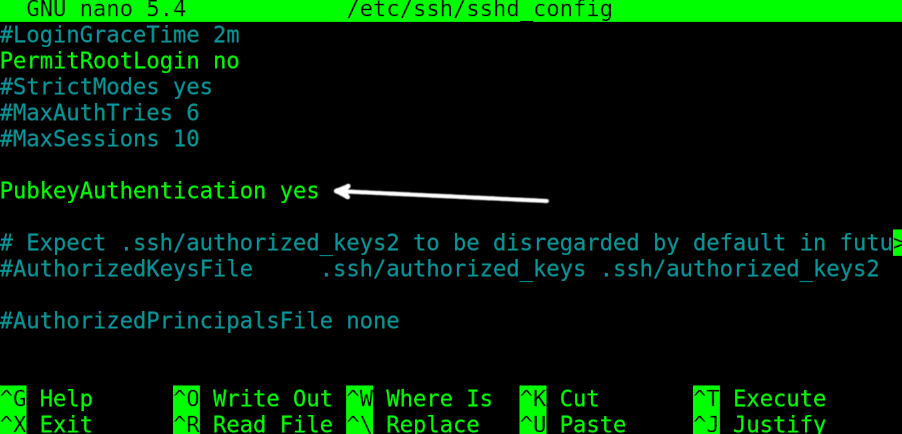
Restart the ssh service to apply the changes using systemctl as shown in the following:

That’s all that the user needs to do on the server side.
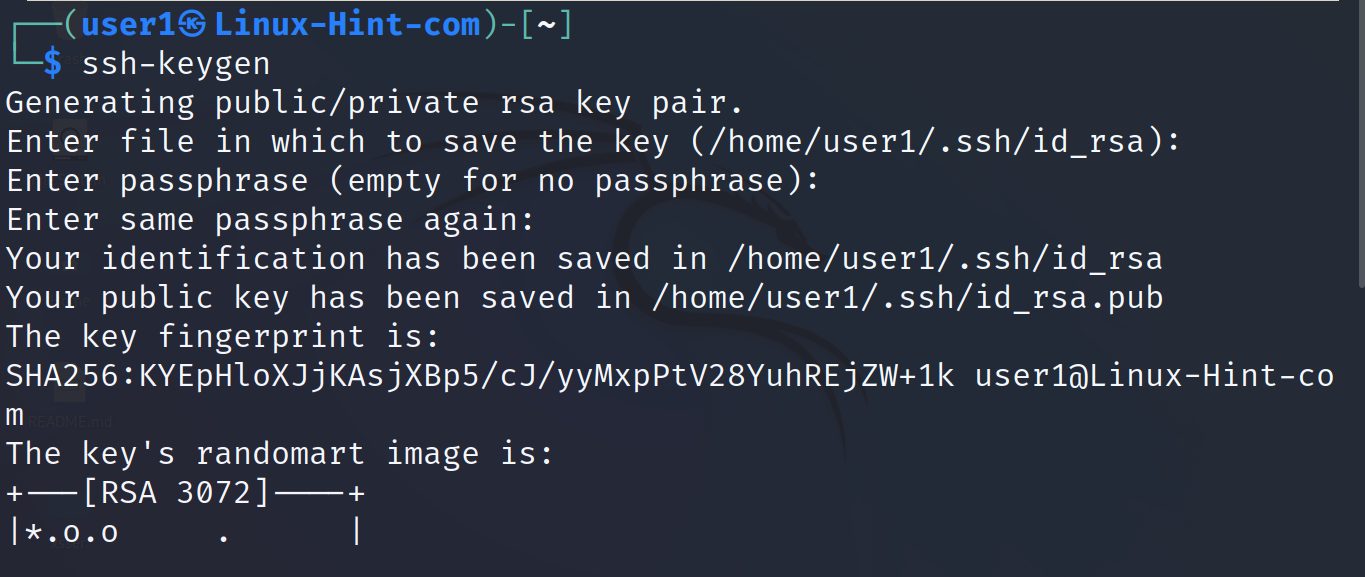
On the client side, the computer which accesses the server to upload or download the files, the user needs to generate the key pair by executing the following command.
When asked, the user can choose to type a passphrase which will be requested when logging in an optional extra security measure. If the user doesn’t want it, he can just just press ENTER when requested. In my case, I typed it.
After running the previous command, ssh-keygen, the key needs to be copied to the server.
The syntax to send the key to the server is the following, where <User> must be replaced with the existing user in the server and <IP> must be replaced with the server IP.
In my case, I run it as shown in the following. When requested, the reader must type the password of the user on the server that he is logging in as folows:
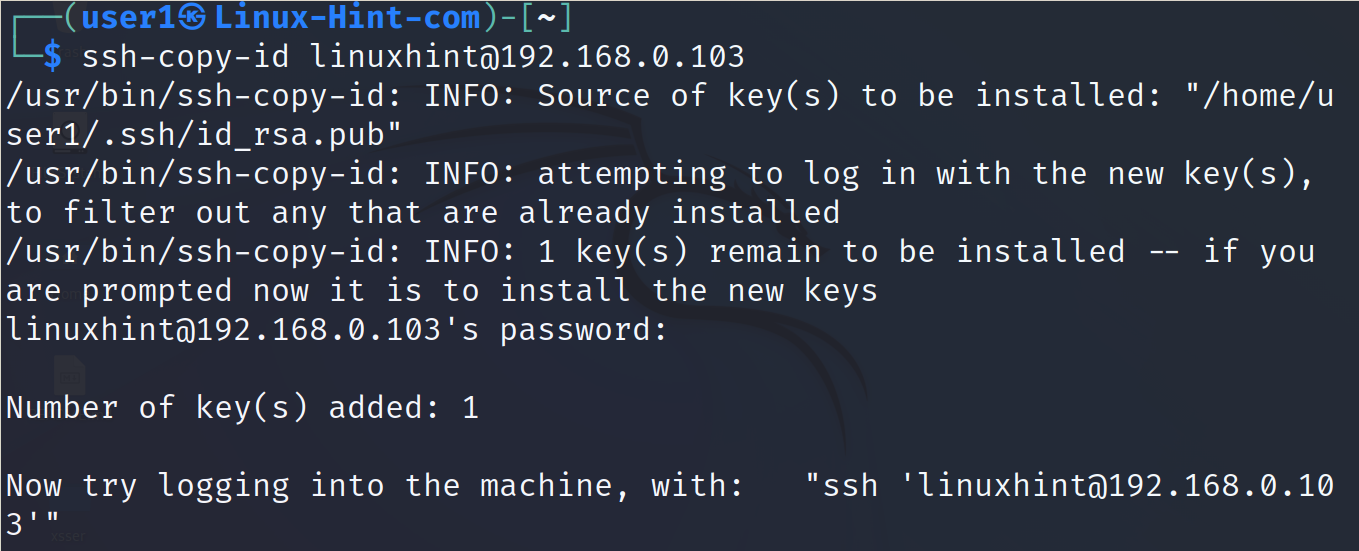
As you can see in the previous screenshot, the key was successfully copied.
The first examples of SFTP explain the interactive mode.
To connect to the SFTP server, use the following syntax where <User> must be replaced with the remote user and <ServerIP> with the SFTP server IP address.
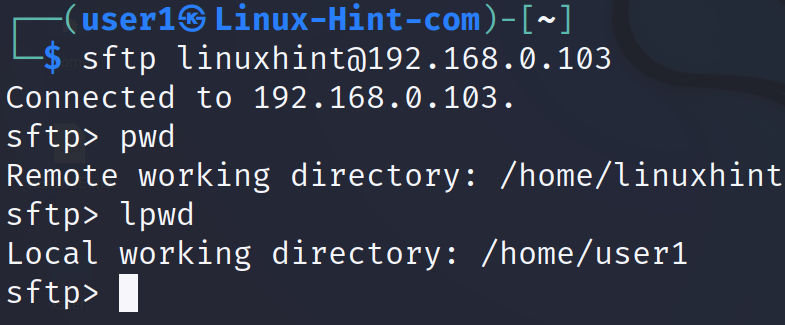
In my case, I run the command as shown in the following:
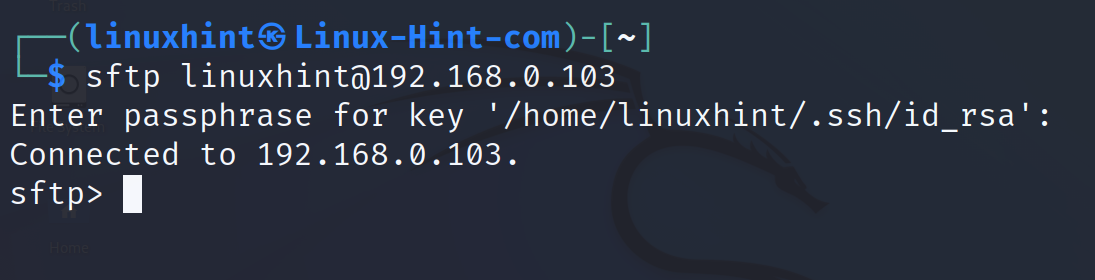
As you can see, the login was successful and the user gets a sftp> command prompt where the user can execute the commands.
The sftp service allows the user to execute different operations once the user is logged in.
The user can show and move to allowed directories and subdirectories, both at local and remote level.
Commands like cd (Change Directory), ls (List) or pwd (Print Working Directory) can be executed and will affect the server. They interact with the server or print information on it.
The cd command can be used to move between server remote directories. The ls command shows the remote files on the server. And the pwd command shows the current remote working directory in the server.
Additionally, if the user executes lcd, the command shows the current local working directory (on the client). The lls command shows the files and directories in the current local working directory on the client side. If the lpwd command is executed, it prints the current local working directory on the client. Just add an l (of “local”) and it is executed at the local level.
In the following example, the user connects to the SFTP server and then runs the pwd command which returns the current remote working directory (on the server).
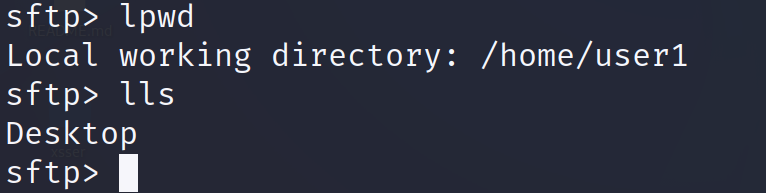
Then, the user executes the lpwd command which returns the current local working directory (on client side).
If the user executes lls, it shows the files and directories in the current local working directory. In the following screenshot, the command shows in the user1 home directory that there is only a subdirectory called Desktop.
If, while being logged into the server, the user wants to move to another local directory, he can use the lcd command as shown in the following. As you can see in the following lpwd execution, the working directory was changed from /home/user1 to /home/user1/Desktop.

To move to another directory remotely in the server (not locally), use the cd command as normal.

The syntax to download the files after being logged into the server is the following:
Or
In the following example, I download a file named “unetbottin-linux64-702.bin” using get.

As you can see in the output, the file was properly downloaded.
To download the directories instead of files, add the -r flag as shown in the following:
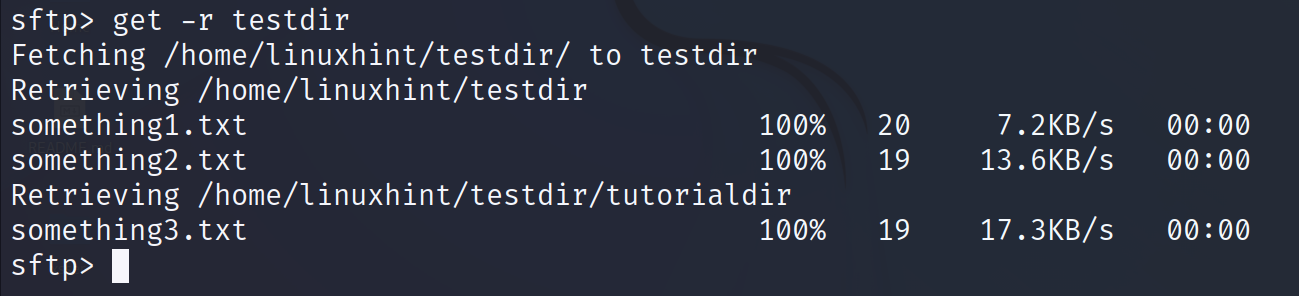
As shown in the previous figure, the output shows the progress of each downloaded file.
To upload the files to the server, use the put command followed by the file or the path to the file to upload.
To upload directories, add the -r flag.

To logout from the server, use the exit command.
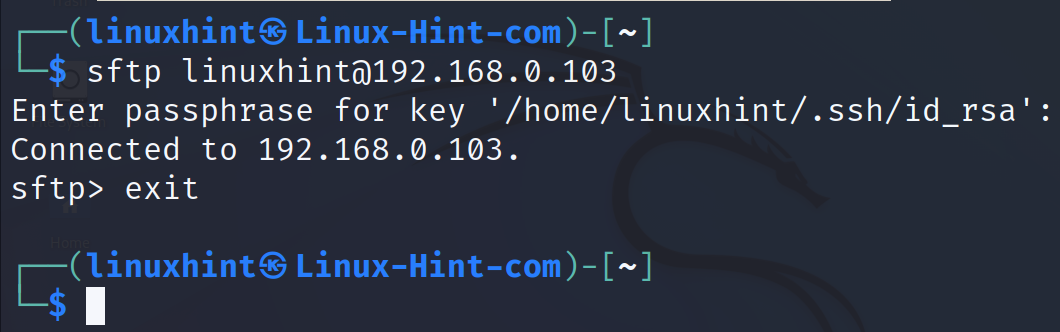
These are the most used commands after you login into the server.
The following examples describe the sftp command usage without previous login. The login process is part of the command itself.
These commands allow you to upload or download the files directly from the command line, without accessing the interactive interface that is previously described.
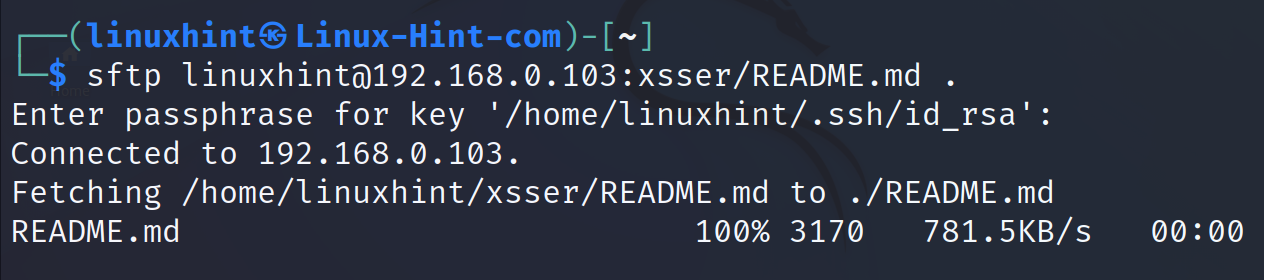
The syntax to download a file with a single command using SFTP is the following where <User> is the remote user existing on the server, <Remote/Path/To/File> after the colon is the path to the file to download and <LocalDirectory> is the path to the directory where the user wants to save the file.
In the following example, the user downloads the file README.md located in the remote xsser subdirectory to the current local working directory represented by a dot.
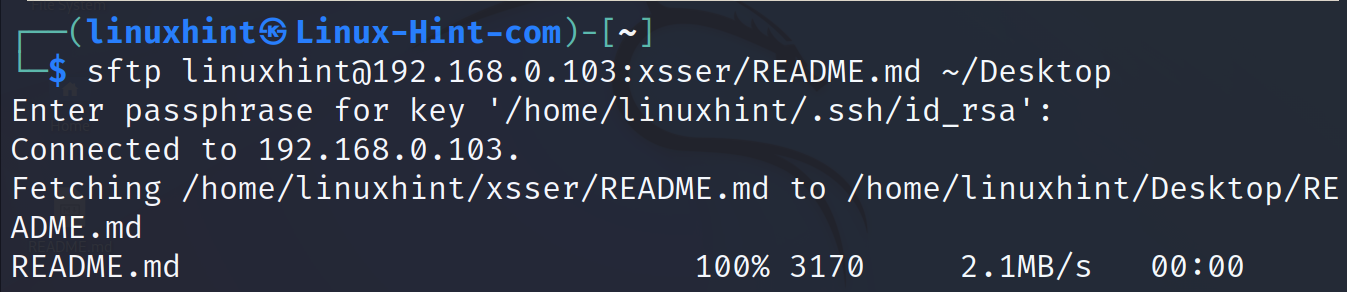
In the following example, the same file is downloaded to the local Desktop directory located under the home directory.
To download the directories, add the -r flag. In the following example, the entire xsser directory is downloaded to the Desktop local directory.
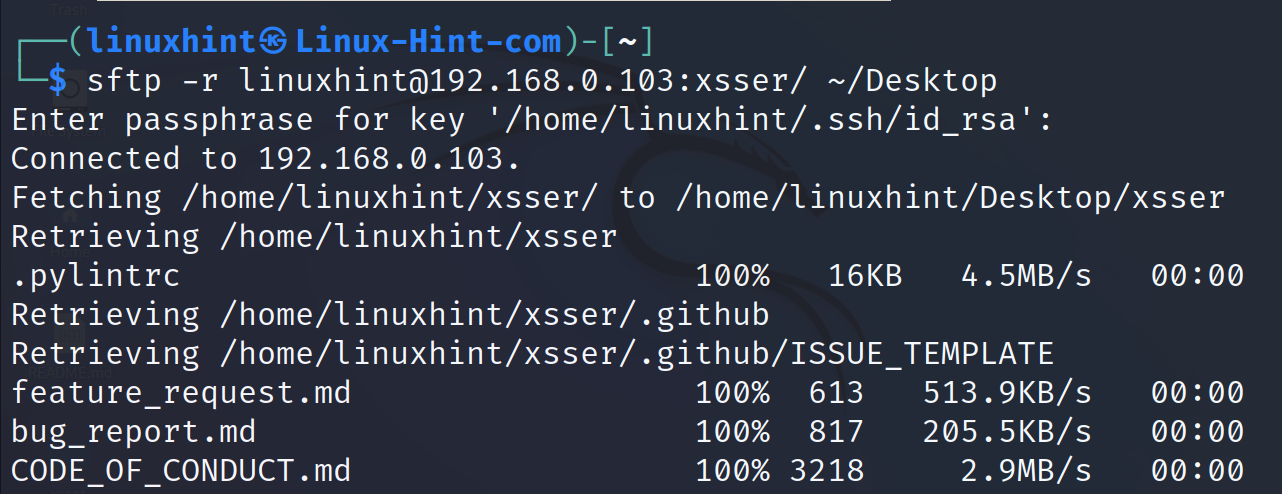
As you can see, the directory was recursively downloaded with all its content.
Transferring Files Using SCP
SCP (Secure Copy Protocol) is another useful command to transfer files.
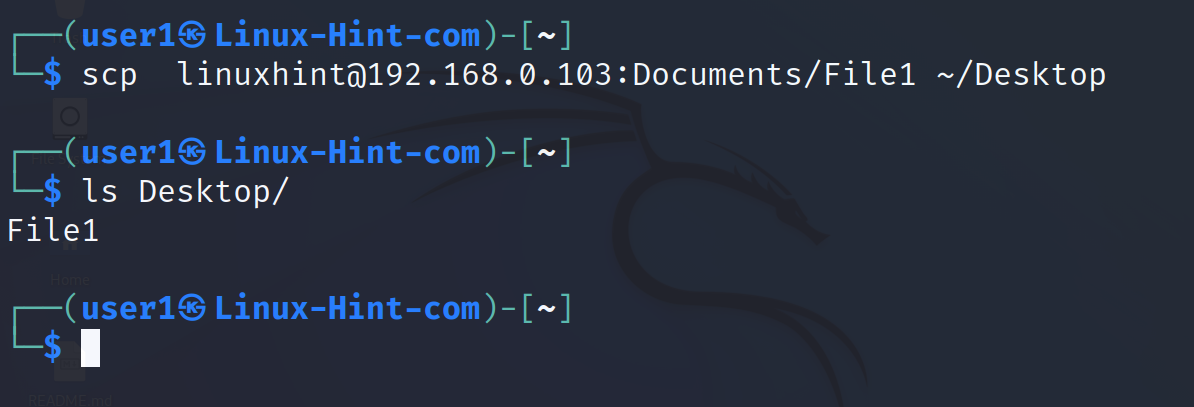
The syntax to download a file using SCP is the following: where <RemoteUser> is the existing user on the server, <ServerIP> is the SCP server from where the user wants to download the file, <Path/To/File> is the file or file location, and <LocalDirectory> is the local directory on the client side where the user wants to save the downloaded file.
In the following example, the user downloads a file named File1 located under the server subdirectory Documents. The user saves the file in the local Desktop subdirectory under his home.
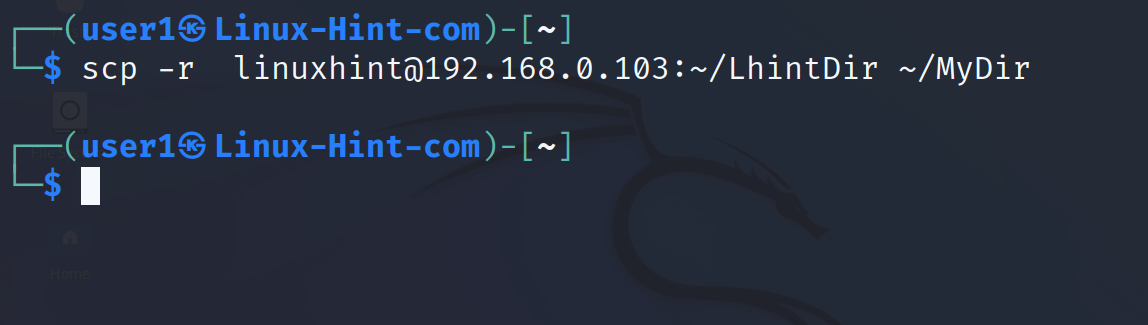
Downloading the directories requires almost the same syntax, except for the required -r flag.
In the following example, the -r flag is implemented to download a directory named LhintDir and save it under the local directory MyDir.
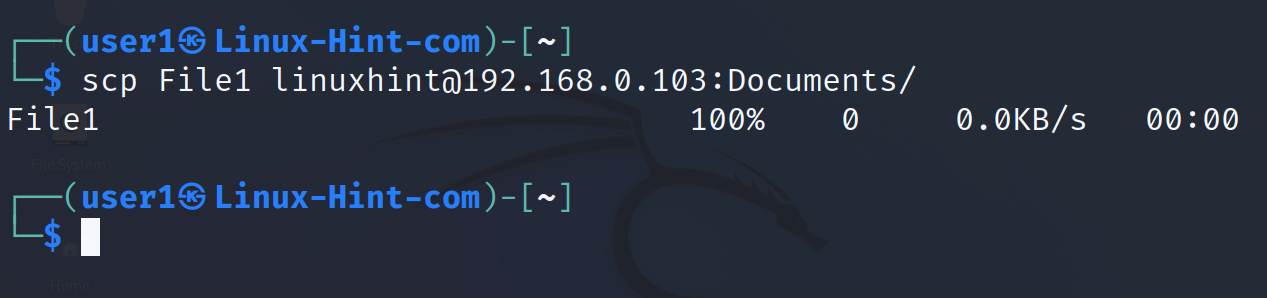
To upload a file the syntax is the following: where <FIletoUpload> is the local file or path to it that you want to upload to the server. <RemoteDirectory> is the server directory where the file is uploaded.
In the next example, the user uploads a file named File1 to the remote subdirectory Documents located under the remote user’s home.
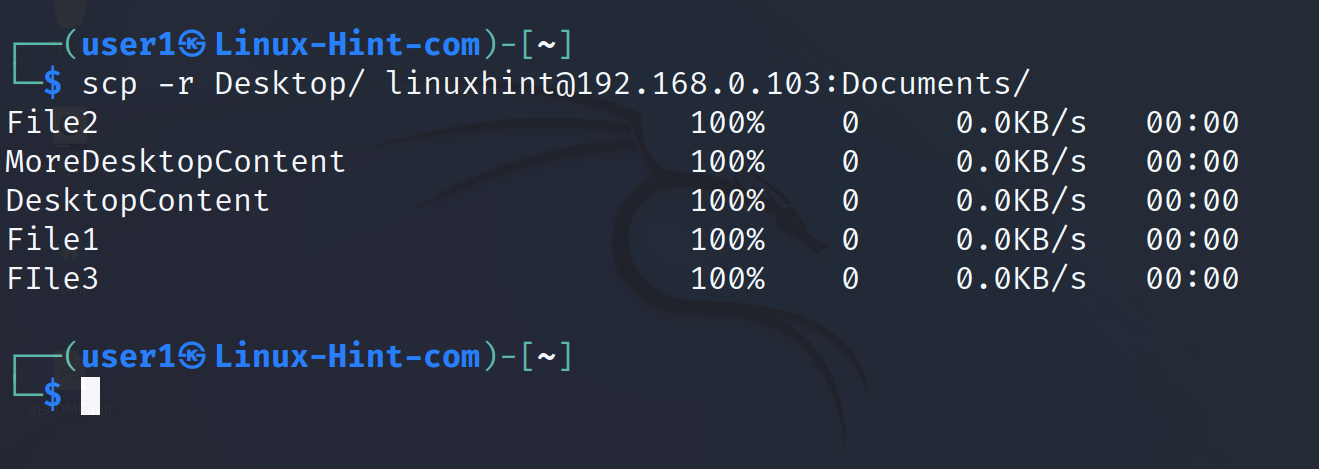
To upload the directories, use the same syntax except for the required -r flag.
In the next example, the Desktop directory is uploaded to the remote Documents subdirectory.
The scp command also allows the users to transfer the files between two remote computers.
The user must not necessarily download or upload the files from his computer. He can transfer the files from two computers which he has no physical access to and without previous ssh login.
The syntax is the following: where the user makes a remote host with IP1 to transfer the file <PathToFile> to a second remote host (IP2) directory (Path/Dir).
In the following example, the remote computer with IP 10.0.0.2 sends the ~/Documents/file.txt to the computer with IP 10.0.0.23. The file is stored in the subdirectory Downloads on the second remote computer.

SFTP and SCP are the most popular methods to transfer the files between Linux systems. The next chapter focuses on cloning directories or file systems remotely.
The “rsync” Command
The synchronization can be done between two directories of the same computer, or between two different computers.
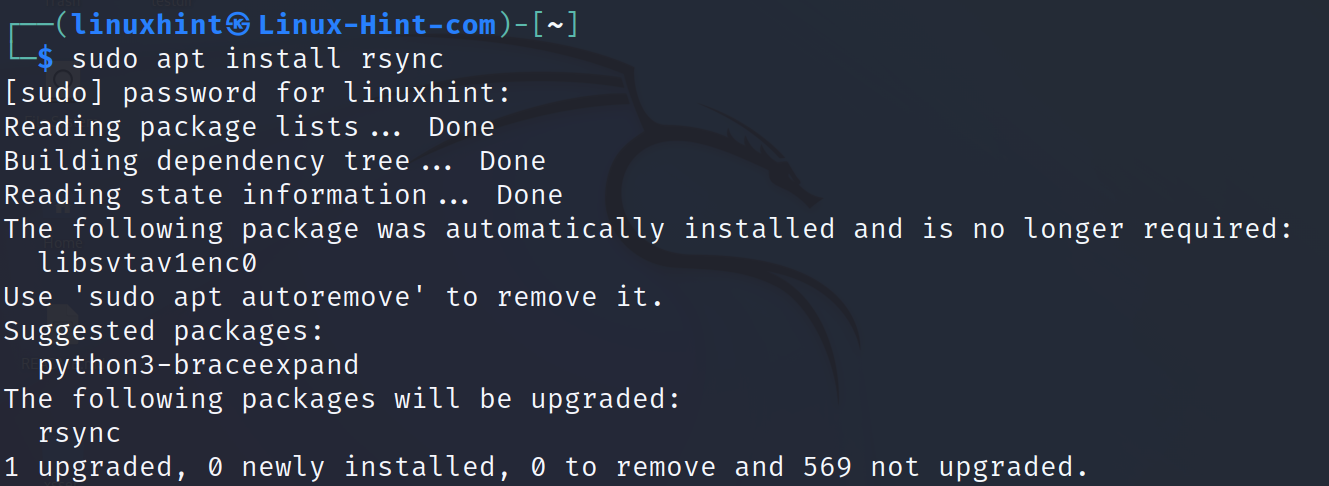
Rsync is widely used to backup servers, keeping backups up to date by applying all changes done in the source file or directory to the destination file or directory. The backups are incremental, which means that once the backup is created, when changes are made on the source, only the changes are updated without the need to transfer the entire backup again.
To install Rsync on Debian based Linux distributions, use the apt packages manager as shown in the following:
The syntax to synchronize, backup, or clone a remote directory to a local one is the following: where -a instructs rsync to include the main directory (otherwise, it only copies the content, skipping the main directory).
The rest of the fields have the same syntax as sftp and scp which are explained in the first and second chapters of this document.
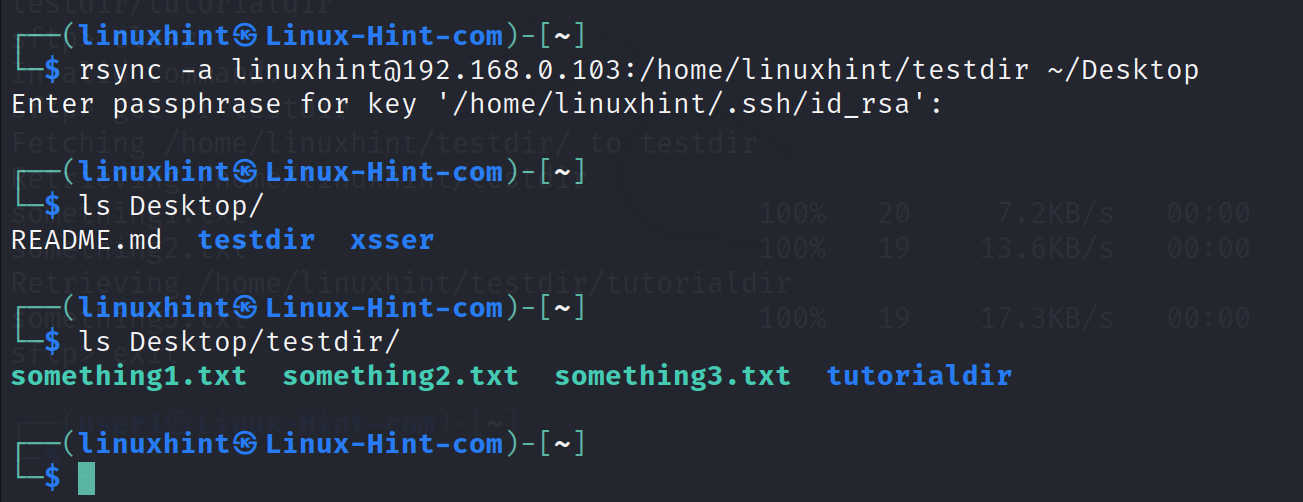
As you can see in the previous screenshot, the directory testdir was successfully copied from the remote computer home directory to the local Desktop directory.
The following syntax is used to send a file to a remote directory. Where -a includes the main directory, -v instructs verbosity, and -z instructs compression to increase the transference speed.
The next example shows the inverse to the previous one. The local directory testdir is transferred to the remote ~/Downloads directory.

That’s how you can copy the directories or files from or to another computer.
The “whois” Command
The whois command allows the users to learn information on a domain name or IP address proprietary, registrar, registration, and expiration dates, among others.
This command is not installed by default on some Linux distributions. On Debian based distributions, the user can install it using the apt packages manager as shown in the following:

To install whois on RedHat based distributions, use the commands:
Or:
Once whois is installed, run it followed by a domain name.
By executing the following command, the user can learn an information on the domain name linuxhint.com.
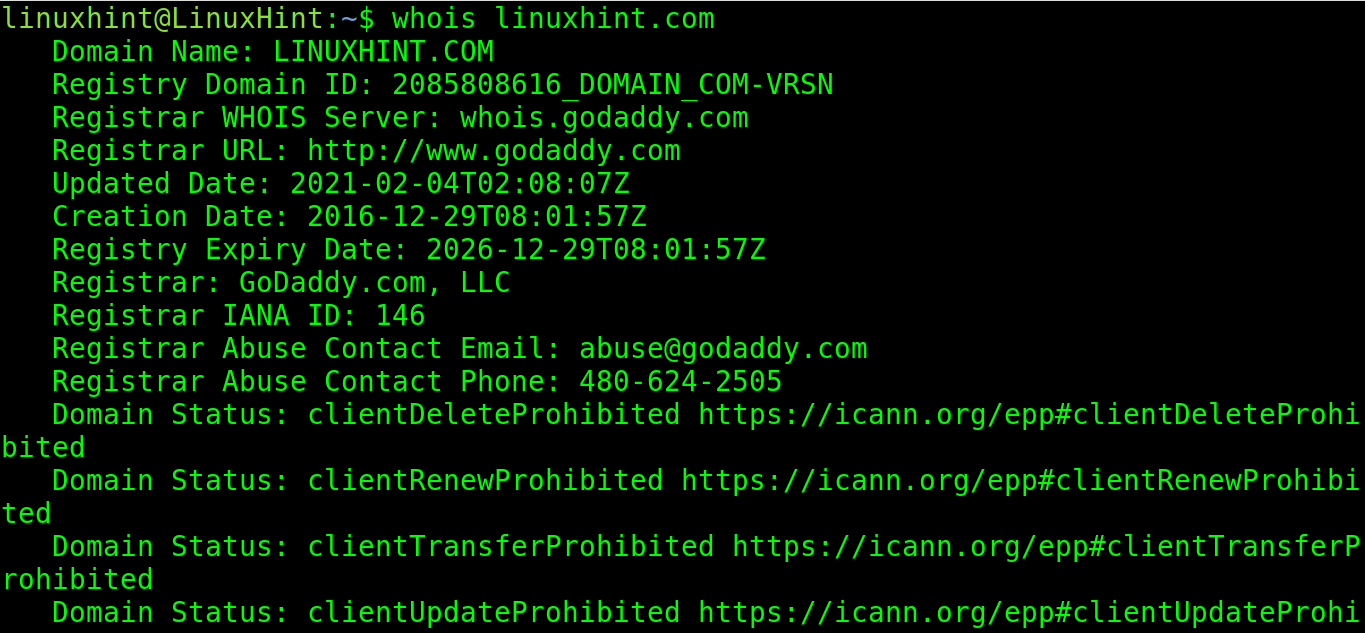
As you can see, all we learned in this case is the domain register (Godaddy) and the creation and expiration dates.
The returned information is not very informative because the domain name has a privacy protection proxy.
Let’s try with a website without privacy protection:
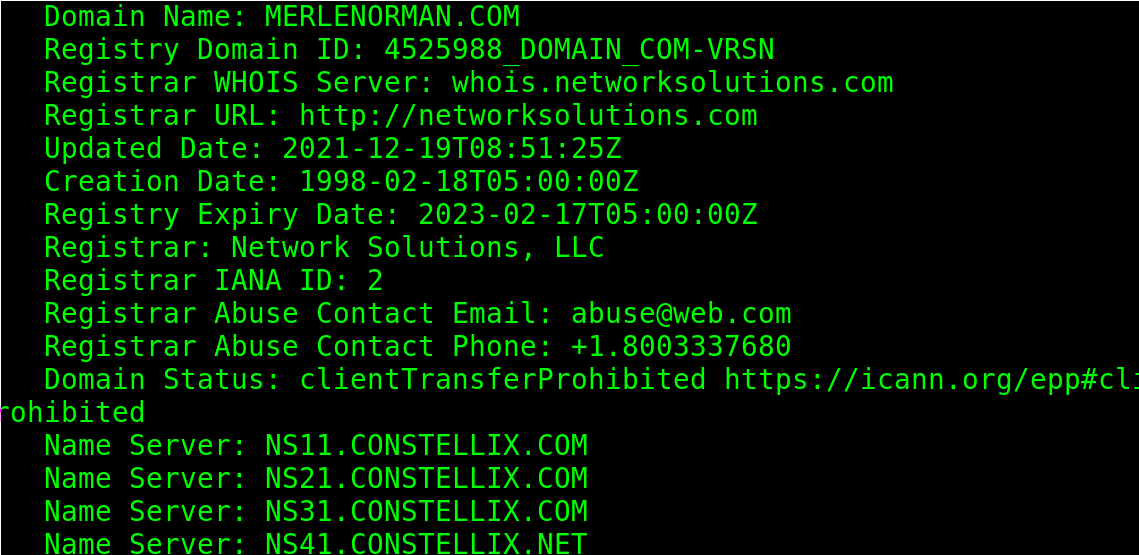
As you can see, it first throws an information on the domain registrar, dates, city, etc.
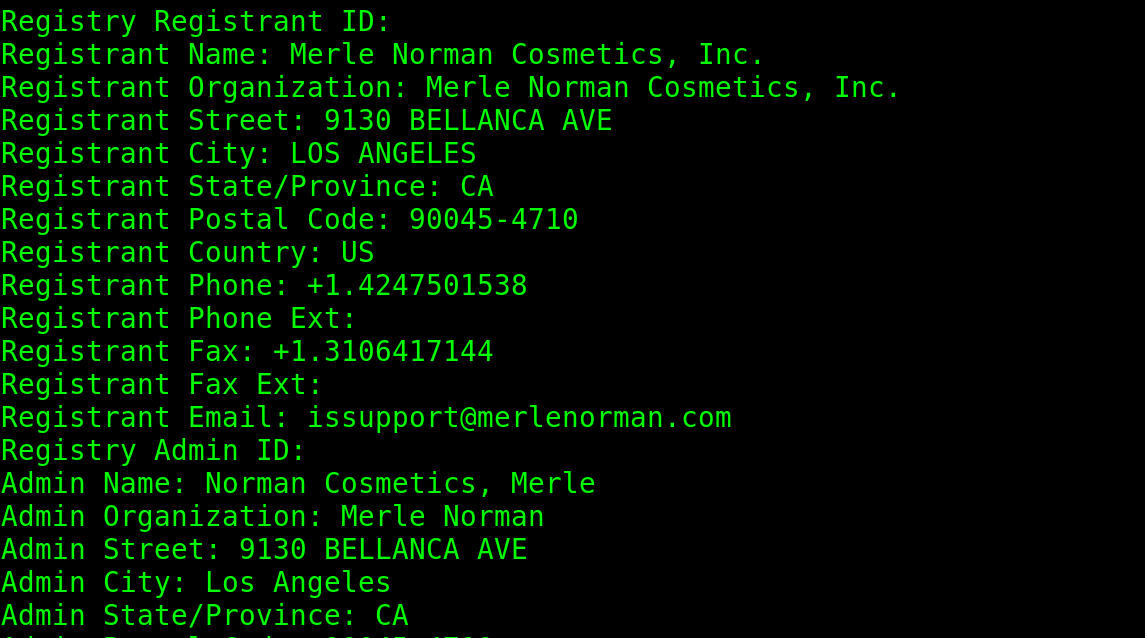
By scrolling down, the user can see additional information on the owner, postal code, address, phone and fax numbers, email, and more.
The whois command also allows the user to consult the IP addresses.
In the following example, the syntax is the same except for the IP that replaces the domain.
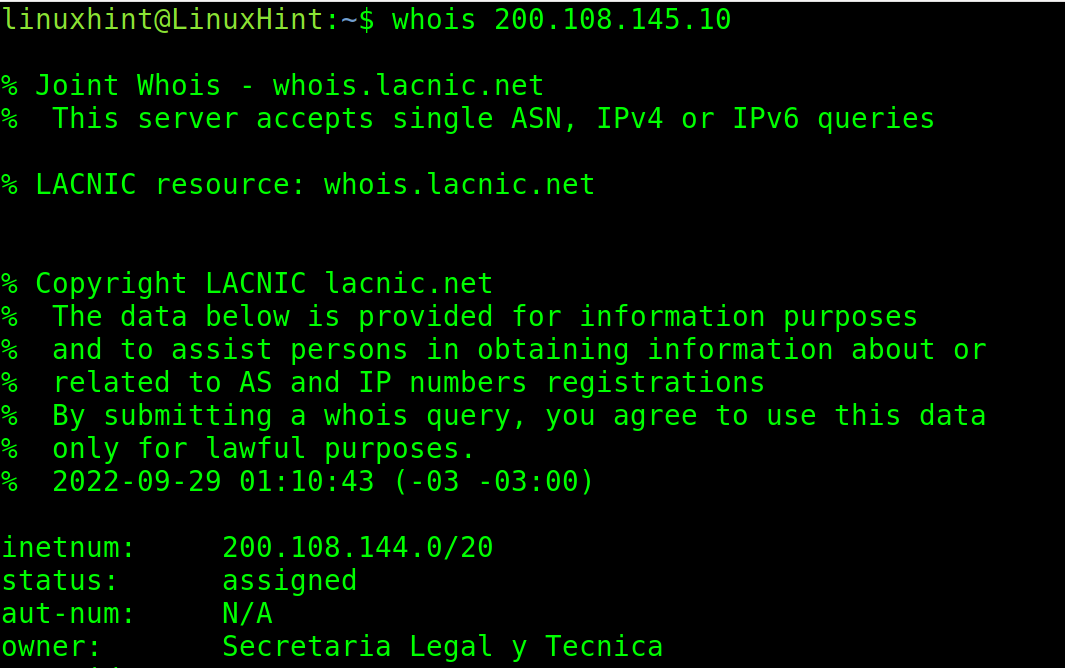
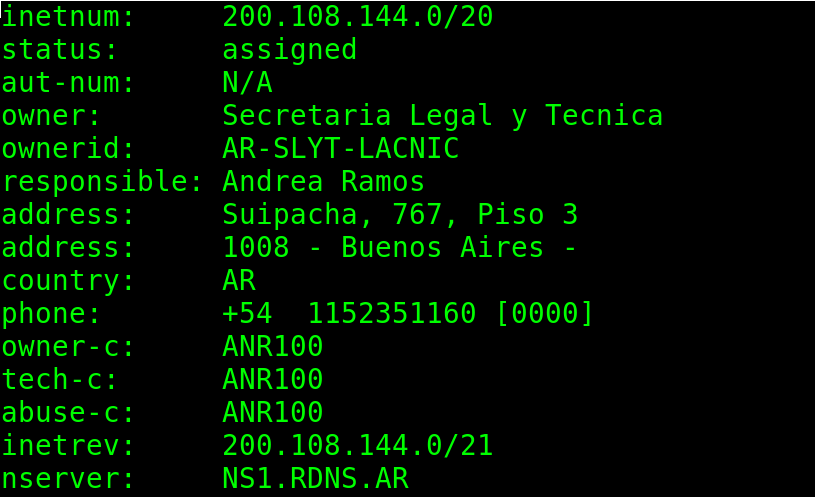
The IP belongs to the Argentinian Network Information Center.
As you can see, it returns an information on who is responsible of this organism, address, phone number, email, DNS, and more.
This is a great technique to get an information on websites and IP addresses.
The “nslookup” Command
The nslookup command line tool is useful to send queries to domain name servers to get an information on a domain name.
It allows us to learn the IP and DNS records of the specified domain.
When executed without arguments, nslookup can be used in interactive mode. But this tutorial covers its usage with single commands.
The first example executes nslookup followed by a domain name.
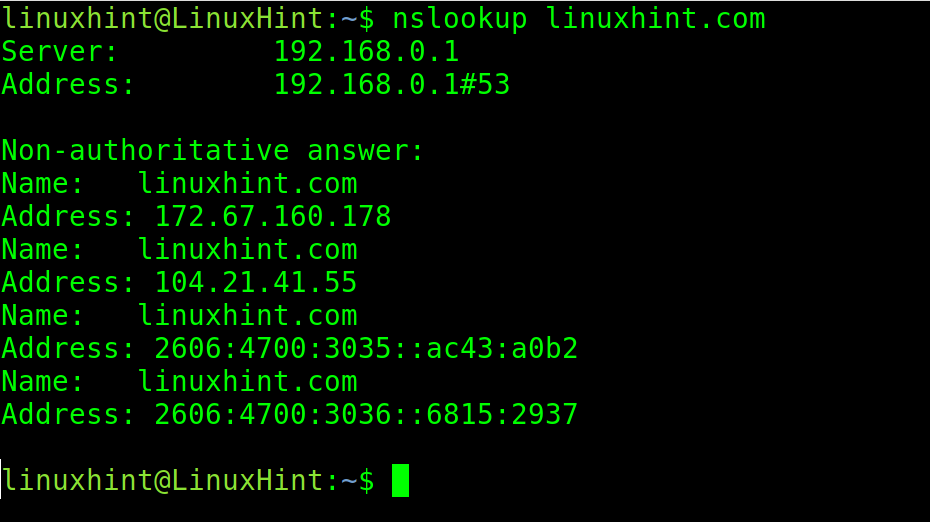
As you can see in the previous screenshot, when nslookup is executed without options and is only followed by the domain name, it returns all A records.
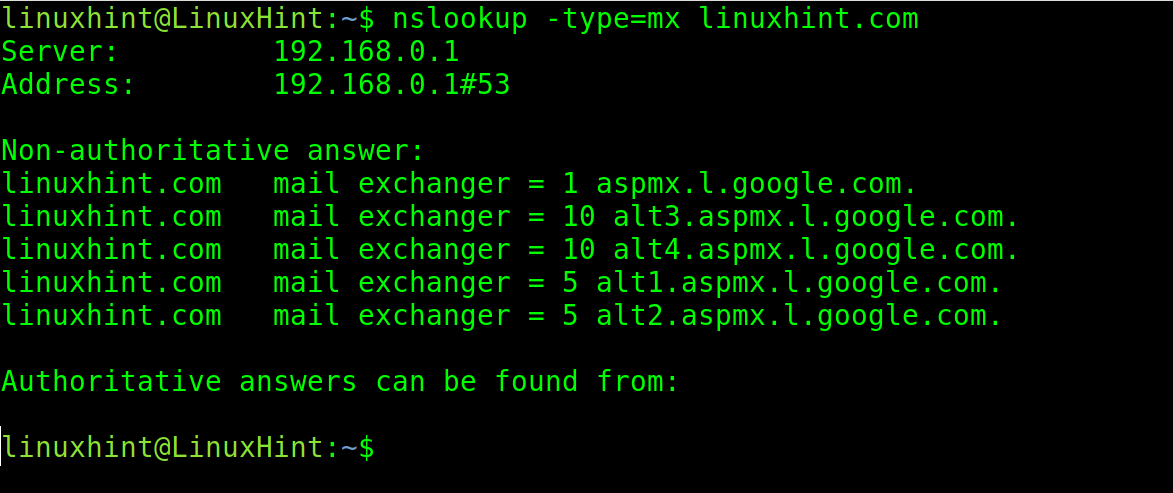
The following command with the -type=mx argument returns an information on all mail servers.
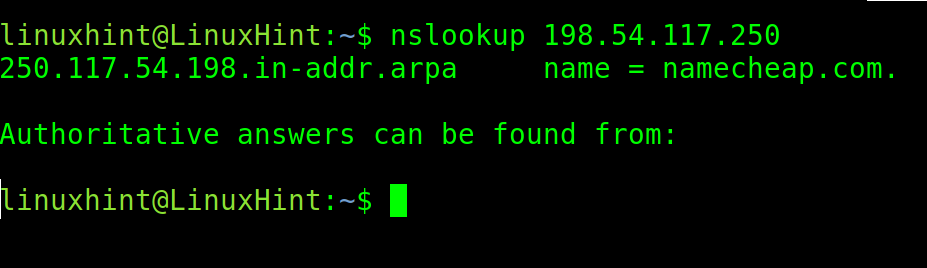
The user can also use the command to make a reverse nslookup by providing an IP address linked to a domain name.
In the following example, nslookup is executed with the IP of the NameCheap company. As you can see, the output returns the correct domain name.
The “traceroute” Command
All modern operating systems include the traceroute feature. This function is excellent to diagnose the network problems, including speed tests and tracing packets which can’t reach the destination.
When the traffic goes through the internet, each routing device intermediating is called “hop”. Traceroute helps to identify what hops are affecting our traffic in some manner, for example, delaying it or blocking it.
The following example shows a simple traceroute, without options, for lanacion.com:
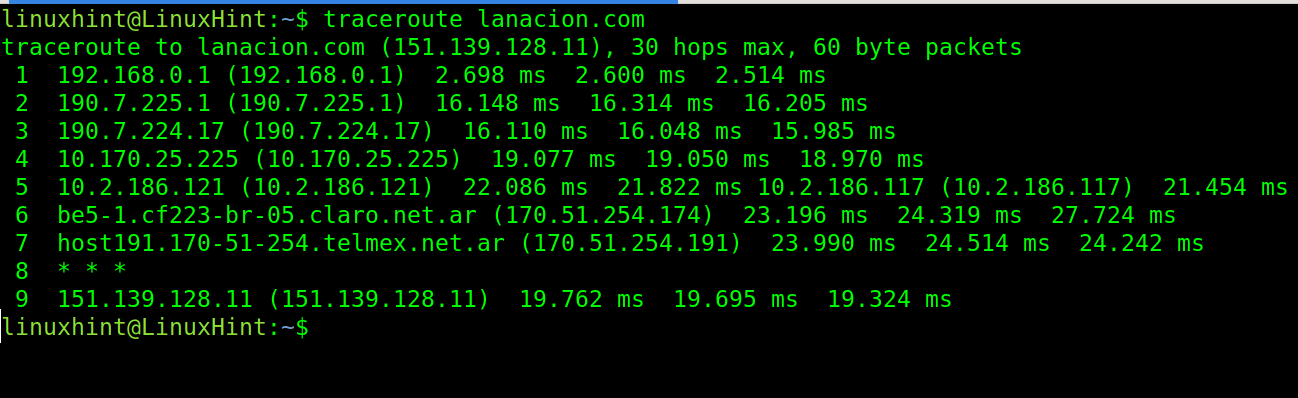
In the previous example, you see 9 hops or routing devices between my local router 192.168.0.1 and linuxhint.com. The hop 8 showing wildcards does not reply to the traceroute packets (* * *).
The timing after the IP addresses (right side) represent the round-trip time in milliseconds. The round-trip time is the time it takes the packets to reach the destination and go back to the origin device. There are 3 times because traceroutes, by default, send 3 packets. This can be modified.
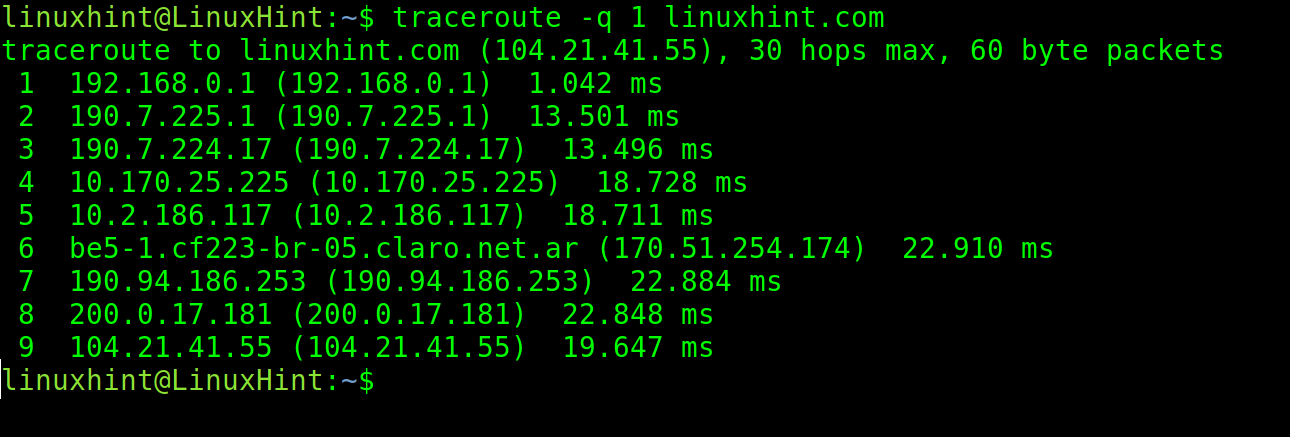
To modify the number of packets, use the -q option followed by the number of packets to send.
In the following example, the -q flag is used to send only 1 packet.
If you can’t reach a network resource like an internet website, traceroute can help you realize where the traffic is interrupted.
Opening Ports and Transferring Files with Netcat
The nc (netcat) command is among the most useful tools for system administrators. Netcat or nc is useful for many tasks like redirecting, port scan, server diagnostics, file transferences, network monitoring, and more. This tutorial shows two examples of the nc command used to scan ports and transfer files over the network.
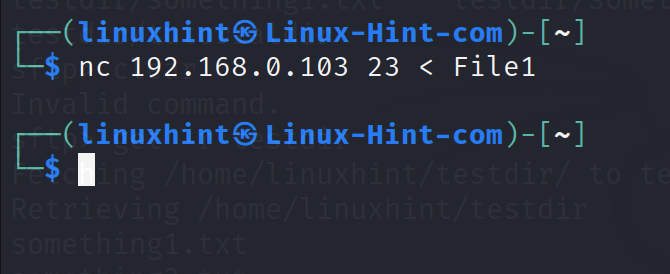
The following example shows how nc is used to send a file named “File1” from a computer to another through port 23.
On the destination computer which receives the file, run the following command replacing 23 with the port that you want to use, and “File1” with the name or path to the file that you want to receive.
The -w flag specifies the timeout and -l instructs nc to listen in the specified port.

Run the following command On the sending computer:
As you can see, after executing ls, the file is listed. It is saved in the current working directory where the user executed nc.


In the following example, gunzip is implemented to compress the transferring files.
To transfer the files with compression, run the command on the receiving computer shown in the following:

Run the command on the sending computer as shown in the following:
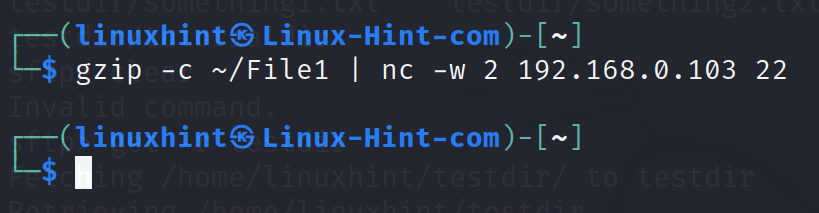
As you can see in the next screenshot, the file is properly transferred.

Advanced Nmap Commands
Nmap (Network Mapper) is the most popular security scanner written in C/C++. It is used to discover hosts, to map and scan networks, ports and hosts. When the NSE (Nmap Scripting Engine) is implemented, the user is able to detect security holes on the target.
Although Nmap basic commands were explained in the first part of this course (Linux Networking Basic Commands), I decided to start this section with some of the basic commands for users who didn’t read the basic networking commands document.
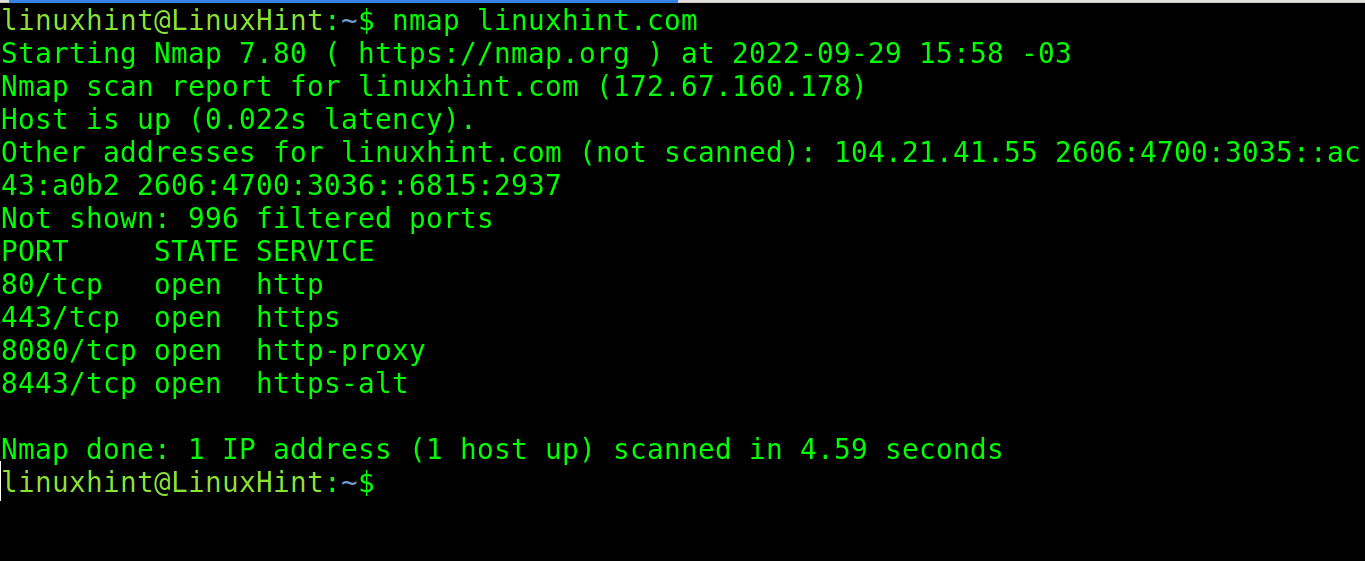
When executed without parameters and only followed by a domain name, Nmap by default scans 1.000 most popular ports for each protocol.
In the following example, nmap is executed to scan linuxhint.com.
As you can see in the output, http/https and proxy ports were found open. The output also reports that the rest of the 996 ports are filtered (probably by a firewall).
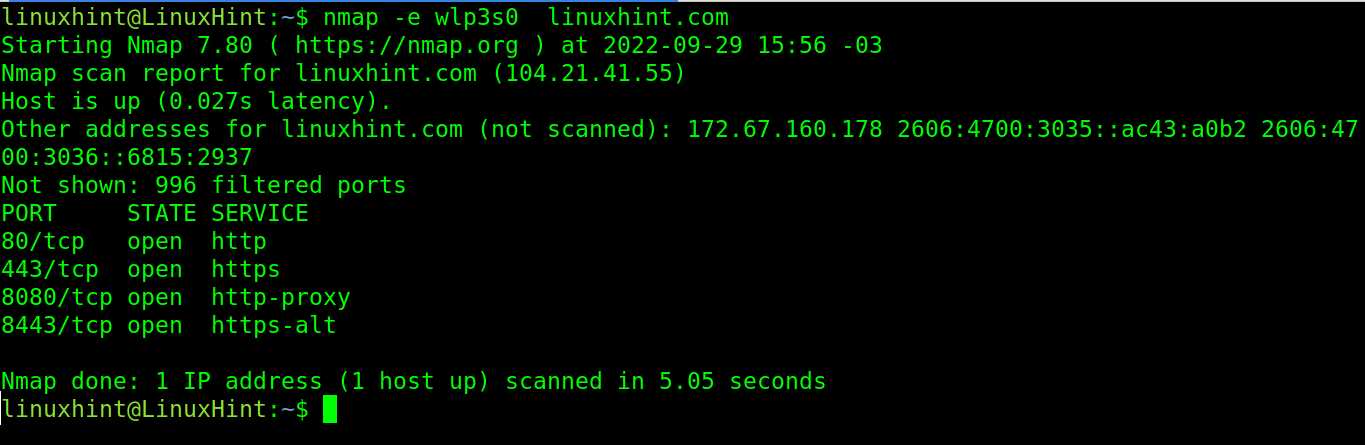
The -e flag allows the user to specify a network device through which nmap launches the scan. In the following example, the network device wlp3s0 is specified for nmap.
Nmap and Ports
This subsection shows different options to specify the ports with Nmap.
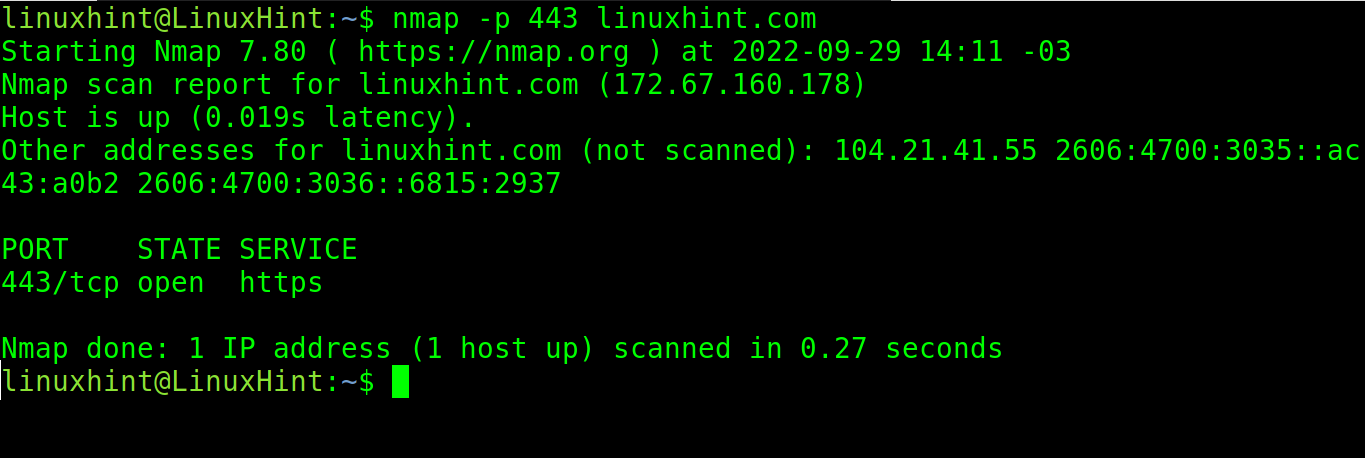
To specify the ports, use the -p flag as shown in the following example where the port 443 is scanned.
You can specify more than one port by separating them with a comma.
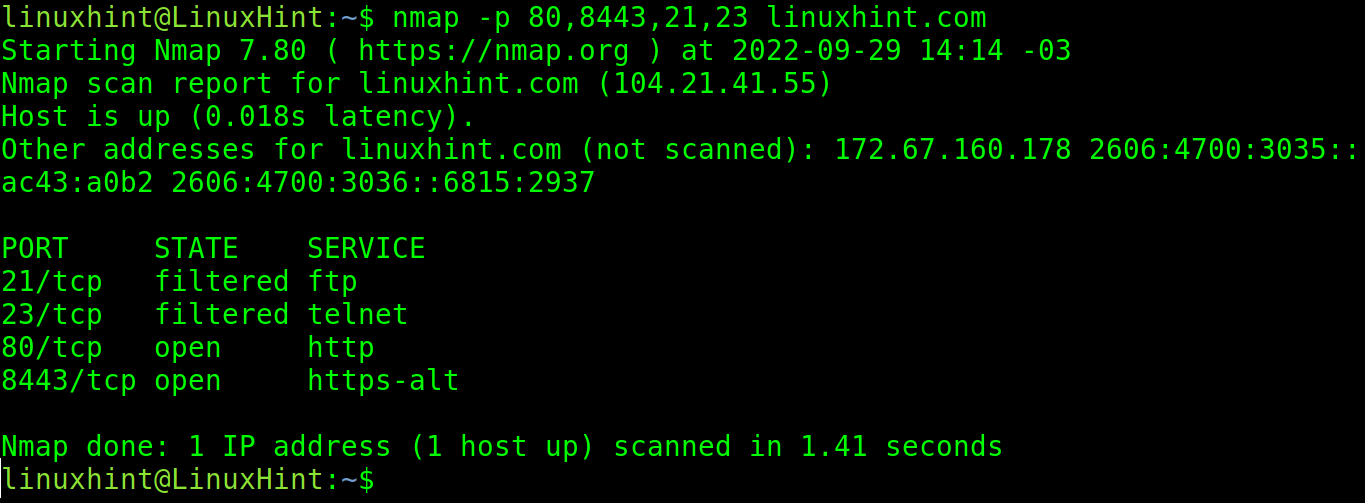
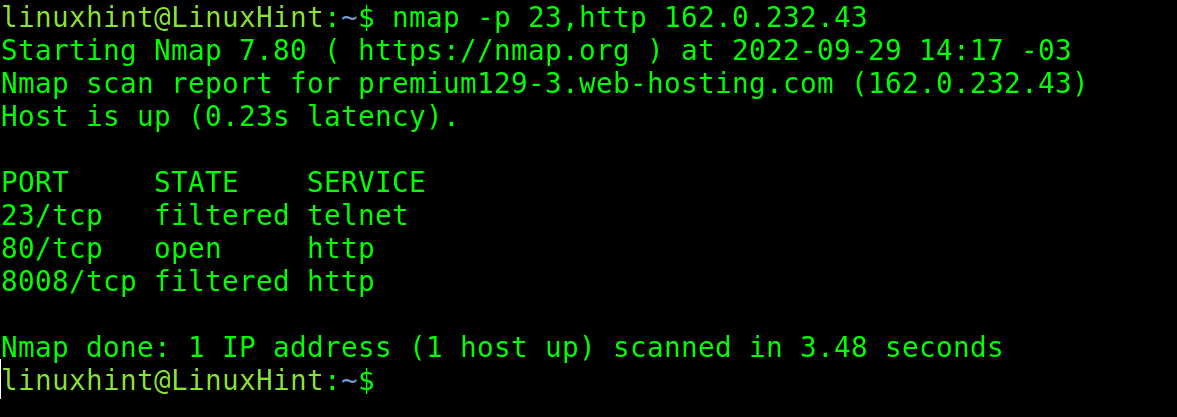
You can use both port numbers and protocol names. In the following example, you can see that instead of port 80, the protocol http was specified.
By implementing a hyphen, the user can specify a port range. In the following example, the user specified the range from port 75 to port 80.

Nmap and Targets
This subsection explains the different methods to specify the targets.
In the previous examples, only the single hosts/IP were scanned.
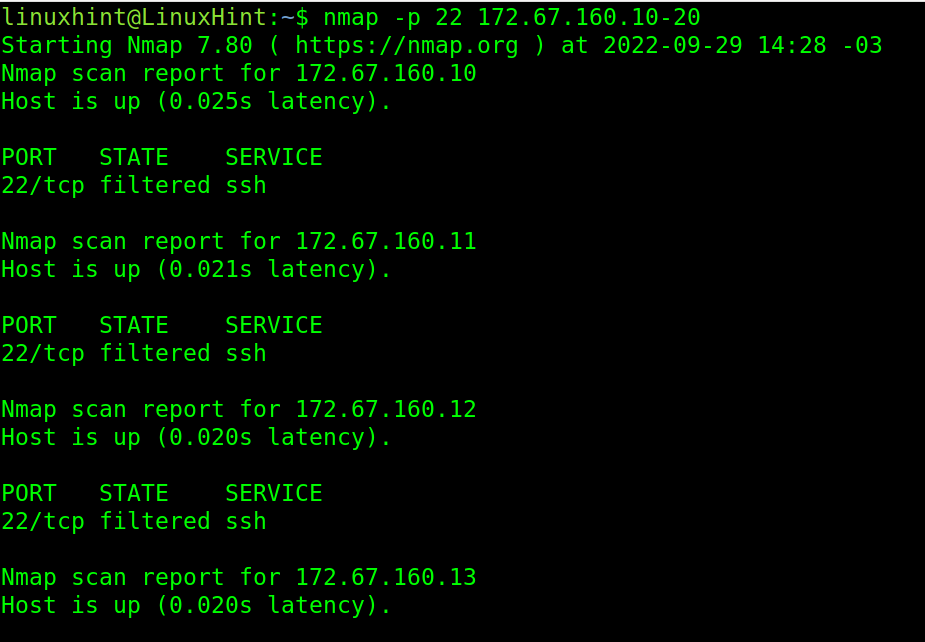
In the next figure, the user specified an IP range in the last octet of the IP address. Nmap scans the port 22 from IP 172.67.160.10 to 172.67.160.20.
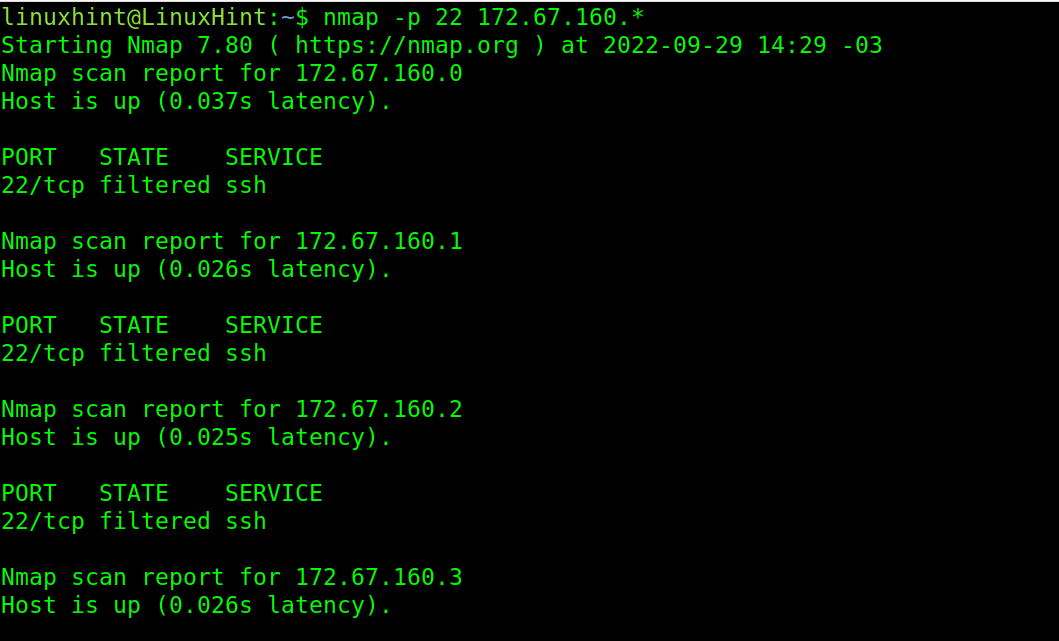
Users can also scan all the range, from 0 to 255 of an octet or more than one, by implementing a wildcard. The following example scans the IP addresses from 172.67.160.1 to 172.67.160.255:
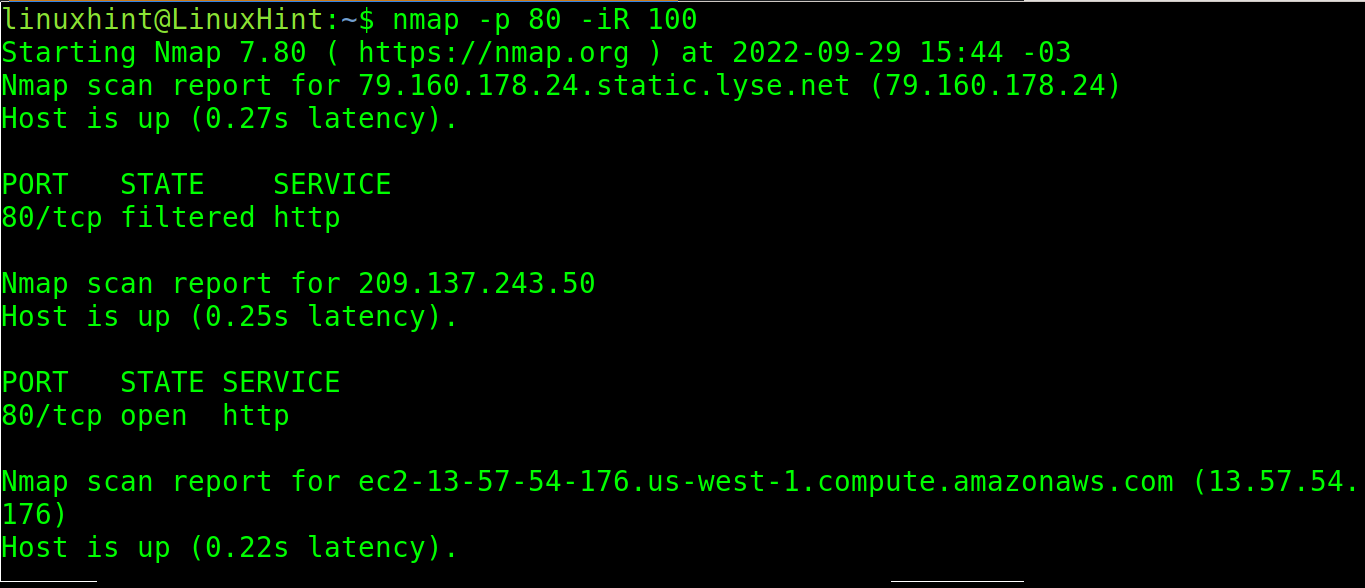
The -iR option instructs Nmap to scan some random IP addresses.
In the following image, nmap scans the port 139 of 100 random addresses:
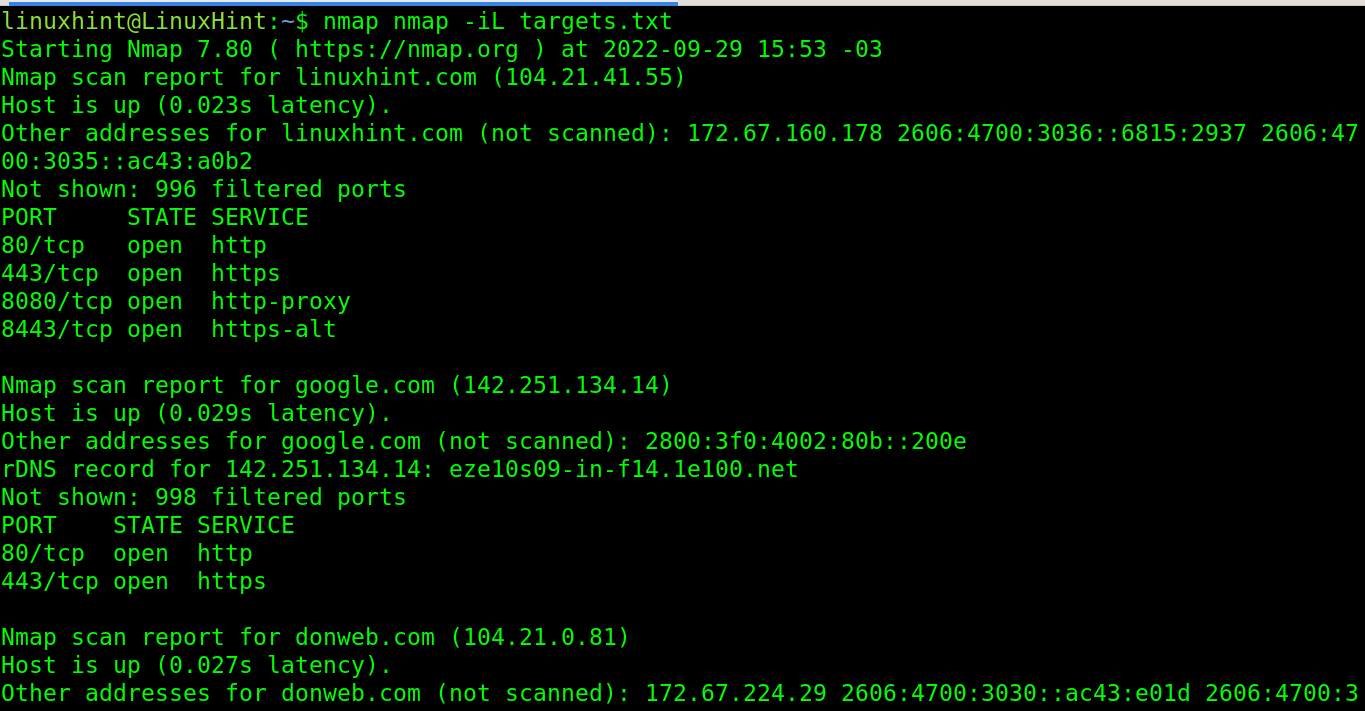
The user can select a file with a list of hosts/IP to be scanned.
In the following image, nmap scans a list of targets listed in the file targets.txt. The file format is simple; just type a host or IP per line.
If the user has a list which includes the hosts that he would like to skip, he can implement the –exclude option as shown in the following illustration. The linuxhint.com domain is excluded.
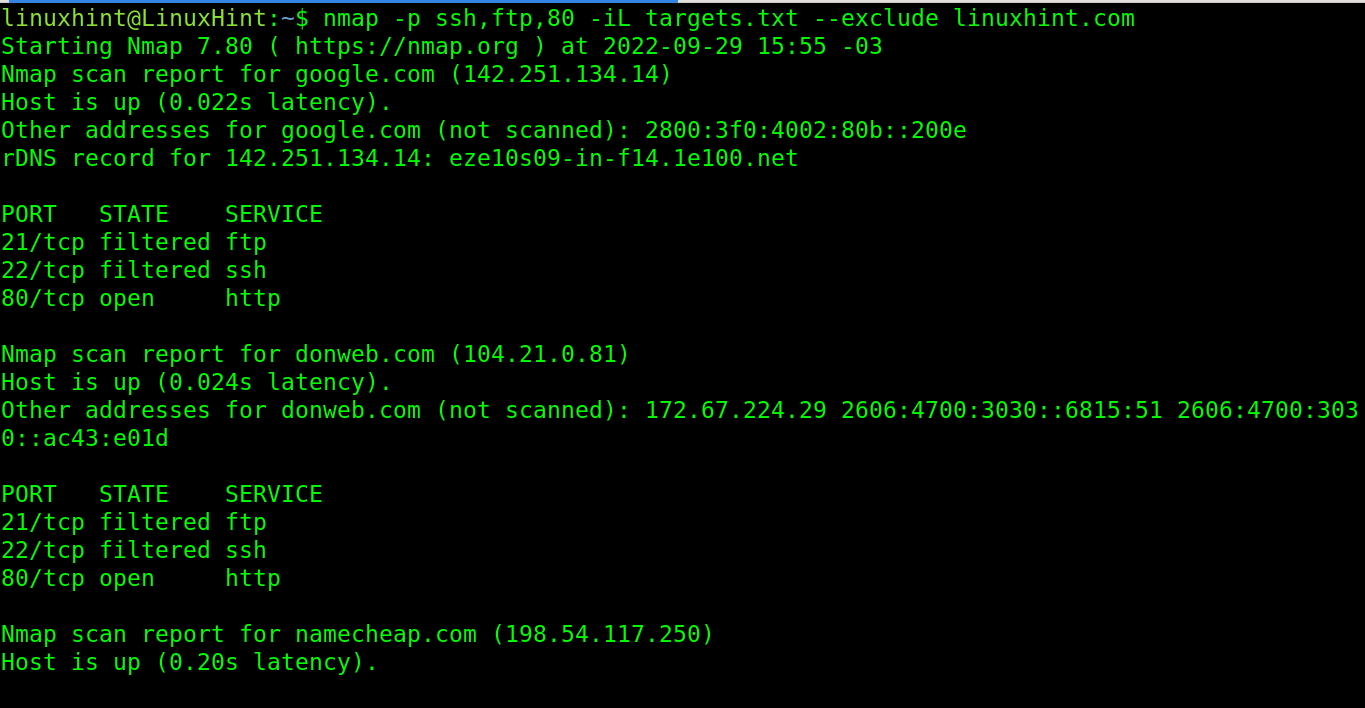
These are the different ways that Nmap offers to define the targets.
Nmap and OS/Version Detection
This section explains how to use Nmap to detect the target OS and software versions.
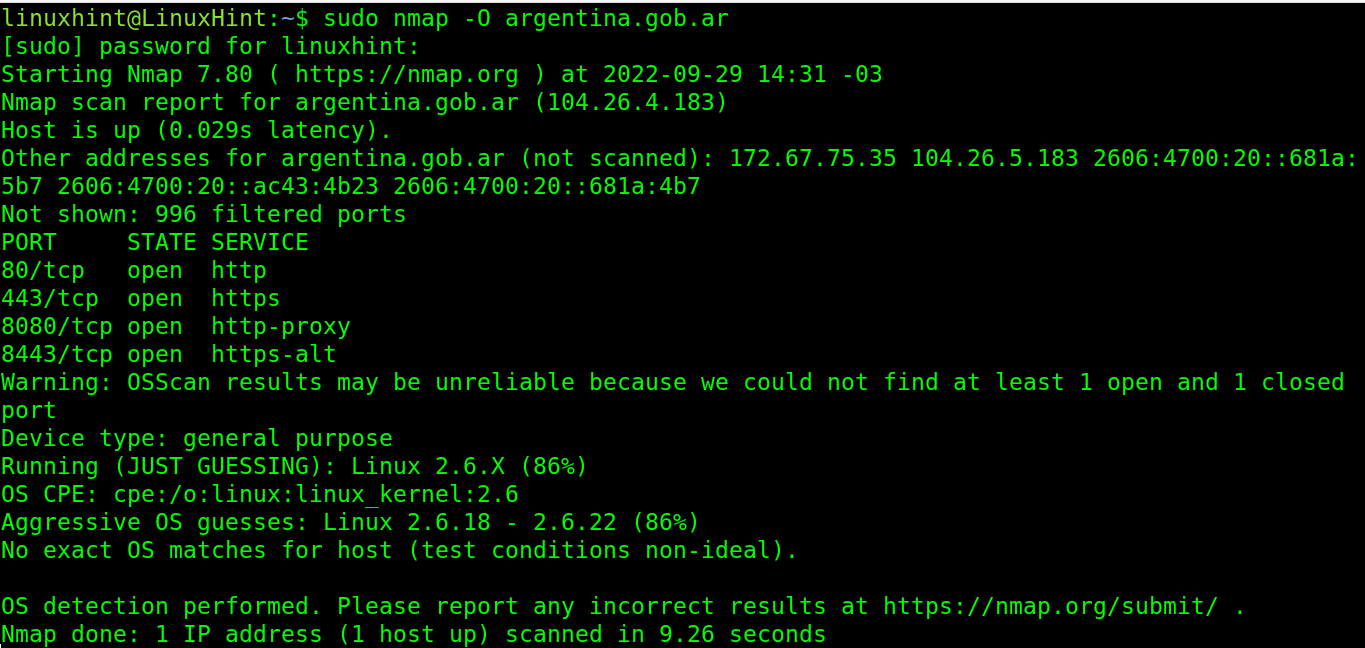
To detect the target’s operating system, the user can implement the -O flag as shown in the following where Linux 2.6.x was detected:
To learn the versions of the software on each port, use the -sV flag as shown in the following. As you can see, Apache 2.4.29 was detected:
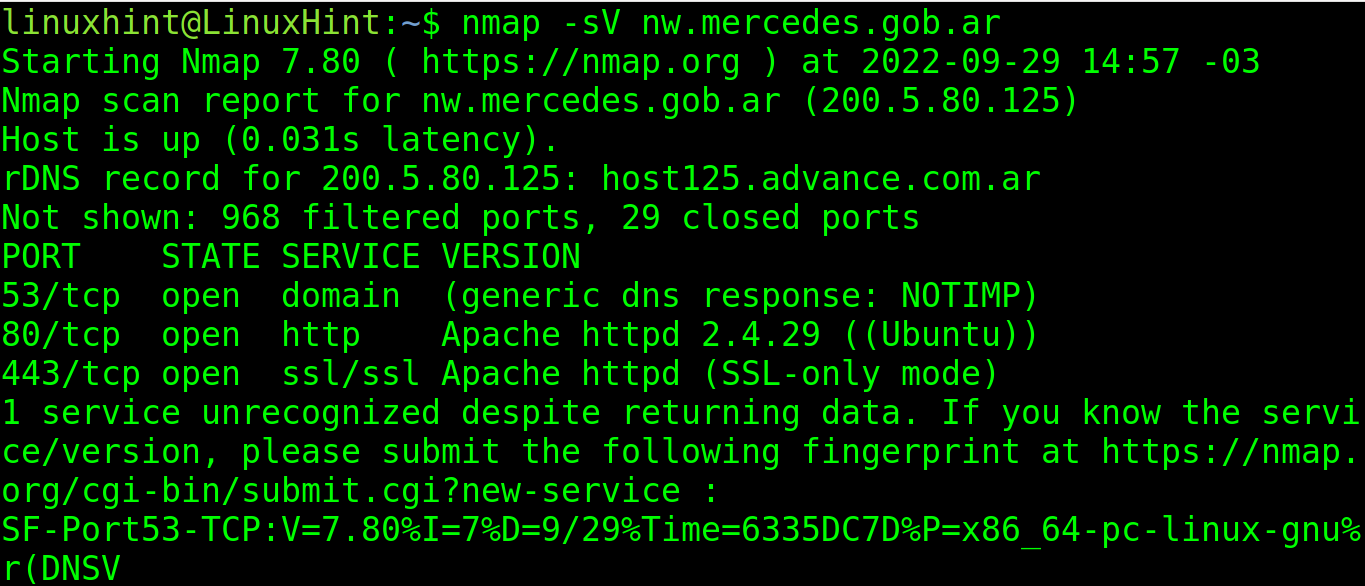
The user can define the intensity of the version detection. Zero (0) is the less intense scan, while 9 is the most intensive one. By default, if an intensity is not defined, like in the previous example, the intensity level is 7.
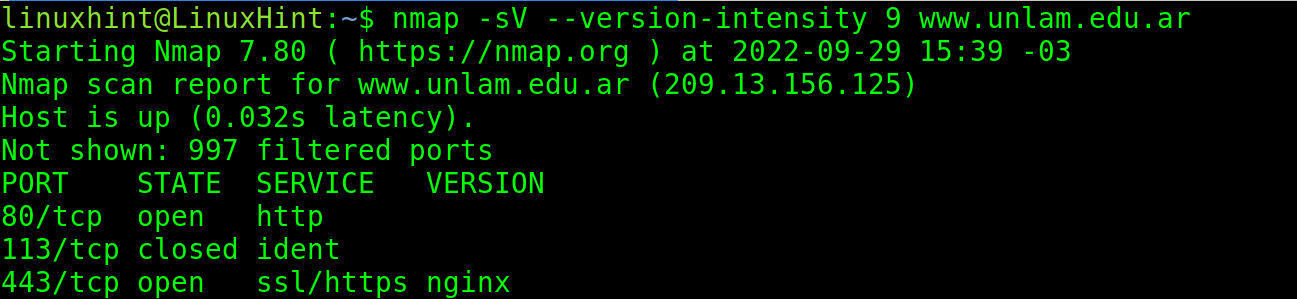
In the following example, version detection is implemented with the maximal intensity and Nginx is detected.
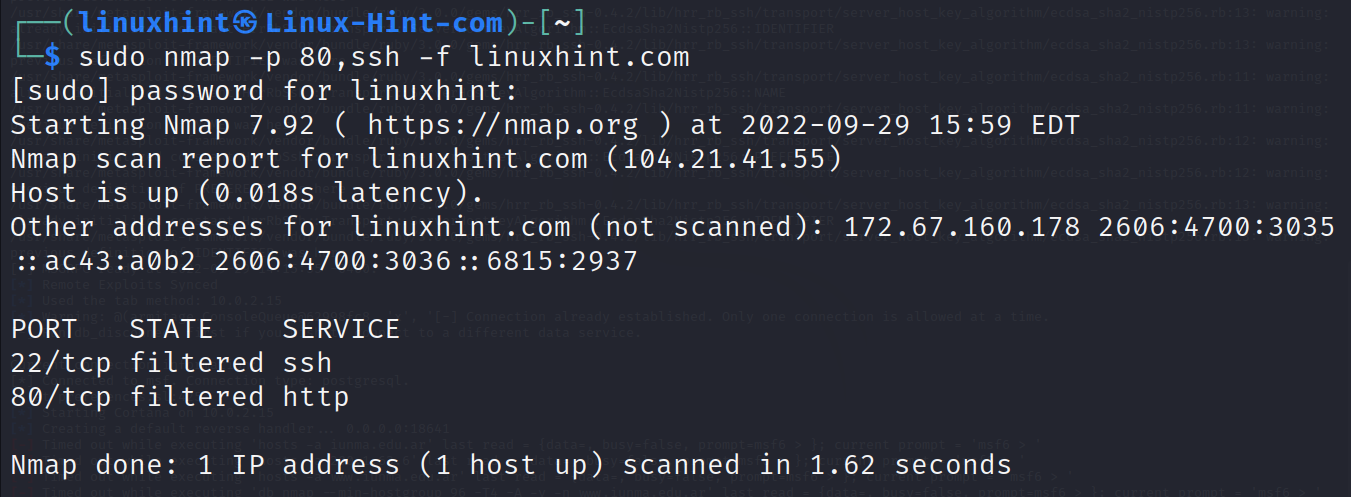
The -f flag can be used to instruct Nmap to fragment the packets, making it harder for the target to detect the scan.
Using Nmap to Find Security Vulnerabilities
The NSE (Nmap Scripting Engine) allows to implement additional functions in the scan process by including scripts for additional tasks such as vulnerability detection or exploitation.
The Nmap Scripting Engine contains scripts classified by category. Users can also program their own scripts with custom functionalities.
This section describes NSE basics with practical examples which shows how to use NSE to hack the WordPress websites and SSH (Secure Shell) credentials or to run some additional security checks.
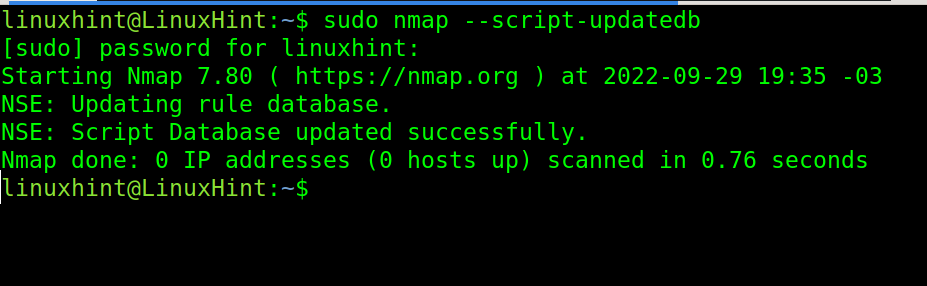
The first step before running Nmap with NSE is to update the scripts database. To do it, use the following command:
The syntax to use the NSE scripts is the following: where <Script Name> must be replaced with the desired script and <Target> with the target IP or host.
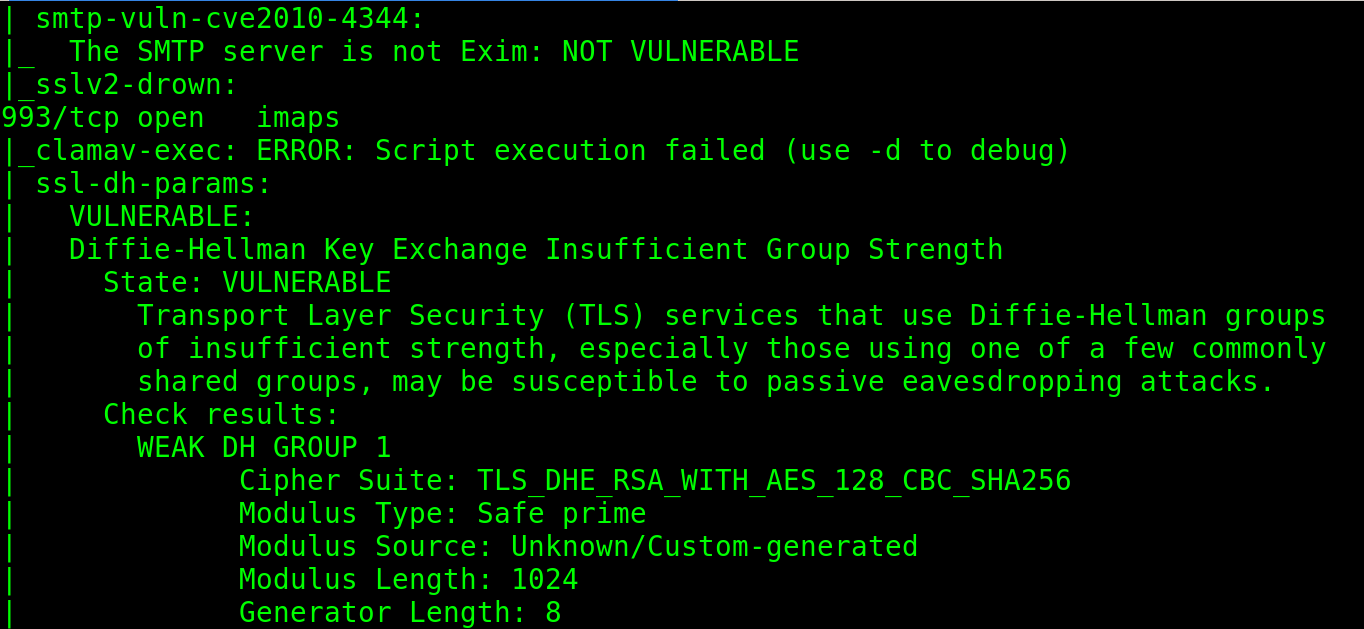
In the following example, the user implements the vuln script which is used to detect common vulnerabilities. The user also defined an IP range in the second octet of the address.
The next example launches a brute force attack against a WordPress website.
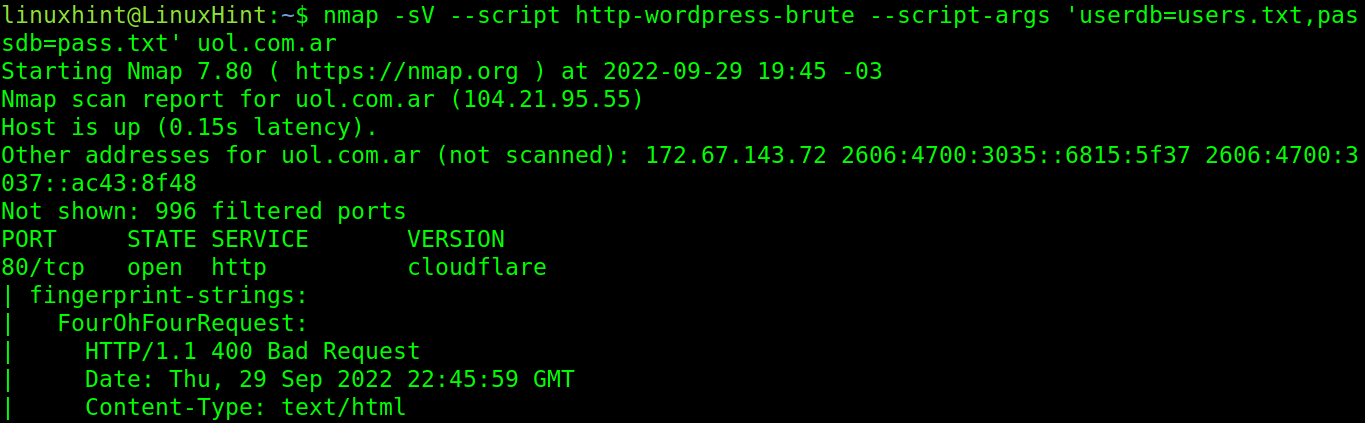
Where:
- –script http-wordpress-brute calls the http-wordpress-brute NSE script to launch a brute force attack against the wordpress sites.
- –script-args ‘userdb=users.txt,passdb=pass.txt’ specifies the user and password lists. In this case, the users list is users.txt and the passwords list is pass.txt. The files were located in the same directory in which Nmap was executed. You can also specify the path: –script-args ‘userdb=/path/to/dicionaty/users.txt,passdb=/path/to/dicionaty/pass.txt’
As said previously, NSE scripts are classified by category. The reader can see all available categories in this link https://nmap.org/book/nse-usage.html#nse-categories.
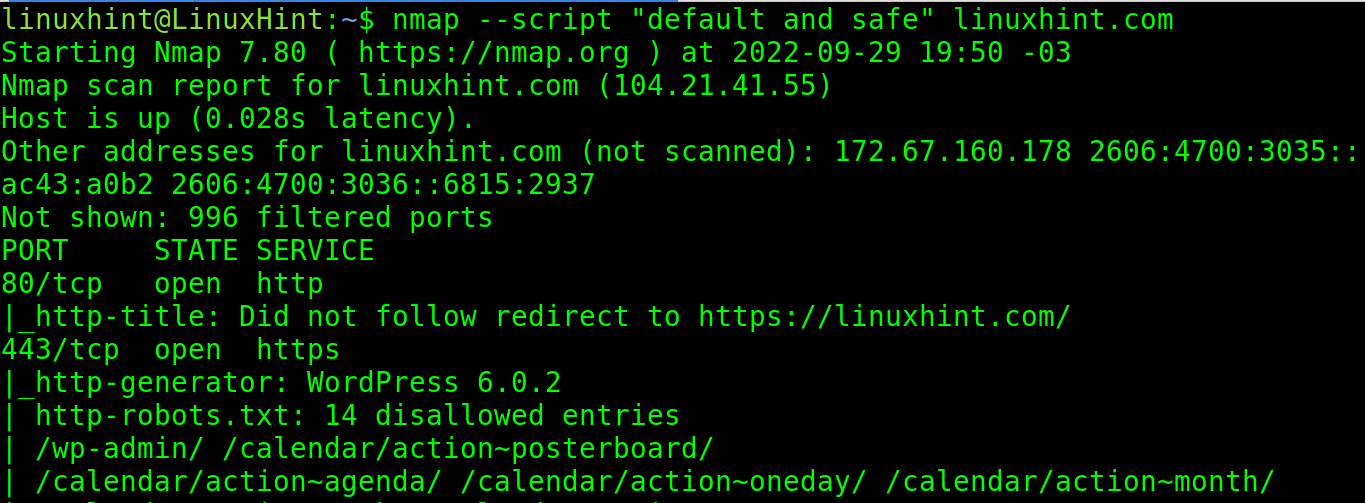
The next example shows how to execute all scripts belonging to a specific category. In this case, both to the Default and Safe categories with a user-friendly syntax:
For additional information on the Nmap NSE, I highly recommend you to read our Nmap scripting engine tutorial.
Reverse Proxy
In reverse connections, the server connects to the client that produces the outgoing traffic. While in normal connections, the client connects to the server that gets the incoming traffic.
In reverse connections, the communication is established from “the other side”.
For example, in some cases, a user may need an access to a remote computer, but port 22 for ssh may be blocked by a firewall or router. The remote user can use a reverse connection application like TeamViewer or Ngrok to make their local resources (like ssh, web server, etc.) public by starting the connections with outbound traffic instead of accepting incoming connections.
This tutorial explains how to do a reverse connection using Ngrok to make a local website (http://127.0.0.1 or http://localhost) public on the internet.
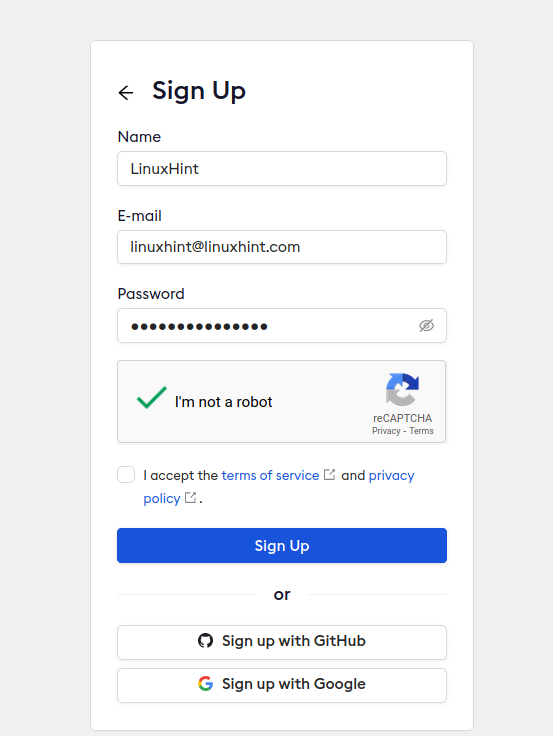
To begin, access this link to register a Ngrok account https://dashboard.ngrok.com/signup.
Fill your information and press the Sign Up button.
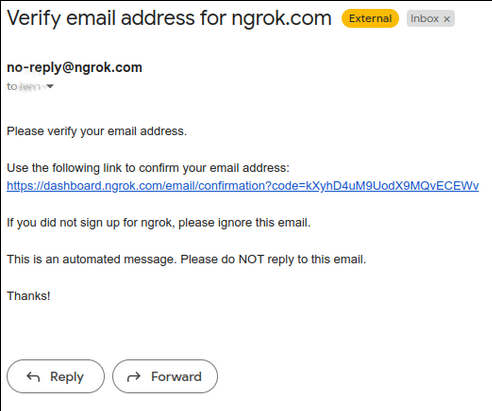
Press the confirmation link that is sent to your email.
Login to your Ngrok account. Once you’re on the dashboard, download Ngrok for Linux by pressing the button shown in the following screenshot:

Extract the .tgz file containing Ngrok.

Go back to your dashboard. Scroll it down and find the authentication token which you can see in the following figure:
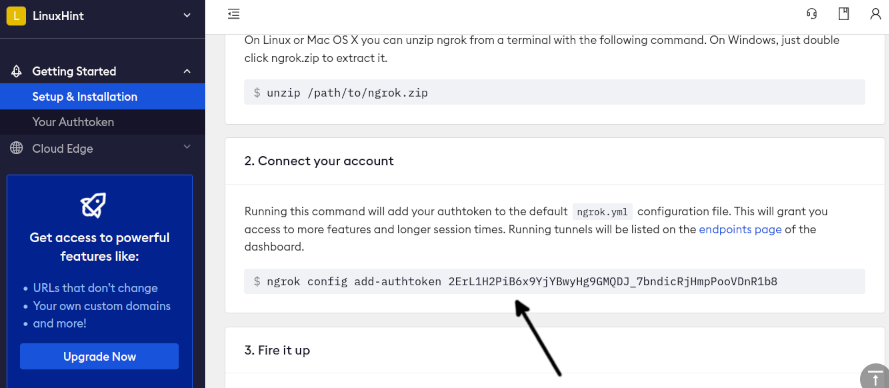
Execute the following command in the directory where Ngrok was extracted. Replace my token with yours:

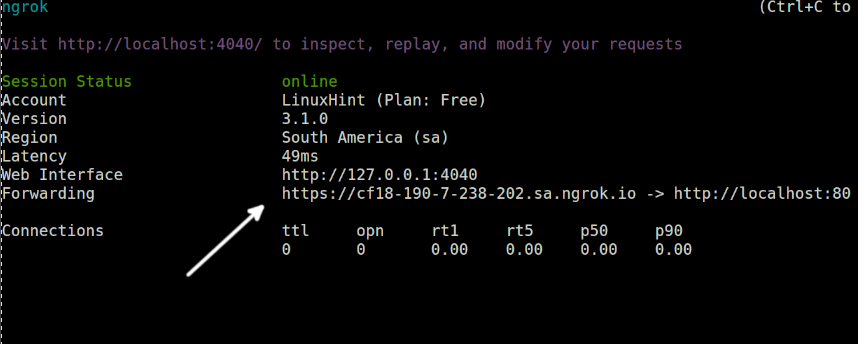
To share your local web server with the world, the user needs to enable Ngrok on port 80. The syntax is pretty simple as shown in the next example:

After running Ngrok for http, it shows a screen that is similar to the following screenshot. In the “Forwarding” line, you will see a link that ends in nrog.io and redirecting to the localhost:80.
That’s the link through which your local website becomes accessible from the internet.
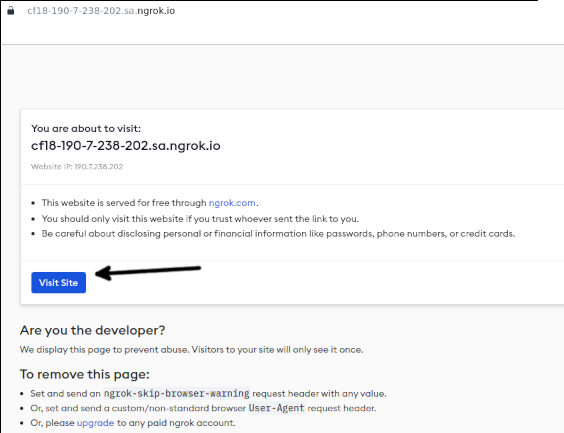
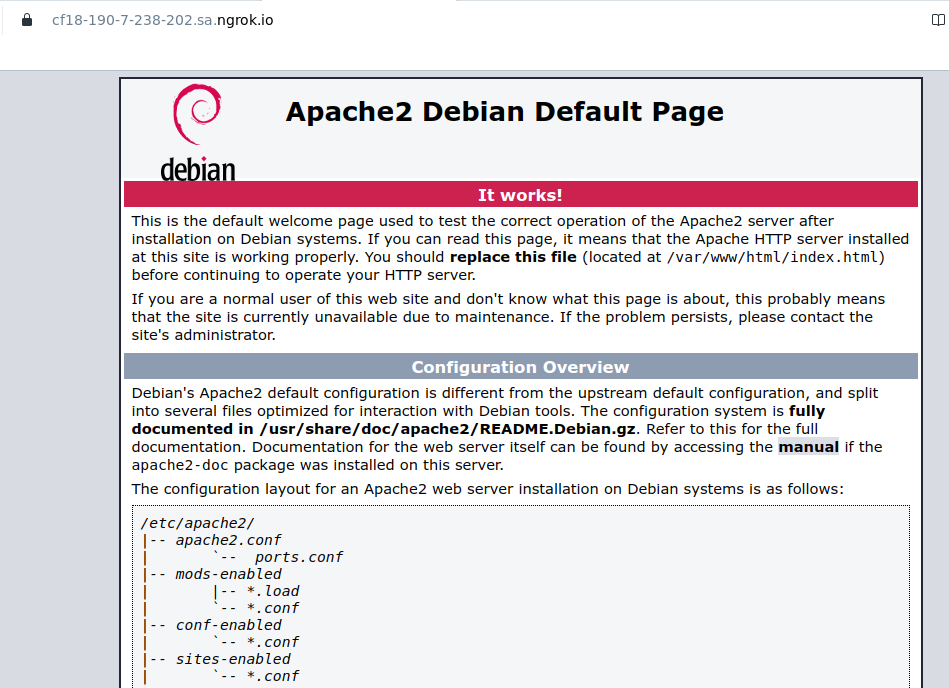
When opening the link provided by Ngrok, you will see a warning message as shown in the following. Press the Visit Site button to continue.
As you can see, the site is accessible from the internet. In my case, it’s just the Apache default index page.
Network Monitoring
This section describes 2 different tools to monitor a network. The first method is interactive and fully intuitive. The second one is a command line monitor which is also simple to use.
The interactive network monitor that is used in this tutorial is Iptraf.
To install it on Debian based Linux distributions, use the apt packages manager as shown in the following:
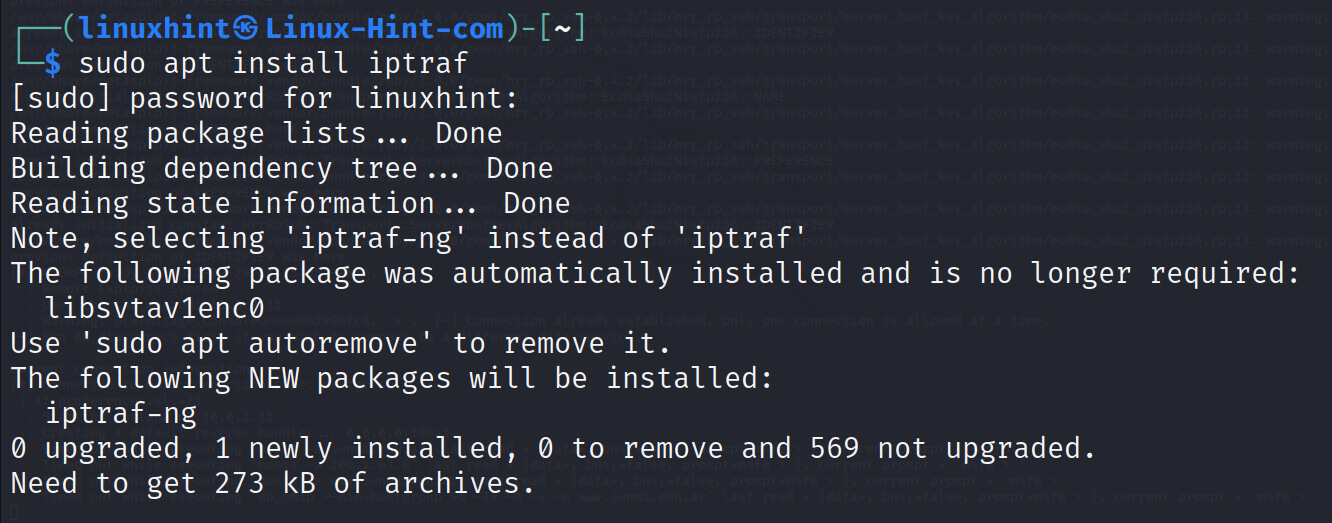
To start the Iptraf, the user needs privileges. Use the sudo command followed by iptraf-ng as shown in the following:
Note: Iptraf requires a minimum terminal size to be executed.

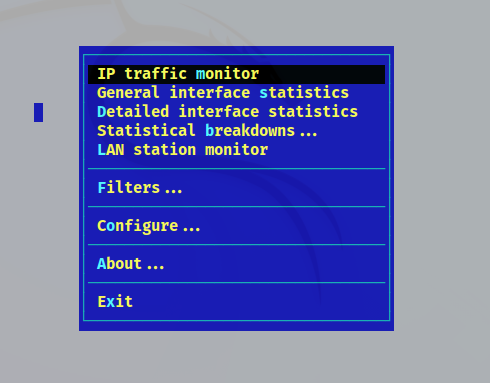
As said previously, iptraf is interactive and intuitive. The user can easily learn it autodidactically so this is only a review of the features.
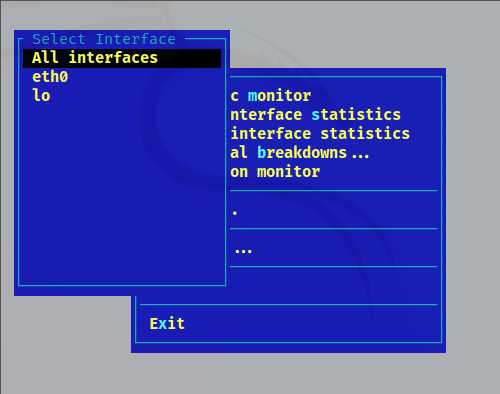
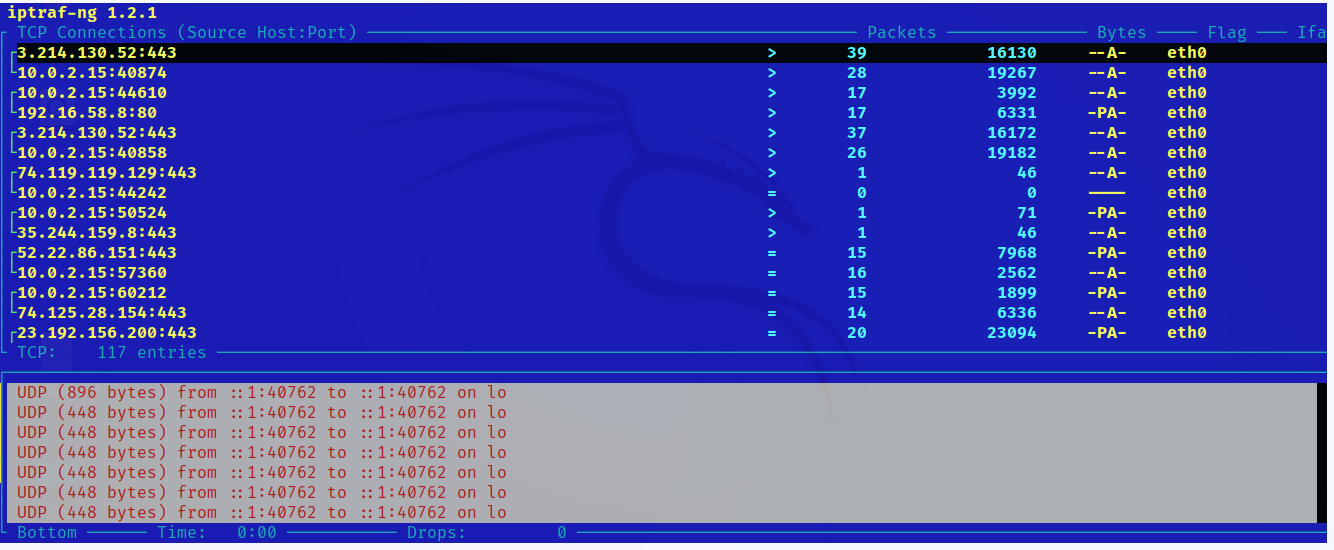
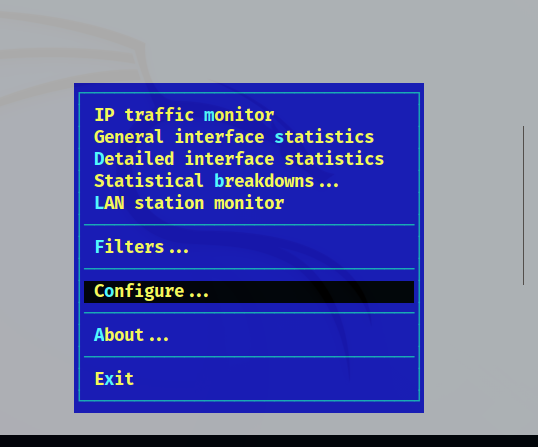
The first option “IP traffic monitor” allows the user to select specific network interfaces or all of them. Press ENTER on it.
In my case, I have only a network interface, eth0. After the user presseses ENTER on the chosen option, the monitor will show up.
There is a screenshot of Iptraf in the following, including all connections, packets, and bytes.
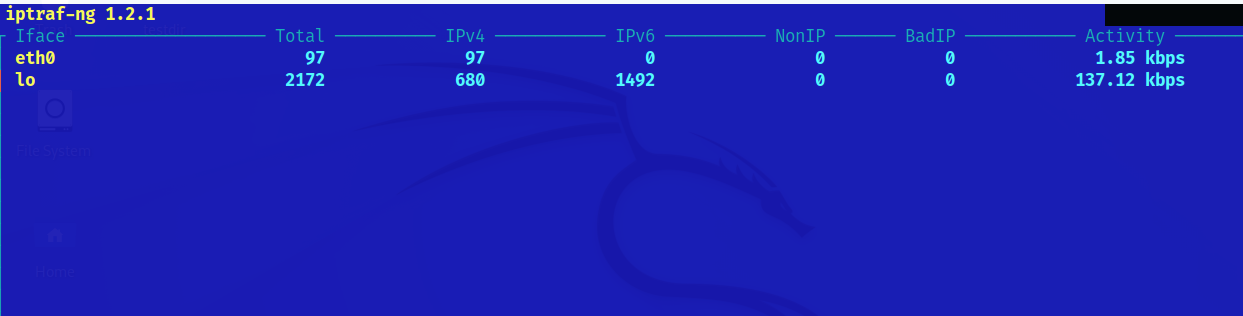
Back to the main menu, the General interface statistics shows the total of KBps per network interface. It doesn’t show an information per connection like in the first menu option described in the previous example.
Press Esc to leave the monitor. Press the x to leave Iptraf menus.
You can see how the General interface statistics option seems in the following illustration:
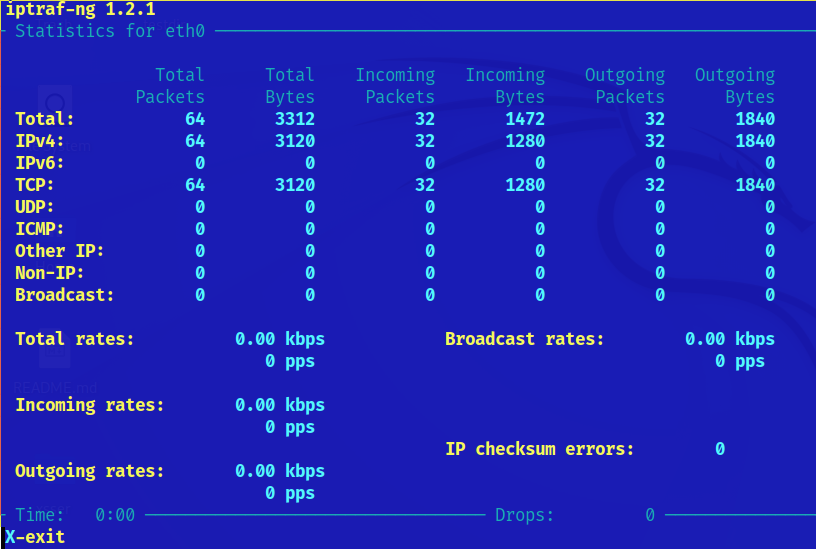
The third menu option Detailed interface statistics shows specific interface bytes and packets as the reader can see in the following screenshot:
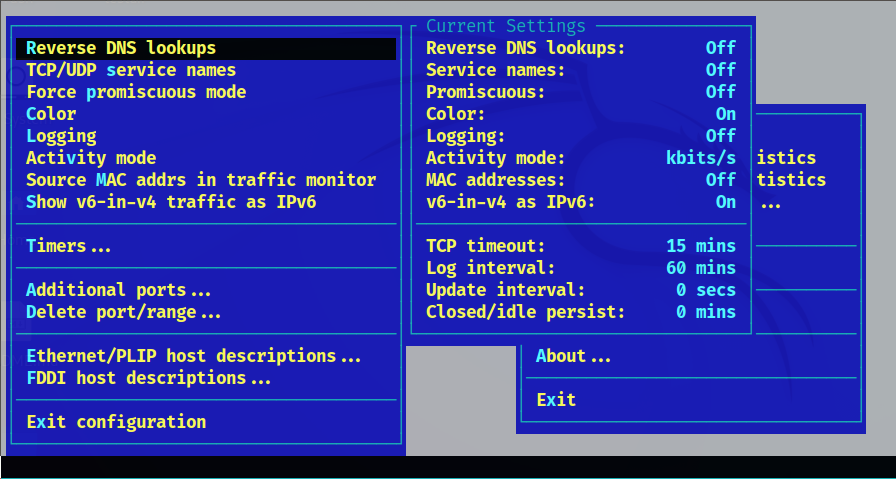
The Configuration option includes more features like defining ports, port ranges, specific protocols, and more.
Iftop is another network monitor which can be executed from the Linux terminal.
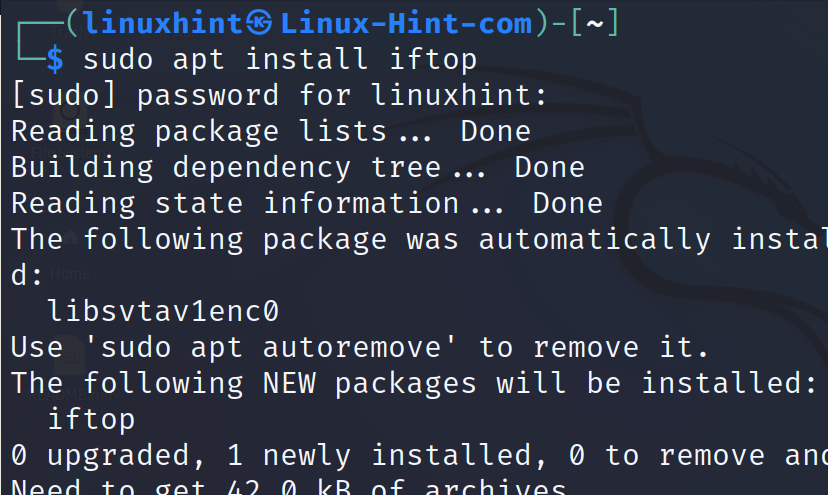
It also can be installed using the apt packages manager on Debian based Linux distributions.
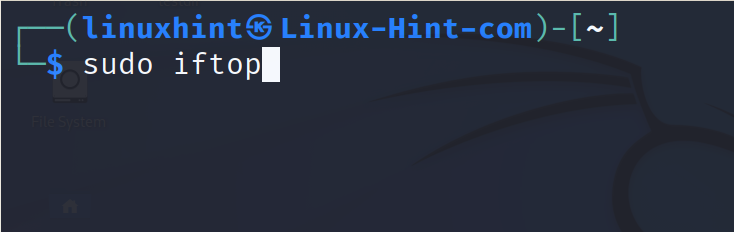
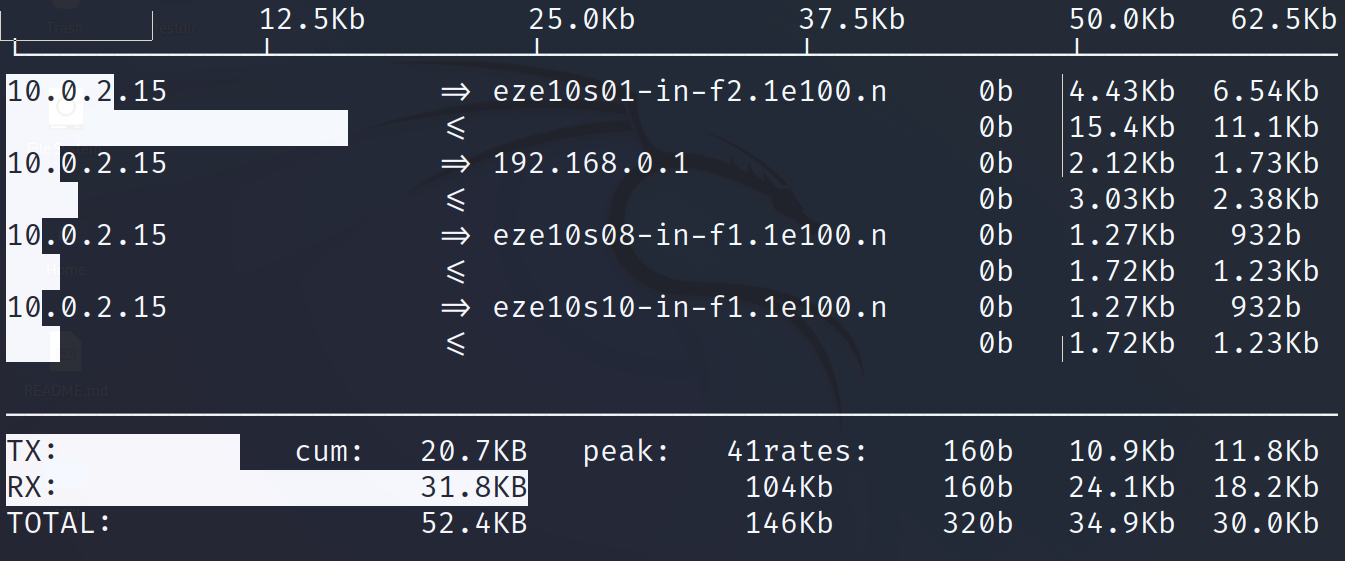
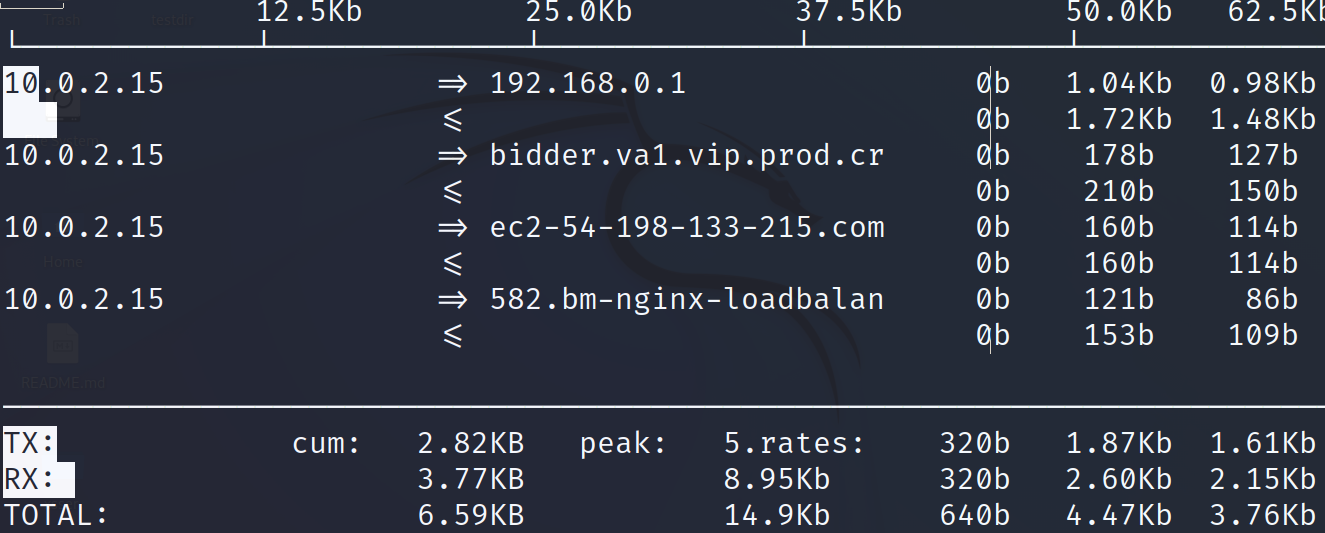
Once installed, run iftop with privileges as shown in the following. This displays the connections on all network interfaces.
To instruct the iftop command to show only the information on a specific network interface, use the -i flag followed by the interface name.
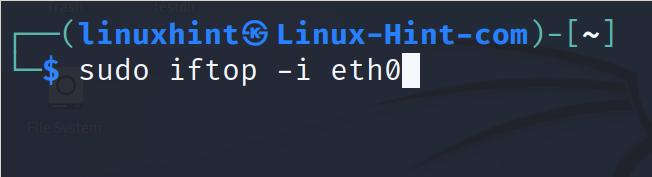
In my case, both outputs are similar because I only have a network interface.
That’s how the users can monitor their network activity. The market offers a lot of alternatives that the Iptraf and Iftop users can try.
Setup VPN
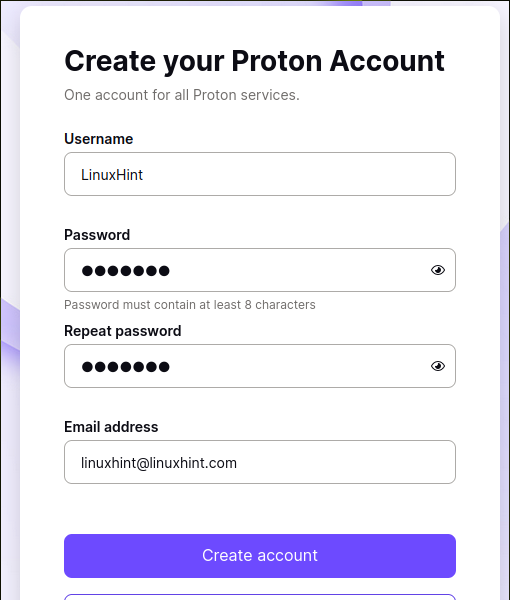
This section explains how to set up a free VPN service for safe connectivity.
To begin, register at https://account.protonvpn.com/signup?plan=free&billing=1&
Debian users need to download this .deb package:
https://repo.protonvpn.com/debian/dists/stable/main/binary-all/protonvpn-stable-release_1.0.3_all.deb
Note: You can visit the link https://protonvpn.com/support/linux-vpn-setup/ to make sure that you download the last package version.
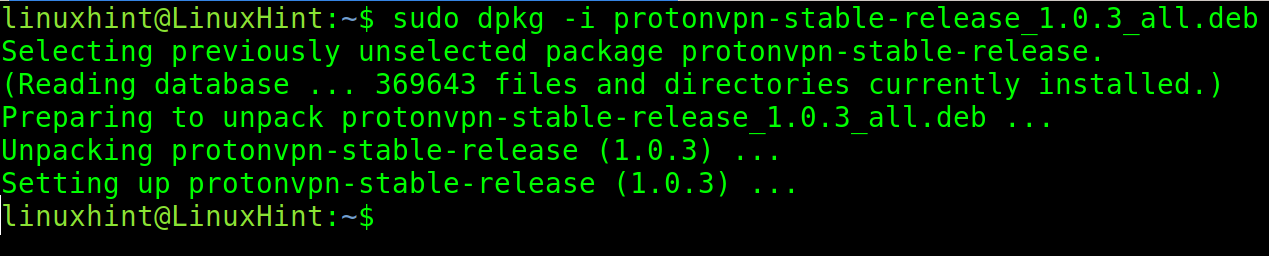
Install the package using the dpkg command followed by the -i flag as shown in the following:
After installing the .deb package, update your repositories.
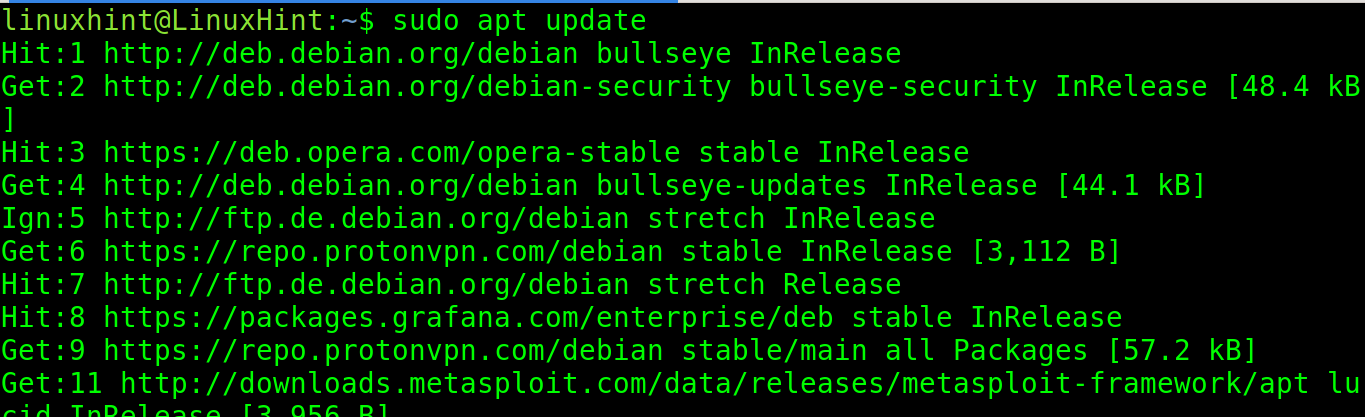
Install the ProtonVPN command line tool using apt.

For RedHat based Linux distributions including Fedora, download https://protonvpn.com/download/protonvpn-stable-release-1.0.1-1.noarch.rpm
Note: You can visit the link https://protonvpn.com/support/linux-vpn-setup/ to make sure that you download the last package version.
Then, run the following command, replacing the path for the correct one.
Update the repositories.
Install ProtonVPN by running the following command:
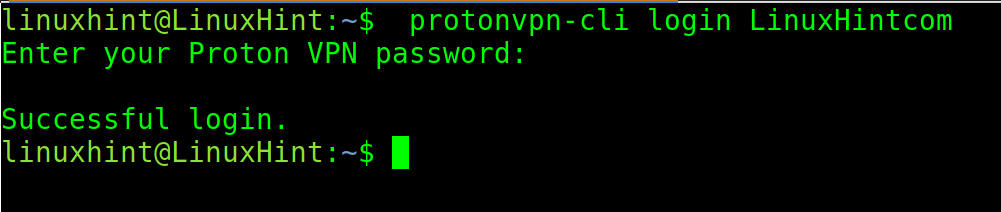
Login to the ProtonVPN from the command line using the following command where the <Username> must be replaced with the user that you registered in the first step of this section.
When requested, type the password and press ENTER.
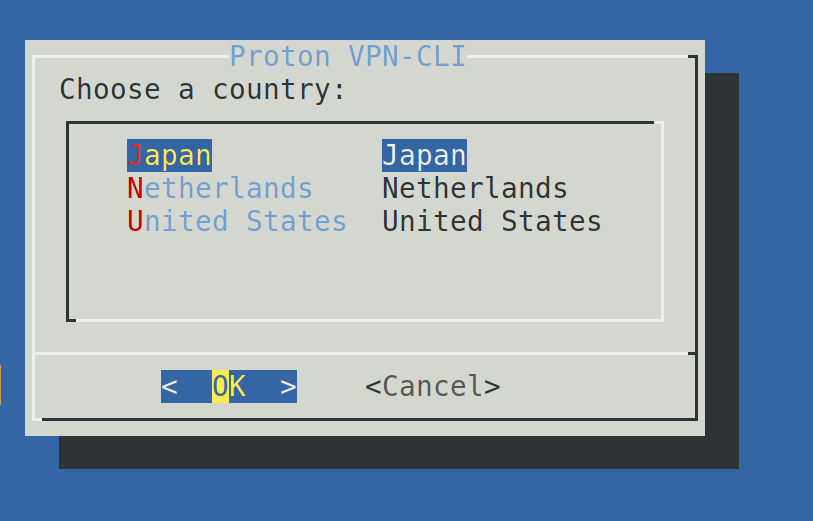
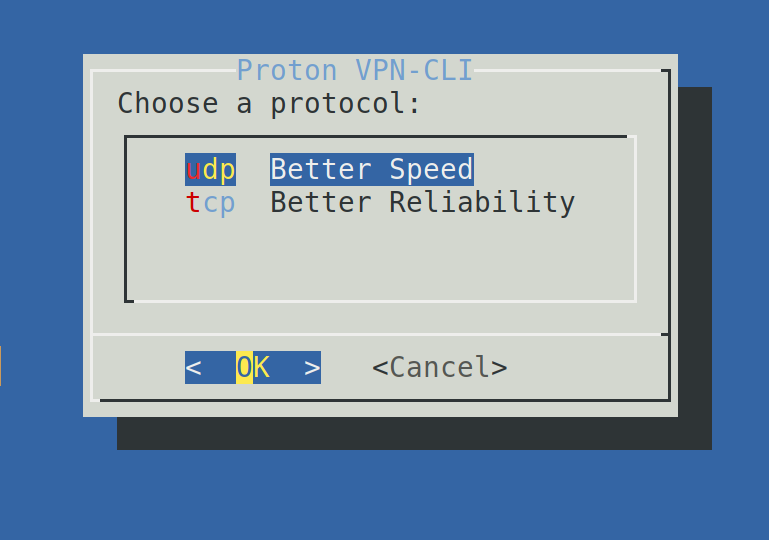
Once logged in, use the following command to connect. Then, select the country of the proxy that you want to use and press OK. The free ProtonVPN version only allows 3 countries.
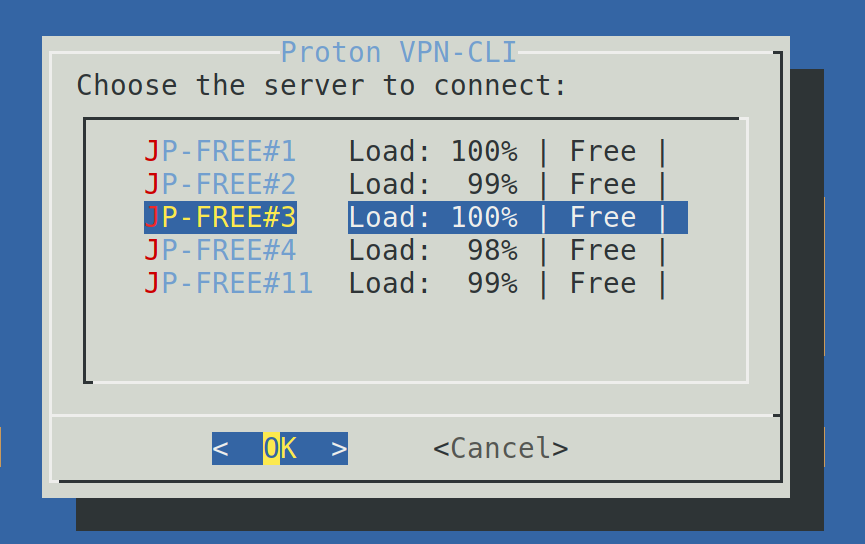
After selecting the country, choose any of the available servers and press OK.
You can select between TCP and UDP. While TCP is more reliable, UDP is faster. Make your choice and press ENTER.
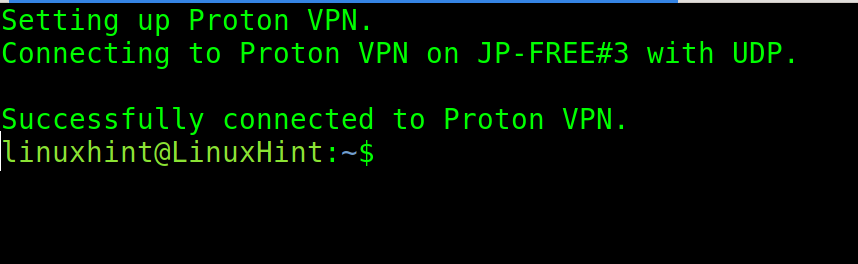
If properly connected, you will see a success message.
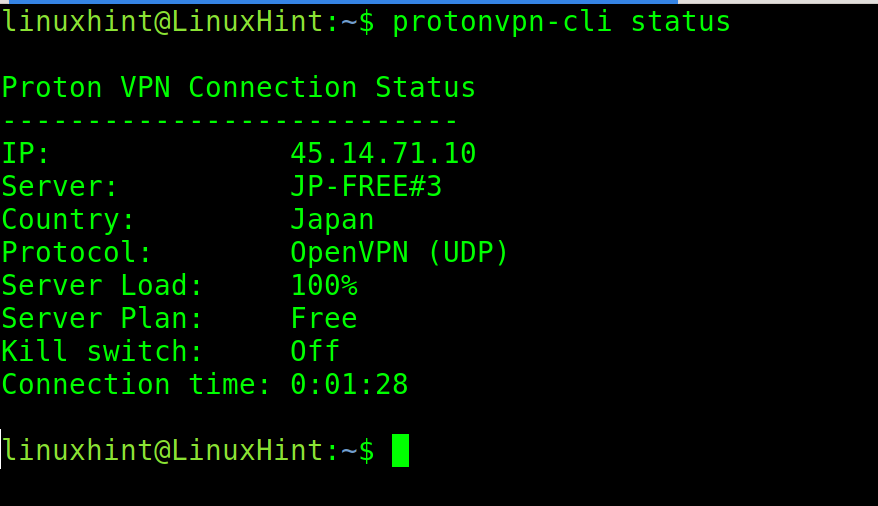
To check the ProtonVPN status, use the following syntax:
To disconnect, run the following command:
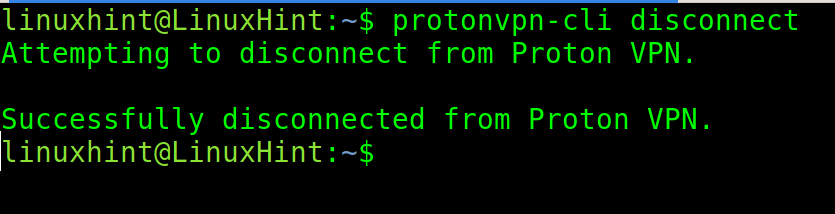
As you can see, all internet users can protect their traffic with a few steps.
UFW (Uncomplicated Firewall)
UFW is a friendly user frontend for the classic Iptables firewall. It allows the users to create their own firewall rules with a very simple syntax.
UWF is included by default in the previous Debian based Linux distributions like Ubuntu. While the current versions incorporate the Nftables, the older versions with Iptables offer the Iptables frontend called UFW.
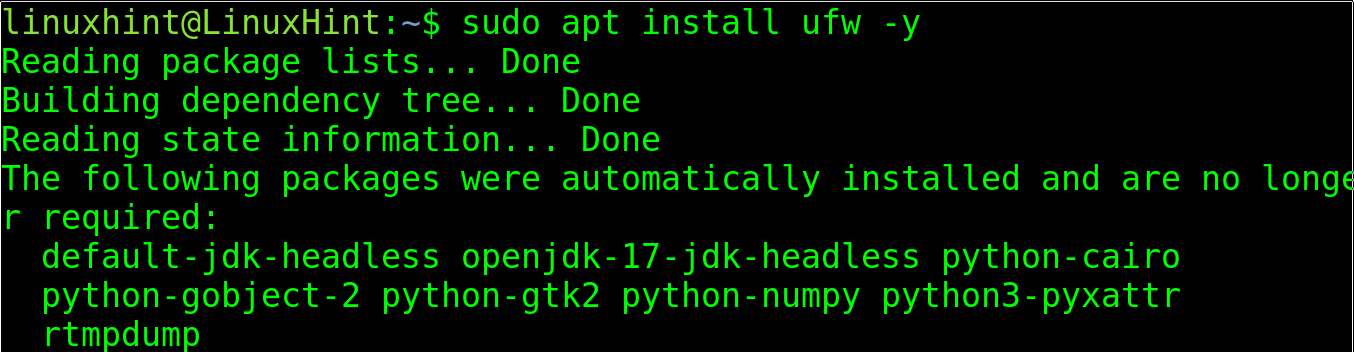
In case the UFW isn’t installed, you can install it using the apt packages manager as shown in the following:
Whether UFW is already installed or you installed it, check its status (if enabled or disabled) by running the following command:

As you can see, UFW is inactive. To enable it, use the following command:

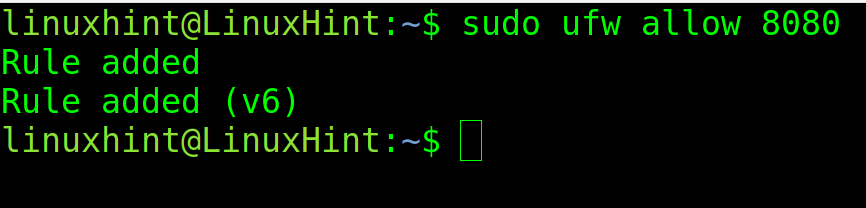
Once enabled, use the following syntax to open specific ports:
For example, to open the port 8080, execute the following command:
With UFW, you can specify the ports both by their number or by their protocol name. For example, to open the ssh port, you can run the following command:

You could get the same result by replacing “ssh” with “22”.
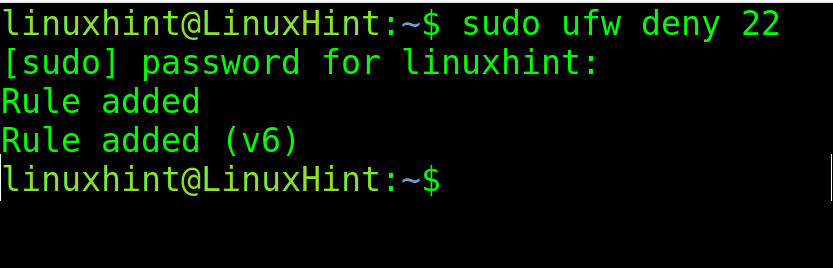
The syntax to close the ports is the same. Just replace “allow” with “deny” as shown in the following where the port 22 is closed:
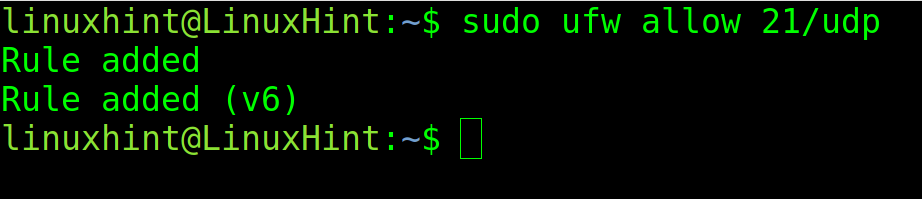
To specify a protocol (UDP or TCP), add a slash after the defined port, followed by the protocol.
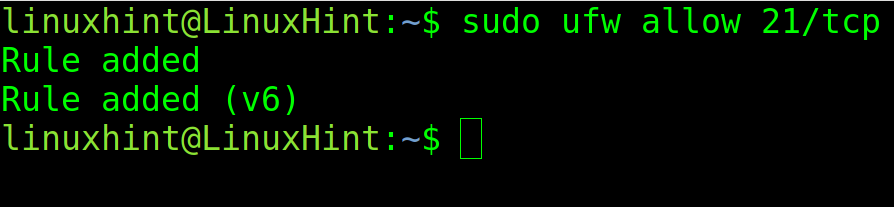
In the following example, the port 21 is open specifically through the UDP protocol.
To allow the TCP traffic, use the same syntax and replacing “udp” with “tcp” as shown in the following screenshot:
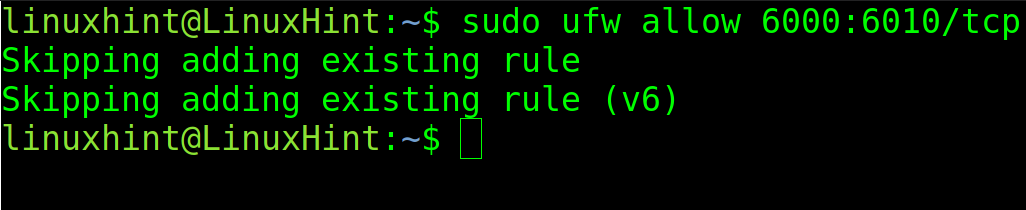
You also can deny or allow the port ranges. But when doing it, the user must specify the protocol.
In the following figure, the port range between 6000 and 6010 is allowed through protocol TCP.
UFW allows you to define the default policies, restrictive or unrestricted.
By defining a restrictive policy, we deny all the traffic through all ports and protocols unless we define the exceptions.
Contrary to this, when defining an unrestricted policy, all traffic is allowed unless exceptions are defined.
For example, to deny all incoming traffic by default, run the following command:
To allow all outgoing traffic, run the following command:
Not only a specific port can be allowed or denied for either outgoing or incoming, but also an IP address, too.
When the IP address is specified in the rule, any request from this particular IP is subjected to specified rule. For instance, in the following command, it allows all requests from 67.205.171.204 IP address. Then, it allows all requests from 67.205.171.204 to both port 80 and 443 ports. What this means is any device with this IP can send successful requests to the server without being denied in a case when the default rule blocks all incoming connections. This is quite useful for private servers that are used by a single person or a specific network.

Then, enable the incoming traffic from a specific IP to port 80.

The following command enables the traffic from a specific IP to port 443.

When a range of IP addresses are involved, its difficult to manually add each IP address record to a firewall rule to either deny or allow. Thus, the IP address ranges can be specified in CIDR notation, which typically consists of the IP address, the amount of hosts it contains and IP of each host.
In the following example, it uses the following two commands. In the first example, it uses /24 netmask, and thus the rule is valid from 192.168.1.1 to 192.168.1.254 IP addresses. In the second example, the same rule is valid for the port number 25 only. So, if incoming requests are blocked by default, now the mentioned IP addresses are allowed to send requests to port number 25 of the server.

The following command allows the traffic from a specific subnet to port 25.

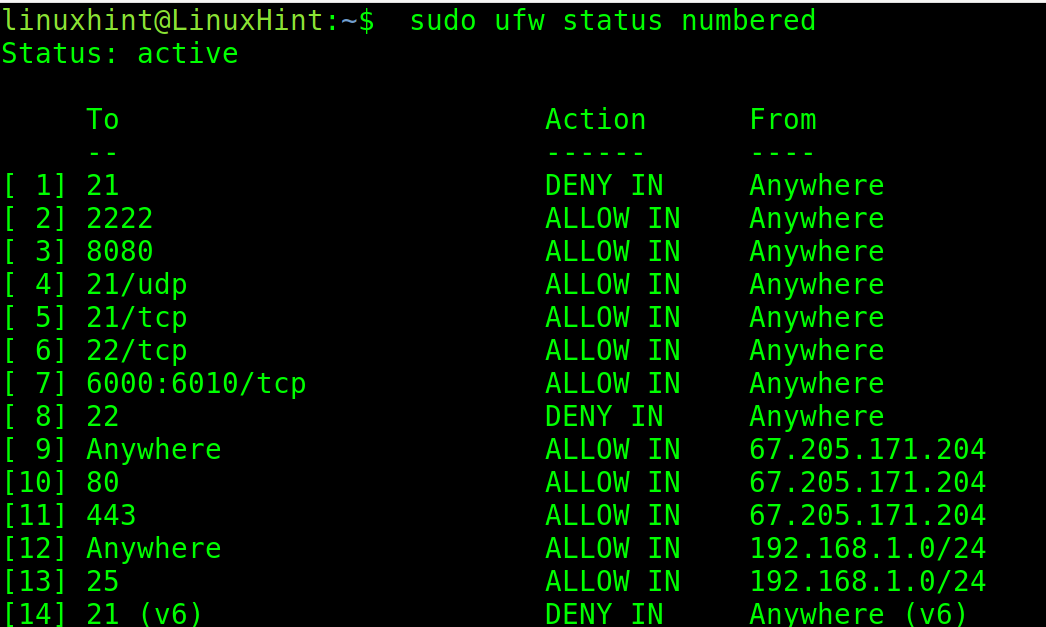
Rules can be removed from the firewall. The following first command lines up each rule in the firewall with a number. Then, with the second command, the rule can be deleted by specifying the number belonging to the rule.
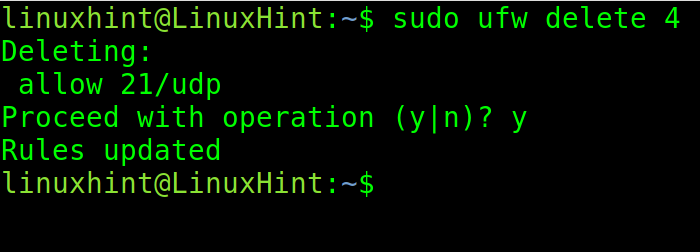
To delete rule 4, which allows the traffic through port 21/UDP, run the following command:
When requested to confirm the operation, type “y” and press ENTER.
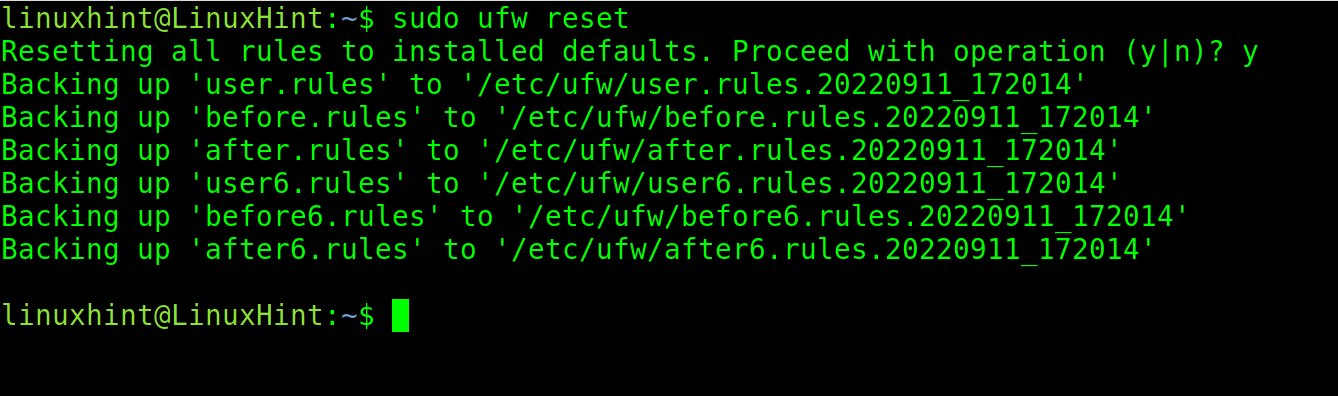
Finally, to start over the firewall configuration, use the following command. This is quite useful if the firewall starts working oddly or if the firewall behaves in an unexpected manner:
Sometimes, the default firewall has to be disabled in order to test the network or when a different firewall is intended to install. The following command completely disables the firewall and allows all incoming and outgoing connections unconditionally. This is not advisable unless the aforesaid intentions are the reasons for disabling. Disabling the firewall doesn’t reset or delete its configurations; hence, it can again be enabled with the previous settings.

You can go deeper into UFW with the following articles: How to limit ssh with UFW and Working with Debian Firewalls (UFW).
If you would like to learn more about firewalls, I highly recommend learning the Nftables which is replacing the Iptables. At Linux Hint, we published a very friendly Nftables tutorial to get started.
Conclusion
As you can see, the advanced Linux commands don’t require too much knowledge, and the needed theory is easy to understand if accompanied with examples. Every Linux user can learn all the steps described. All the instructions, except for some installation methods, are valid for all Linux distributions. Don’t copy paste the examples given in this document and type everything by yourself to incorporate the knowledge. We encourage you to continue with the Nftables article that is offered previously.
Thank you for reading this document explaining advanced Linux network commands. Keep following us for more professional content on Linux and networking.
Source: linuxhint.com