Adding Users to Ubuntu Step-by-Step
Add a User via GUI
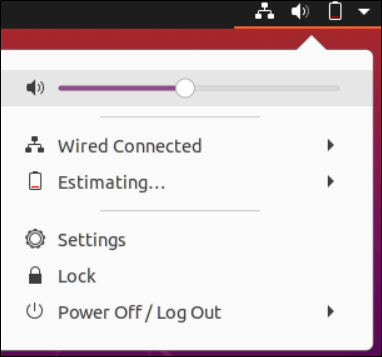
On the right side of the Ubuntu desktop, you can find the small triangle icon beside the battery icon which holds some essential settings for the Linux system. The “Settings” option must be selected from the list of settings that appears.
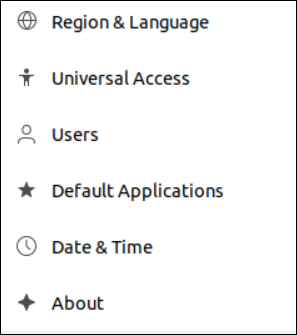
The “Settings” panel will appear on your Ubuntu desktop screen. The “Users” menu can be found by extending the scroll bar on the left side of the panel all the way down.
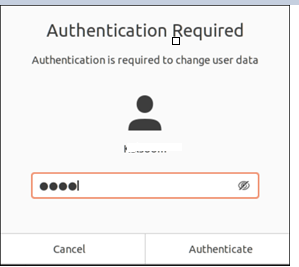
When you tap on the “Users” menu, you will be asked to unlock it first before making any changes. Consequently, click on the “Unlock” button at the screen’s top.

The presently logged-in user will be prompted for their password in an authentication pop-up window. Add your password and use the “Authenticate” button to proceed.
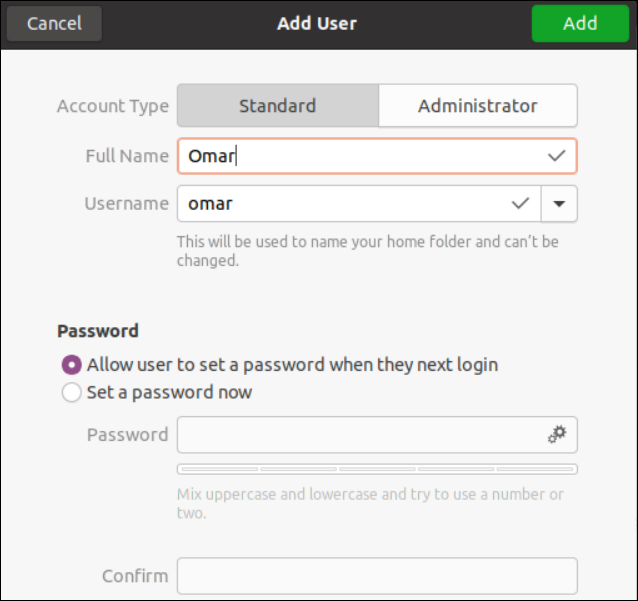
Now, a “Users” panel allows you to add new users to your Ubuntu system via the “Add User” green button on the taskbar.

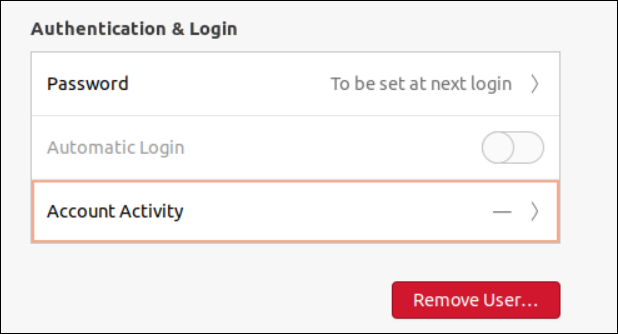
Using the “Add User” button, we can add an entirely new user to an Ubuntu System without any command. For instance, we create a new user named “Omar” in the Linux system. You can select the type of account to be created like standard or Administrator. Then, you need to provide the Full name and Username of a new account to be created. The “Password” section allows you to set the password right at the moment or set the password on the next login. The “Add” button ensures that the account has been created successfully in the Ubuntu system.
Along with the currently logged-in account, a new user which is “Omar” is also listed.

Below the “Authentication & Login” section, you can find the “Remove User” button that can be used to delete a newly created user directly in one click.
Add a User via the Command Terminal
After creating a new account which is “Omar”, we log in from it and open its terminal via the “Ctrl+Alt+T” shortcut key. We create new user accounts within this terminal shell with different options in the terminal commands. To list all the available users of your Ubuntu Linux system, we utilize the “cat” instruction in the command-line shell. This includes the “/etc/passwd” path to the “passwd” file that contains the information regarding the users. The following output displays the available users:
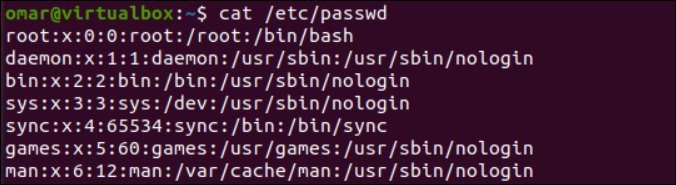
Moving down to the bottom of this instruction’s output, you can also find your username listed.

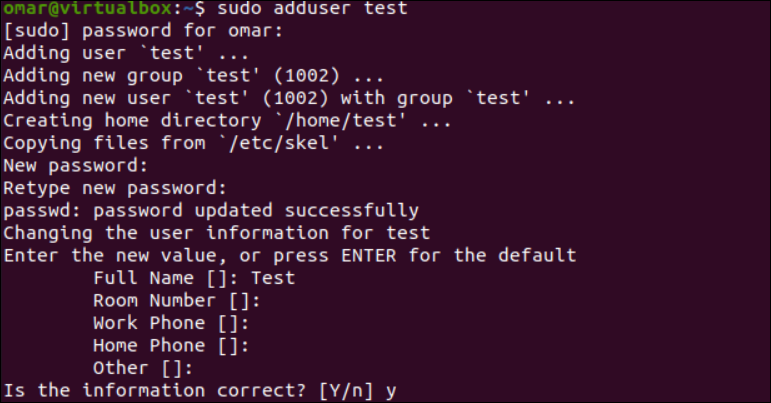
Let’s begin with the Ubuntu command line instruction to add a new standard user into a Linux environment. For this, Linux provides us with the “adduser” keyword instruction that should be executed with the “Sudo” rights. We use this instruction to create a new user named “test”. The instruction processing starts with the prompt to ask for a password of a currently logged-in user, i.e. “omar”.
You need to add your password and hit the “Enter” key to continue. After that, the processing at the backend creates a new user which is “test”. Another prompt will appear to request a new password to create a new account. After successfully setting the password for a new user, you need to press “Enter” on a prompt to assign a full proper name to a user. The other information is also optional to provide. Otherwise, tap on “y” to affirm that the information is correct.
Now that the user is created successfully, we can look for it in the system. The “grep” instruction of Linux is used to search for a specific pattern in a system. It is used to search for the “test” word within the “passwd” directory. The output of this instruction displays that the “test” user belongs to the “Test” group, and its group number is 1002.
![]()
We now created a standard user via the “useradd” instruction that is only good for routine work, but you cannot perform any administrative tasks using it. Therefore, to promote or add your new users to a “sudo” group, you should utilize the “usermod” instruction with “sudo” rights. The “-aG” option that is used in this instruction makes sure that the “test” user should be added to the “sudo” group of your system.

You should employ the “useradd” instruction with the “-G” parameter to add a user to a particular group of users when creating a new user, i.e. to create and add the user “john” to a “sudo” group. The “-m” option that is used here mostly moves a user’s home directory.
$ grep ‘^john’ /etc/passwd

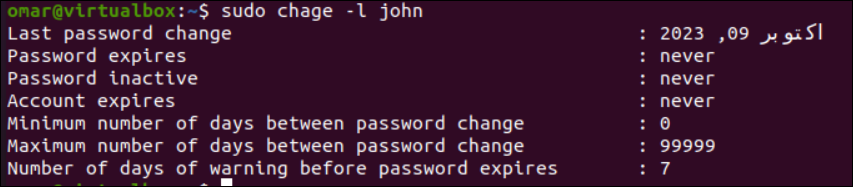
The “chage” instruction is utilized with the “-l” option and the newly created username can display the basic information regarding the particular user, i.e. when the password was last changed, the date of password expiration and inactivity, account expiry, and some restrictions.
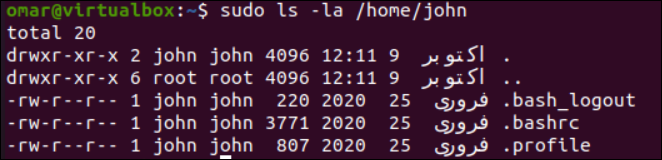
You can get the information regarding the home directory of the newly created user which is “john” using the “ls” instruction followed by the “-la” option and the “/home/john” path.
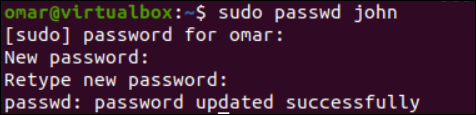
We can set the password for a newly created user account, if it is not yet set, via the “passwd” instruction. Ensure that you perform this action with “sudo” rights and act according to the prompts.
The “userdel” instruction can be utilized with or without the different options to delete a user from a Linux system.
$ sudo userdel -r john

The “-r” option can also remove the home directory of a user that you want to delete.

The “deluser” instruction is also available to remove a user’s home directory with the “–remove-home” option.

Conclusion
As discussed in this guide, the users are essential to any operating system when managing a whole project or system. We discussed the two most elemental, simplest, yet effective ways to add new users to an Ubuntu system. We also discussed about the queries to delete the users, how to set the passwords, and how to add the users to groups.
Source: linuxhint.com