Adding the LWC Component in Salesforce
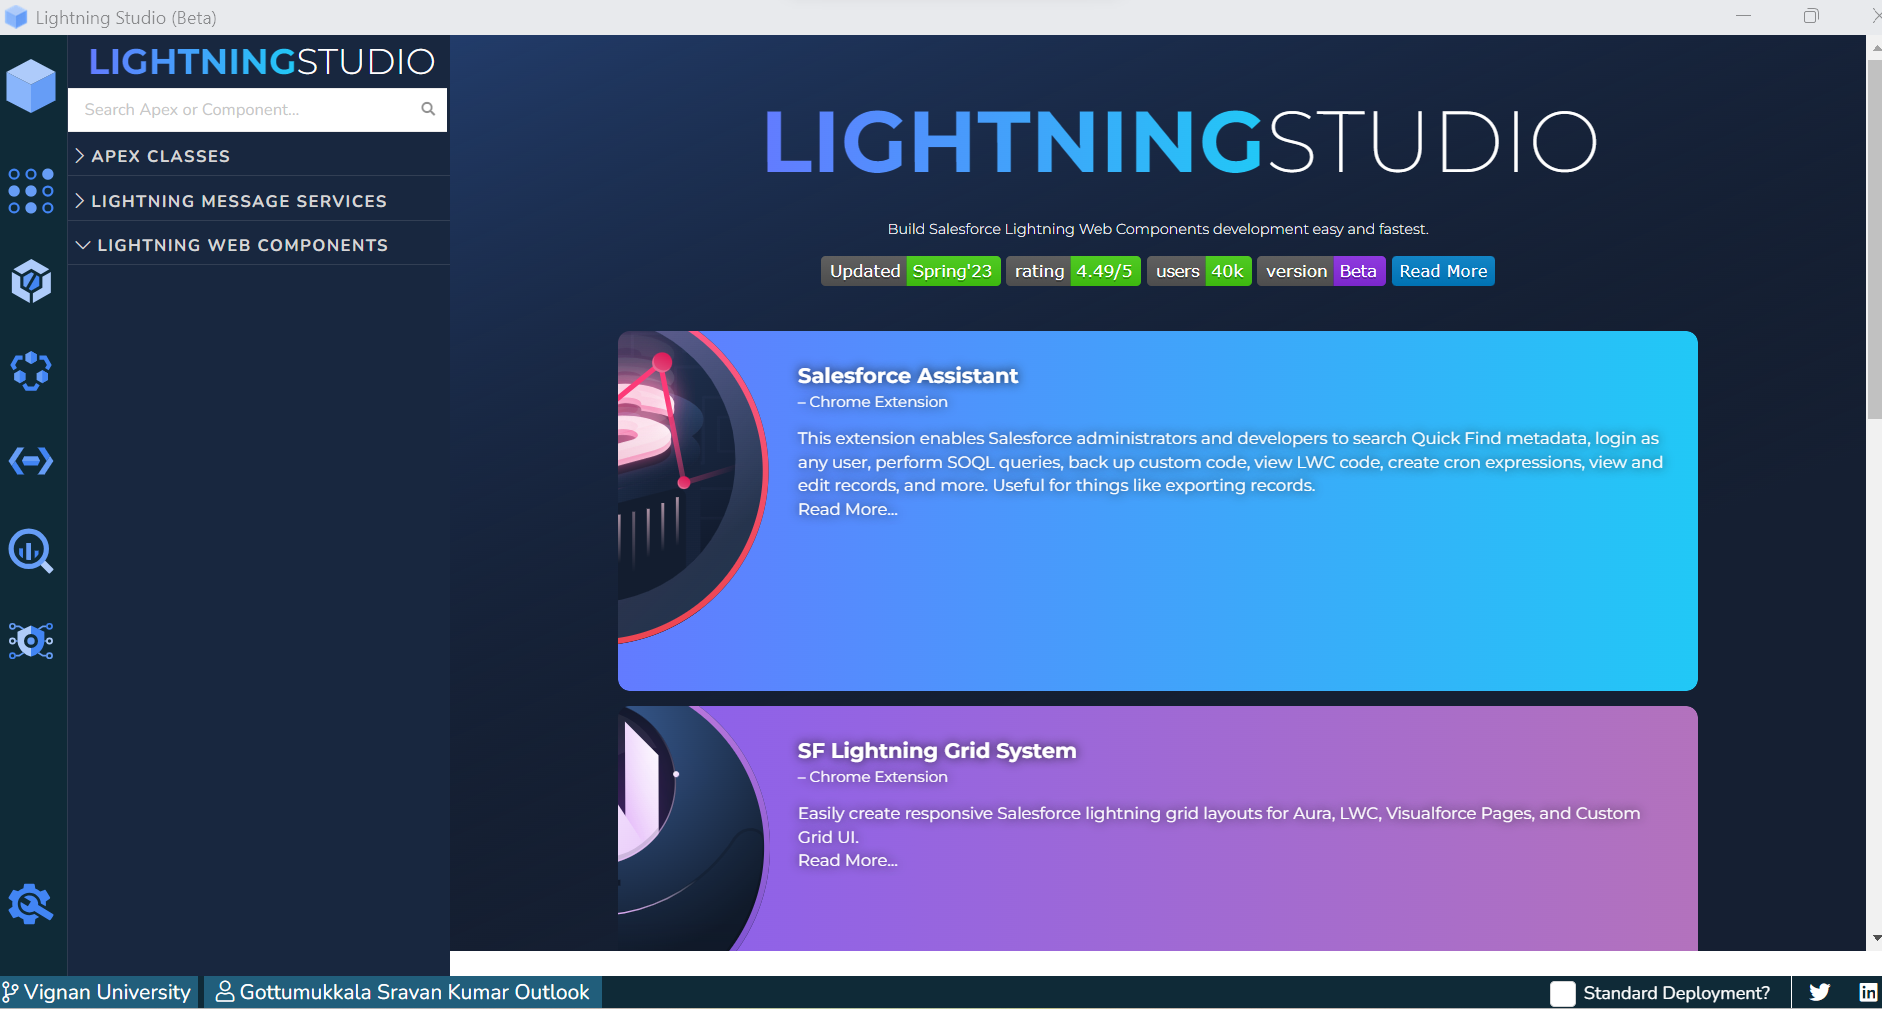
Introducing the Lightning Studio Extension
Lightning Studio builds the Salesforce LWC development easy and fastest. Within this editor, we can directly create the Apex/message channels and LWC scripts. Also, we can directly deploy the LWC (custom) components in one go. Let’s see how to add this to our website and open it.
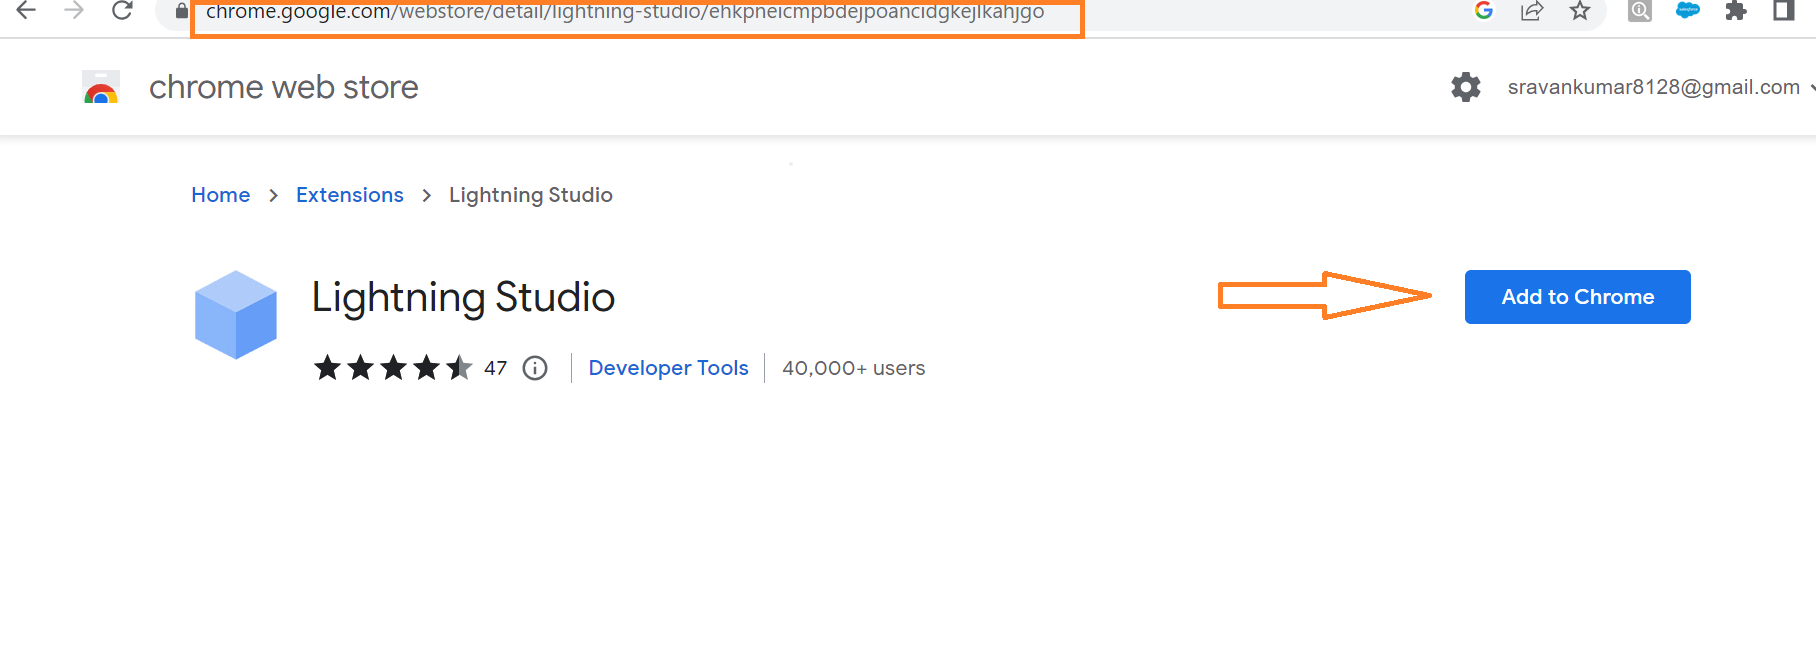
Go to the website and search for “Lightning Studio – Add Chrome” (if you are using Chrome). Click on the “Add to Chrome” button.
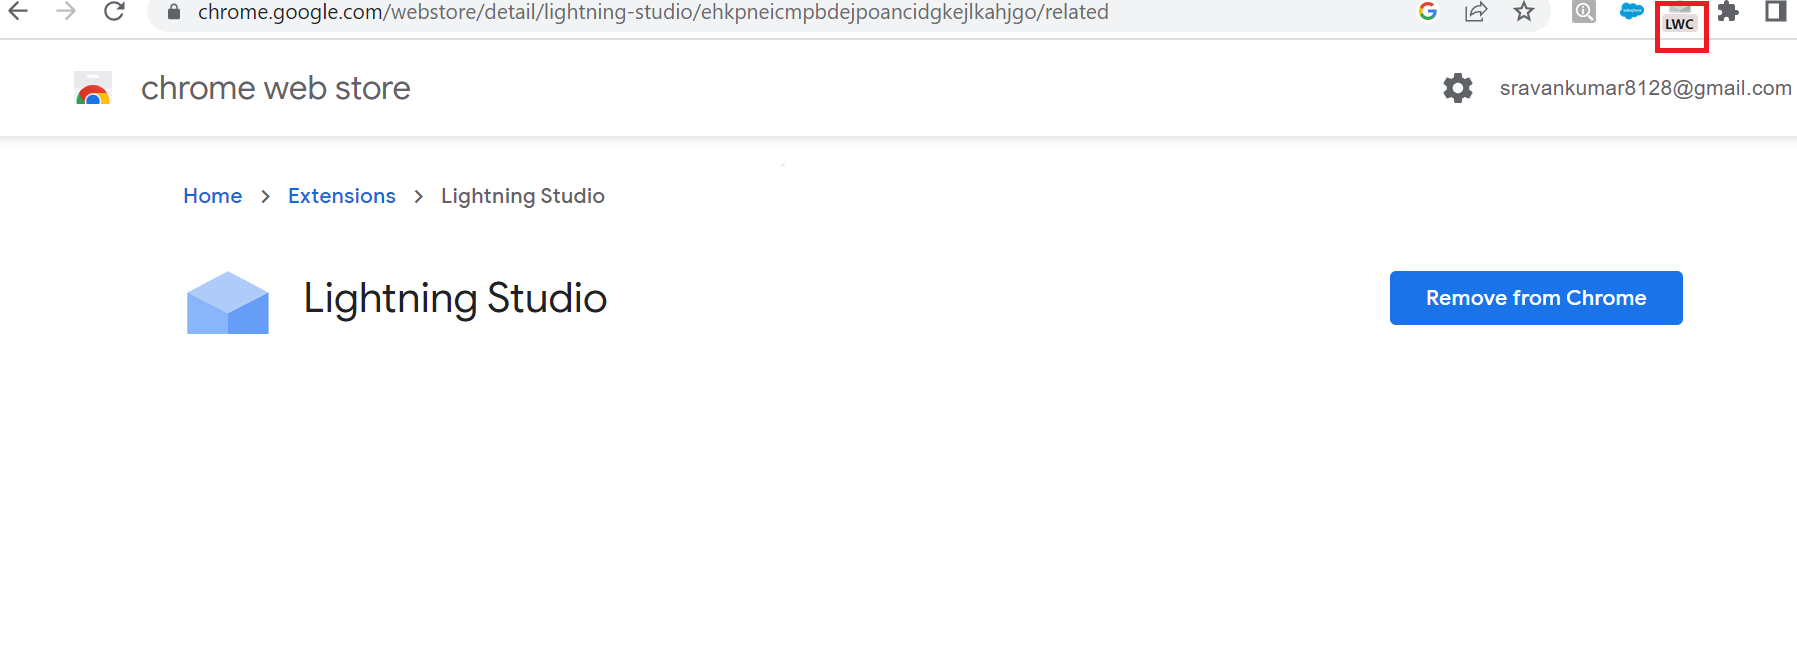
We can see that it is added to Chrome. Now, it is disabled. It will enable only if the Salesforce Org is opened.
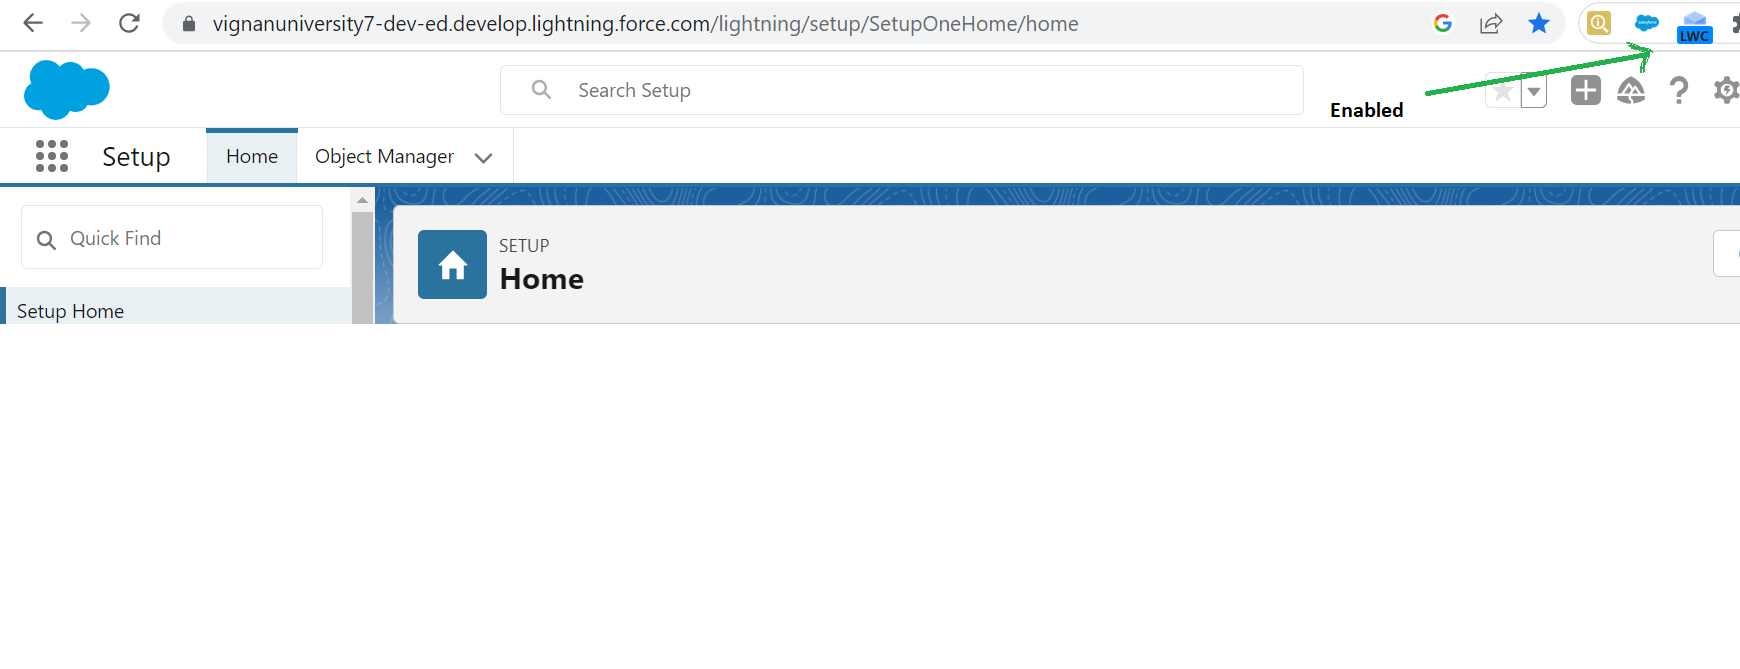
It is enabled after logging into the Salesforce Org.
Click on the extension.
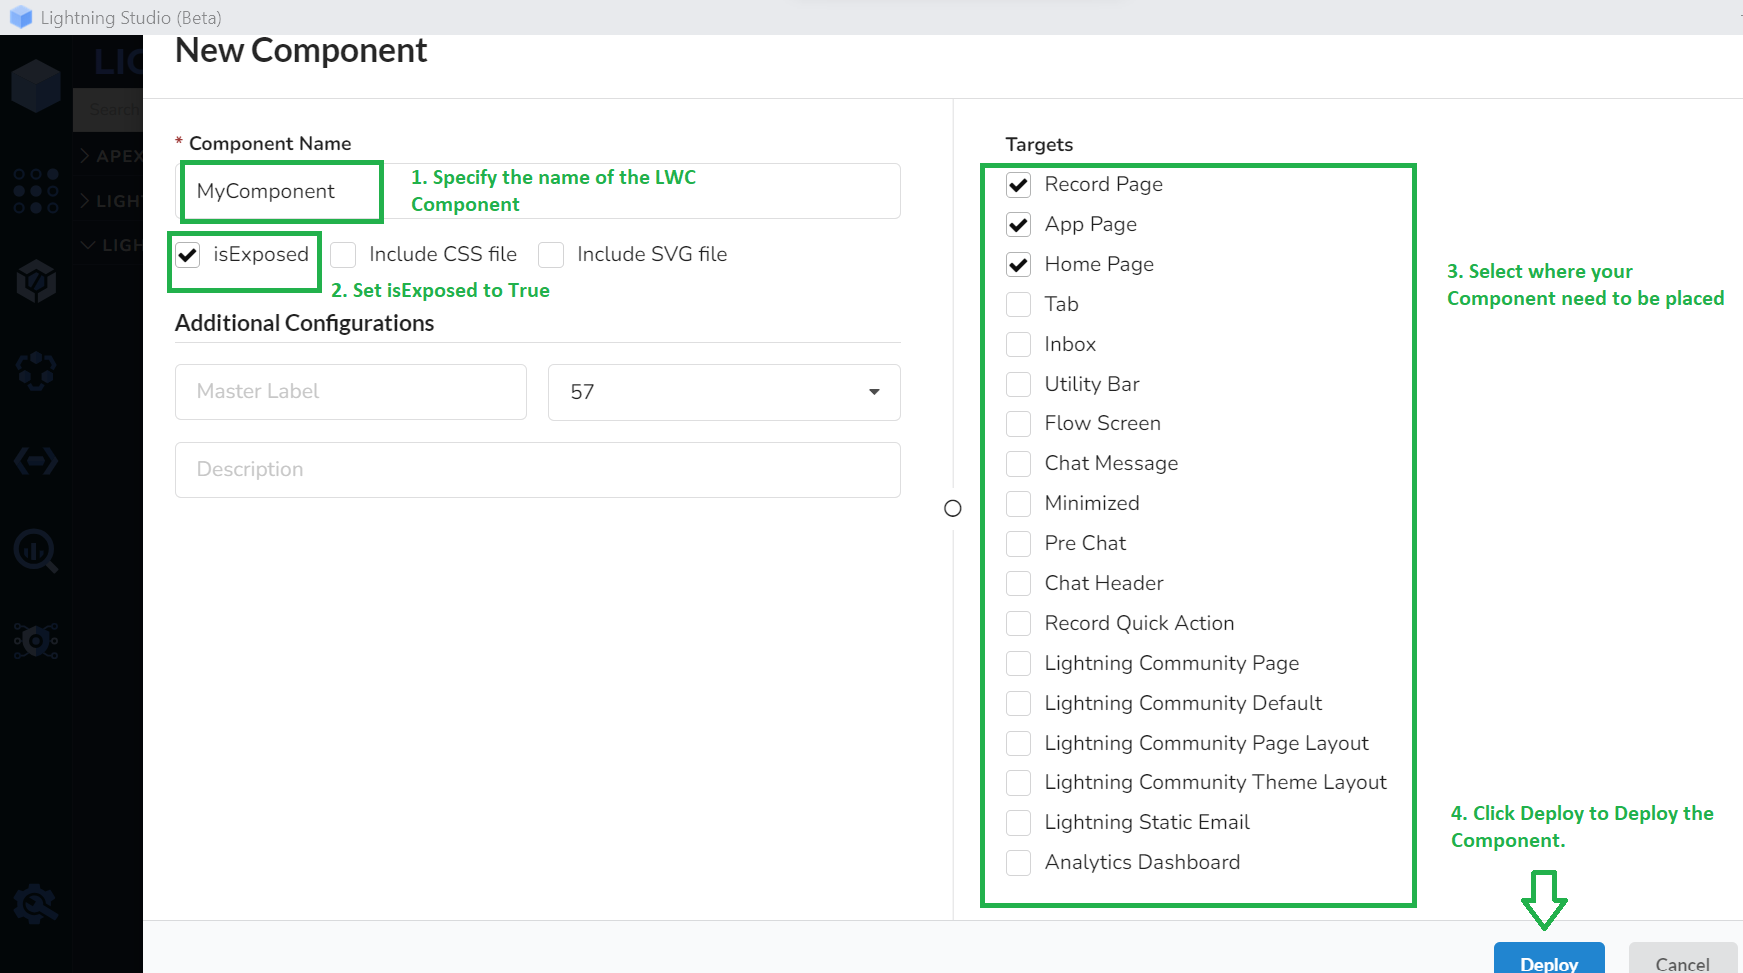
Go to the left and select the third icon which is used to create a new LWC component.
- First, we need to specify the name of the component.
- The “isExposed” is used to set the component visibility in Salesforce. It must be set to true.
- It is important to specify the target where the component is to be placed. Multiple targets can be selected.
- Deploying the component is the final step (click on “Deploy”).
Example 1: Adding to the Record Page
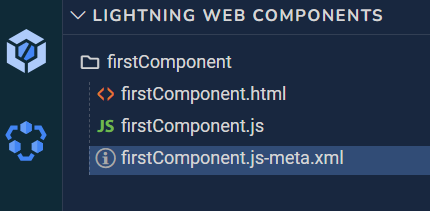
In this scenario, we create the “firstComponent” LWC script that displays the “Added to Record page” text and add this component to the “Account Record” page. In the “firstComponent.js-meta.xml” file, we need to specify the target as lightning__RecordPage.
Code Structure:
firstComponent.html
<lightning-card variant="Narrow" title="Linuxhint">
<p>>Added to Record page</p>
</lightning-card>
</template>
firstComponent.js
export default class FirstComponent extends LightningElement {
}
firstComponent.js-meta.xml
<LightningComponentBundle xmlns="http://soap.sforce.com/2006/04/metadata">
<apiVersion>57.0</apiVersion>
<isExposed>true</isExposed>
<targets>
<target>lightning__RecordPage</target>
</targets>
</LightningComponentBundle>
Adding a Component:
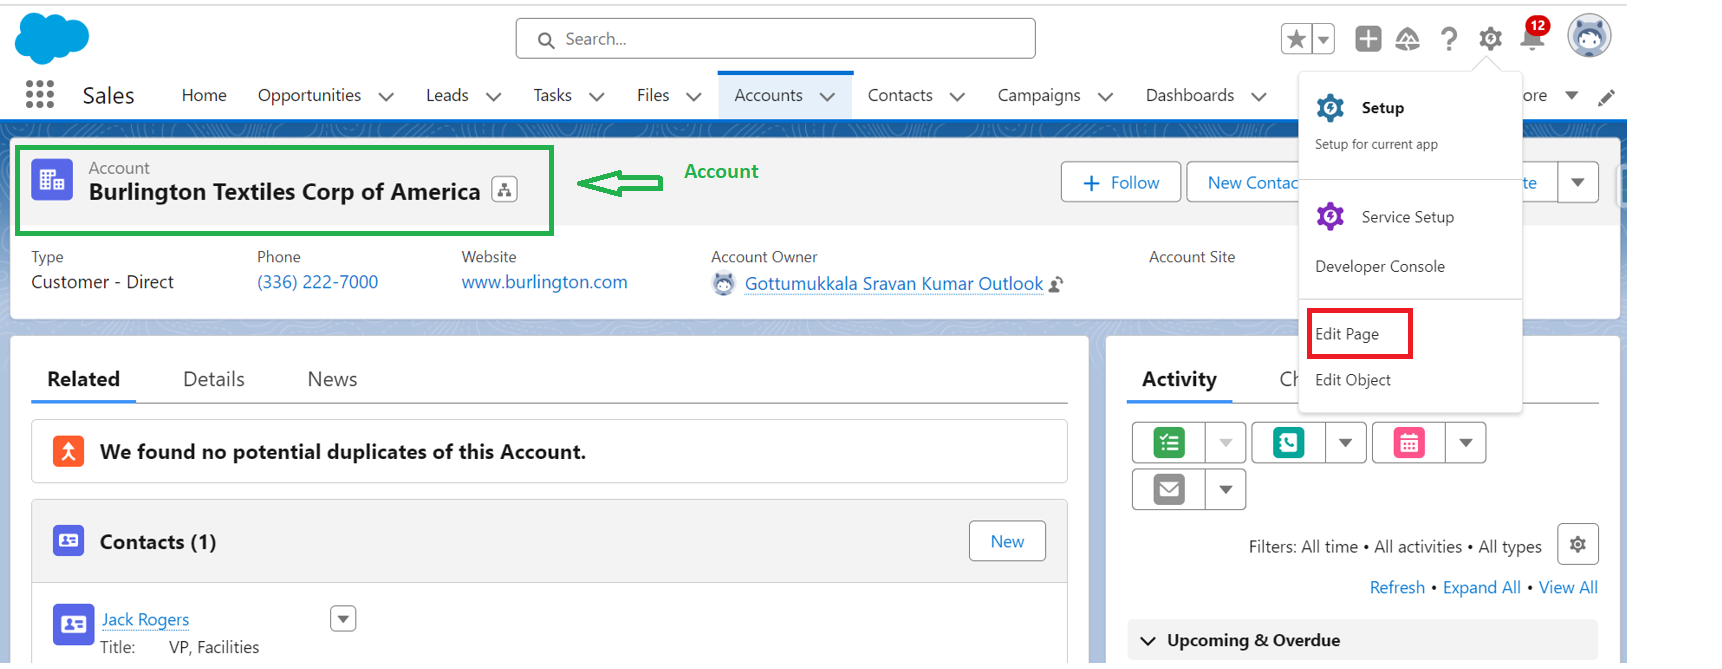
Go to the Salesforce Org and search for the “Sales” app under the App Launcher.

Open any account record by navigating to the “Accounts” tab. Go to the gear icon and select “Edit Page”.
Now, go to the left and search for your component.

Drag the component and it place below the “Highlights Panel”.
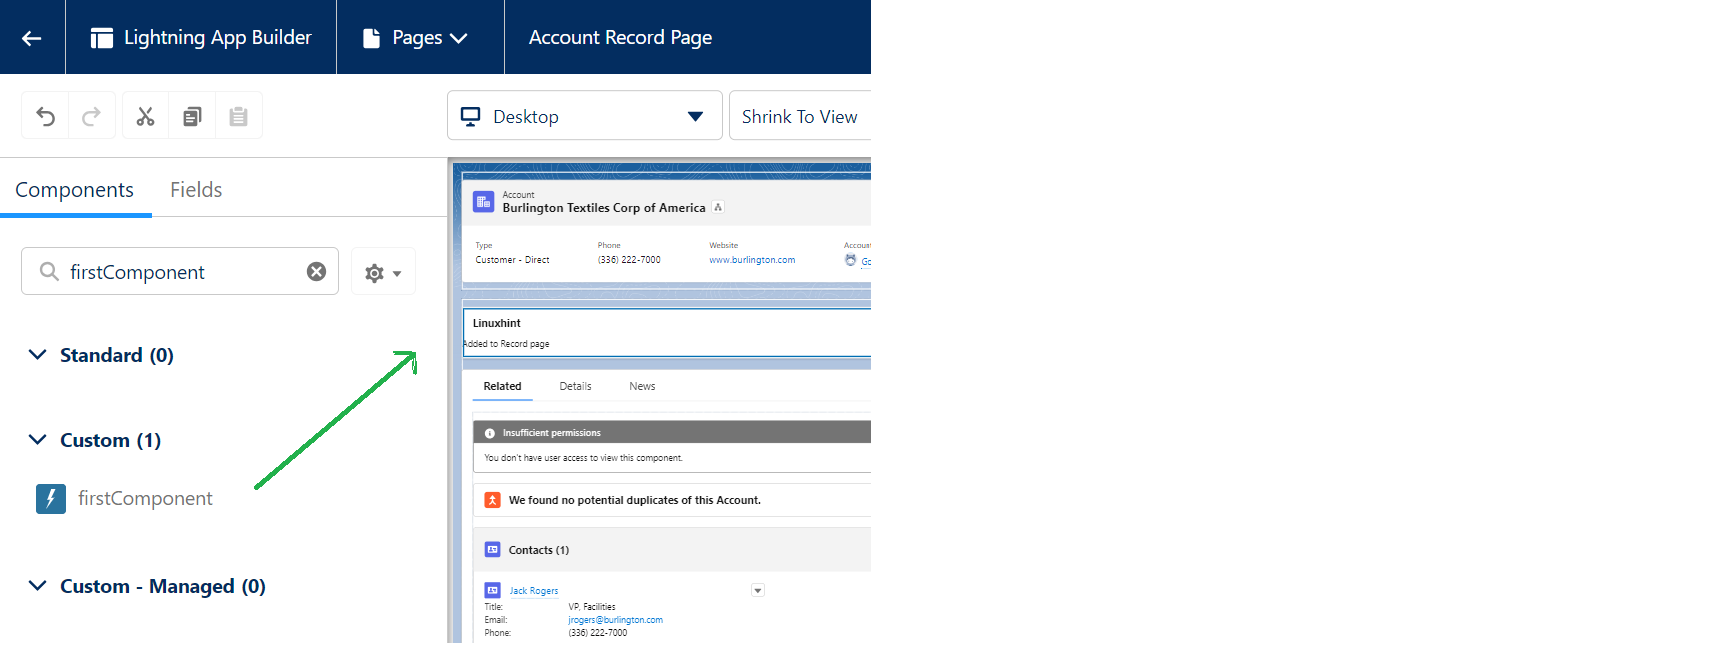
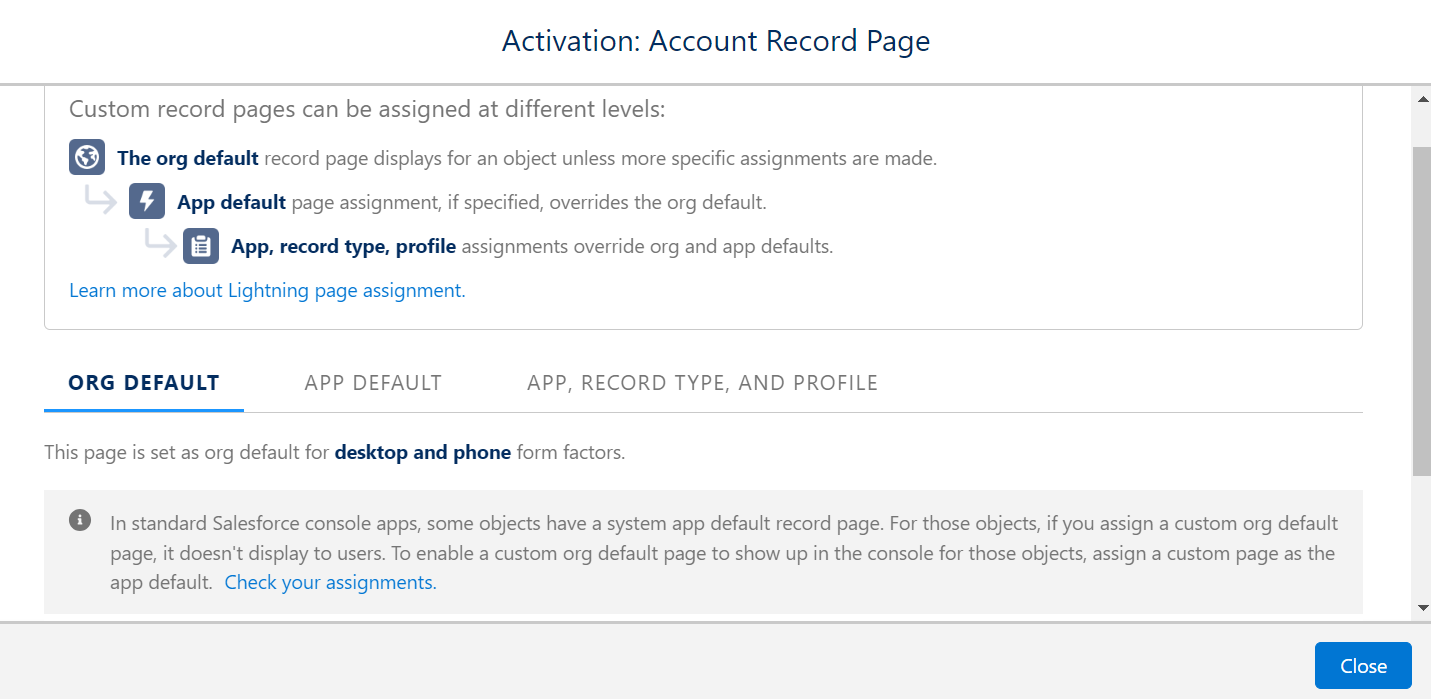
Click on “Activate” and assign it as the Org default. Finally, save the record page.

It’s done. Now, go back to the “Sales” app page and go to the “Account Record” (any record). You can see that the custom component is added.

Example 2: Adding to Home Page
Let’s utilize the “firstComponent”. Modify the paragraph text as “Added to Home page” in the HTML file. Specify the target as “lightning__HomePage” in the “firstComponent.js-meta.xml” file.
firstComponent.html
firstComponent.js-meta.xml
<LightningComponentBundle xmlns="http://soap.sforce.com/2006/04/metadata">
<apiVersion>57.0</apiVersion>
<isExposed>true</isExposed>
<targets>
<target>lightning__HomePage</target>
</targets>
</LightningComponentBundle>
Adding a Component:
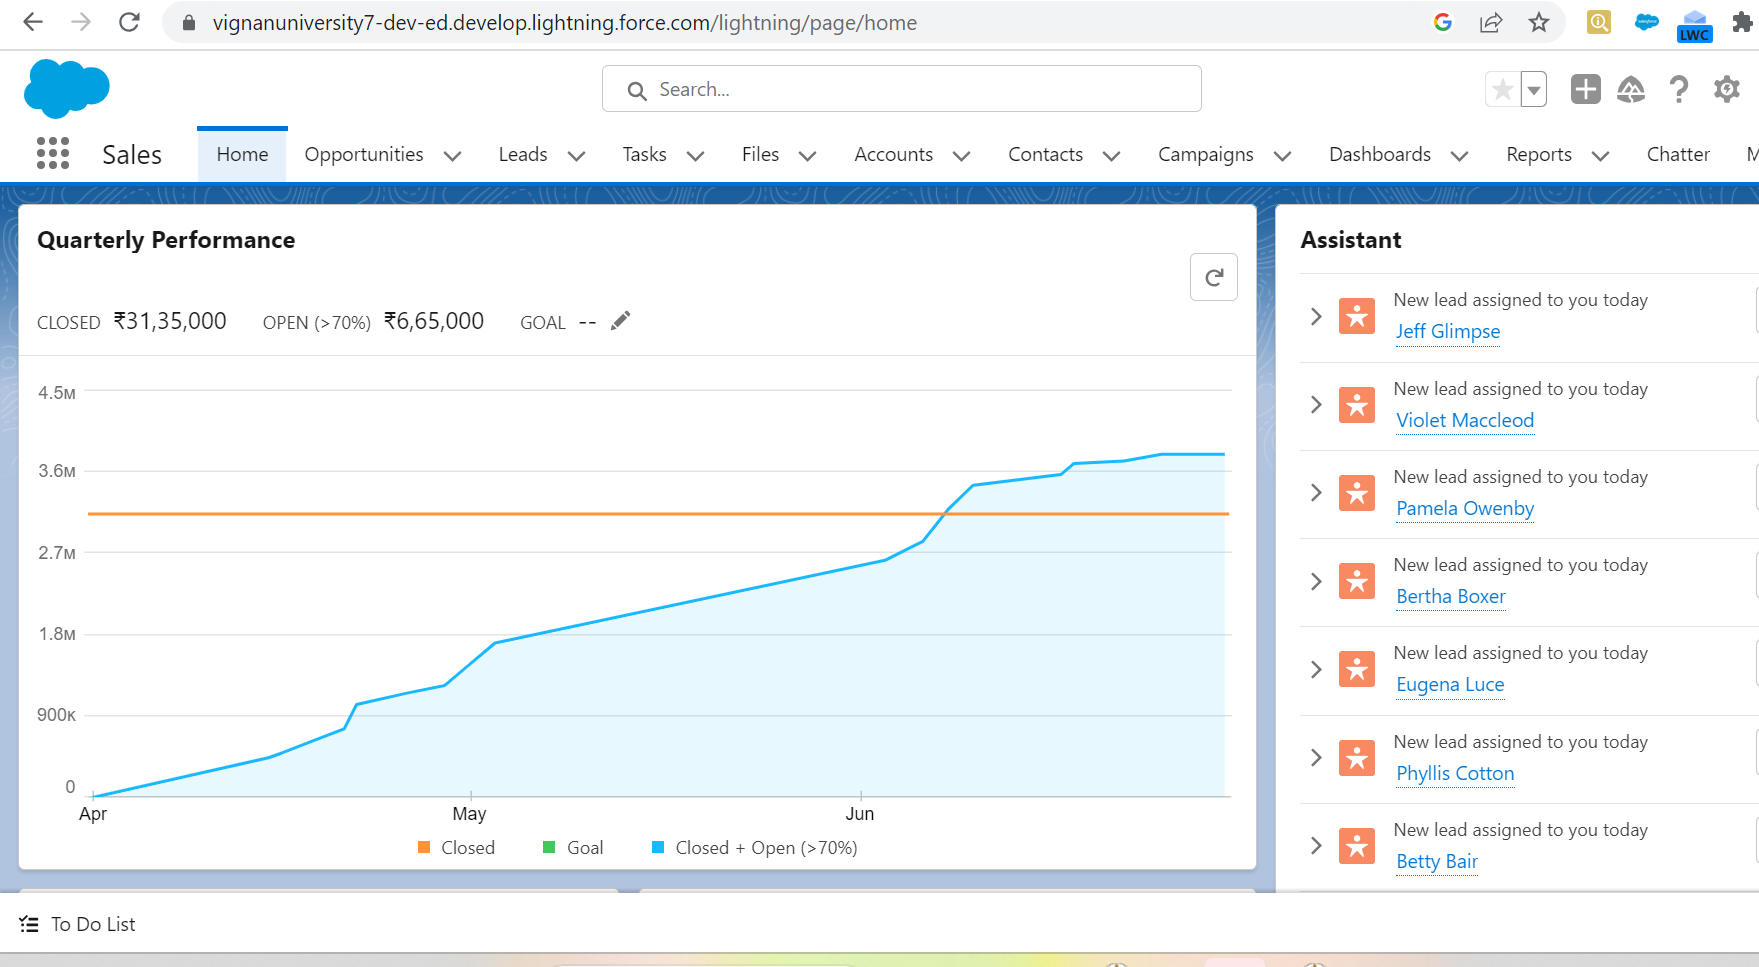
Go to the “Sales” app and click on the “Home” tab.
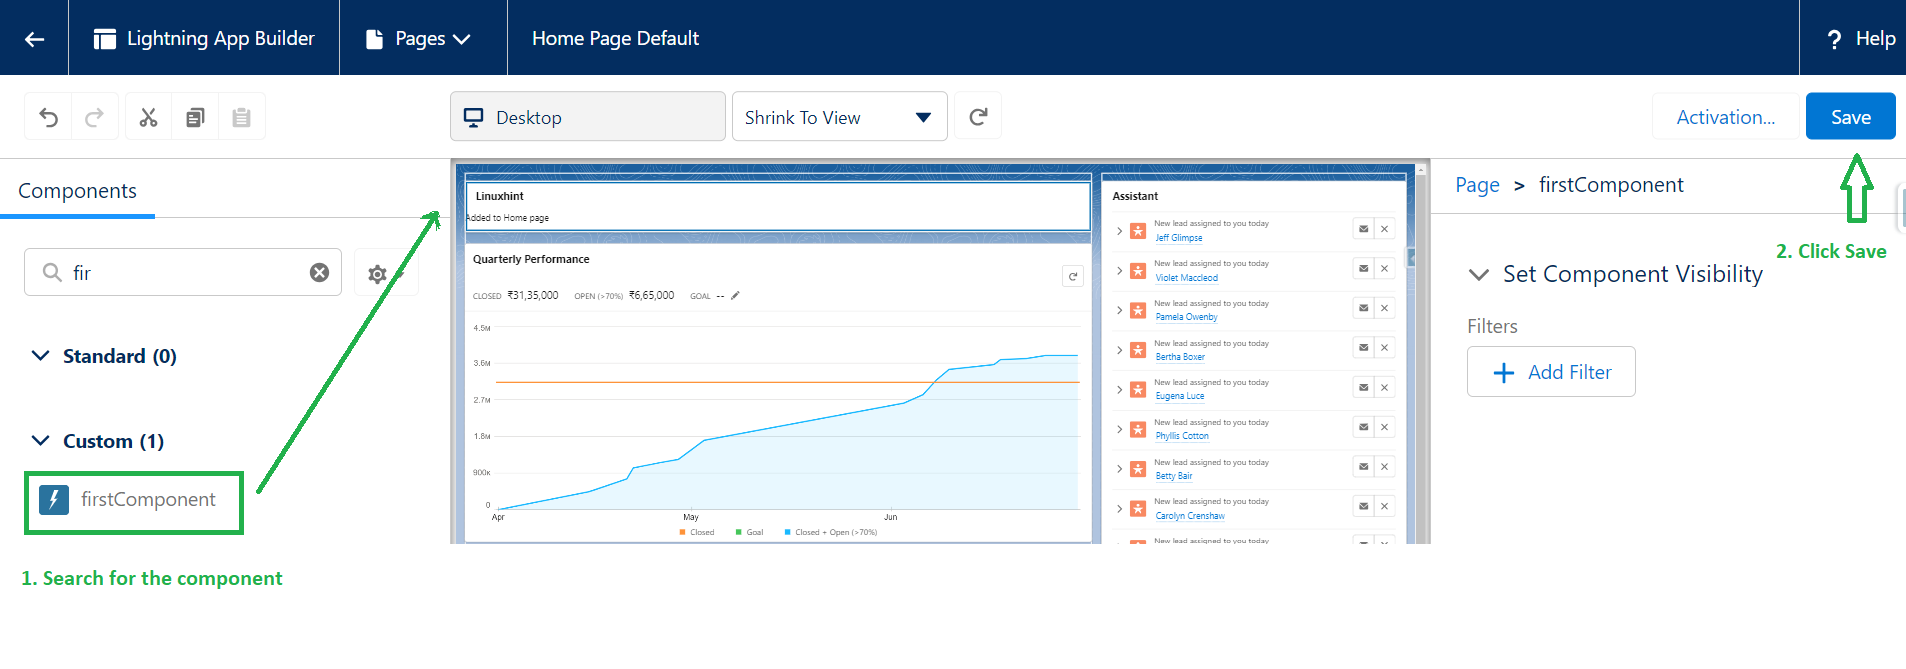
Click on the edit page available under the gear icon. Search for the component and place it above the “Performance” component. Save the page.
Refresh the “Sales Home” tab.
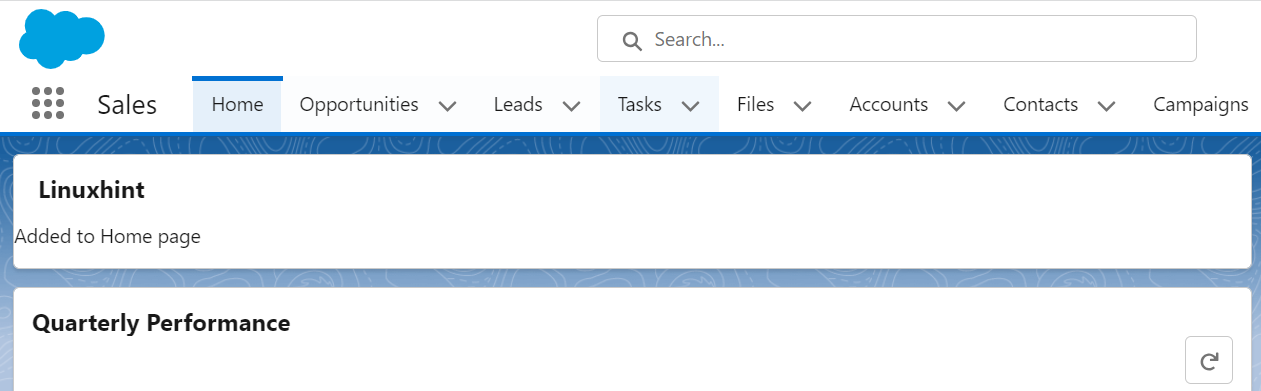
We can see that our component is added to the Home page.
Example 3: Adding to App Page
Let’s utilize the “firstComponent”. Modify the paragraph text as “Added to App page” in the HTML file. Specify the target as “lightning__AppPage” in the “firstComponent.js-meta.xml” file.
firstComponent.html
<lightning-card variant="Narrow" title="Linuxhint">
<p>Added to App page</p>
</lightning-card>
</template>
firstComponent.js-meta.xml
<LightningComponentBundle xmlns="http://soap.sforce.com/2006/04/metadata">
<apiVersion>57.0</apiVersion>
<isExposed>true</isExposed>
<targets>
<target>lightning__AppPage</target>
</targets>
</LightningComponentBundle>
Adding a Component:
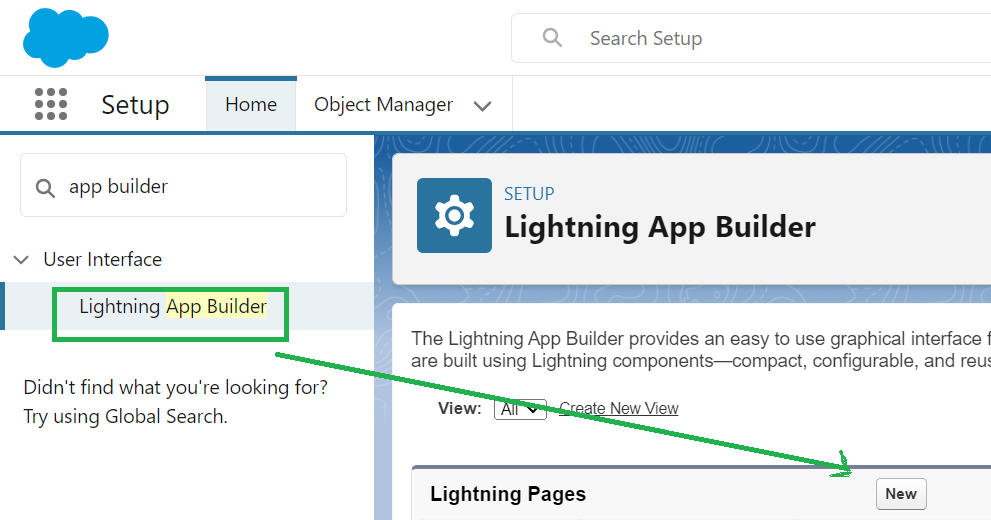
First, we need to create an App page in Salesforce using the Lightning App Builder. Search for “Lightning App Builder” in the “Quick Find” and click on “New” to create a new lightning page.
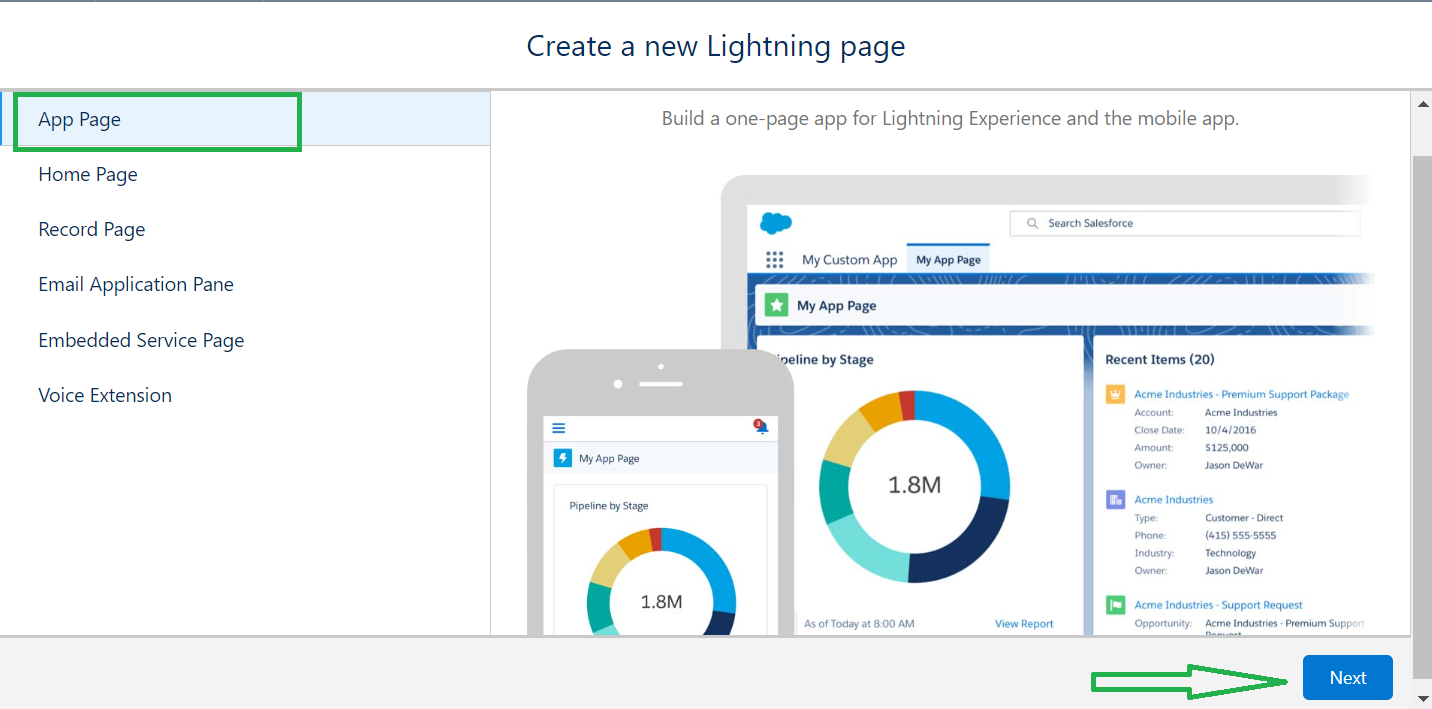
Choose the App page and go to “Next”.
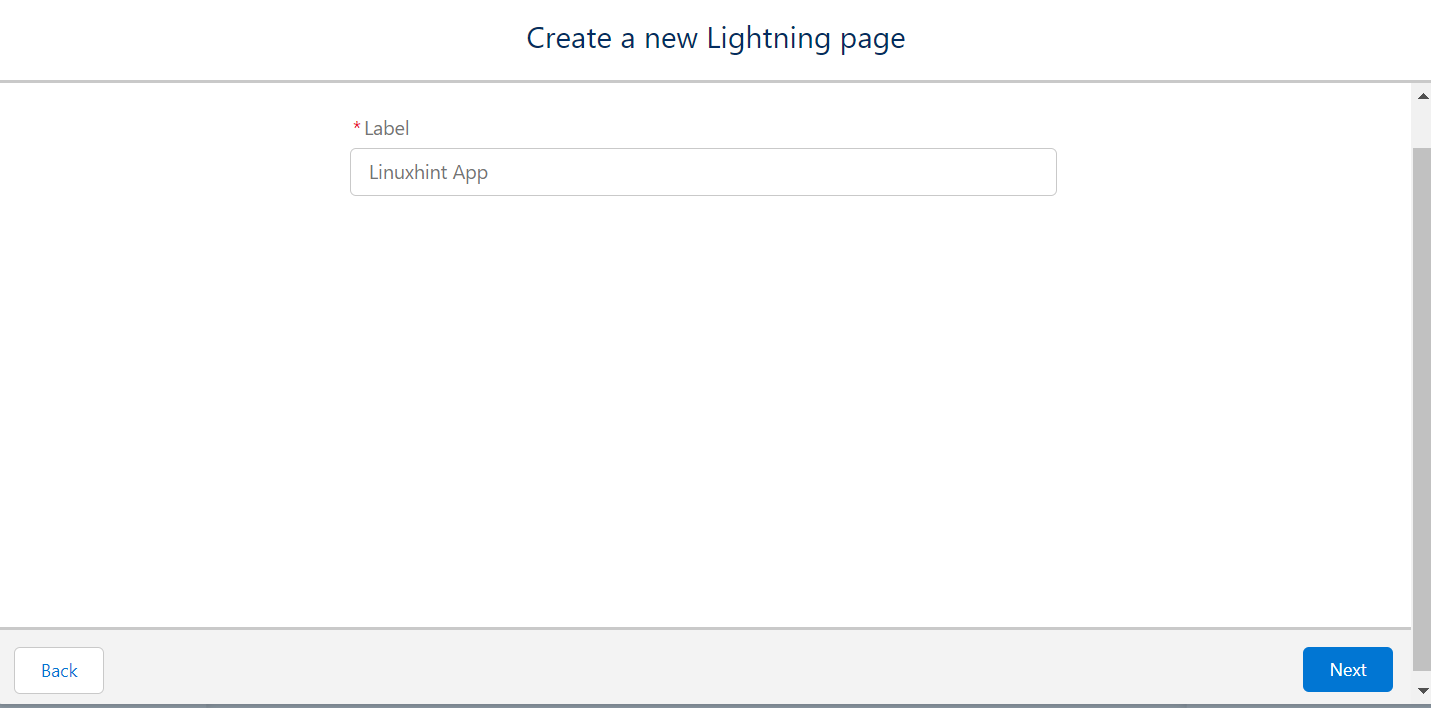
Give the label as “Linuxhint App” and go to “Next”.
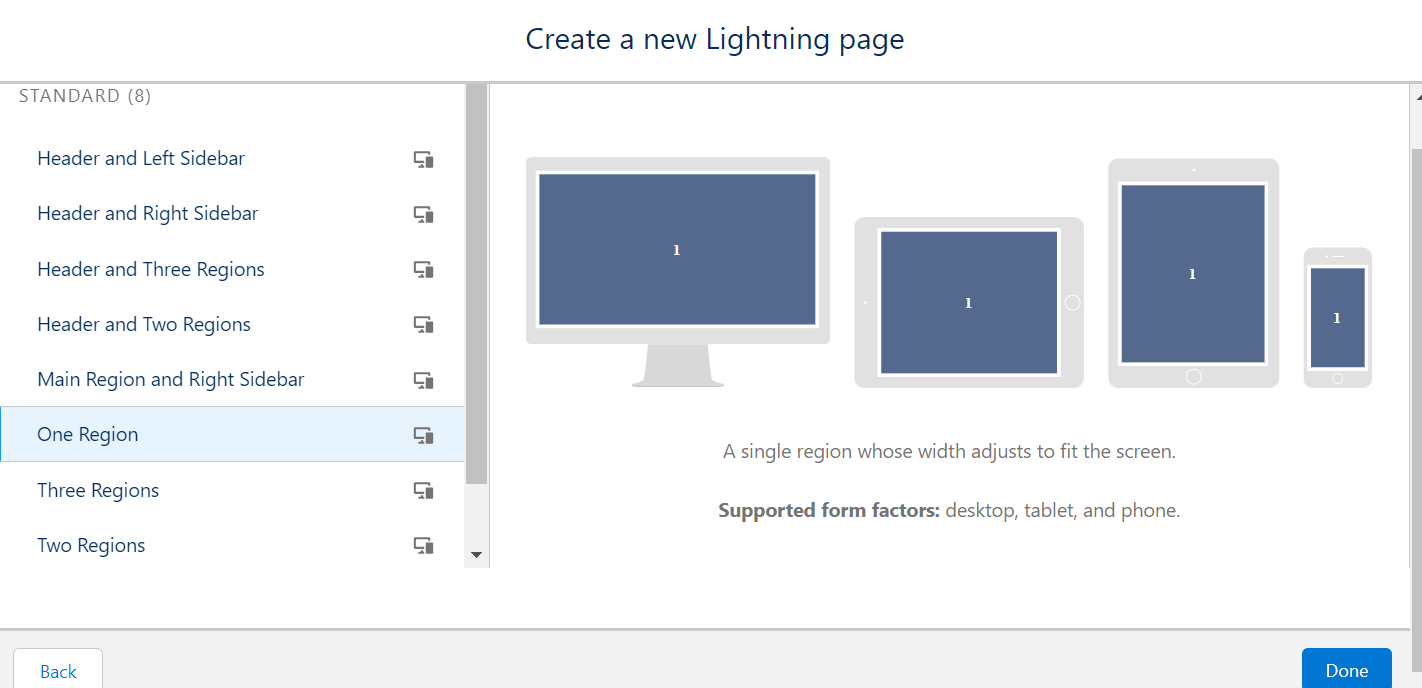
As of now, we only need one region to place the component. So, choose “One Region” and click “Done”.
Now, drag the “firstComponent” to the page and save the page.
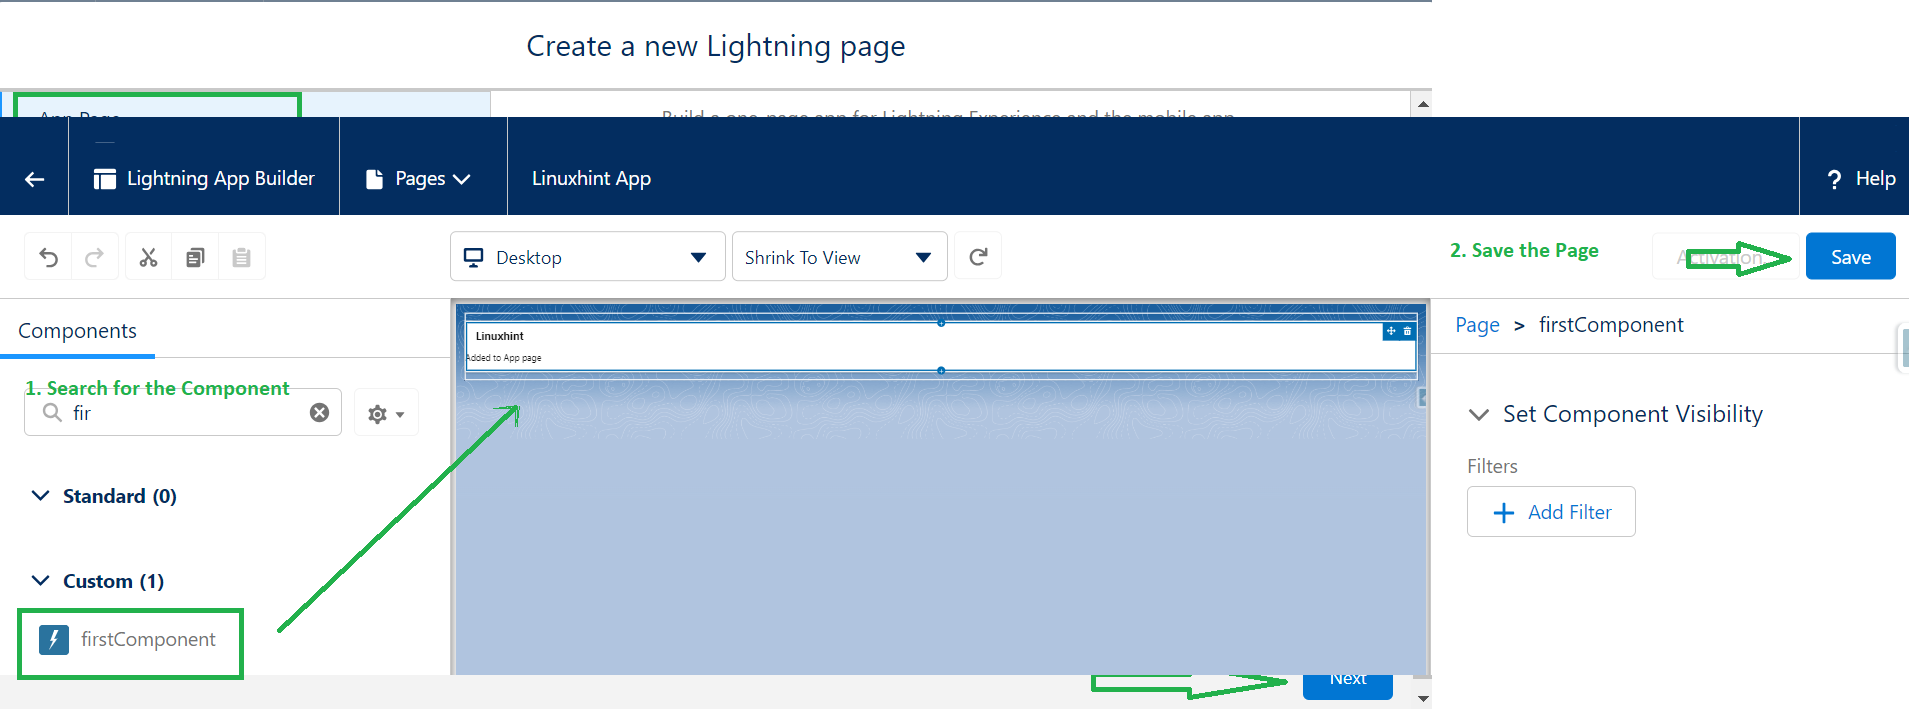
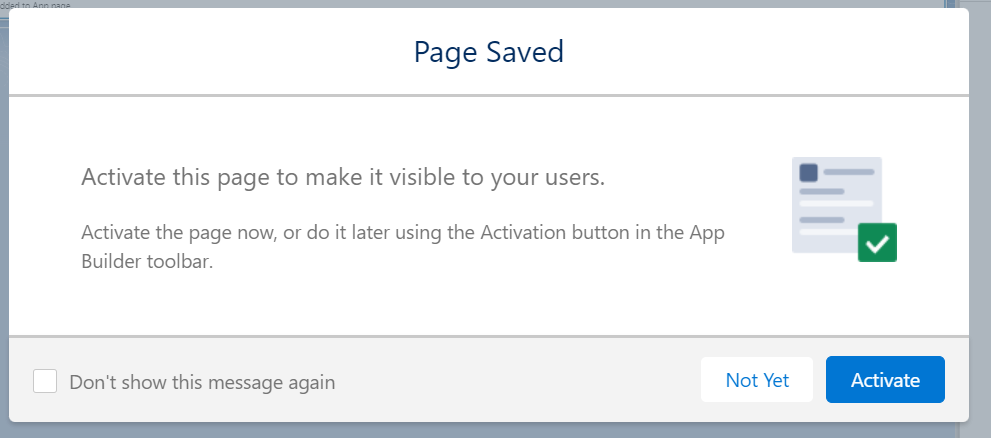
A popup will come in which the page needs to be activated. Click on “Activate”.
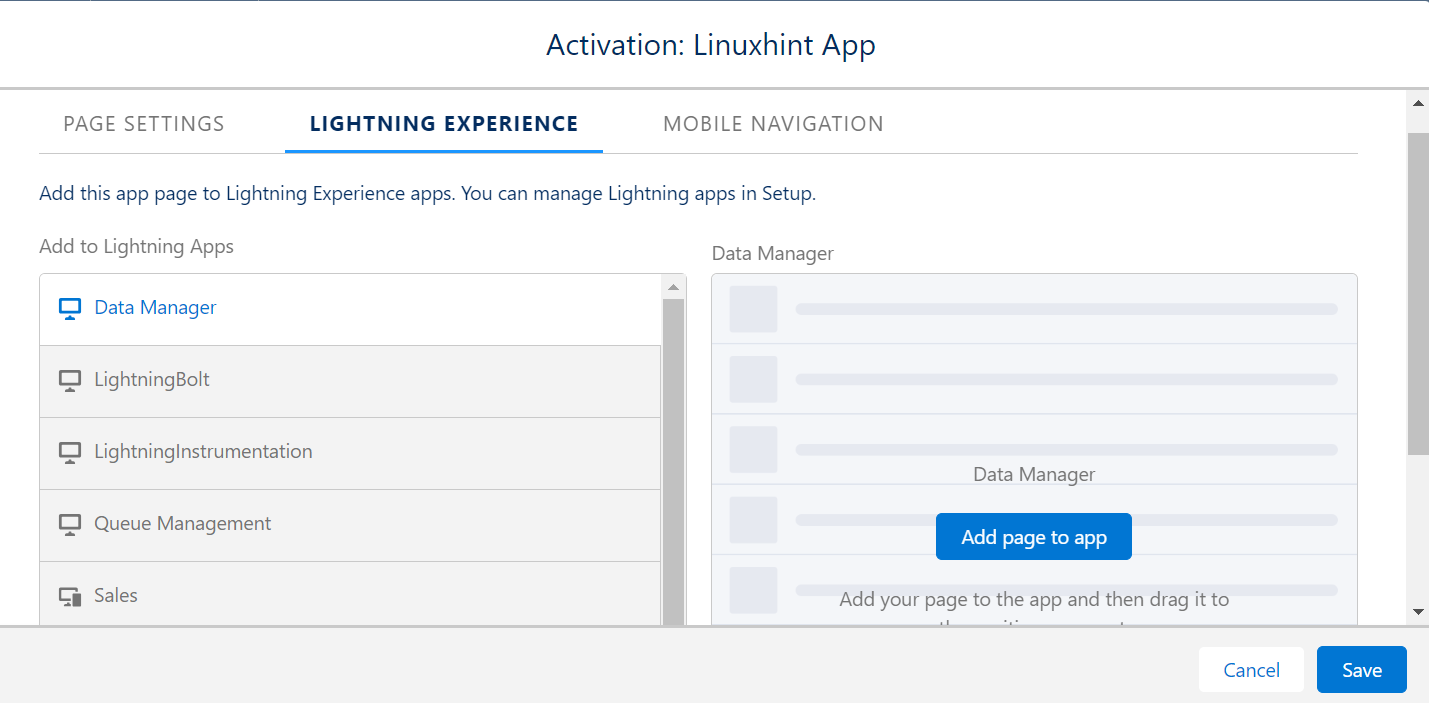
After that, you need to add a page to the app. Go to the “LIGHTNING EXPERIENCE” tab and do this. Save this activation.
Now, go to the App Launcher and search for “Linuxhint App”. You can see that our component is added to the App page.

Conclusion
Now, we are able to understand how to add LWC to the App page, Home page, and Record page. In all scenarios, we used the same examples to get a better idea. Make sure that the “isExposed” is true. Otherwise, the component is not visible in the Salesforce Org. In this entire guide, we utilized the Lightning Studio (Beta) editor to develop the code. All steps are explained on how to download and use this editor at the start of this guide.
Source: linuxhint.com