Add Digital Signature on a PDF Document
The digital signature is one of the well-known achievements in a computerized environment. It is a method that uses mathematical algorithms to verify and validate the authenticity of messages and documents. The document bearing a digital signature is highly reliable and unchangeable. More specifically, public-key cryptography supports it for identifying individuals. In other words, it offers the original shape of an electronic document that cannot be altered.
This post will describe:
- How to Add Digital ID in Adobe Acrobat?
- How to Create Digital/Electronic Sign in Adobe Acrobat?
- How to Add Digital Signature on a PDF Document?
How to Add Digital ID in Adobe Acrobat?
The key step in the digital signature process is digital ID. Like a passport, it is referred to as an electronic identity. It is mostly utilized to secure digital signatures or certificates. A digital ID comprises a username, organization name, region, algorithm or approach, and expiration date.
To add a digital ID for a digital signature, first, download Adobe Acrobat by navigating to the attached link. Then, look at the offered instructions to add a digital ID for a digital signature.
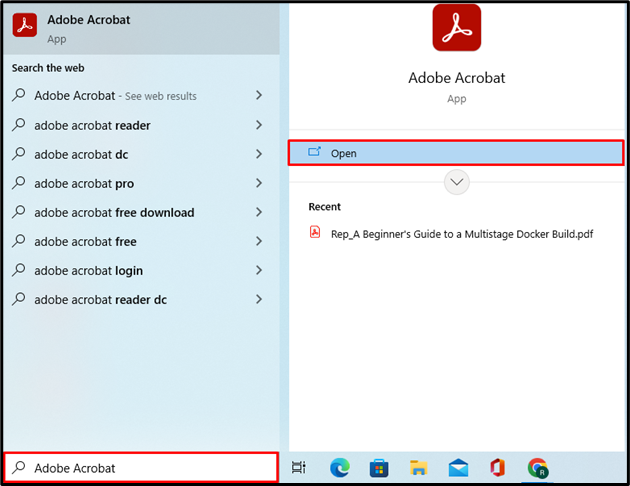
Step 1: Open Adobe Acrobat
From the Windows Start menu, launch the Adobe Acrobat application:
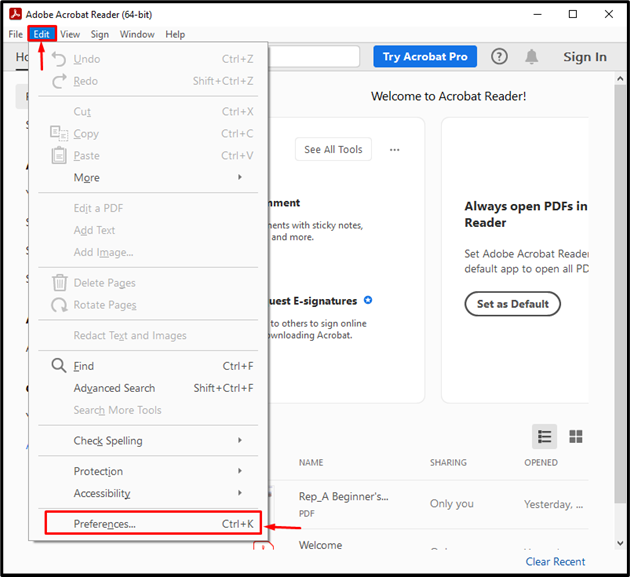
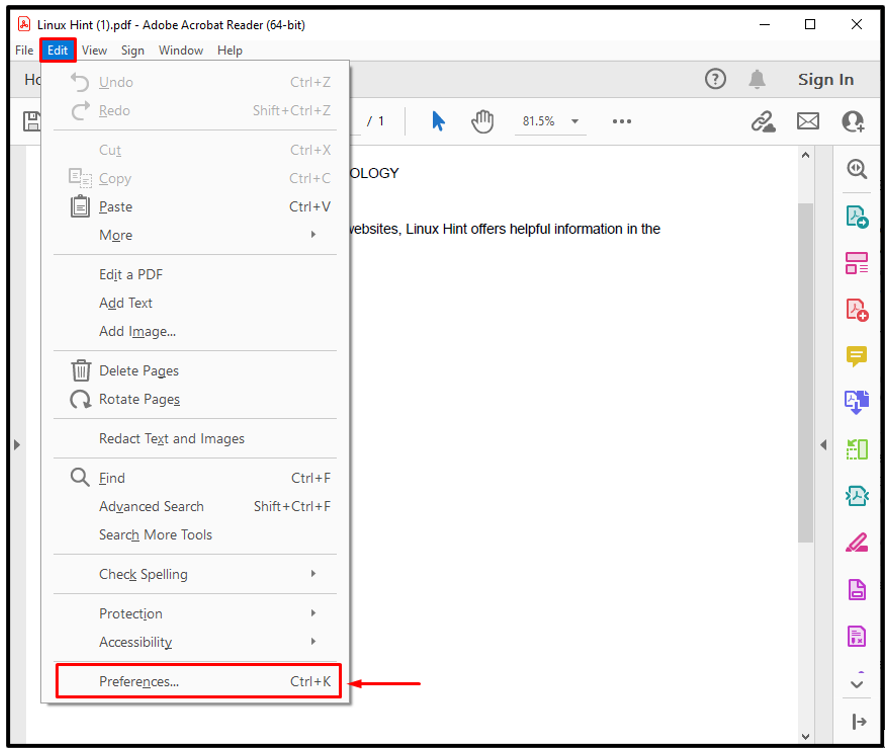
Step 2: Choose Preferences
Visit the “Edit” menu and click on the “Preferences” option:
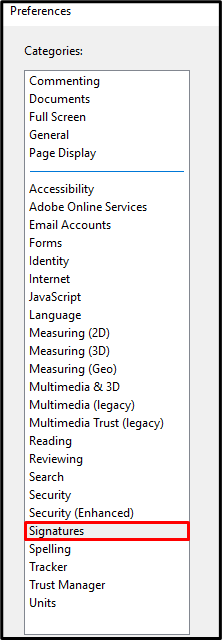
Step 3: Set Signatures Preferences
Next, select “Signatures” from the Preferences panel to set the signatures preferences:
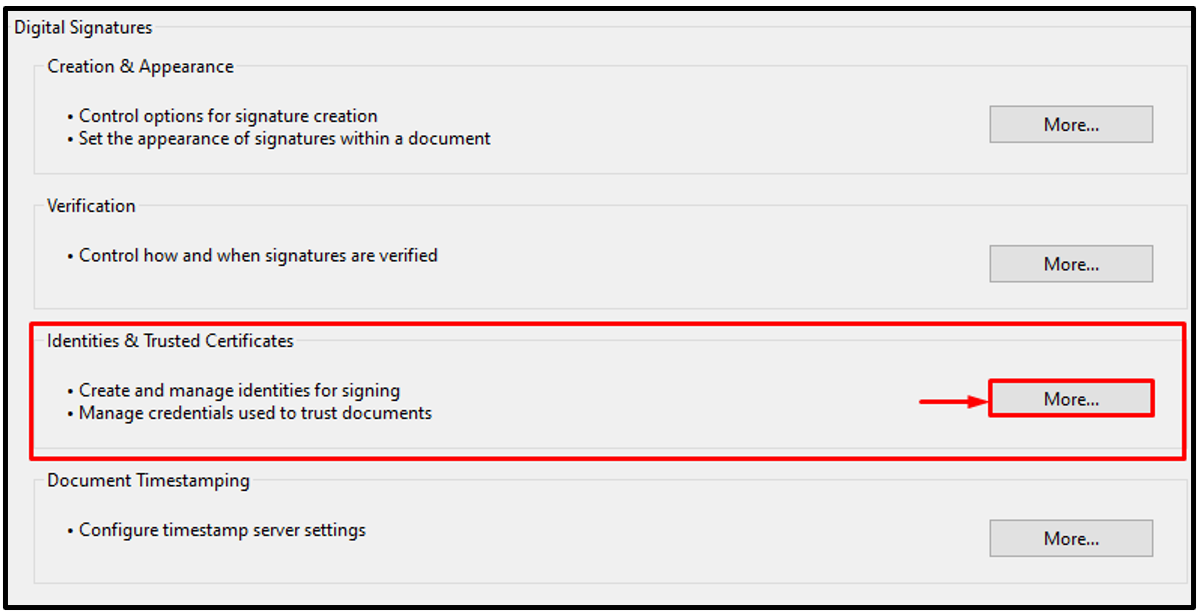
Step 4: Create a New Digital ID
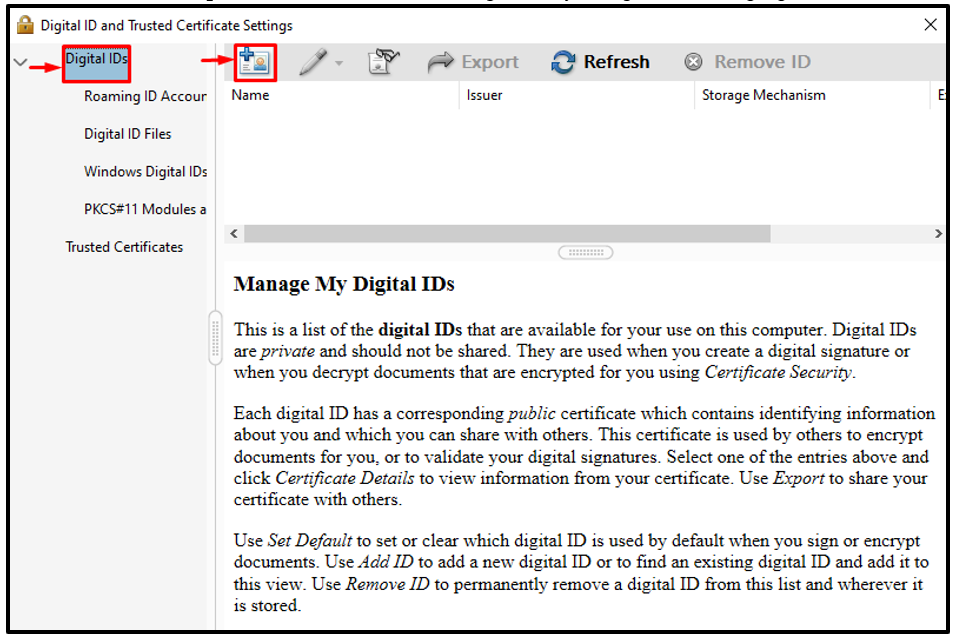
Click on the “More” button from the “Identities & Trusted Certificates” category under the “Digital Signatures” menu:
After that, from the “Digital IDs” menu, add the new digital ID by hitting the below highlighted “Add” icon:
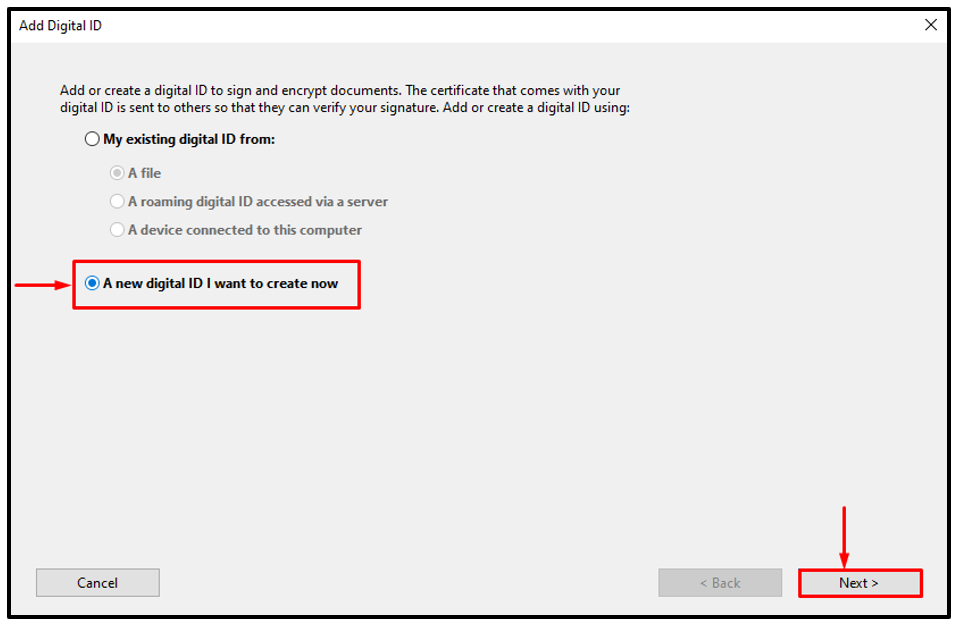
Add the new digital ID by selecting the highlighted option and press the “Next” button:
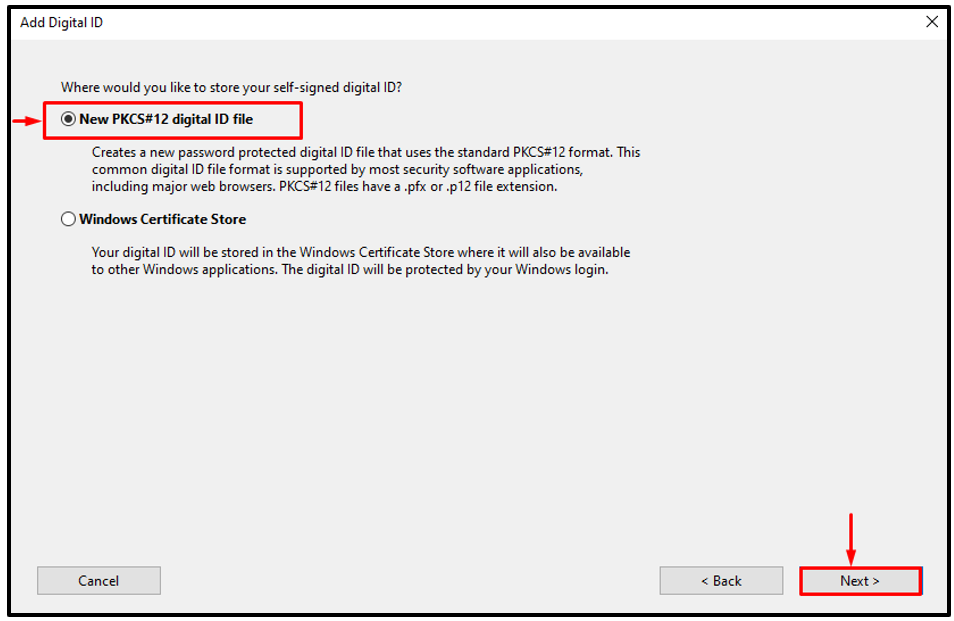
Next, mark the “New PKSC#12 digital ID file” option to create a new password-protected digital ID and click on the “Next” button:
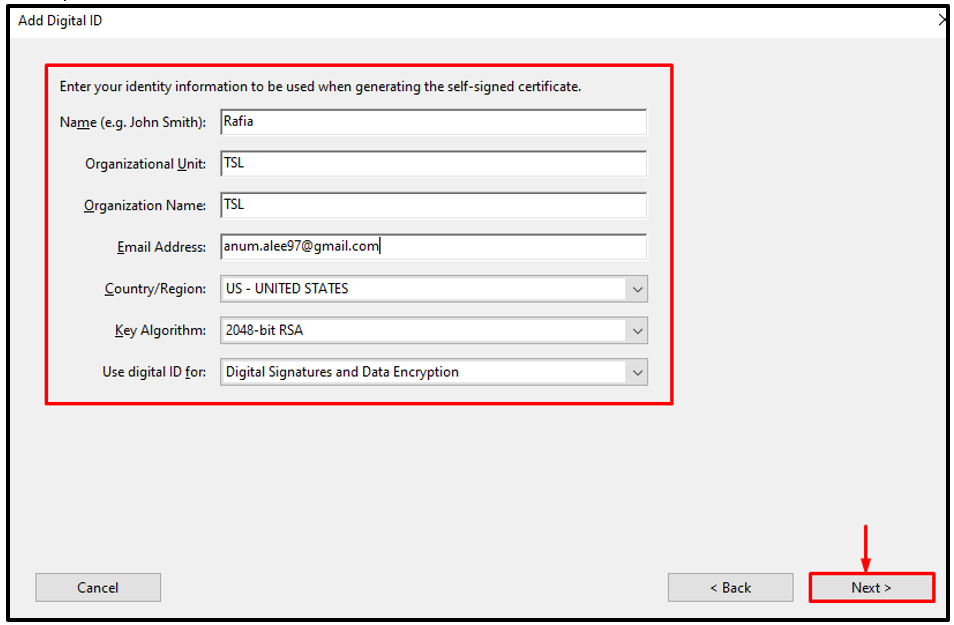
Here, provide the following information:
- Name
- Organization Unit
- Organization Name
- Email Address
- Country/Region
- Key Algorithm
- Use digital ID for
Then, press the “Next” button:
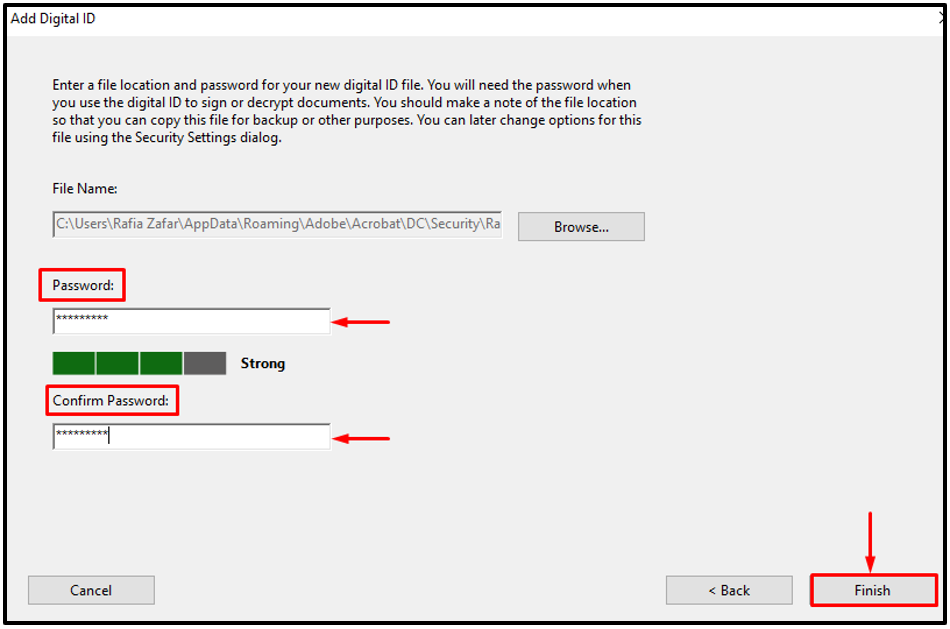
Enter a password to create a password-protected digital ID. After that, hit the “Finish” button:
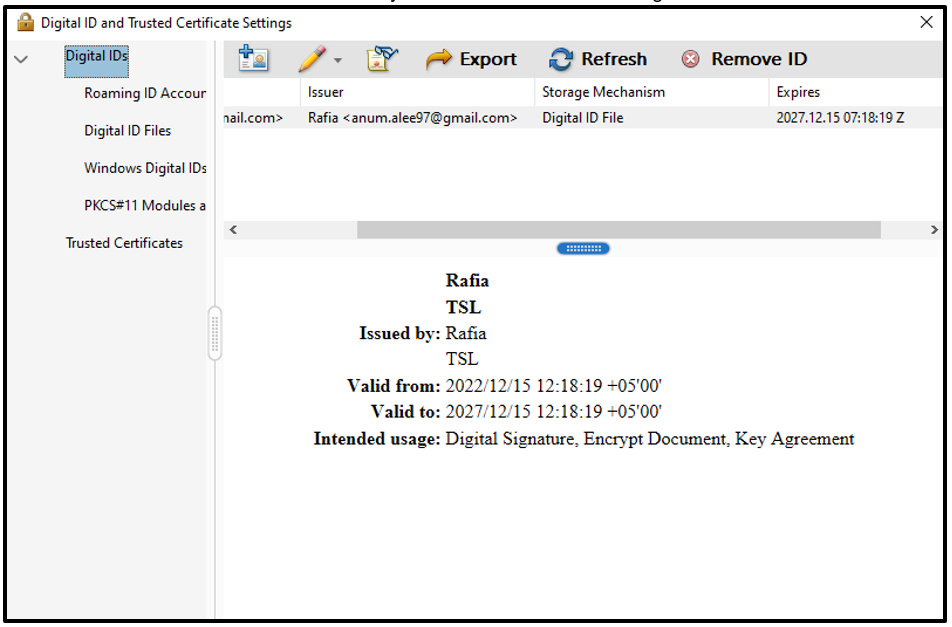
It can be observed that we have successfully created and added a new digital ID:
How to Create Digital/Electronic Sign in Adobe Acrobat?
The term “digital sign” also refers to an electronic signature. When a document is digitally signed with the help of a digital ID signature, it cannot be changed.
To create a digital or electronic signature, go through the provided instructions.
Step 1: Open any PDF File
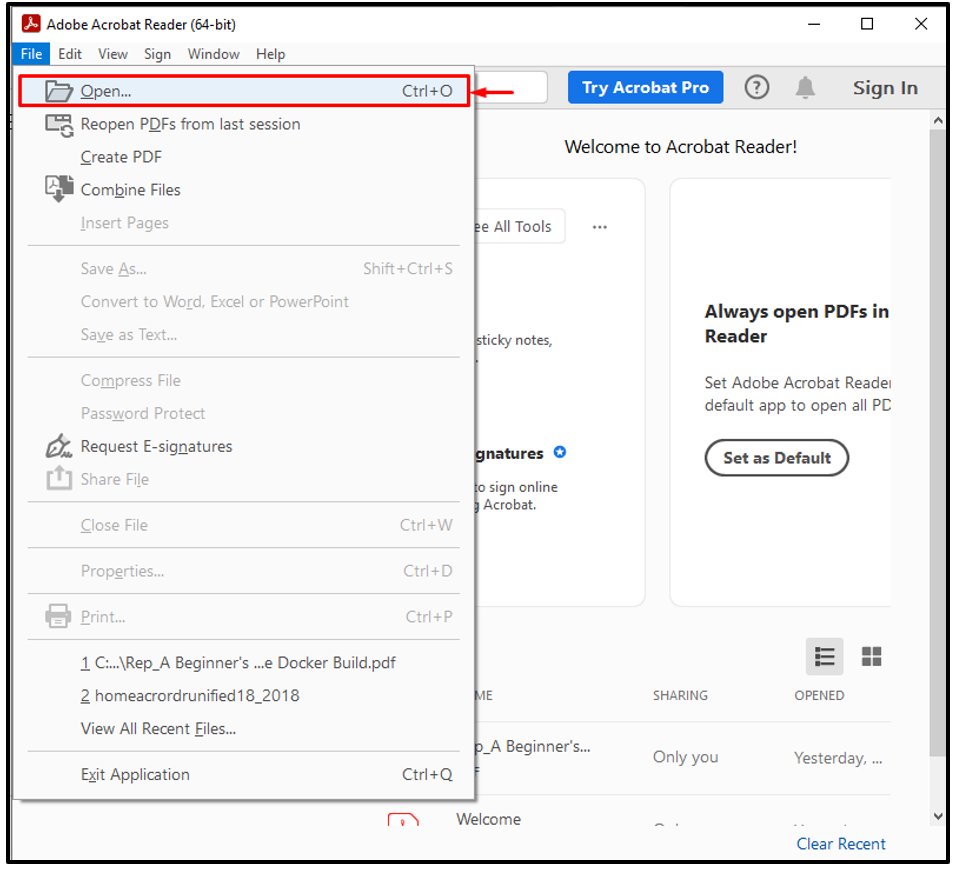
Open any PDF file from the “File” menu, as Adobe Acrobat only supports the “PDF” format:
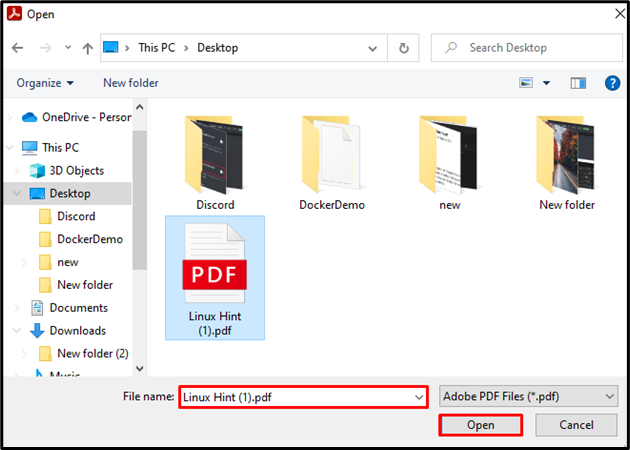
Select the file and hit the “Open” button:
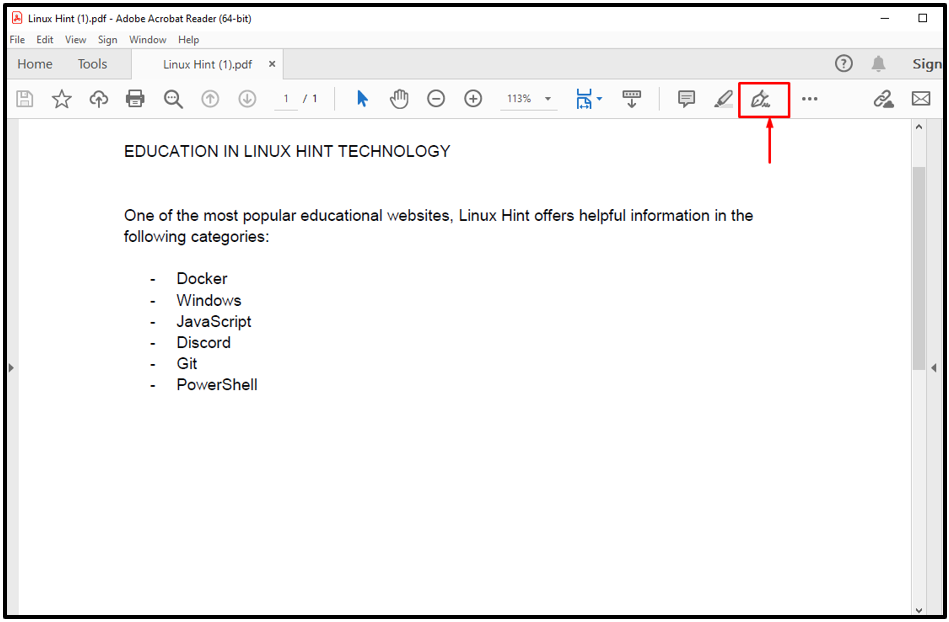
Step 2: Open Sign Yourself Menu
Next, click on the below highlighted “Sign Yourself” menu:
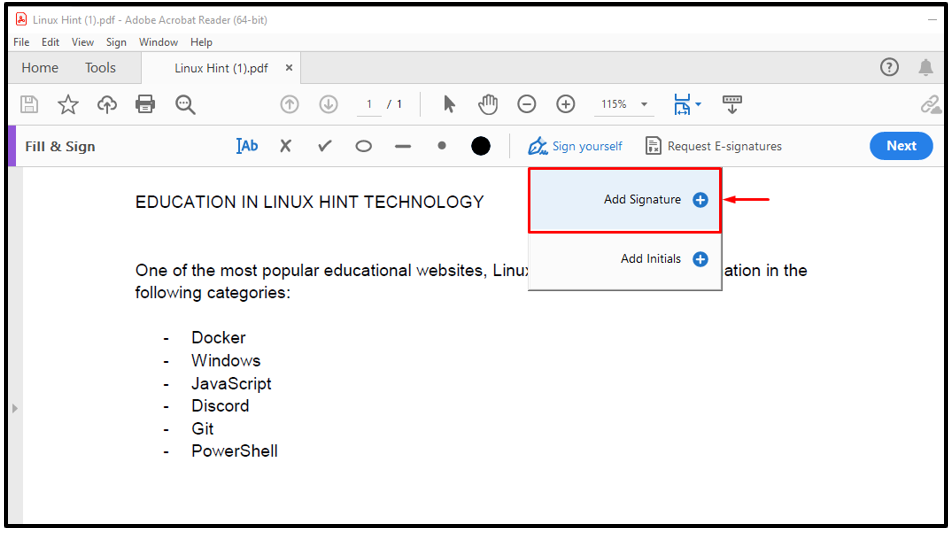
Step 3: Add Signature
Click on the “Add Signature” option to add a signature:
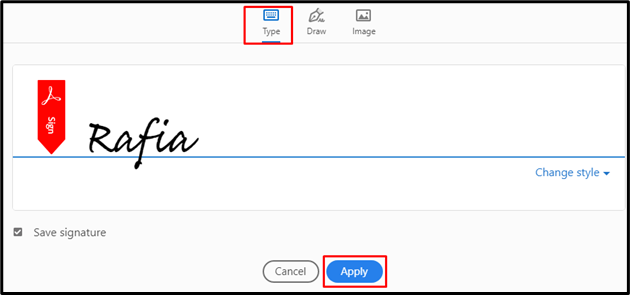
“Type”, “Draw”, and “Image” are the three available options. For instance, we will type a signature using the “Type” option. Then, hit the “Apply” button:
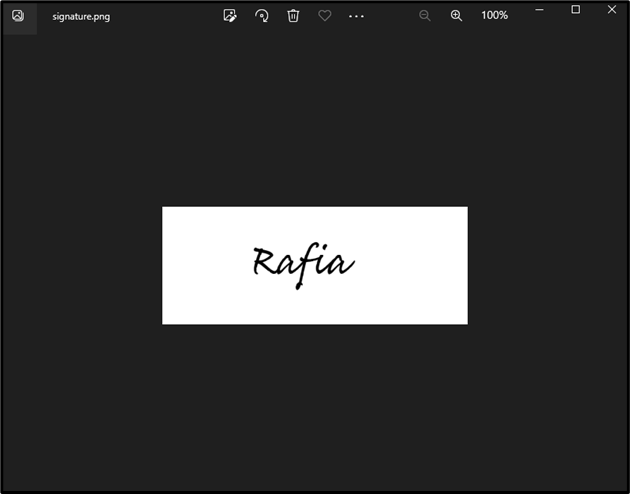
Step 4: Take a Screen Shot of Signature
The selected signature will display on the page. Take a screenshot of it, then click the “bin” icon to remove the signature:

Here, you can see we have successfully created and saved the screenshot of the signature. Now, convert it to PDF format:
Step 5: Customize the Digital Signature
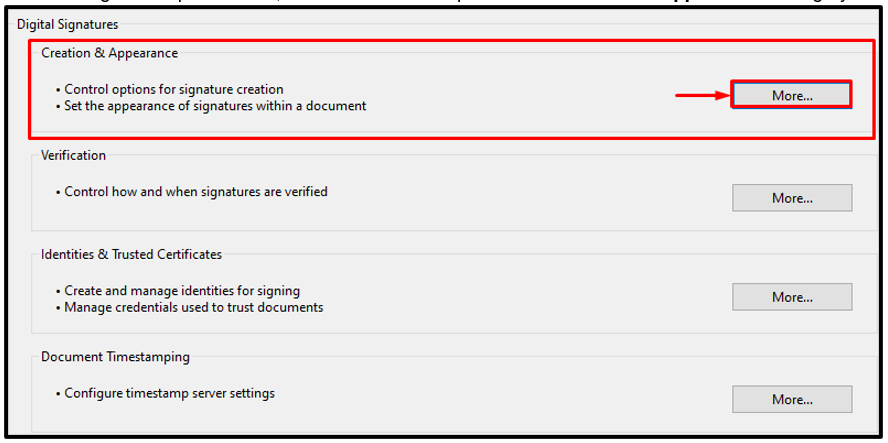
Again, open the “Preferences” option from the “Edit” menu:
From the Signatures preferences, click on the “More” option of the “Creation & Appearance” category:
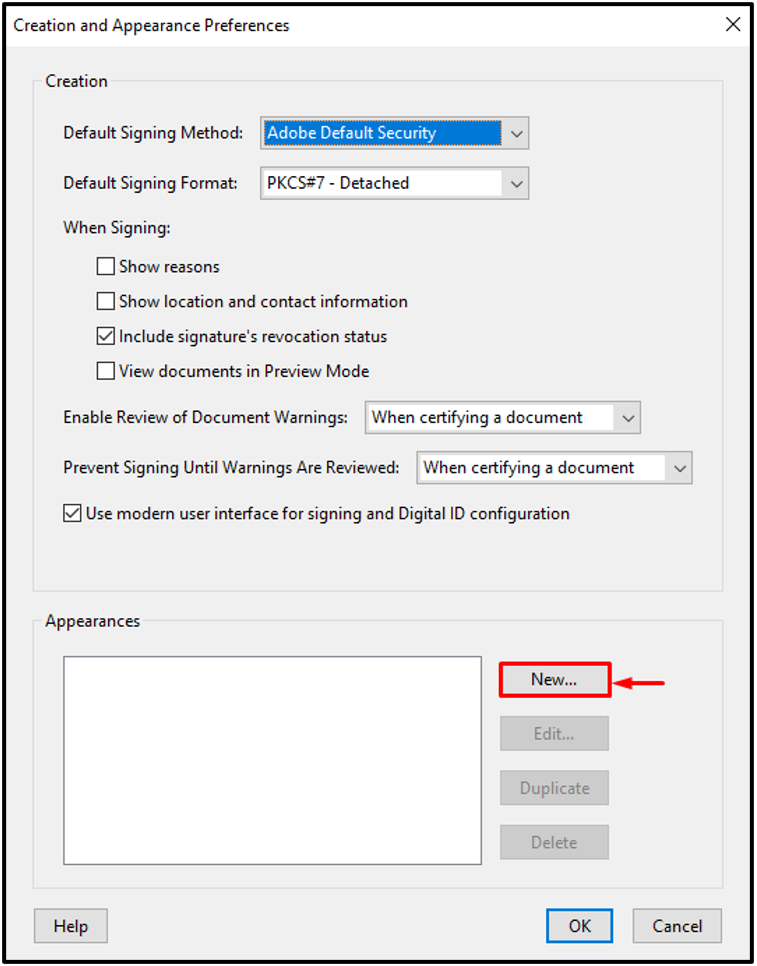
Step 6: Add New Appearance
Add the saved signature to Adobe Acrobat by clicking on the “New” option under the “Appearance” panel:
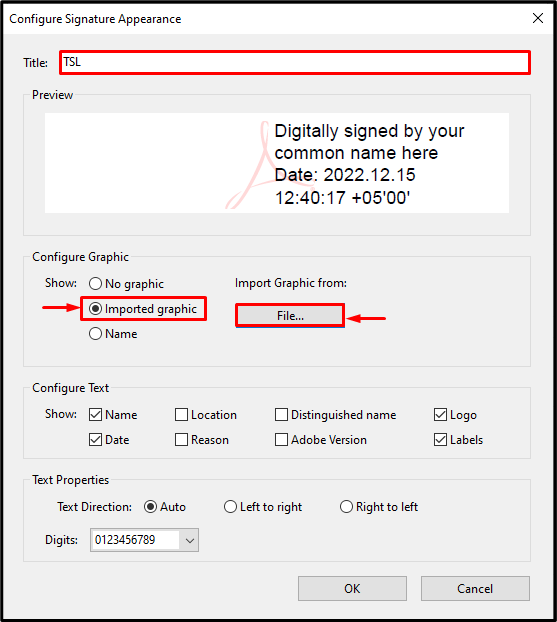
Step 7: Import the Signature Image
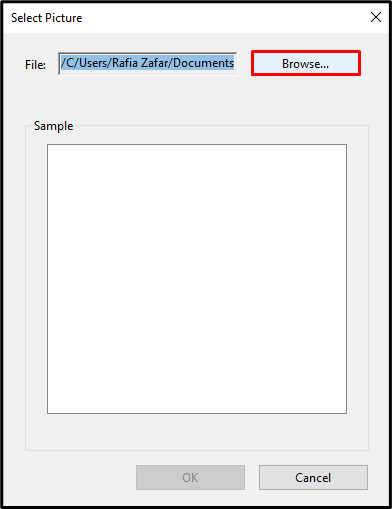
Next, provide the Signature title. Then, mark the “Imported graphic” radio and hit the “File” button:
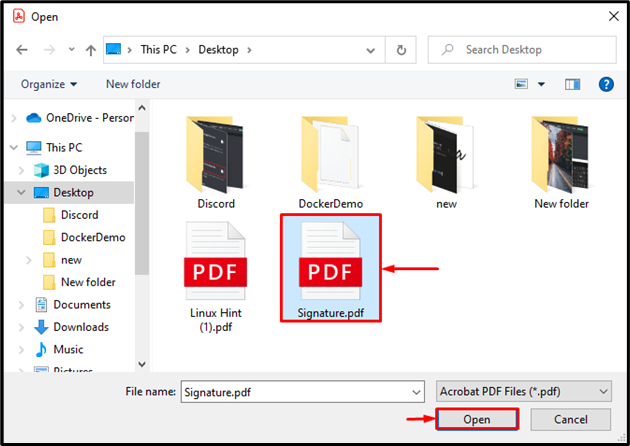
Open the signature you have saved in PDF format with the help of the “Browse” button:
After selecting the PDF-formatted signature image, press the “Open” button:
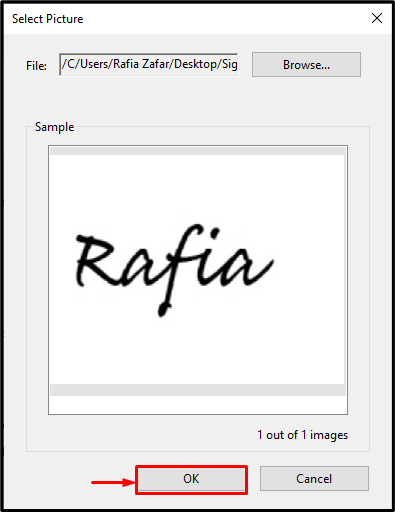
Hit the “OK” button to embed the signature:
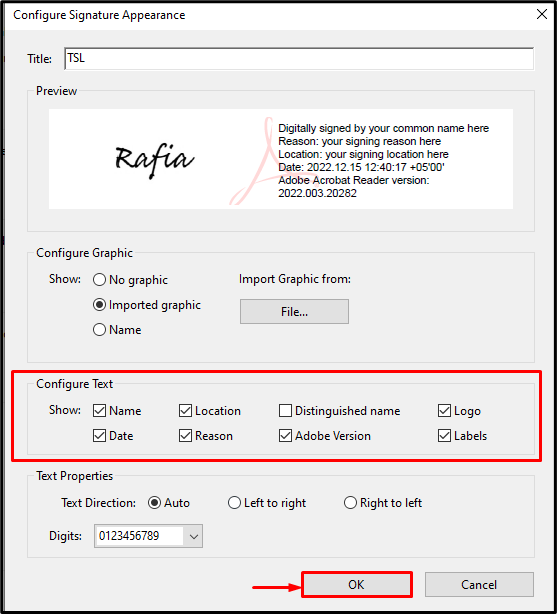
Step 8: Customize the Signature
Next, select the option according to your preferences because that is the basis for identifying the signature validation. After that, press the “OK” button:
How to Add Digital Signature on a PDF Document?
After creating a digital ID and digital signature, the user can add the digital signature on a PDF file to digitally sign the document. For this purpose, go through the listed steps.
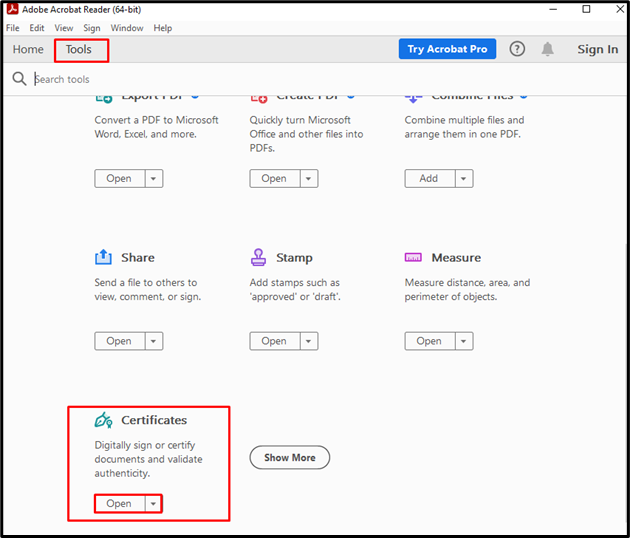
Step 1: Open Certificates
Open the document in the PDF format you want to sign. Then, visit the “Tools” menu and open the below highlighted “Certificates” option by clicking on the “Open” button:
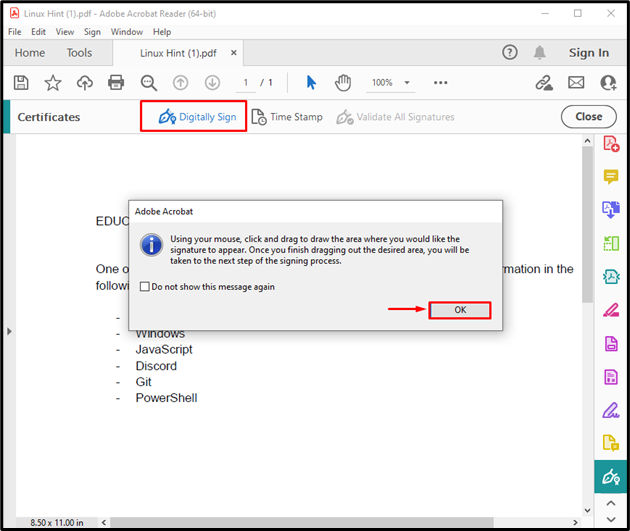
Step 2: Add Digital Signature
To digitally sign the document, click the “Digitally Sign” button. Then, click the “OK” button for confirmation:
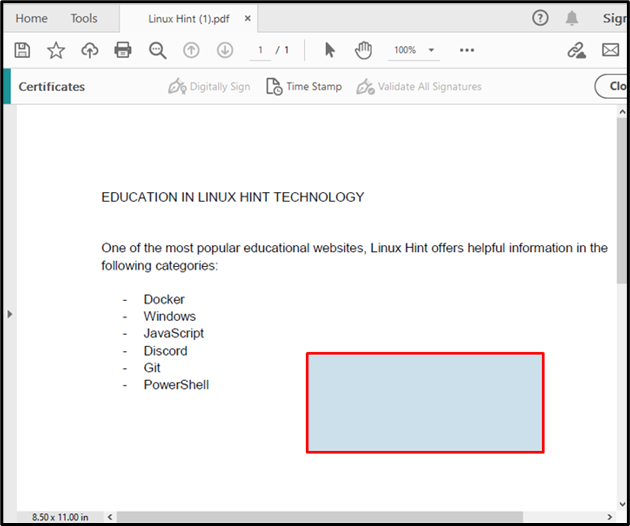
Drag the mouse pointer on the screen where you want to add Digital Signature as shown below:
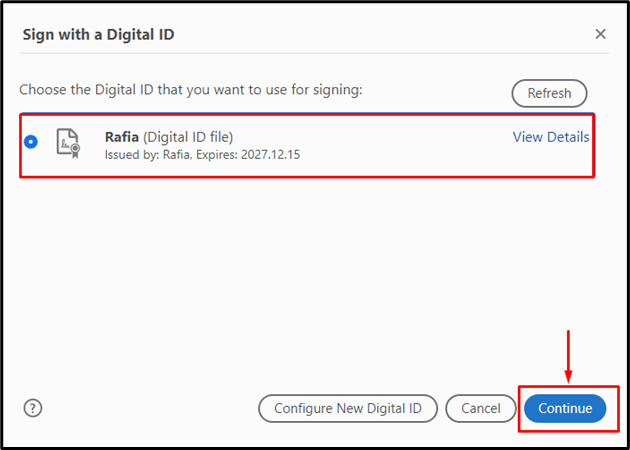
Step 3: Select Digital ID
After that, the “Sign with a Digital ID” window will appear on the screen. Choose the newly created digital ID and press the “Continue” button:
Step 4: Signed and Lock the Document
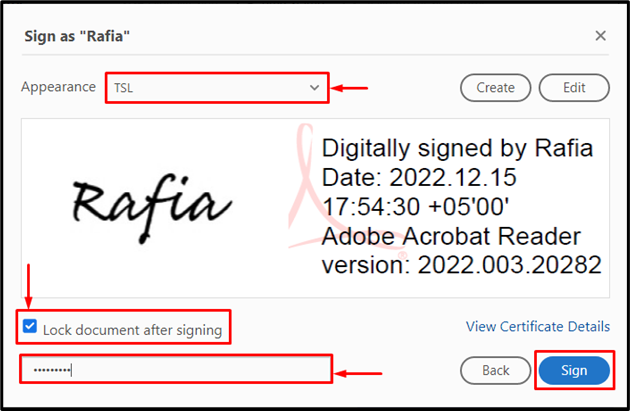
After that, select the appearance of the digital signature from the “Appearance” drop-down menu. Mark the highlighted “Lock document after signing” checkbox, provide the password and click on the “Sign” button to digitally sign the document:
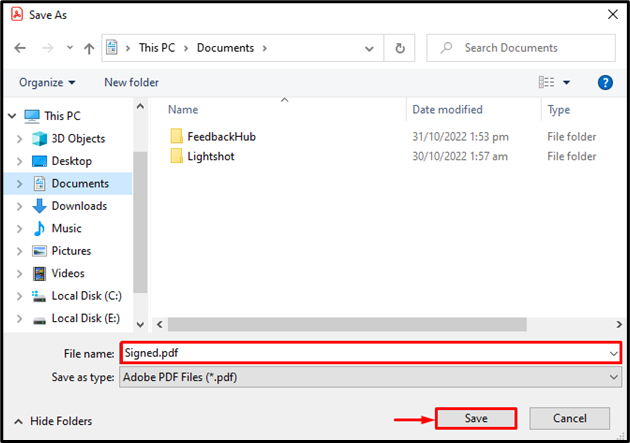
Enter the document name and click the “Save” button to save it:
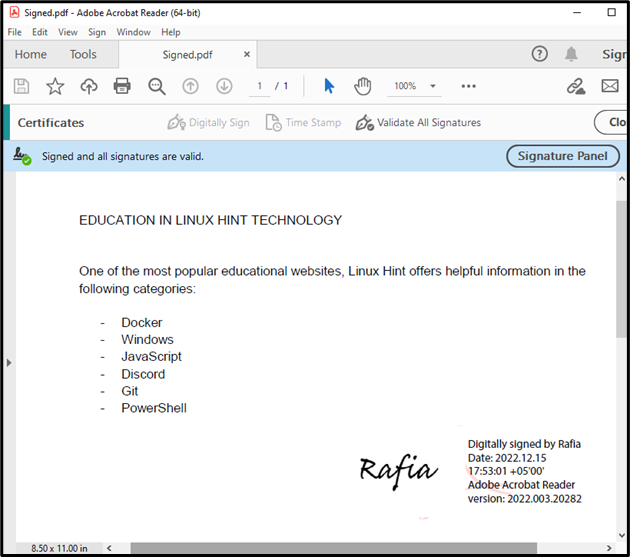
It can be seen that we have successfully added the digital signature on the PDF document:
We have taught you the complete procedure for adding a digital signature to a PDF document.
Conclusion
To add a digital signature to a PDF document, users can utilize the “Adobe Acrobat” application. To add a digital signature, first create a digital ID that contains a username, organization name, algorithm, region, and expiration date. Next, create a new digital signature and add it to Adobe Acrobat “Preferences”. After that, digitally sign the PDF document by adding a digital signature. We have guided you about adding the digital (electronic) signature on a PDF document.
Source: linuxhint.com