A Complete Guide to Zoom In and Out on Mac
- Guide to Zoom In and Out on a Mac
- Customizing the Zoom Area
- Using Smart Zoom with Trackpad
- Using Smart Zoom with Magic Mouse
- Zoom Touch Bar on a Mac
- Zoom in Safari
- Zoom Text on a Mac
- Conclusion
Note: In Macs, the trackpad pinch in and out is used to zoom in and out on any type of document, web window, and the previewing photos or PDFs in the Preview app. However, there is also an Accessibility Zoom feature on Mac that provides various techniques to zoom in and out.
Guide to Zoom In and Out on a Mac
Apple provides different approaches to using the zoom accessibility feature in Macs. For example, the quickest way to zoom in and out on Apple laptops is by using the trackpad. As we all know, Apple makes some of the best trackpads. If you are a programmer then this functionality can also be availed using the keyboard shortcuts. Let’s discuss the approaches to utilizing the zoom accessibility on a Mac:
1. Using Shortcut Keys
If you want to zoom in and zoom out the entire screen on Mac using your keyboard then see the instructions given below:
Note: I am using macOS 14 Sonoma for this guide.
i. How to Zoom In and Out the Entire Screen
By default, the zoom-in and out the entire screen feature may be disabled on your Mac. You first need to activate it:
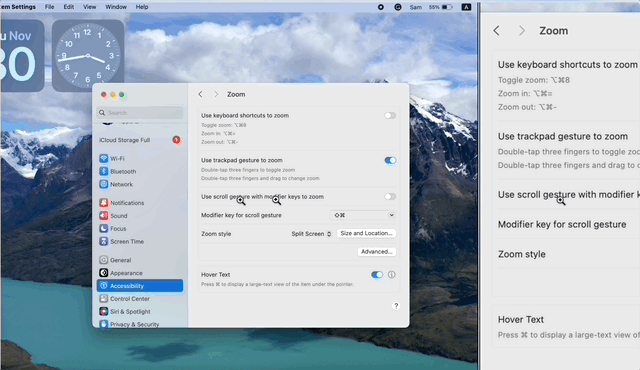
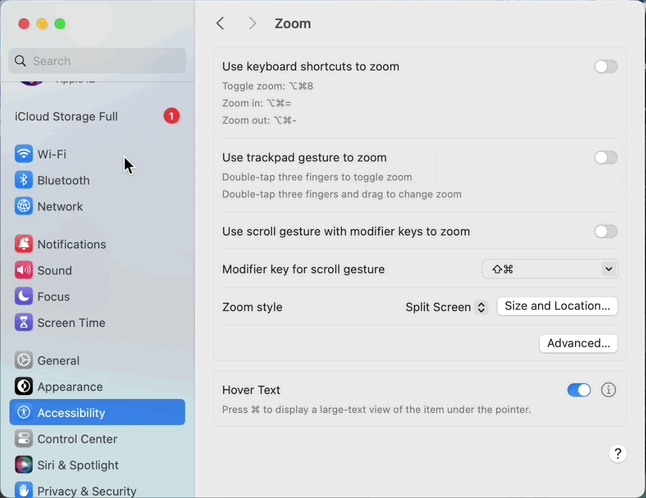
1. Open the System Settings.
2. Click on Accessibility; you will find various accessibility options related to vision, hearing, motor, and speech. Click on Zoom in the Vision section:
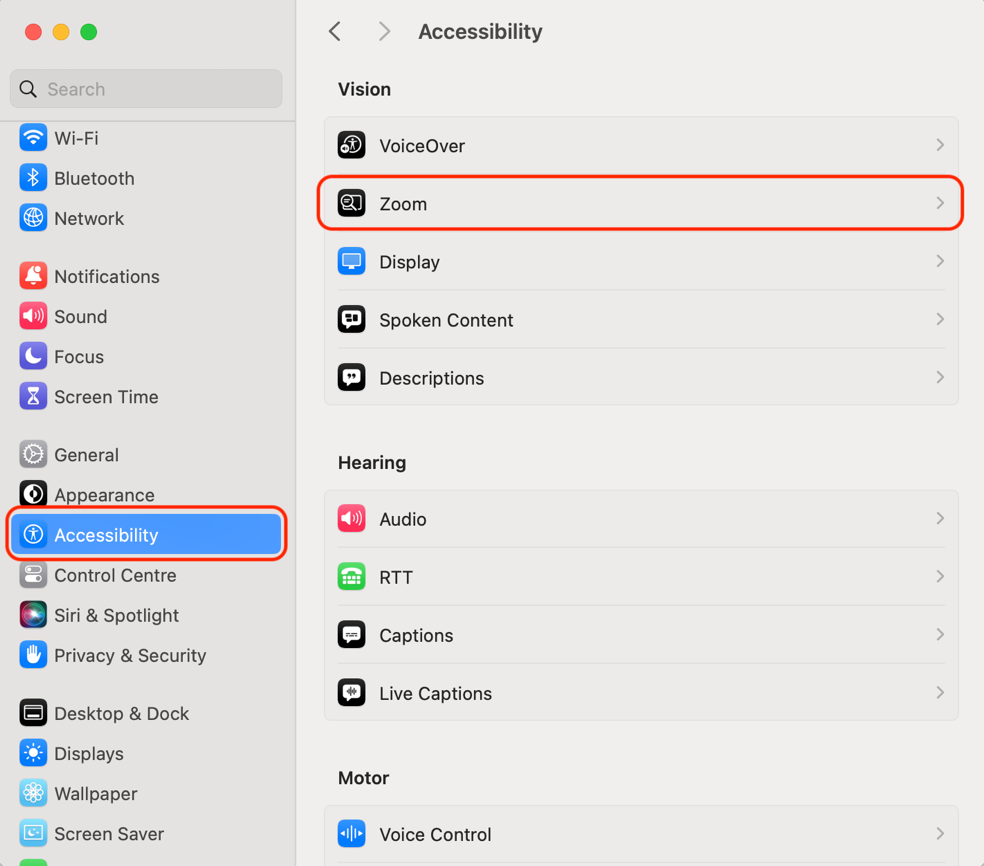
3. Toggle on the Use keyboard shortcuts to zoom option.
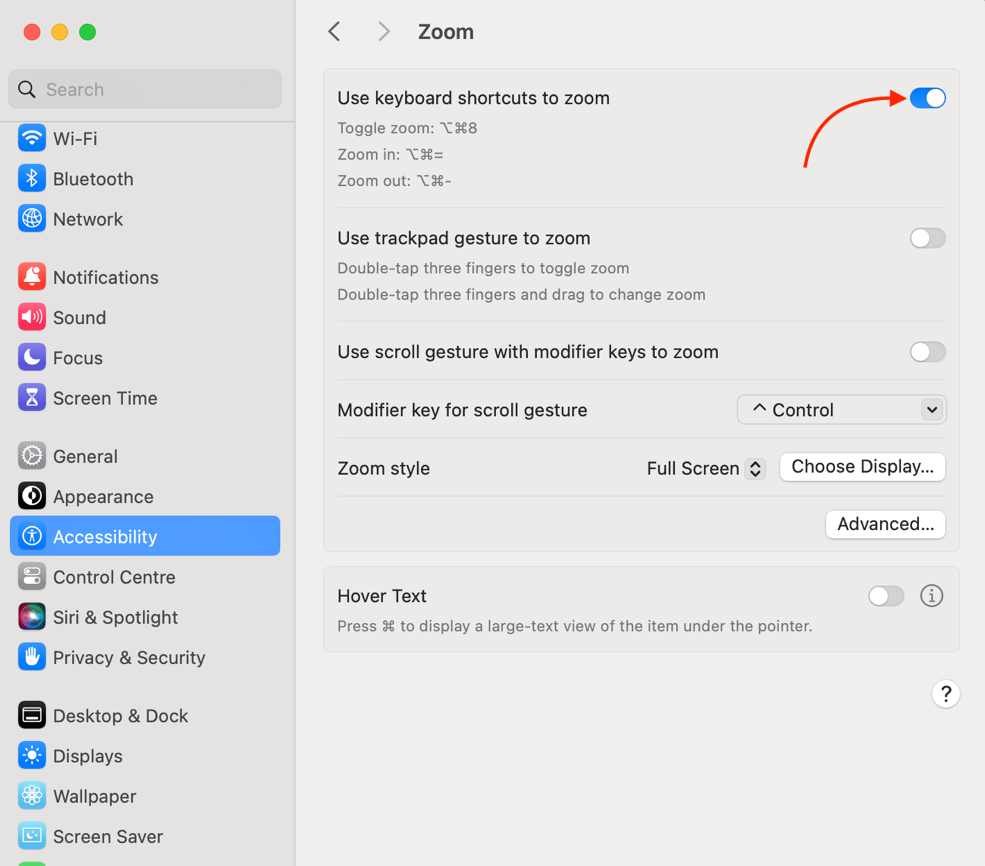
Use the following keyboard shortcut keys for:
| Shortcut Keys | |
| Zoom In | option + command + (=) |
| Zoom Out | option + command + (-) |
| Toggle Zoom | option + command + 8 |
ii. How to Zoom In and Out the Specific Window on a Mac
You don’t need some specific settings to zoom in and zoom out when you are in a specific window on Mac. To zoom in and out the specific window on a Mac, use the following shortcut keys:
| Shortcut Keys | |
| Zoom In | command + (+) |
| Zoom Out | command + (-) |
iii. Other Keyboard Shortcuts for Zoom In and Out
A few other useful, Mac shortcuts to zoom in and zoom out are listed below:
| Shortcut | Description |
| command + 0 | In the Preview app, this shortcut makes the photo or PDF file appear in the actual size. |
| Command + 9 | In the Preview app, this shortcut fits the photo or PDF file in the window. |
| command + Shift + 8 | While editing a photo or a document this shortcut the zoom in the section that you are editing. |
| Command + (+) & command – | In this preview app, these shortcuts zoom in and zoom out the photo or PDF document. |
2. By Double Tapping the Trackpad
The next method to zoom in and out is by double-tapping on the trackpad. Well, to use this option read the instructions mentioned below:
1. Go to System Settings and click on the Accessibility.
2. In the Accessibility section, click on Zoom and activate the Use trackpad gesture to zoom.

Use the following keyboard shortcut keys for:
| Toggle Zoom | Double-tap on the trackpad with 3 fingers. |
| Zoom In and Out | Double-tap on the trackpad with 3 fingers and drag your fingers to zoom in and zoom out. |
3. Using Scroll and Modifier Key
Zoom in and out by using a scroll and a keyboard key is another accessibility option that can be used to zoom in and zoom out on a Mac. To use this functionality; see the following instructions below:
1. Go to System Settings and click on the Accessibility.
2. In Accessibility, click on Zoom and toggle on the Use scroll gesture with modifier keys to zoom.
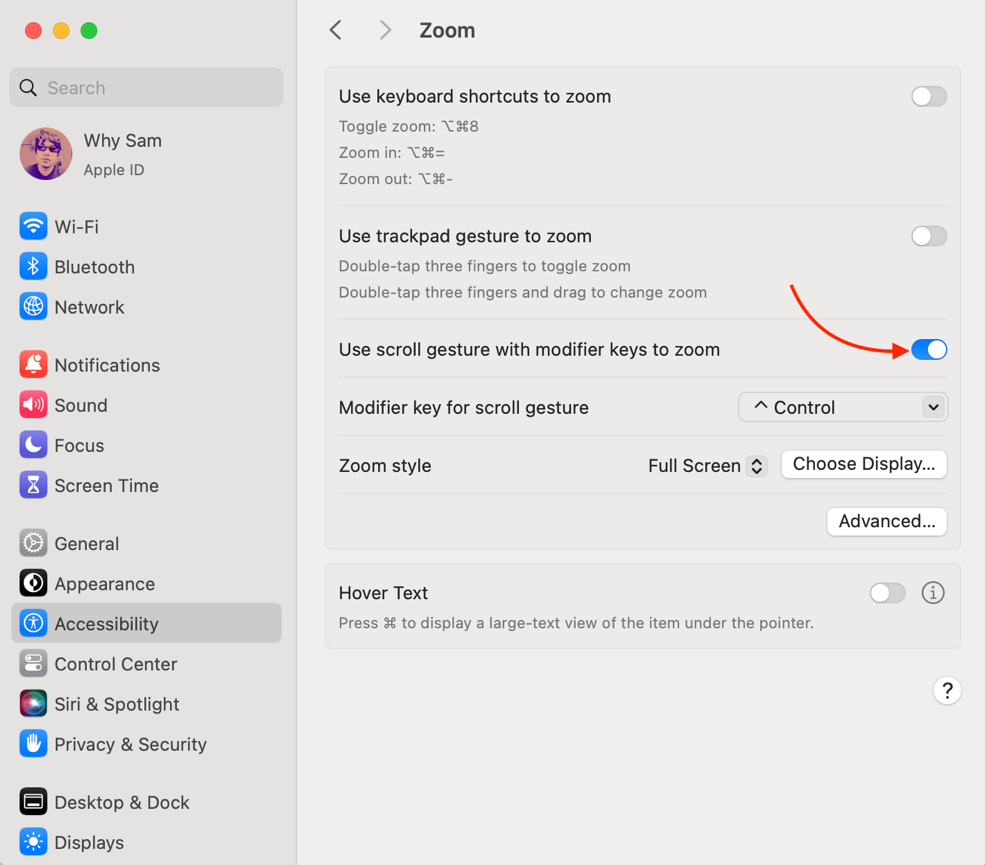
Note: There are three modifier keys: command, option, and control key.

After enabling it, press and hold the modifier key and perform scrolling.
| Zoom In | Modifier Key + Scroll Up |
| Zoom Out | Modifier Key + Scroll Down |
Customizing the Zoom Area
On Mac, it is completely in your control to manage the zoom settings. You can change how and where the zoom should appear.
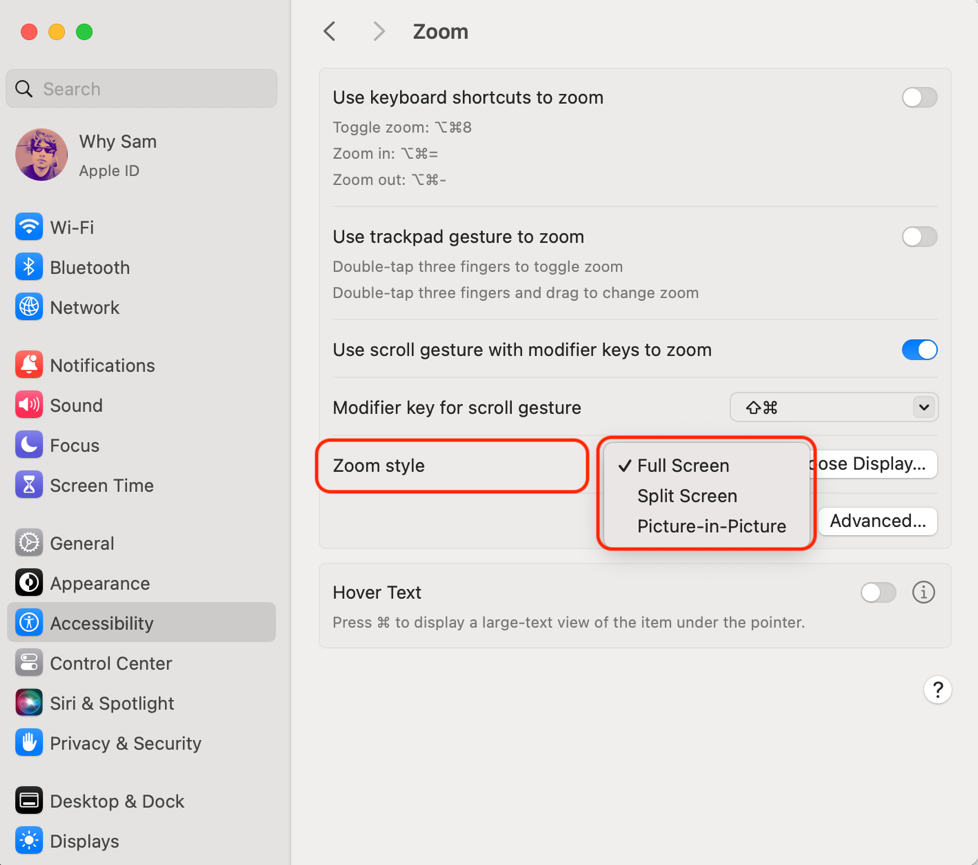
For this go to the System Settings, click on Zoom in the Accessibility option.
You will find the Zoom style option; there you will get three options:
- Full Screen
- Split Screen
- Picture-in-Picture
Full Screen: Zoom will be shown on the entire screen.
Split Screen: Zoom will be shown on any side of the display. You can always drag the split screen zoom on anywhere on the display.
Picture-in-Picture: Zoom will be shown in a box near the cursor.
The demonstration is given below:
The Choose Display option is used to select the display and perform zoom on the attached display.
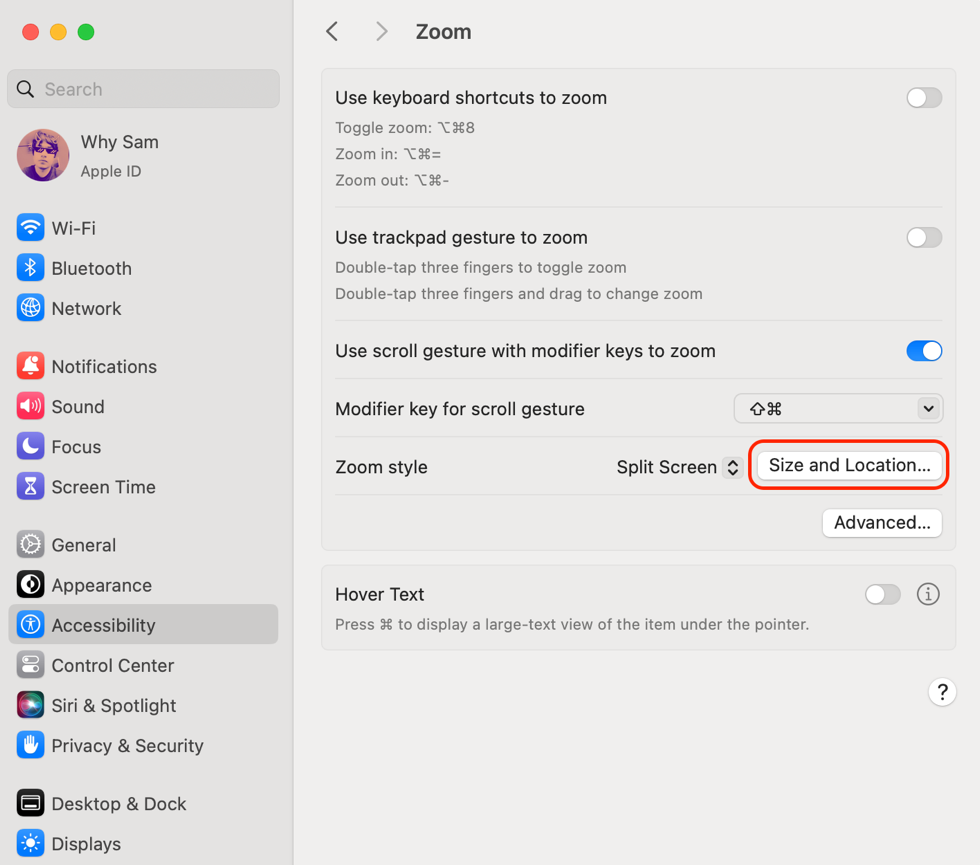
In the Advanced option, you can further modify the zoom settings, you can modify any setting that is related to Zoom. For example:
Adjusting the Size of Zoom Screen in Split Screen and Picture-in-Picture Modes
To adjust the size of the split screen in Split Screen or Picture-in-Picture mode using a keyboard shortcut; see the instructions below:
1. Go to System Settings > Accessibility > Zoom > Advanced.
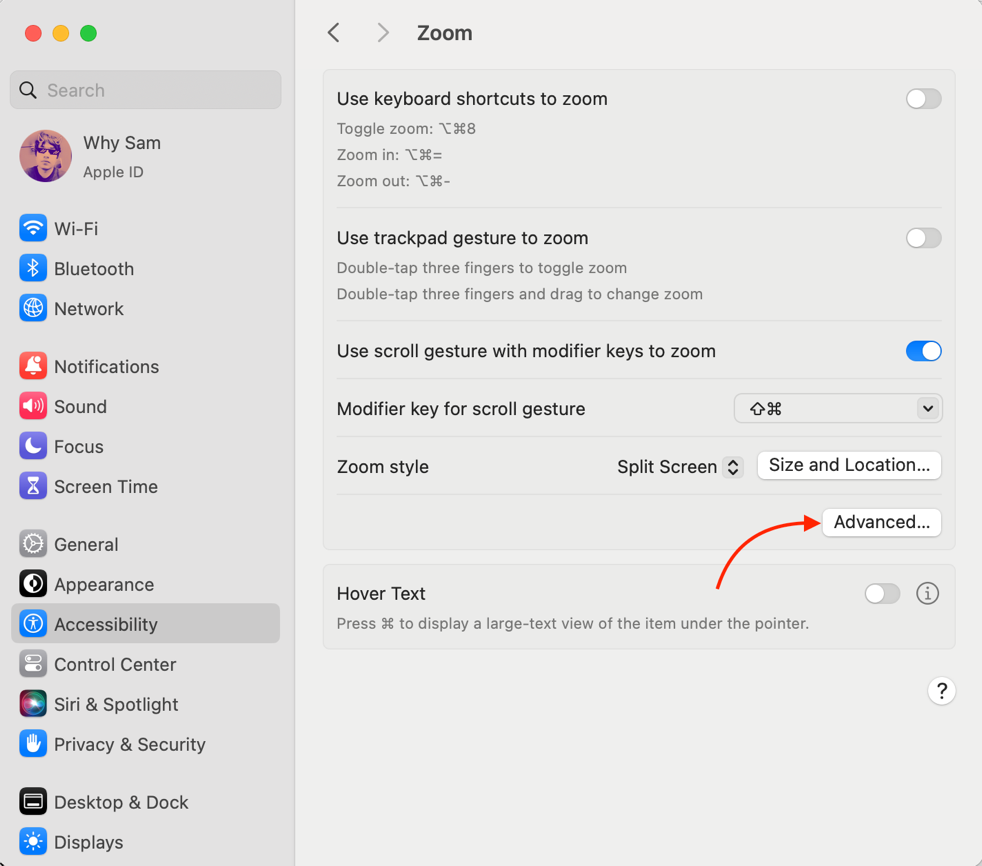
2. In the Controls section, enable Use keyboard shortcuts to adjust the zoom window option.
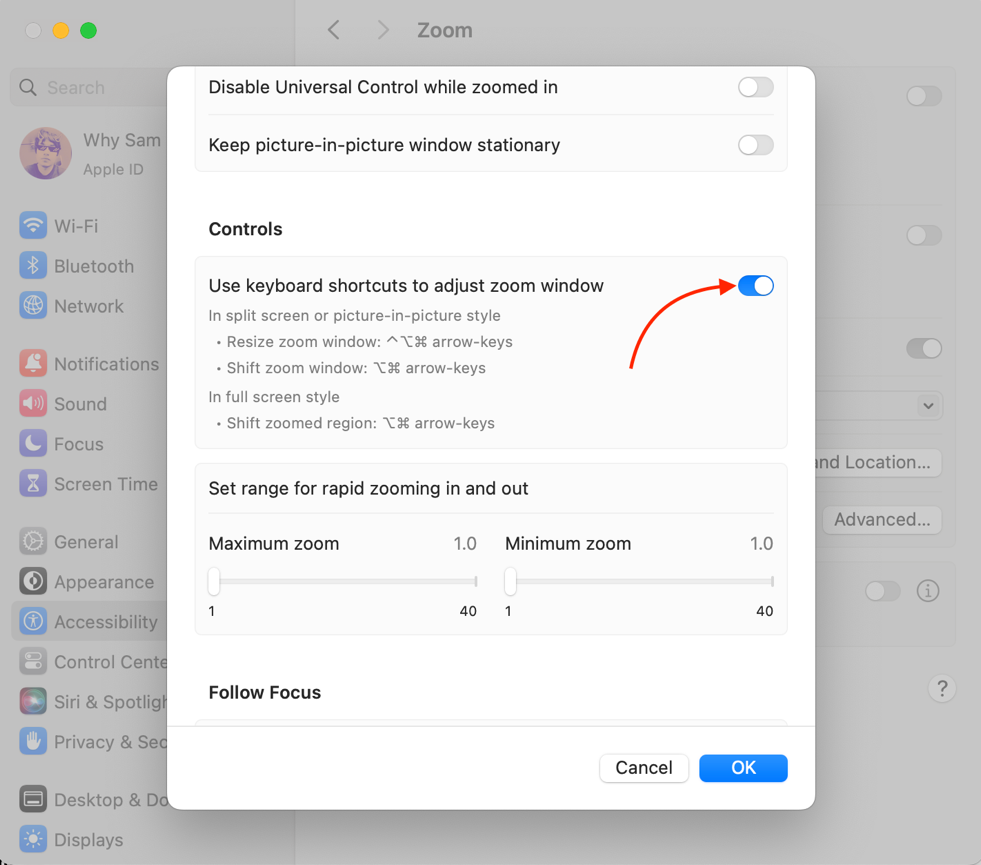
The following shortcut keys will be used to adjust the location of the zoom in the split and picture-in-picture modes.
In the Split Screen mode:
To switch the zoom window location from top, bottom, left, and right: option + command + arrow keys.
To change the zoom window size: control + option + command + arrow keys.
In Picture-in-Picture mode:
To change the size of the zoom window: control + option + command + arrow key (up-down > vertical resize) & (left-right > horizontal resize).
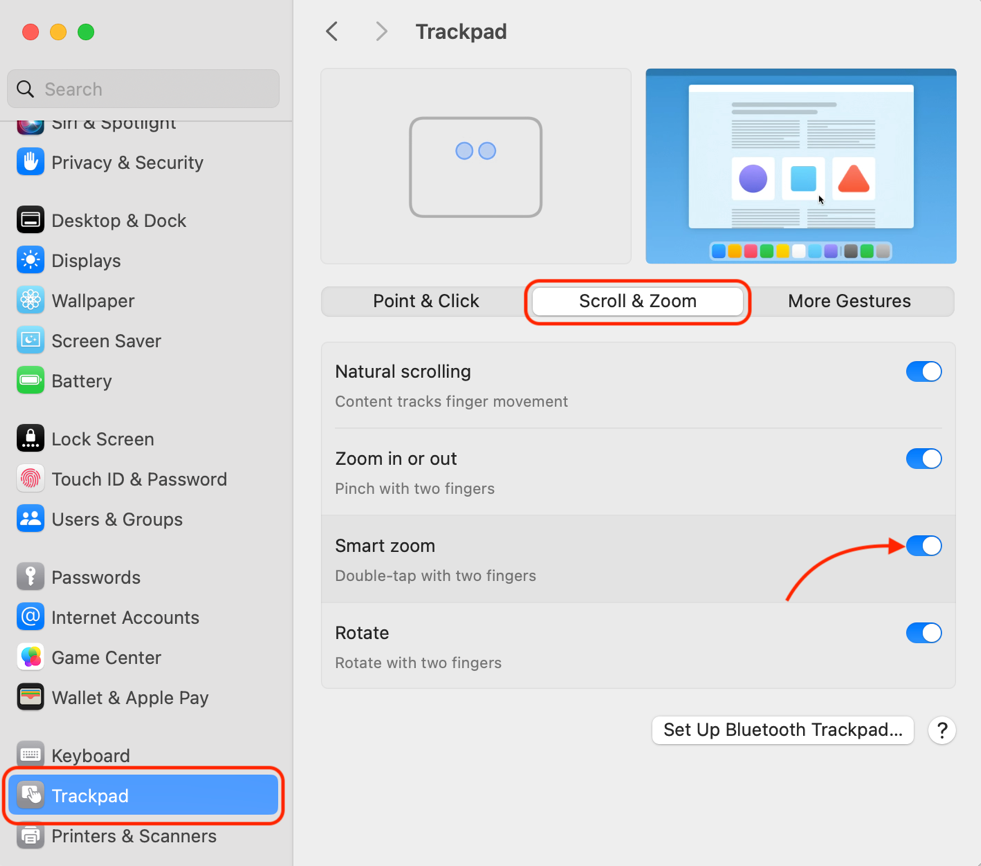
Using Smart Zoom with Trackpad
Smart Zoom is another feature that can be used with just a double-tap of two fingers. The Smart Zoom is like a quick look at something. For example, while browsing you find a very catchy icon to quickly zoom in that particular area smart zoom is used.
It works both on the trackpad and Magic Mouse. See the instructions to enable or disable it.
1. Open System Settings.
2. Scroll, till you find the Trackpad.
3. In the Scroll & Zoom tab, enable the Smart Zoom.
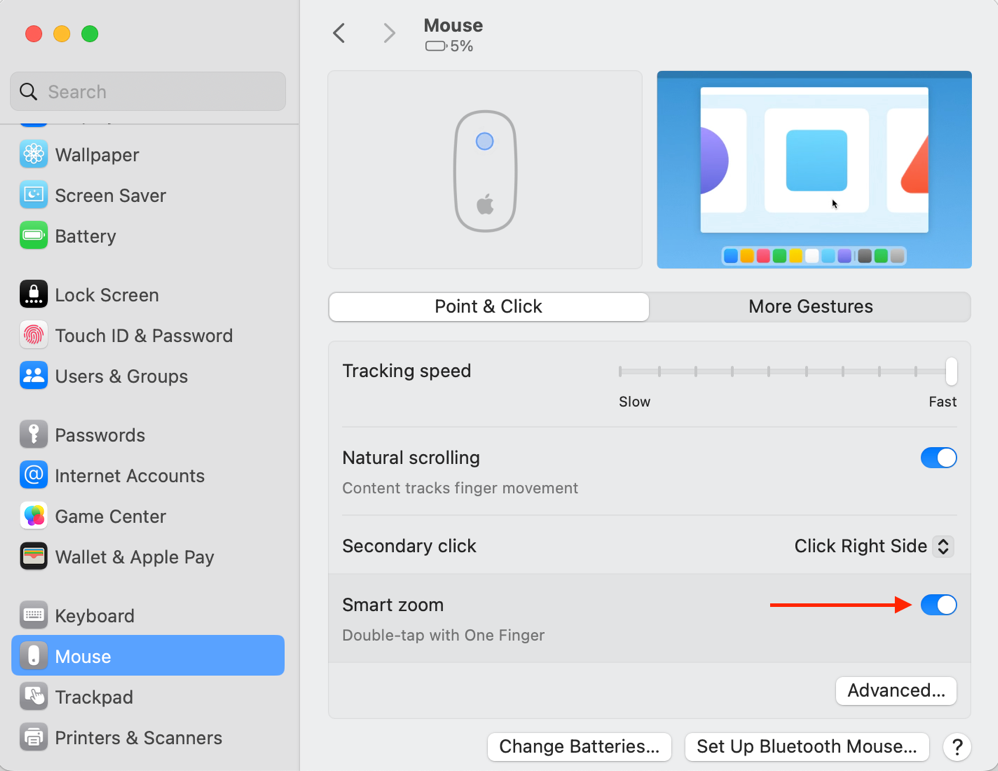
Using Smart Zoom with Magic Mouse
Well, you cannot pinch on the Magic Mouse to zoom, however, the Smart Zoom feature can be triggered by double-tapping the surface with one finger. Moreover, If you have enabled the scroll zoom with the modifier key then that functionality will also go hand in hand with Magic Mouse. Press and hold the modifier key which can be set from the Accessibility option and scroll using your Magic Mouse with a touch gesture.
Zoom Touch Bar on a Mac
Well, you can also zoom in and out a touch bar display on your MacBook display. To enable this zoom, see the below-given steps.
Note: This option is only available for MacBooks with Touch Bar.
1. Open the System Settings, find and click on Accessibility.
2. Click on Zoom, and enable the Touch Bar zoom.
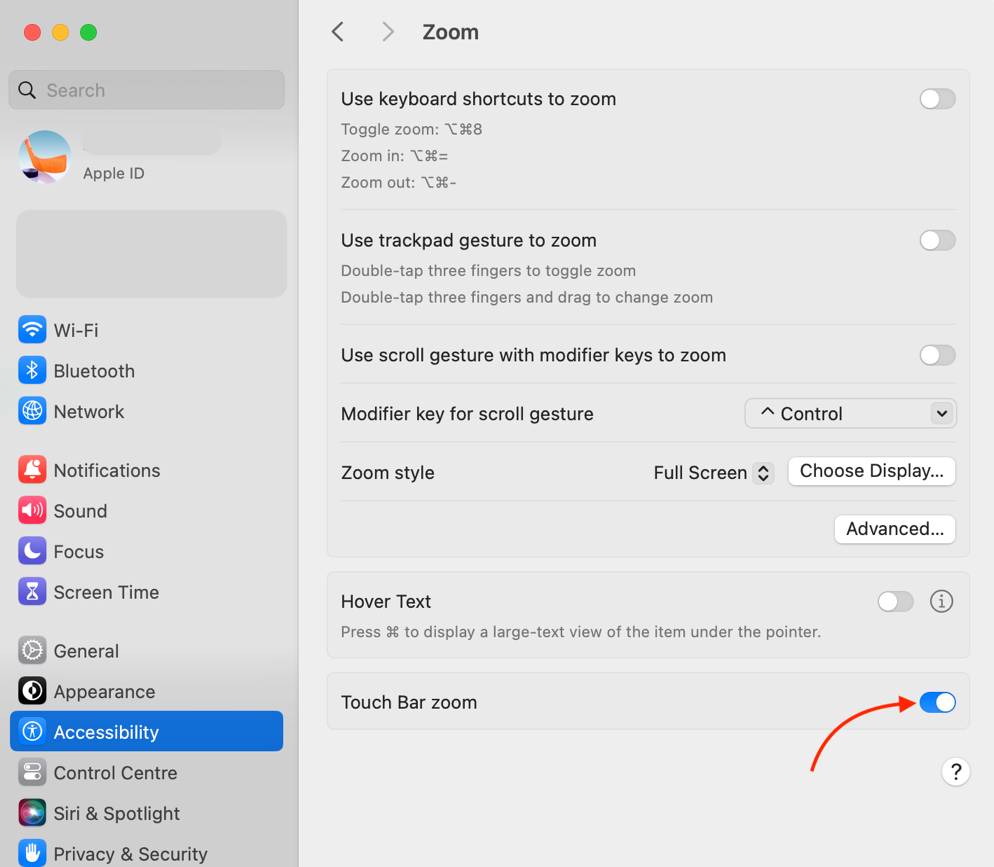
Now, press and hold the command key and pinch on the touch bar with 2 fingers.
Zoom in Safari
Safari is the default browser of macOS; it will support all methods to zoom we mentioned above. The quickest way to zoom in Safari is using the trackpad, pinch out on the trackpad zoom in, and pinch in to zoom out. You can drag the zoomed-in screen using two fingers.
Or you can use the shortcut keys:
| Zoom In | command + + |
| Zoom Out | command + – |
Zoom Text on a Mac
If you want to view the just by hovering the cursor over the text then you need to enable this option. See the instructions given below:
1. Open System Settings.
2. Go to the Accessibility, then click on the Zoom.
3. In the Zoom, toggle on the Hover Text option.
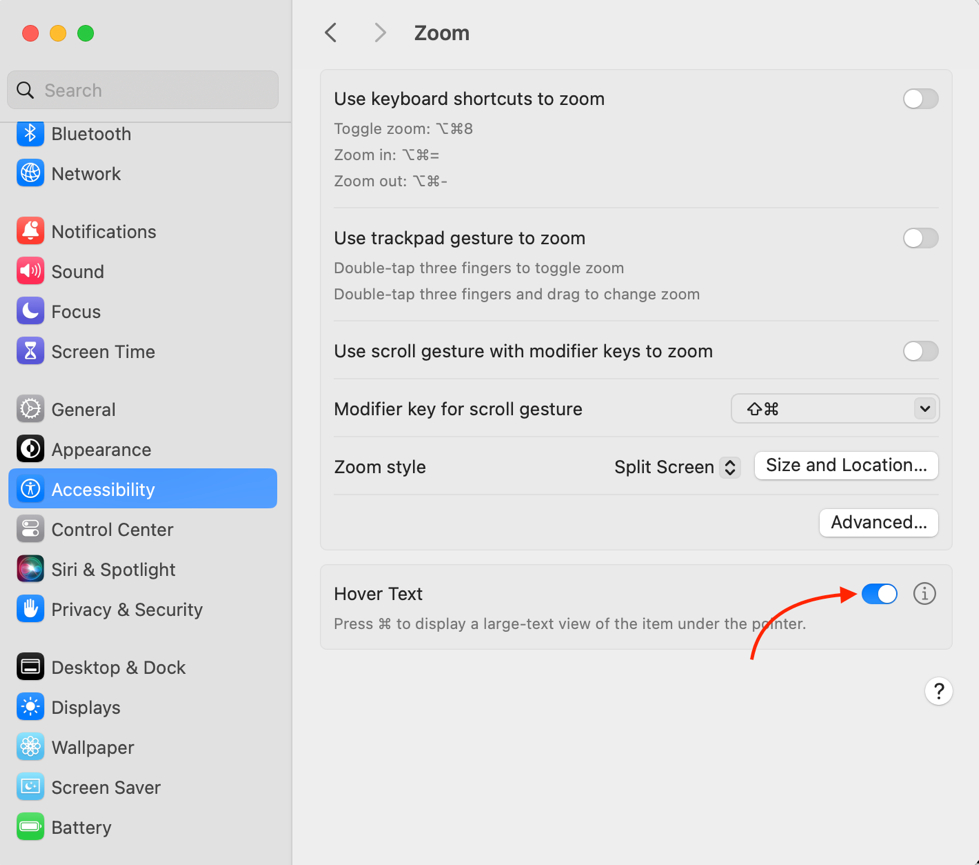
Now, whenever you hover a cursor over a text on a Mac holding the command key, then the text will be enlarged.
Conclusion
Zoom-in is a way to make something on-screen large, thus making things clearer to view. While zoom-out is the opposite of it. In Mac, there are various methods to zoom in and zoom out, such as using keyboard shortcuts, using trackpad gestures, and using Magic Mouse.
Source: linuxhint.com