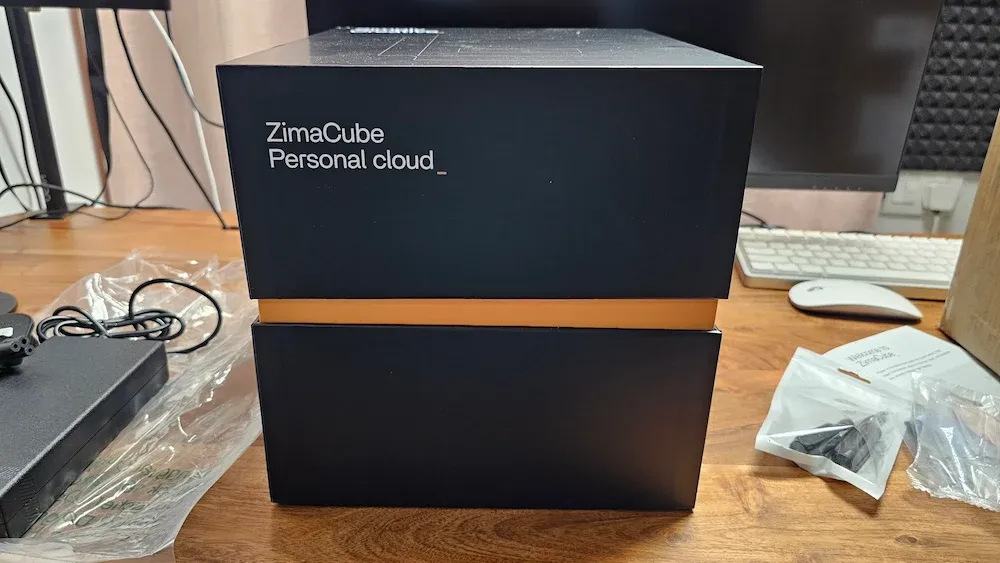
ZimaCube 2 Review: Combining Self-hosting, NAS and Local AI in a Single Package
I already reviewed the original ZimaCube Pro and gave it a positive verdict, for the most part.
So when IceWhale offered me the newer version for review, I was curious to see how much had actually changed.
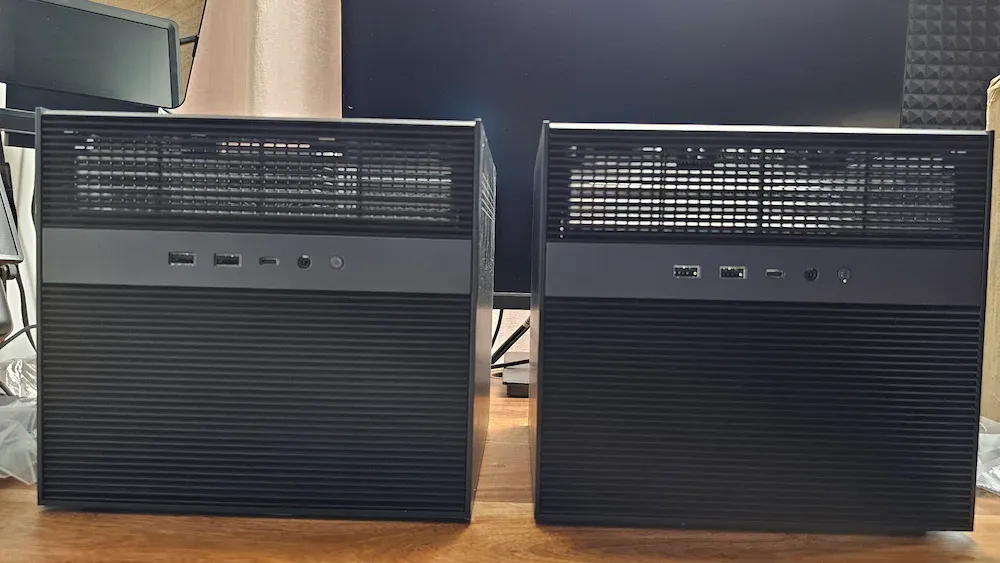
Not much specification-wise. Here’s why. If you compare the spec sheets of the ZimaCube Pro (original) and the ZimaCube 2 Pro side by side, you will find the same Intel Core i5-1235U processor, the same 16 GB DDR5 RAM, the same 256 GB system SSD, and the same six SATA bays. The core hardware of the Pro tier has not changed between generations.
What IceWhale actually did with the ZimaCube 2 lineup is more subtle. The real generational leap happened at the entry level of ZimaCube. The new $799 Standard model replaces the old N100-based unit with a proper Intel Core i3, Thunderbolt 4, and DDR5, which is a substantial and much needed step up. Intel N100 was not the best choice even two years ago.
The Pro, meanwhile, got refinements, especially on the cooling and fan noise side, along with a more mature ZimaOS. The Pro version is not a new machine, it’s just a better-tuned version of the same one.
With that said, here is everything I learned from almost a month of use.
ZimaCube Pro v2 Specifications
The ZimaCube 2 is available in three models:
- ZimaCube 2 Standard ($799): Intel Core i3-1215U, 8 GB DDR5, 256 GB system SSD, 2.5GbE networking
- ZimaCube 2 Pro ($1,299): Intel Core i5 (12th Gen), 16 GB DDR5-4800, 256 GB PCIe Gen4 SSD, 10GbE + 2.5GbE networking
- ZimaCube 2 Creator Pack ($2,499): Everything in Pro, plus NVIDIA RTX Pro 2000 GPU, 64 GB RAM, 1 TB system SSD
The unit I have for this review is the Pro, and I added an NVIDIA RTX 2000 Ada (16 GB VRAM) via one of the PCIe slots bringing it close to Creator Pack territory. This gives local AI capabilities to my otherwise Homelab device.
Again, the Pro specs are essentially identical to the original ZimaCube Pro. The i5-1235U, 16 GB DDR5, 256 GB SSD all unchanged. The ZimaCube 2 lineup’s real generational upgrade happened at the base model ($799 Standard with i3), not the Pro tier.
Key specs for the Pro version:
- CPU: Intel Core i5-1235U, 10 cores
- RAM: 16 GB DDR5-4800 (expandable to 64 GB)
- System Storage: 256 GB PCIe Gen4 x4 SSD
- Drive Bays: 6x SATA (3.5″/2.5″) + 4x M.2 NVMe slots
- Networking: 10GbE + 2.5GbE LAN (no WiFi)
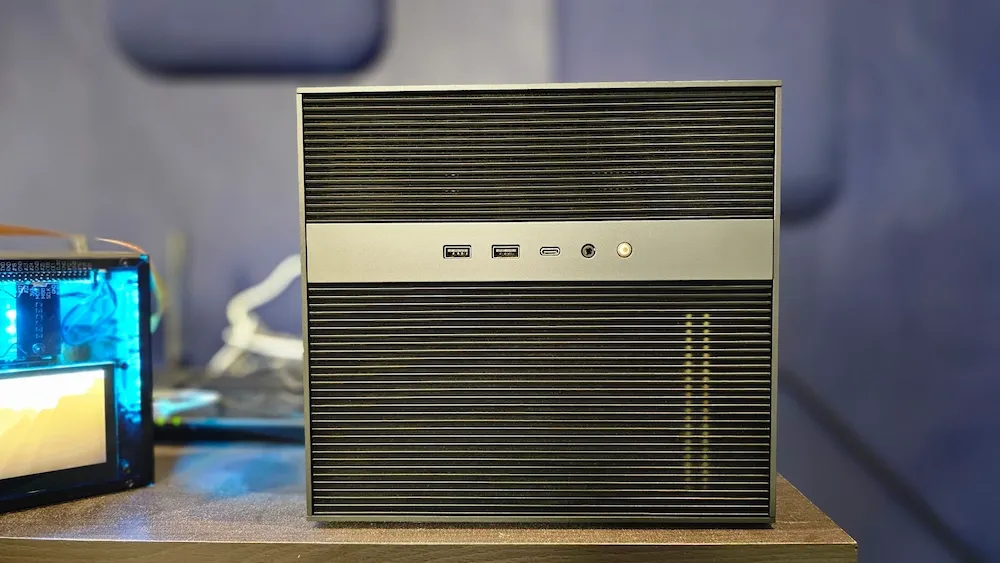
- Ports: 2x Thunderbolt 4 (USB-C, 40Gbps), 2x USB-A (front), 2x USB-C 5Gbps + 2x USB-A (back), DP, HDMI and audio jack
- Expansion: 2x PCIe slots (4.0 X4 and 3.0 X2)
- OS: ZimaOS (default), but you can install Proxmox, Unraid, TrueNAS, Ubuntu, and others
What else in the Box?
The accessory bundle is generous and thoughtful. You get:
- Four heatsinks for the M.2 NVMe drive slots
- A couple of screwdrivers so you can actually open and configure the device without hunting for tools
- Plenty of screws for hard disks and SSDs
- A high-quality Cat6 UTP cable for networking
- A power cable matching your region (a small but sensible touch since they ship worldwide)
Fan noise is handled a lot better now
One of the major complaints I had with the previous ZimaCube was the fact that the tower cooler fan was annoyingly loud. I could not work without my Bose QuietComfort headphones on. I am a little picky about keeping the work environment quiet.
ZimaCube Pro v2 is noticeably quieter than the original generation. That is a real improvement and definitely worth acknowledging.
It is still not an absolute silent device. There is still a faint, constant, low-level whirring from the fans that you may hear in a quiet room if you are standing too close to it and the device is under load. You’ll only notice it if you want to notice it. My TerraMaster NAS operates in near-silence by comparison.
Where you place this device matters. A dedicated server spot away from your workspace: no problem. On your desk in a home office, you might notice it.
The ZimaOS Experience: Still the heart of this device
ZimaOS is the backbone of ZimaCube and all other Zima devices. The good news is that it has matured considerably since the original ZimaOS that was released with the previous ZimaCube.
The interface is familiar: a clean web UI accessible from any browser on the local network, a file manager, and an app store for one-click deployment of self-hosted software. The applications run in Docker containers underneath, but you do not need to know Docker to install or use them.
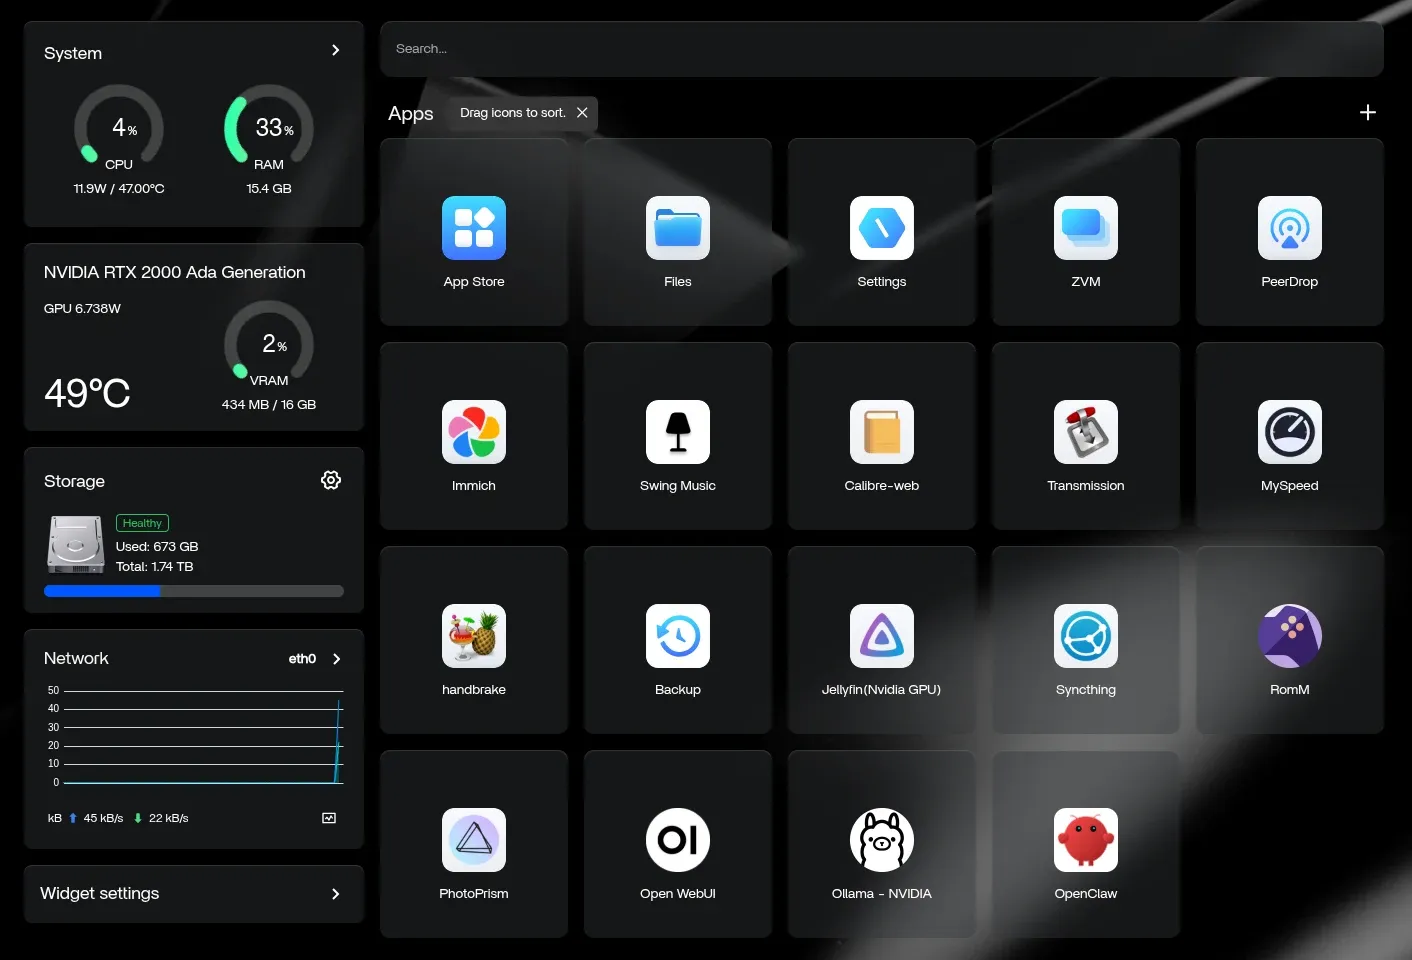
The storage manager continues to be one of the strongest features.
Disk management, merging storage pools, and setting up RAID are all handled through a graphical interface that makes things a lot easier.
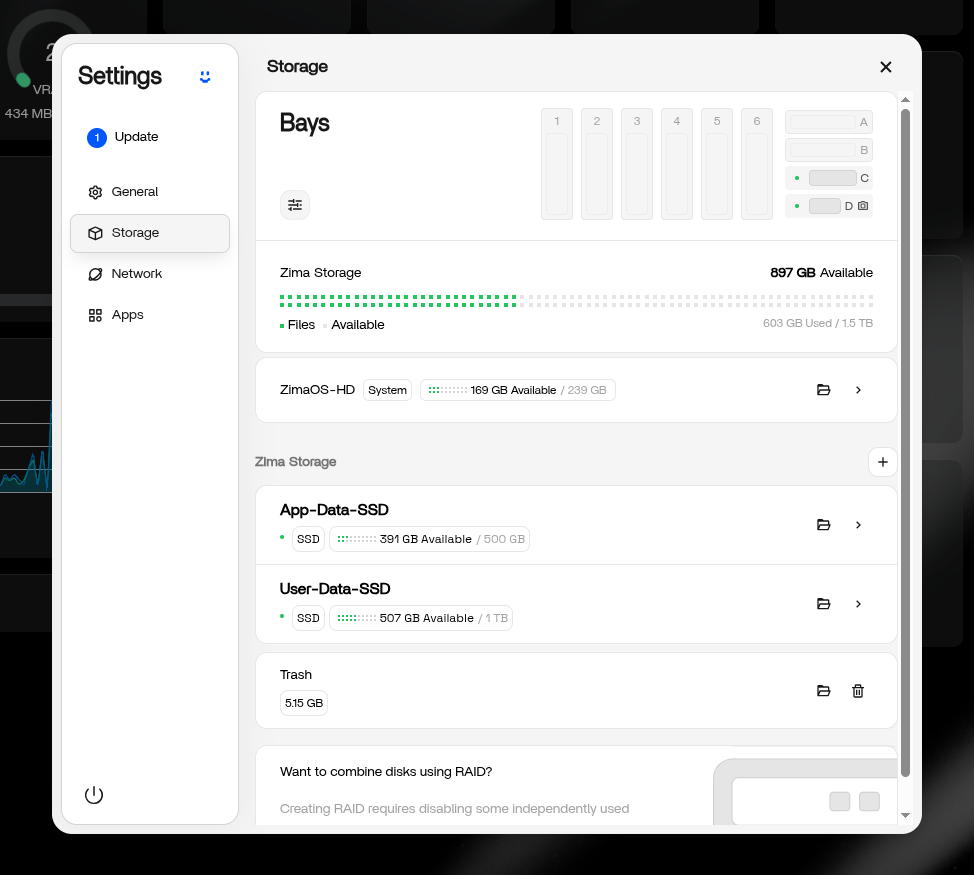
I migrated two drives from my original ZimaCube: a 1 TB SSD and a 500 GB SSD.
A note on RAID for anyone in a similar situation: yes, ZimaCube 2 supports RAID and the ZimaOS GUI makes creating a RAID array incredibly easy.
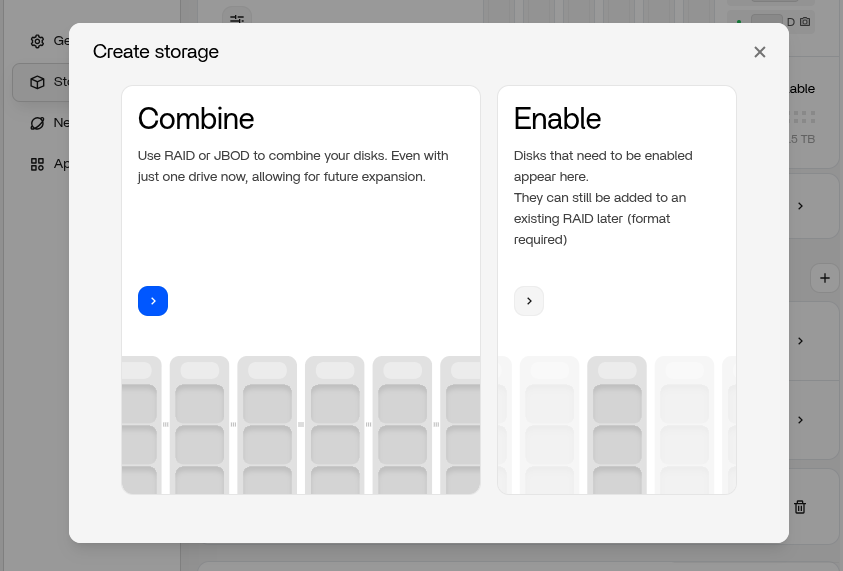
But with mismatched drive sizes, RAID is wasteful. A 1 TB + 500 GB RAID 1 mirror gives you only 500 GB of usable space, wasting the rest.
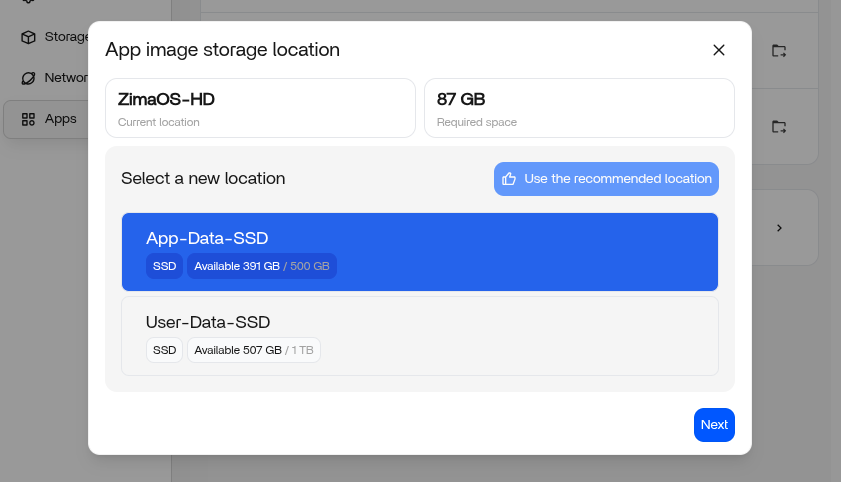
So I skipped RAID and went with a practical split setup instead:
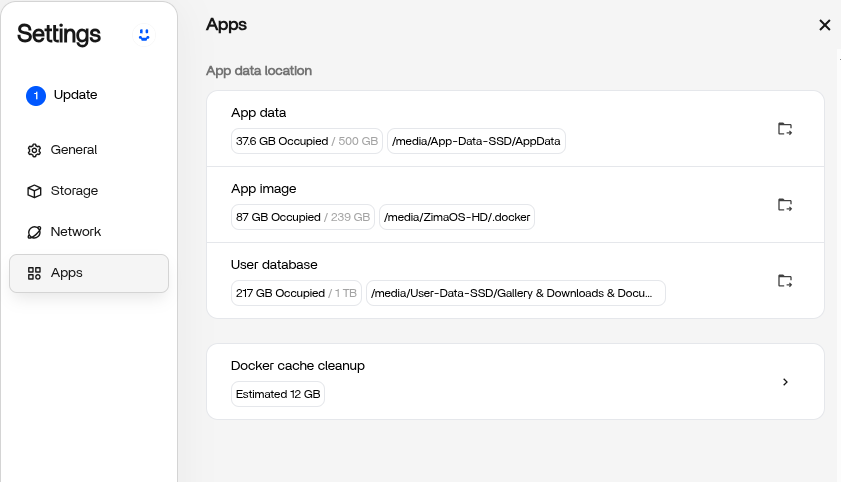
- 500 GB SSD dedicated to app data (persistent storage for all Docker-based apps)
- 1 TB SSD for actual user data and files
Moving the application and container data between disks is effortless thanks to the storage manager.
ZimaCube has 256 GB of built-in storage. But it starts filling up quickly as you install more (Docker) applications and add user data.
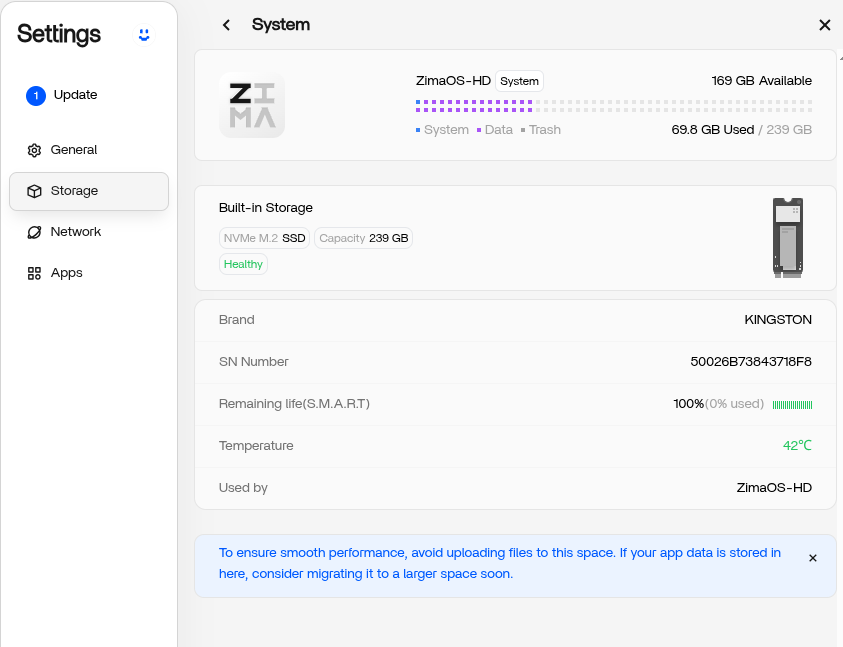
This is why I moved the app data to a 500 GB SSD and the user data to a 1 TB SSD. This way, the built-in storage is free. Once migrated, applications like Immich and others use the dedicated drive without needing to manually configure storage volumes in every app.
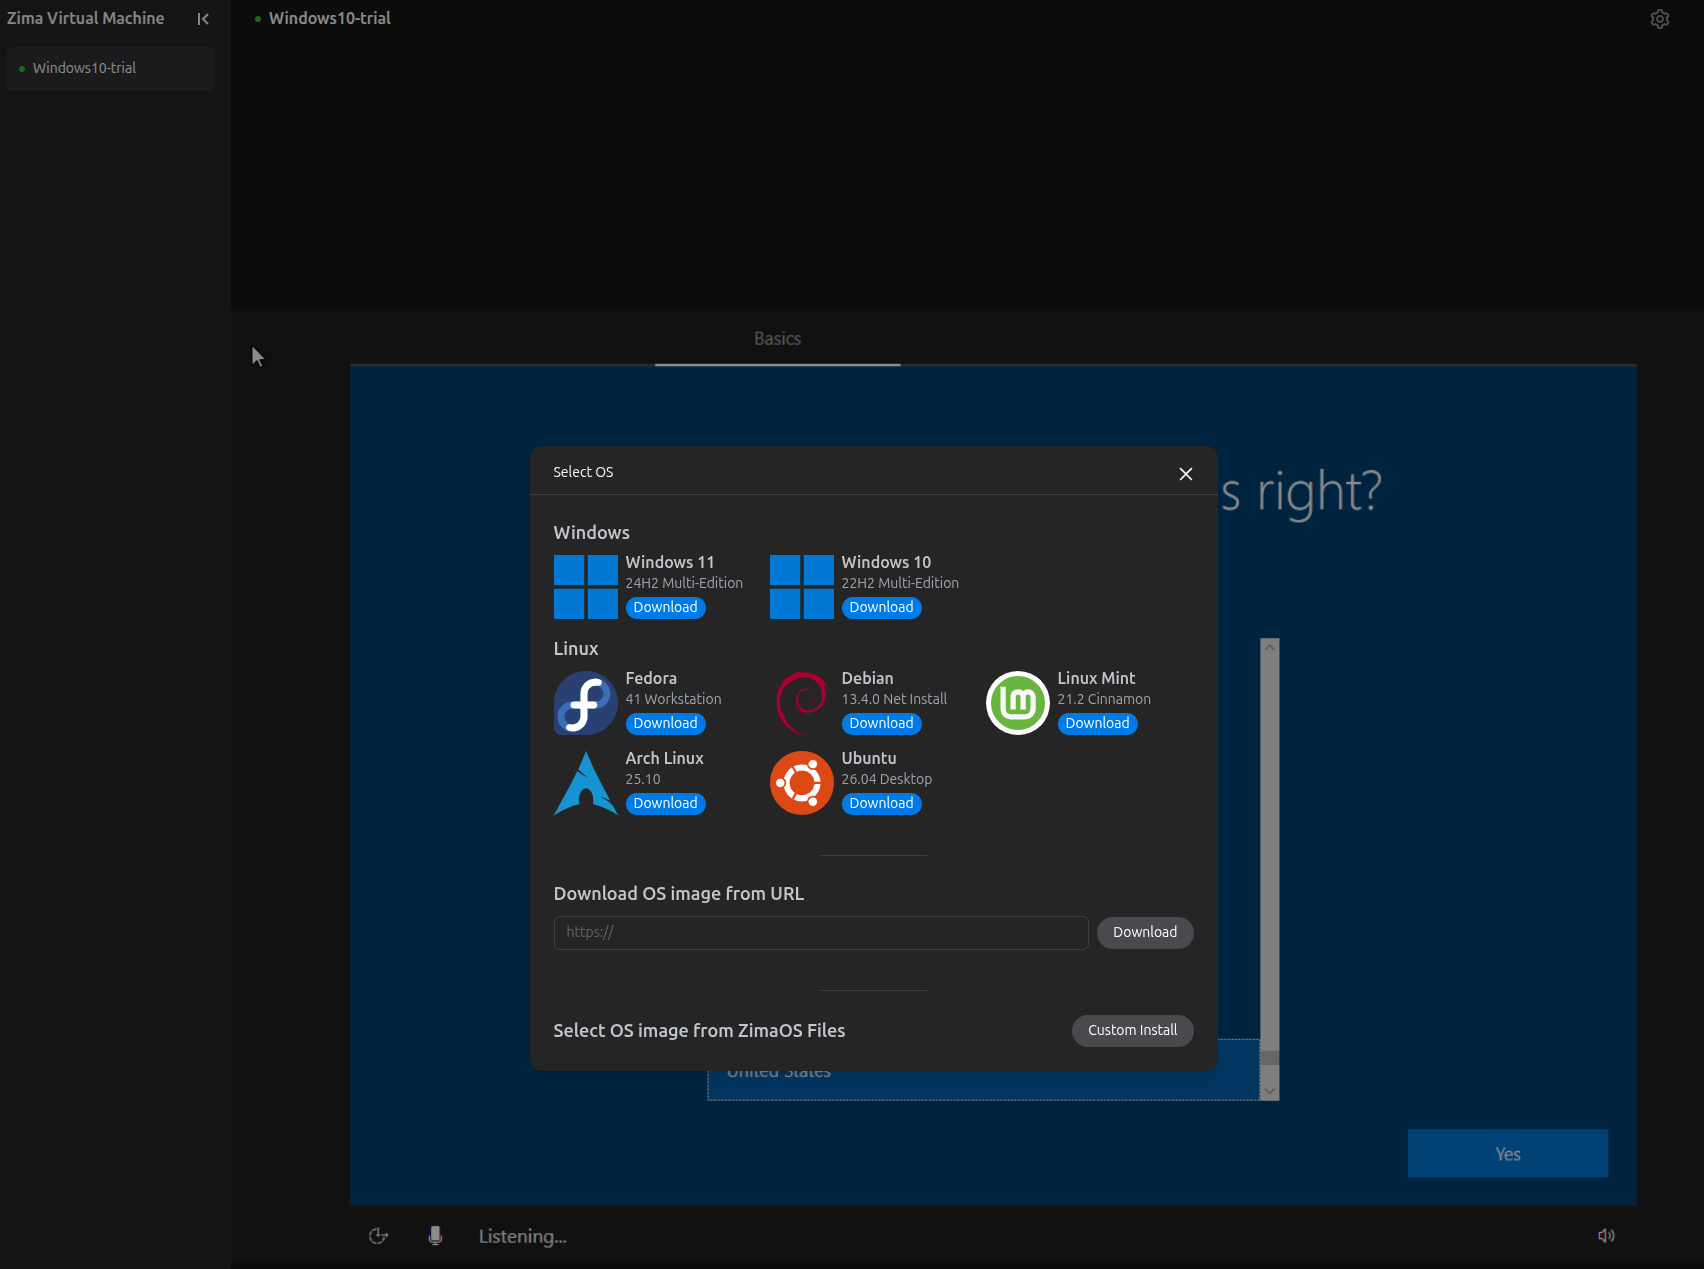
ZVM (Zima Virtual Machines) is also available, letting you run other operating systems directly on ZimaCube from the browser. It comes with a trial of Windows in a VM by default. Not useful to me but I guess it extends the functionality and offering of ZimaCube.
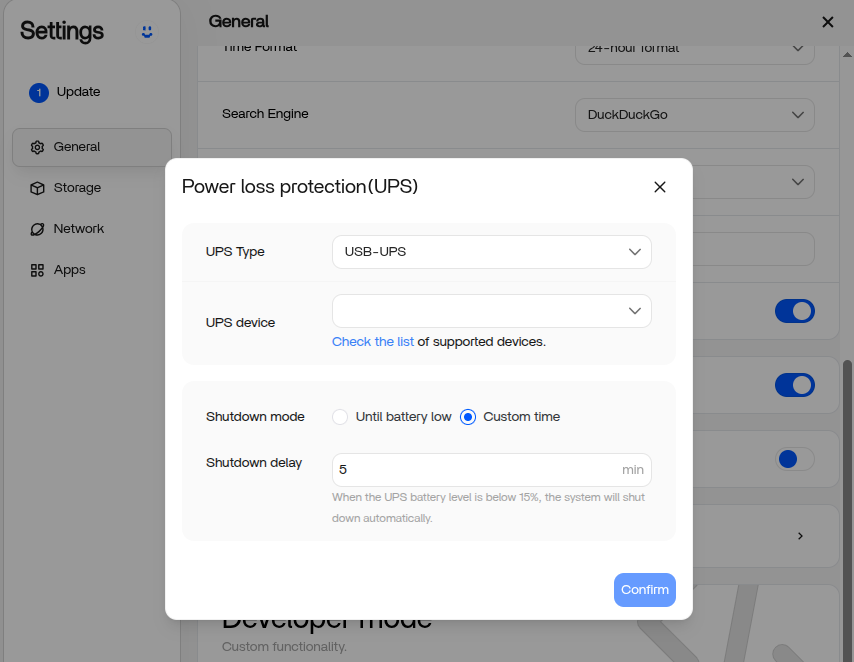
ZimaOS has many little gems that are not well advertised. For example, there is an option to enable UPS settings. In the event of a power failure, if you have added a UPS in the set up, you can choose to gracefully power off the ZimaCube if the power is not restored in the given time frame. This saves the disks and data from a prolonged power failure.
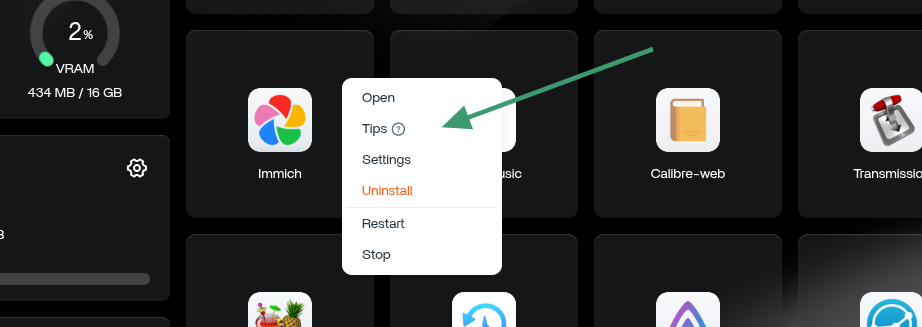
Many self-hosted applications are required to be configured with username and password at installation/deployment time. In such cases, ZimaOS shows the default credentials used under the Tips section. It is accessible when you click on the three vertical dots on the app.
ZimaOS still has room to grow!
The GUI hits its limits more often than the marketing suggests. Some things still require dropping into a terminal, which is fine for Linux users but undercuts the “easy homelab for everyone” pitch for less technical users.
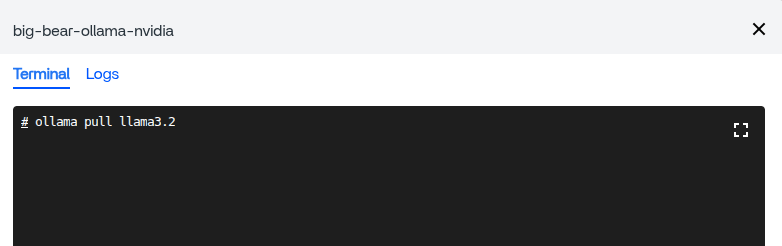
For example, I installed Ollama-Nvidia from the app store. But there was no further information on using it. Since I have used Ollama in the past and I also have experience with ZimaOS, I figured out that it has to be accessed via the terminal of the Docker application.

When I ran Ollama commands, there was no visible output while the model downloaded or installed. It appeared to do nothing and then it was done. For anyone unfamiliar with CLI tools, this will cause confusion.
Thankfully, Open WebUI now directly downloads models from Ollama so a separate Ollama server is not mandatory anymore. But for agentic AI flow, I think Ollama is still better suited.
Jellyfin as a media server
While ZimaOS does makes self-hosting open source software easier, individual applications do require occasional tweaking and configuration changes.
For example, I installed Jellfin Nvidia GPU version as I have added the RTX 2000 Ada. When I tried streaming a 4K video file, the GPU was not used at all. It started consuming 90% of the CPU.
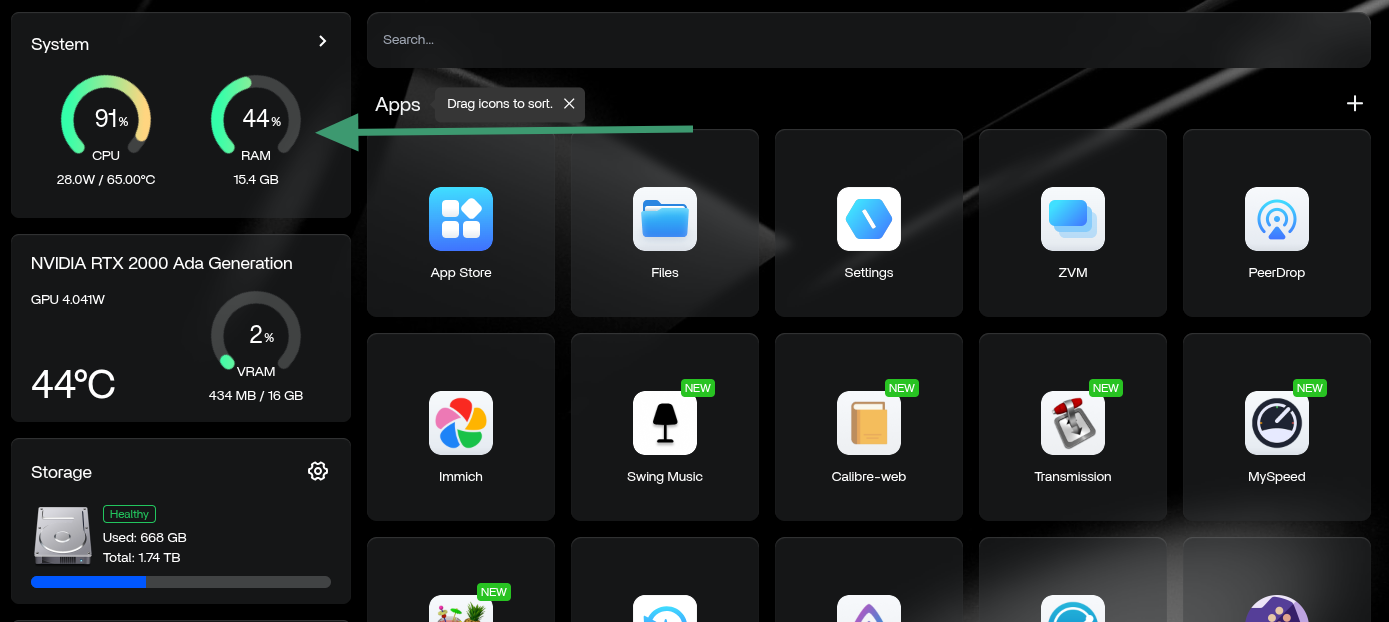
It’s because Jellyfin still needed configuration changes and I had to enable the hardware transcoding with NVIDIA NVENC.
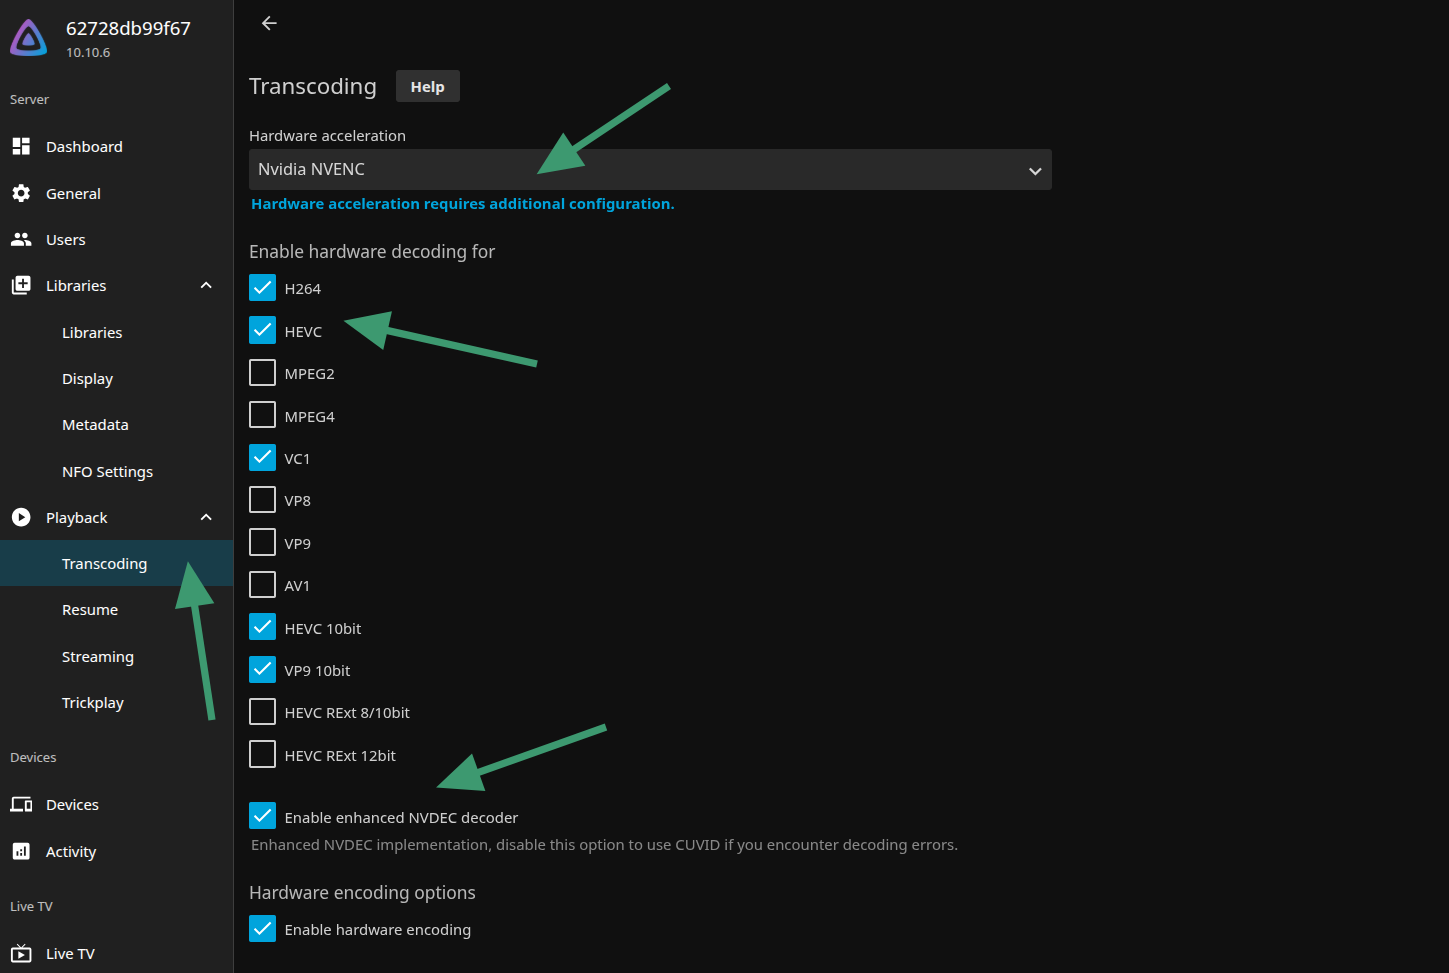
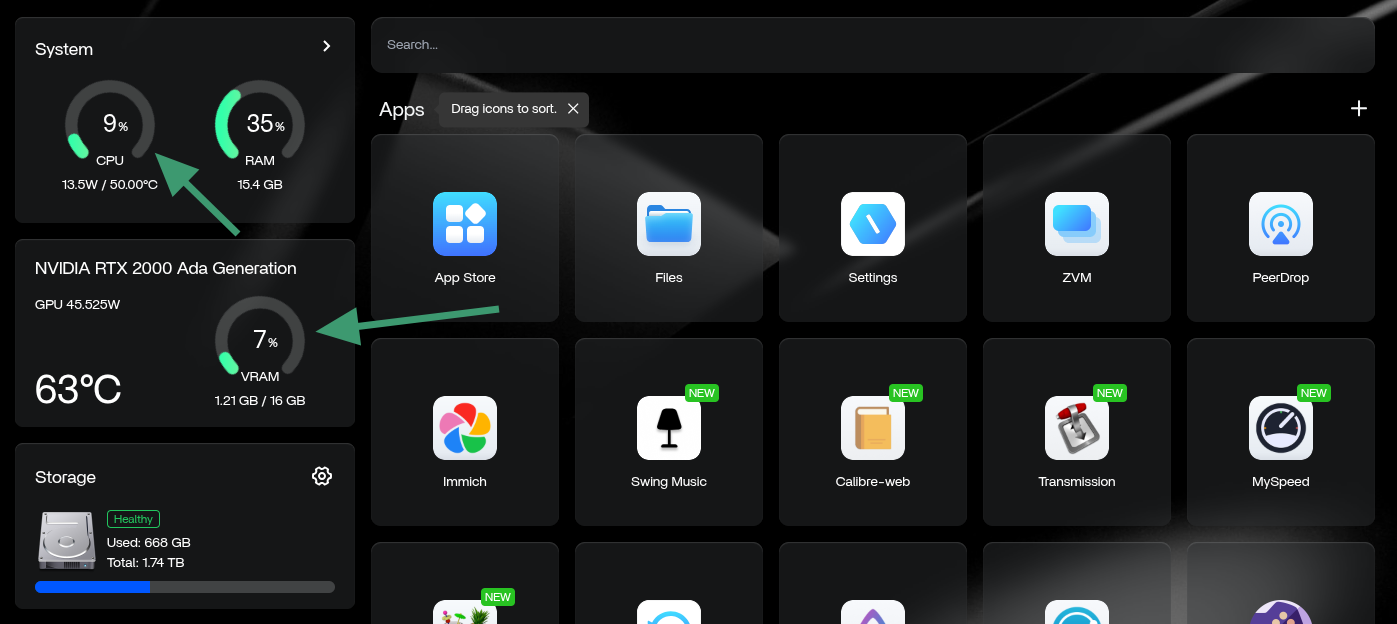
And once I did that, the CPu consumption was at the minimum. GPU was consumed but not much as NVIDIA RTX 2000 Ada is way too powerful for video transcoding.
The point I am trying to make here is that individual apps may require setting and configuration changes of their own.
Zima has improved its documentation considerably and mostly covers such pain points but there is plenty of scope for improvements here.
Photo storage and management with Immich
Immich is a self-hosted Google Photos alternative and ZimaCube is an excellent host for it. The combination covers the full use case: mobile photo backup via the Immich app, face recognition, smart albums, CLIP-based semantic search, and a clean timeline interface in the browser.
With a GPU present, Immich’s machine learning tasks like facial recognition, smart search run noticeably faster than on a CPU-only setup. I forgot to benchmark this data. Sorry for that 😦
The ZimaCube mobile client provides basic folder sync as an alternative if Immich feels like too much setup for your needs. Simple photo backup from your phone can be done without any additional app configuration. Although, it was buggy in my experience and I would prefer relying on PhotoPrism instead.
Using ZimaCube 2 for local AI
This is where ZimaCube Pro v2 genuinely separates itself from a typical NAS as no traditional NAS manufacturer gives you a PCIe slot for a GPU. ZimaCube does, and that changes what the machine can be.
I shared my experience with Ollama earlier but then you don’t necessarily need Ollama all the time. Open WebUI, AnythingLLM works well too.
Anyways, the runtime experience is a different story. Once Ollama is running and models are pulled, things are smooth. With the RTX 2000 Ada’s 16 GB VRAM, 7B and 13B parameter models run entirely in VRAM with no memory spillover. Response times are fast enough for real use: comfortable for chat, fast for summarization tasks, very fast for coding assistance.
For everyday tasks like text summarization, Q&A, quick coding help, 7B to 13B models are the practical sweet spot. They are fast, fit cleanly in 16 GB VRAM, and the quality is more than adequate. Larger models in the 32B+ range will start to push the memory limits, though quantized versions can still run well.
I tried Deepseek-r1, qwen and llama primarily. I wanted to use Kimi but Ollama only has it in cloud mode and that fails the point of setting up a local AI.
I used AnythingLLM as an AI assistant for my private notes. It helps me find and create quick tips for the newsletter and social media. Setting up AnythingLLM was a struggle too.
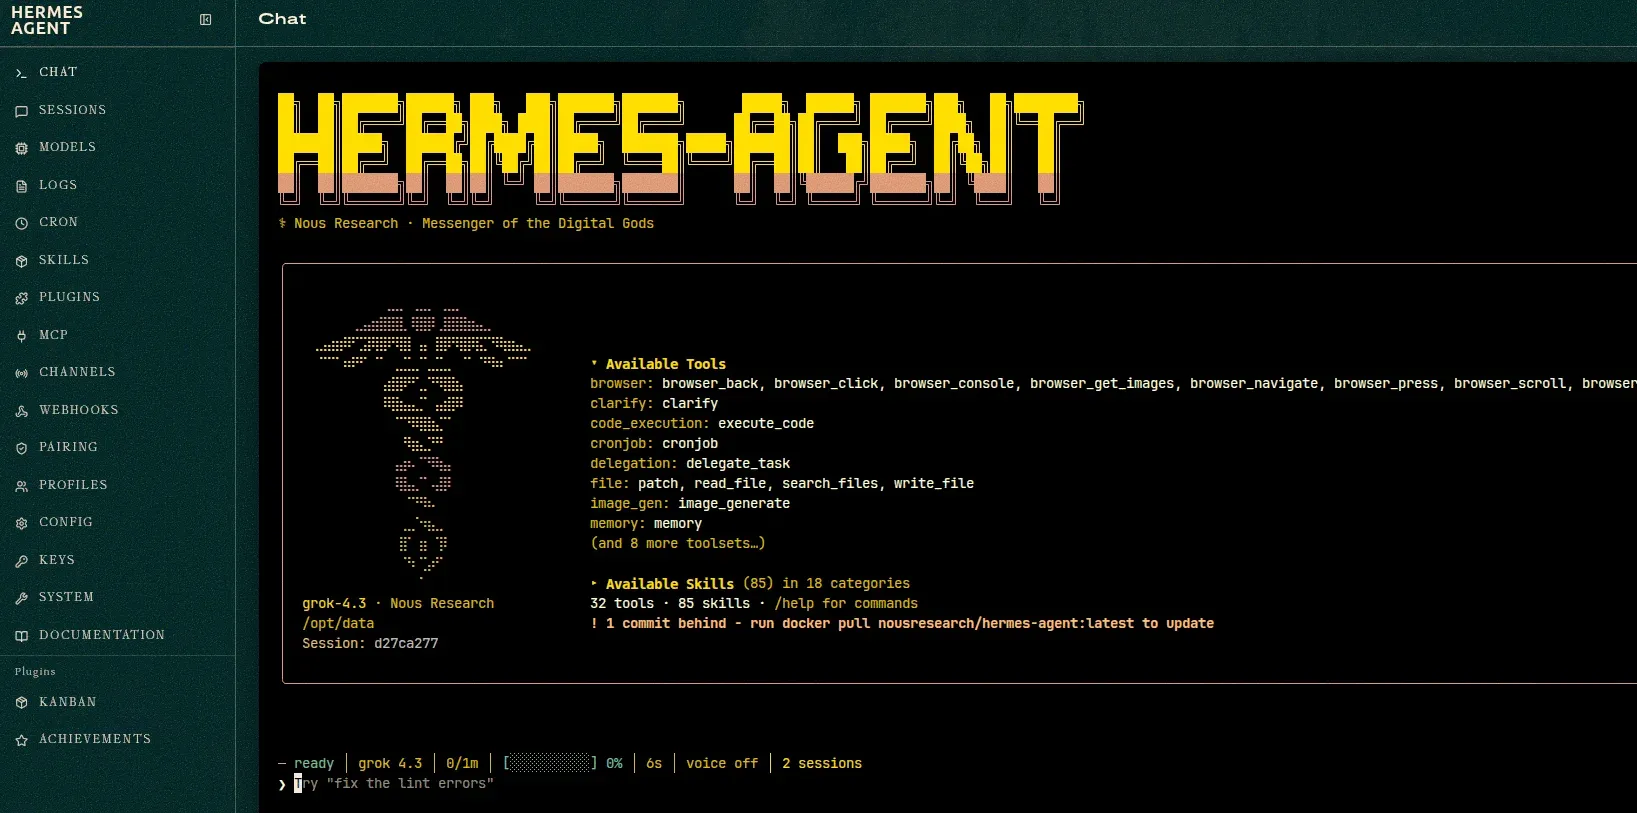
On the agentic AI side, I rely on Nanoclaw as it is super easy to setup. ZimaOS only offers OpenClaw which is more popular but not something I prefer. Setting up Hermes Agent is easier as it has graphical interface.
Let’s be clear. Without a GPU, local AI on ZimaCube is CPU inference. Functional but slow and limited to smaller models. The PCIe slot is what makes the real difference here but then you have to spend on a small form factor GPU as not all GPUs will fit in the ZimaCube.
Linux is still not getting the place it deserves
There were two main concerns that I raised in the previous ZimaCube review: it’s fan was too noisy and the Zima client was not available for Linux.
Built on ZeroTier, Zima client allows you to use your ZimaOS device from anywhere in the world. You have to enable remote access option for this.
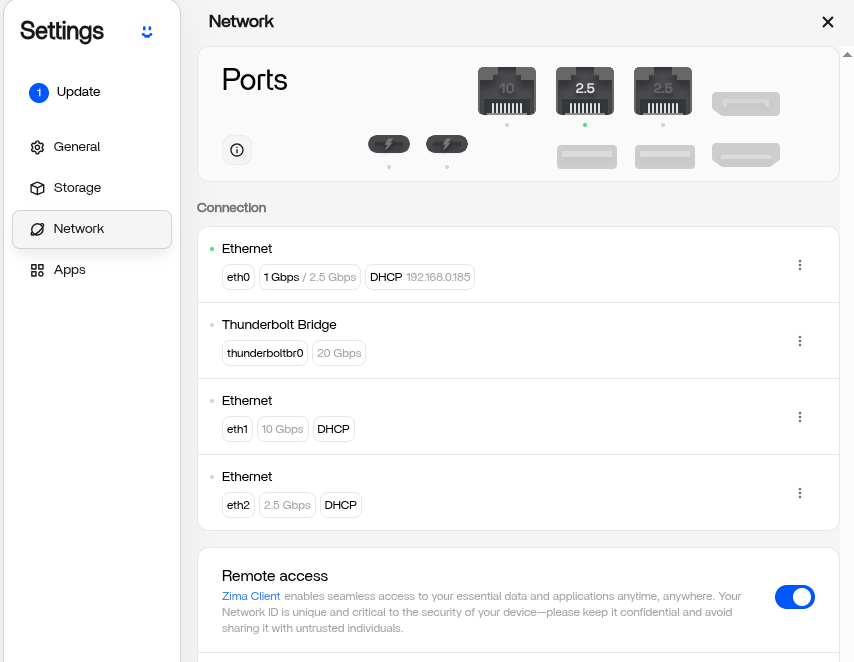
This way, even if your ZimaCube is on your home network, behind a NAT, you can access it from another location, city or country. This makes your homelab available outside the home network.
The problem is that you need to install the Zima Client application on your system and this application is still available only for Windows and macOS.
Two years and we still don’t have Zima Client for Linux and as a Linux user, I am surely disappointed.
What I am using ZimaCube Pro v2 for
I have a few Zima devices in my setup. I started my homelab journey with the ZimaBoard, a smaller SBC type of device that came with CasaOS. It was upgraded to ZimaBoard 2 and it runs continuously in my setup and powers my Home Assistant and Jellyfin servers.
ZimaCube 2 runs the same operating system and thus I could use it for all my homelab need and remove ZimaBoard from the picture, but I chose not to do so.
I use ZimaCube 2 as a combination of NAS and local AI. It has more power and thus also consumes more power. I usually turn the ZimaCube off at the end of the day and keep it running during my working hour.
Photo backup and management with Immich is the primary use case. My full photo library lives here now.
Then I use Local AI inference with Ollama and Open WebUI. Running Qwen and a few other models for summarization, knowledgebase assistant helps (with Anything LLM on my laptop).
File storage for important documents. ZimaCube is one node in my backup strategy.
Is it worth getting?
ZimaCube 2 Pro is priced at $1299. There is an increase in price because SSDs, RAMs cost more (all thanks to the AI craze).
If you already own a ZimaCube Pro, there is genuinely no hardware reason to upgrade. The processor, RAM, and storage are the same. It is not worth the cost of switching just for a more silent fan.
If you are buying for the first time, the ZimaCube 2 Pro is the one to go for. The standard ZimaCube 2, priced at $799, also provides more value now.
Some people may think that it is better to build a PC in the same or cheaper price but than not everyone would want to do that. Devices like ZimaCube serve a niche of people who want to own a homelab without spending too much time dealing with the hardware, networking and the operating system.
These days, you need more than just a NAS, You need that hardware to do more than just storing data. And ZimaCube brings NAS, self-hosting and local AI together. It gives you PCIe expansion, Thunderbolt 4, and an approachable homelab OS in the same box. For the right kind of user, that combination has no real alternative.
For me, ZimaCube is an integral part of my home setup, and it stays that way.
P.S. You can win a ZimaBoard 2 (not ZimaCube 2) and start a small lab with that. Please enter the giveaway on X (formerly Twitter).
🎁 Giveaway alert: Win a ZimaBoard 2 and start your homelab for FREE.
We’re teaming up with @ZimaSpace to give away a one-of-a-kind It’s FOSS × ZimaBoard 2 1664 Edition. And yes, only ONE exists.
Powered by Intel N150 with dual 2.5GbE networking and PCIe expansion, it’s perfect… pic.twitter.com/yTRzYzNYox
— It’s FOSS (@Itsfoss) June 4, 2026
![]()
Source: It's FOSS