How to Install NVIDIA Drivers in Ubuntu 26.04 [in Two Ways]
![]()
This is a step by step beginners guide shows how to install the most recent NVIDIA drivers in Ubuntu 26.04 LTS.
There are two official ways to install NVIDIA drivers in Ubuntu: one from Ubuntu developers, the other from NVIDIA website.
The drivers from the system repository are maintained by Ubuntu developers. Not only the latest version (NVIDIA 595 so far), it also provides old drivers, such as NVIDIA 535, 550, 560, 570, 580, 590 for choices. However, it always has a few weeks (or even few months) delay for the latest driver updates.
NVIDIA website also maintains the drivers packages in .deb/.rpm for Linux users. And, it will always update them to the latest once it’s released.
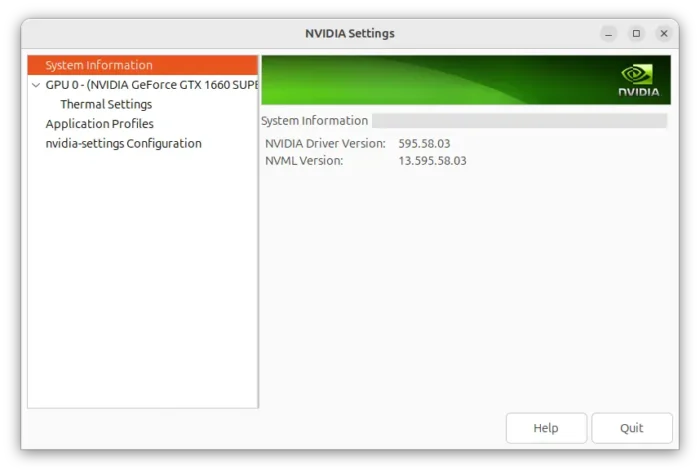
NVIDIA 595.58.
Option 1: Install NVIDIA Driver from Ubuntu System Repository (Recommend)
The best choice is always use the packages from Ubuntu developers, as they are tested and built with Ubuntu specific patches.
Ubuntu used to have a graphical “Additional Drivers” tool for managing drivers, which is however removed from default install in Ubuntu 26.04. You can get it back by installing “Software & Updates” from App Center, though it does no longer work properly in 26.04.
To install Ubuntu’s driver packages, we now use the ubuntu-drivers command line tool
For Desktop, Gaming, and other general use, press Ctrl+Alt+T to open terminal, and run the commands below one by one:
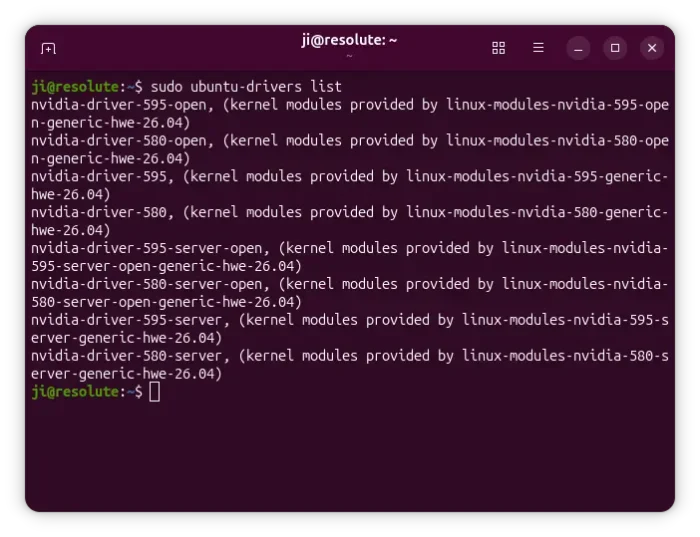
- First, run command to list all available drivers for your hardware:
sudo ubuntu-drivers list
- Then, install one, such as NVIDIA 595, via command:
sudo ubuntu-drivers install nvidia:595
For open kernel modules, use
nvidia:595-openinstead. And, you may usesudo ubuntu-drivers installto let it automatically choose and install the best driver for your hardware.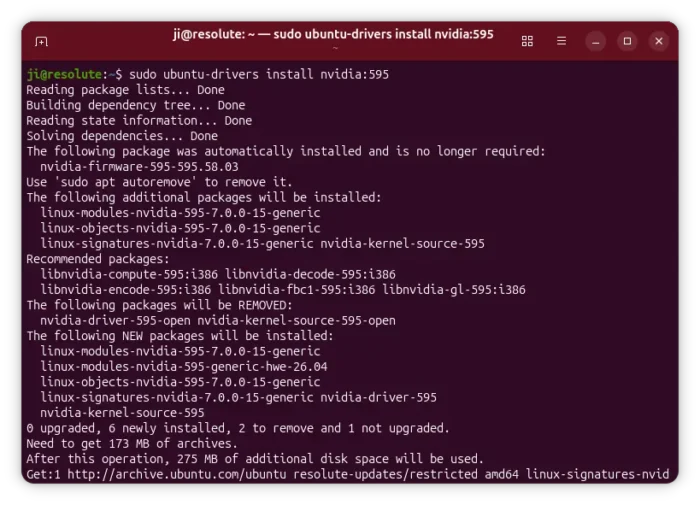
For computing or server use, open terminal or connect to command console, and run commands:
- First, list drivers:
sudo ubuntu-drivers install --gpgpu
- Then install driver, such as NVIDIA595:
sudo ubuntu-drivers install --gpgpu nvidia:595-server
After successfully installed NVIDIA driver, reboot your computer or server. And, run cat /proc/driver/nvidia/version command to check the version of your currently running driver.
Uninstall:
For any reason, you may uninstall the NVIDIA driver by running the 2 commands below one by one in terminal or command console.
- First, run command to tell the version of your currently running driver:
cat /proc/driver/nvidia/version
- Next, uninstall by running command (replace version number 595 accordingly):
sudo apt --purge remove '*nvidia*595*'
Finally restart computer.
Option 2: Install Driver from NVIDIA Website
When a new version is out, and you can’t wait a few weeks or even months for Ubuntu updates, then you may try the one from NVIDIA’s website.
NOTE: You need to remove Ubuntu’s driver package first (if installed), via the command above, before installing this one.
1. Add NVIDIA Repository
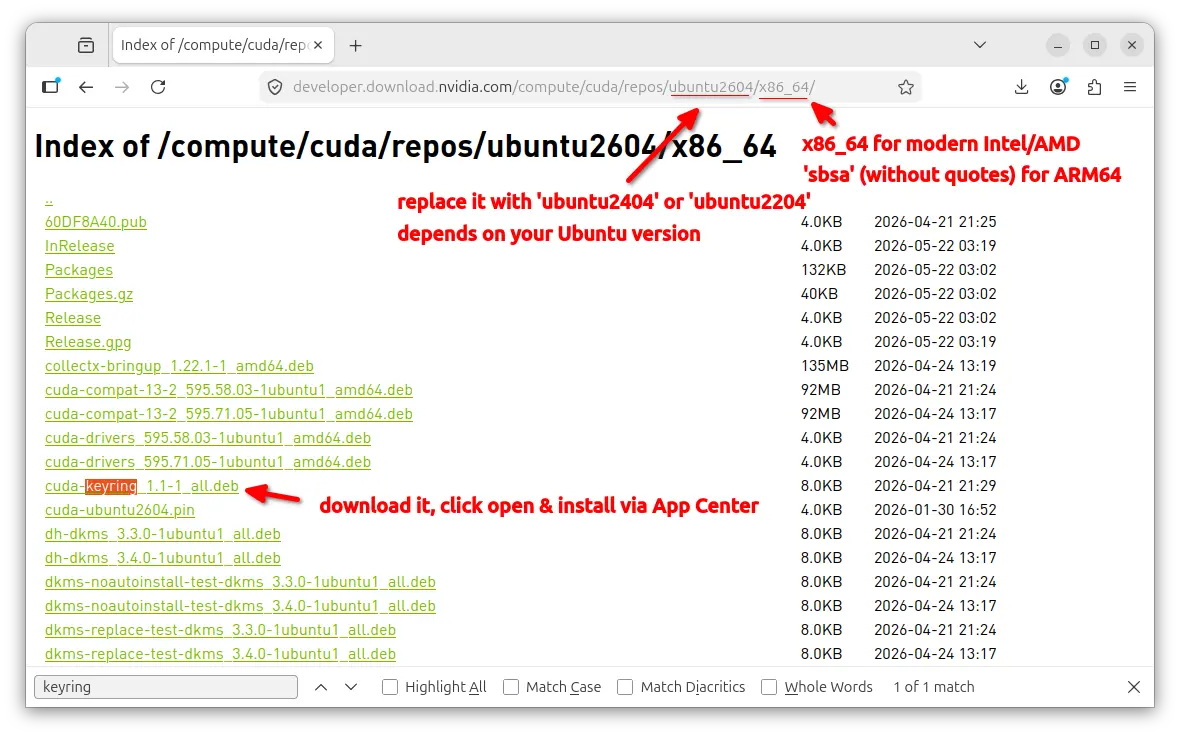
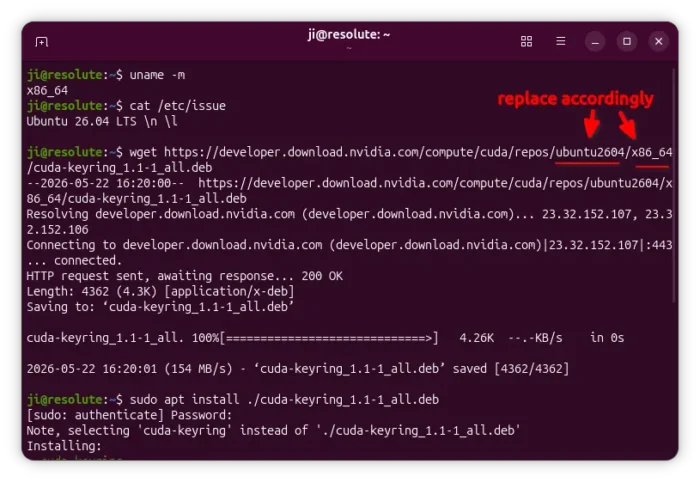
First, go to link below and select download the “cuda-keyring_1.1-1_all.deb” package.
Download CUDA Keyring for Ubuntu 26.04, Ubuntu 24.04, or Ubuntu 22.04 on Intel/AMD platform.
Then click open and install the package with App Center, which will setup NVIDIA repository for your Ubuntu.
For choice, you may open terminal (Ctrl+Alt+T) and run the command below instead to download & install the package to setup NVIDIA repository:
wget https://developer.download.nvidia.com/compute/cuda/repos/ubuntu2604/x86_64/cuda-keyring_1.1-1_all.deb
sudo apt install ./cuda-keyring_1.1-1_all.deb
Though you need to replace ubuntu2604 according to your Ubuntu version, and x86_64 to sbsa if you’re on ARM64 device, such as Snapdragon X.
2. Refresh & install driver
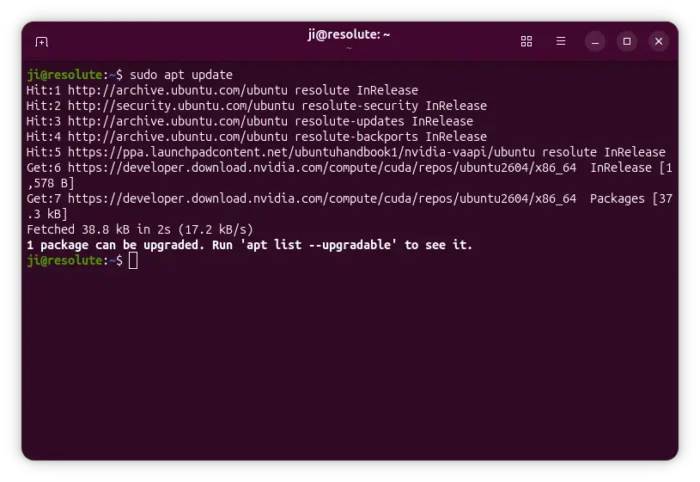
After added NVIDIA repository, run the command below to refresh cache:
sudo apt update
It will show you something that looks like “Get/Hit: https://developers.nvidia.com/ …”.
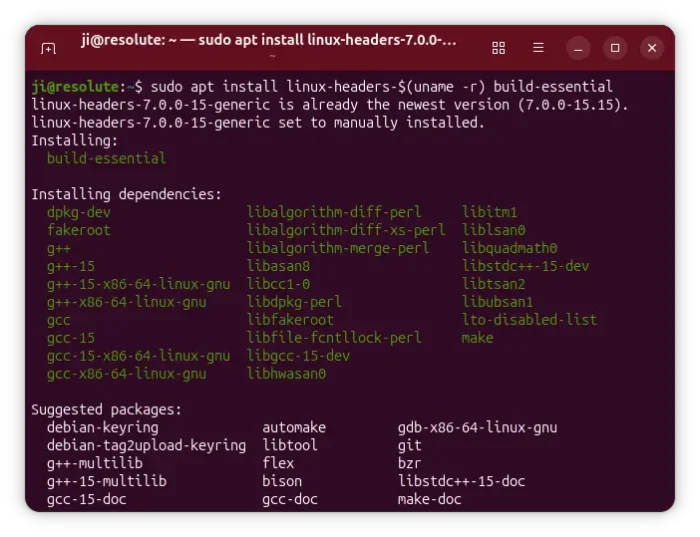
Next, run command to install kernel headers, and build-essential for building the kernel modules.
sudo apt install linux-headers-$(uname -r) build-essential
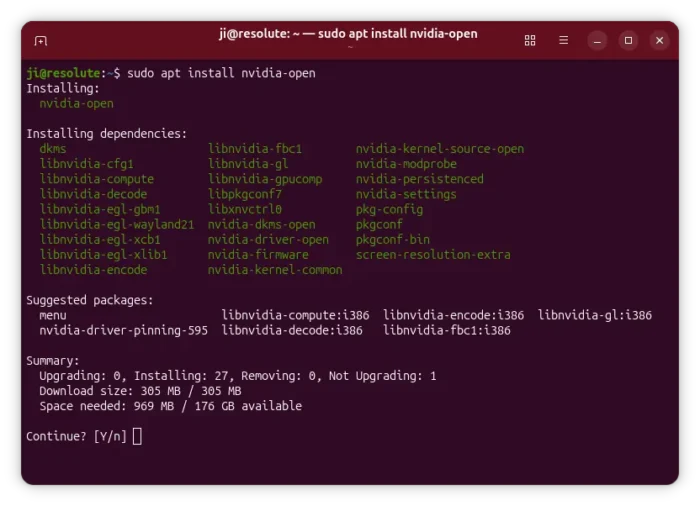
Finally, install the latest NVIDIA driver for both desktop, gaming, computing and server use via command:
sudo apt install cuda-drivers
If you would like to install the open kernel modules, replace cuda-drivers with nvidia-open in last command.
Also restart computer after installed the new driver.
Uninstall:
You may remove the driver packages installed from NVIDIA repository by running command:
sudo apt remove --autoremove nvidia-open nvidia-driver cuda-keyring
Then, remove the repository by deleting the source and key files:
sudo rm /etc/apt/sources.list.d/cuda-ubuntu*.list
In addition for laptop users with both Intel/AMD integrated GPU and NVIDIA dedicated GPU, there’s an extension for default GNOME desktop that add a switch to top-right quick settings menu, allowing to quickly switch between GPUs.
Simply install “Extension Manager” (Debian package) from App Center, then use it to search & install the “GPU profile selector” extension. Though, you need to also download & install “envycontrol” (.deb package under Assets section) from this page.

Reading more:
https://ubuntu.com/server/docs/how-to/graphics/install-nvidia-drivers/
https://docs.nvidia.com/datacenter/tesla/driver-installation-guide/ubuntu.html
Source: UbuntuHandbook