How to Take Screenshots on Google Chrome
In this article, we will show you how to take screenshots of specific web page elements or the entire web page using Google Chrome Developer Tools.
Topic of Contents:
- Opening the Google Chrome Developer Tools
- Selecting a Specific Element from the Webpage Using Google Chrome Developer Tools
- Taking Screenshots of the Webpage Elements Using Google Chrome Developer Tools
- Taking Screenshots of the Full Webpage Using Google Chrome Developer Tools
- Conclusion
- References
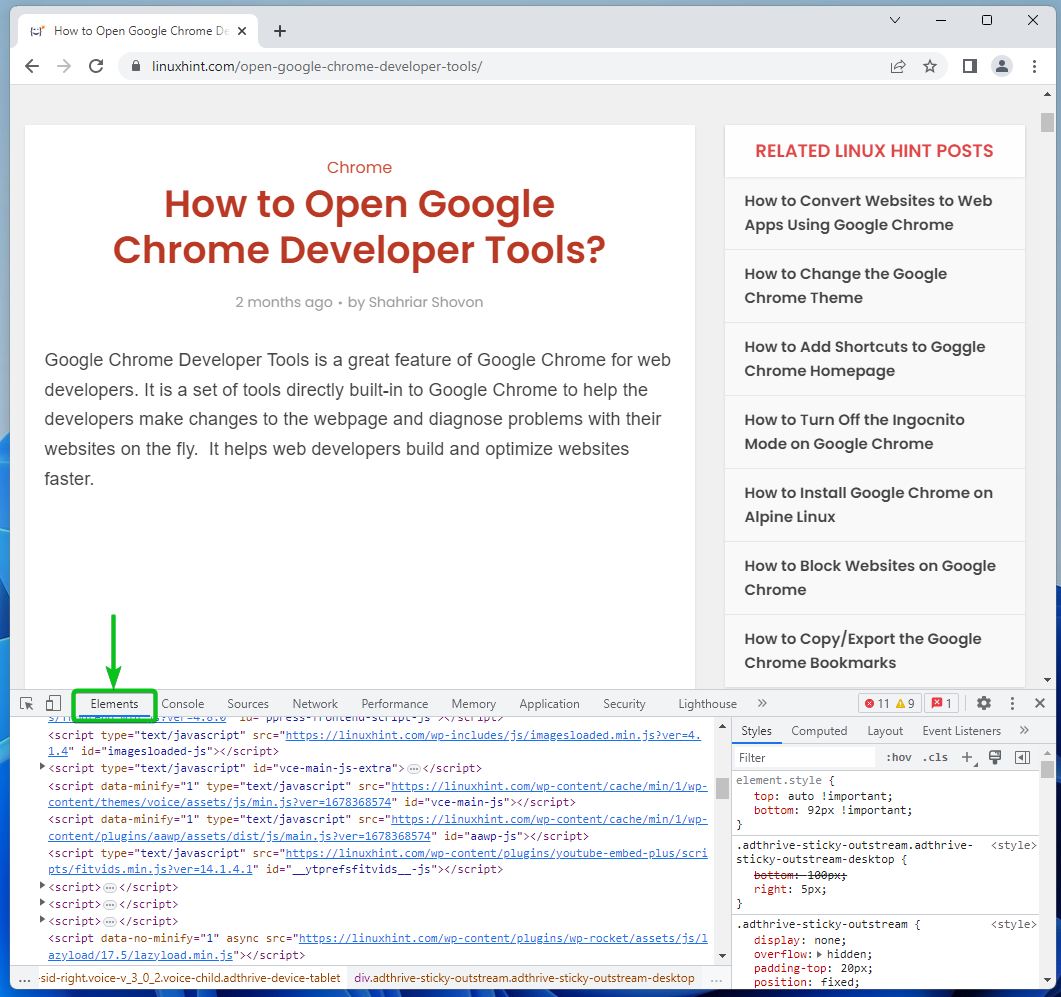
Opening the Google Chrome Developer Tools
To open the Google Chrome Developer Tools, run the Google Chrome, visit the web page that you want to take screenshots of, and press <Ctrl> + <Shift> + I.
If you need any assistance in opening the Google Chrome Developer Tools, read the article on How to Open the Google Chrome Developer Tools.
Selecting a Specific Element from the Webpage Using Google Chrome Developer Tools
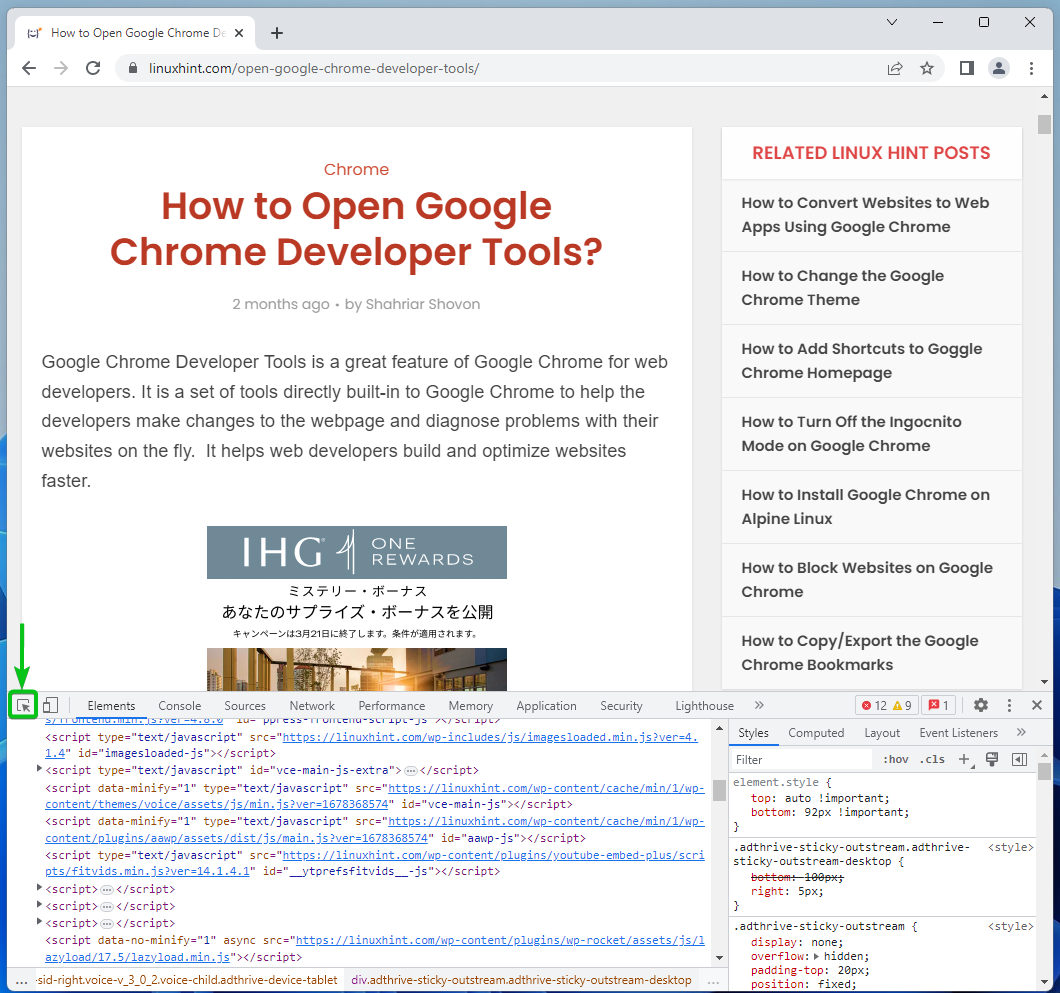
If you want to take screenshots of a specific element from the web page using the Google Chrome Developer Tools, you need to be able to select the element that you want to take screenshots of from the web page.
You can select an element from the web page from the “Elements” tab of the Google Chrome Developer Tools.
You can also use the “Inspect” tool of the Google Chrome Developer Tools to select an element from the web page.
To use the inspect tool, click on
![]()
from the top-left corner of the Google Chrome Developer Tools.
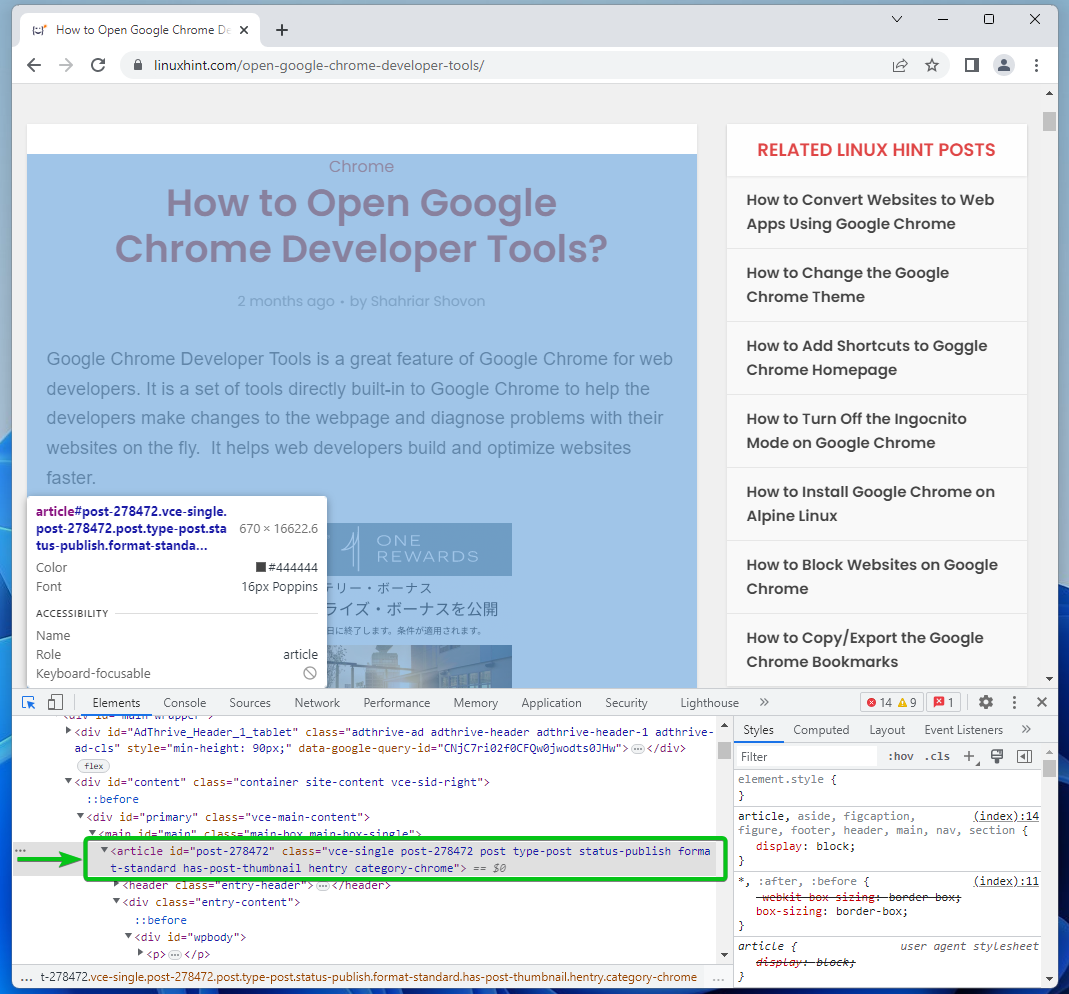
Select the element that you want to take a screenshot of from the web page. Once the element is selected, the HTML code section should also be automatically selected in the “Elements” tab.
Taking Screenshots of the Webpage Elements Using Google Chrome Developer Tools
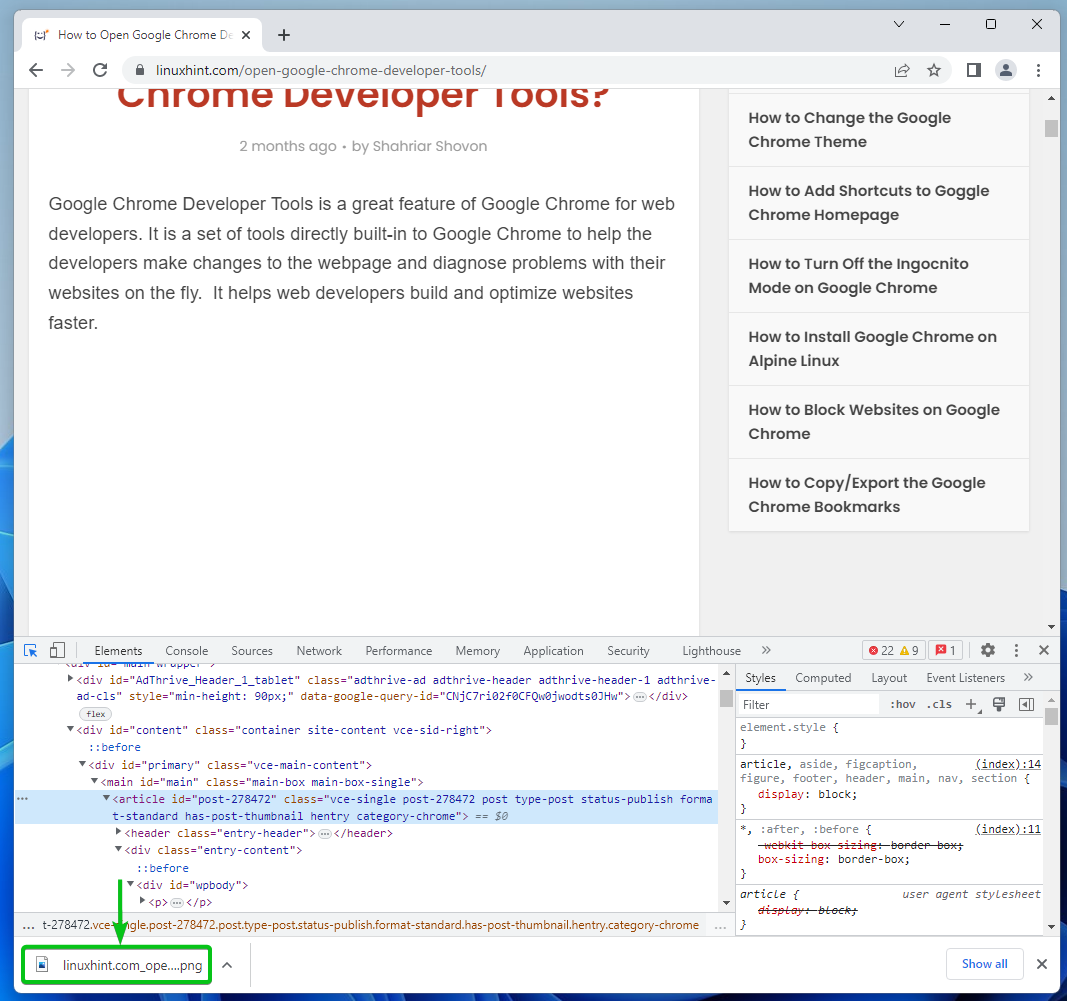
To take a screenshot of the selected web page element, right-click (RMB) on the selected HTML parent element from the “Elements” tab and click on “Capture node screenshot”.
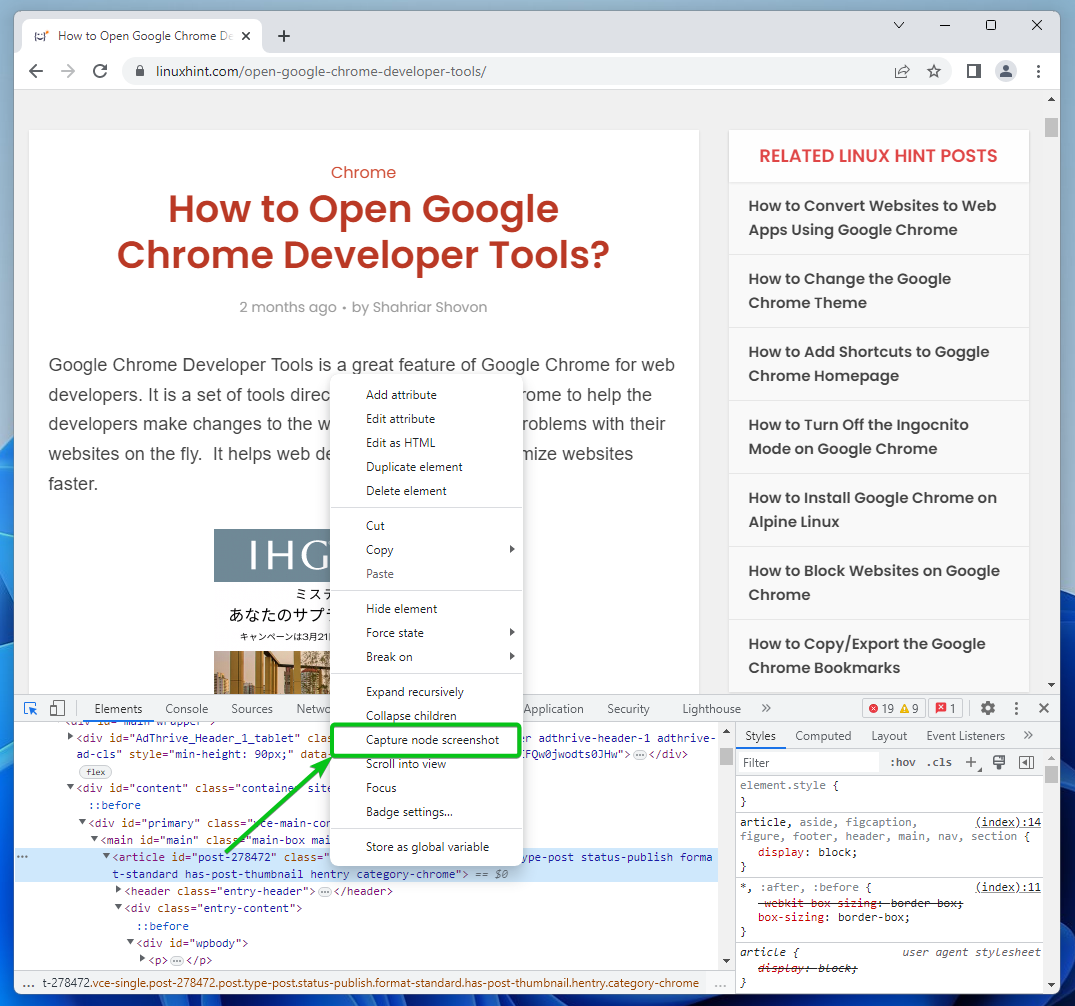
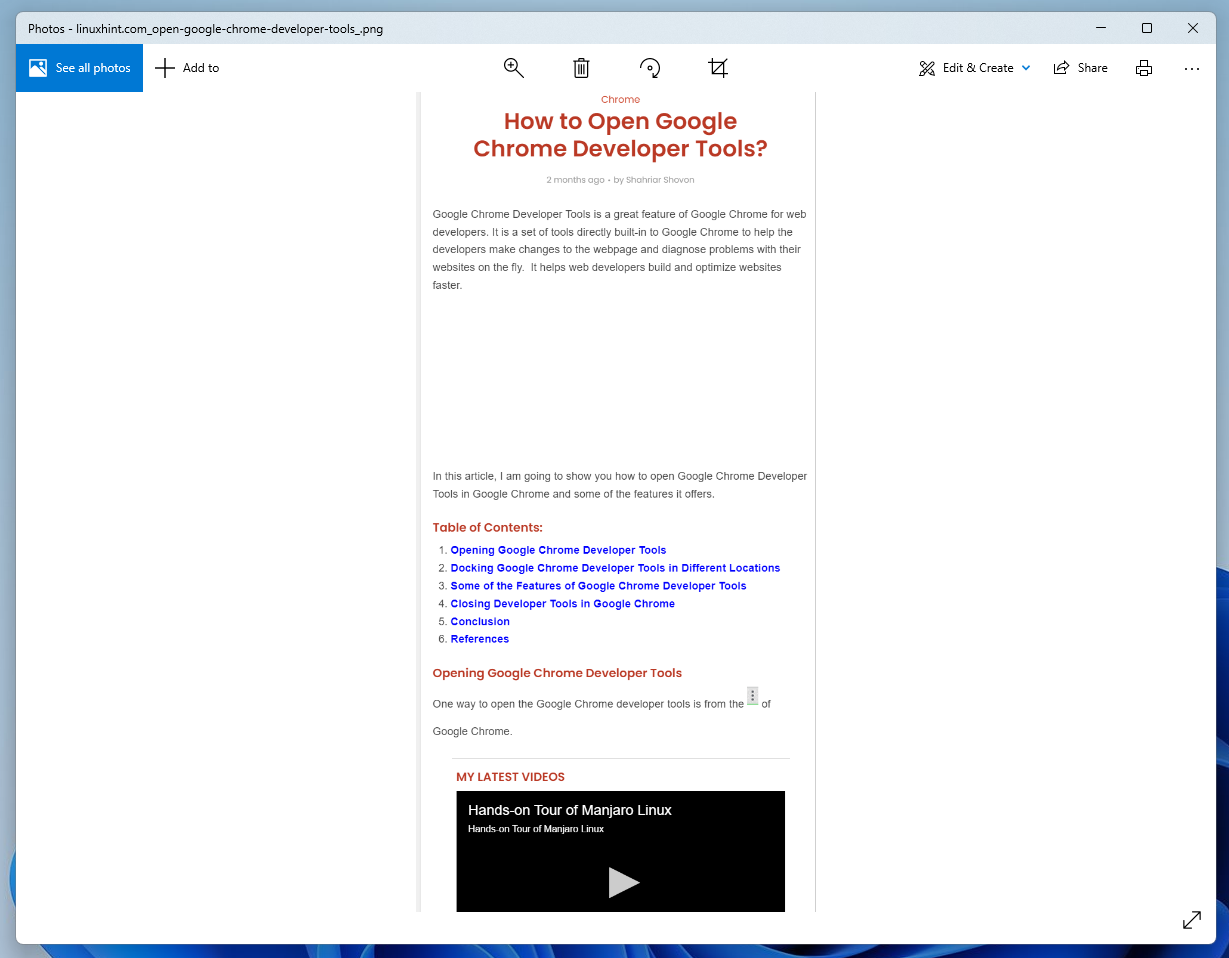
A screenshot of the selected web page element should be taken and saved on your computer.
As you can see, a screenshot of the selected web page element is successfully taken.
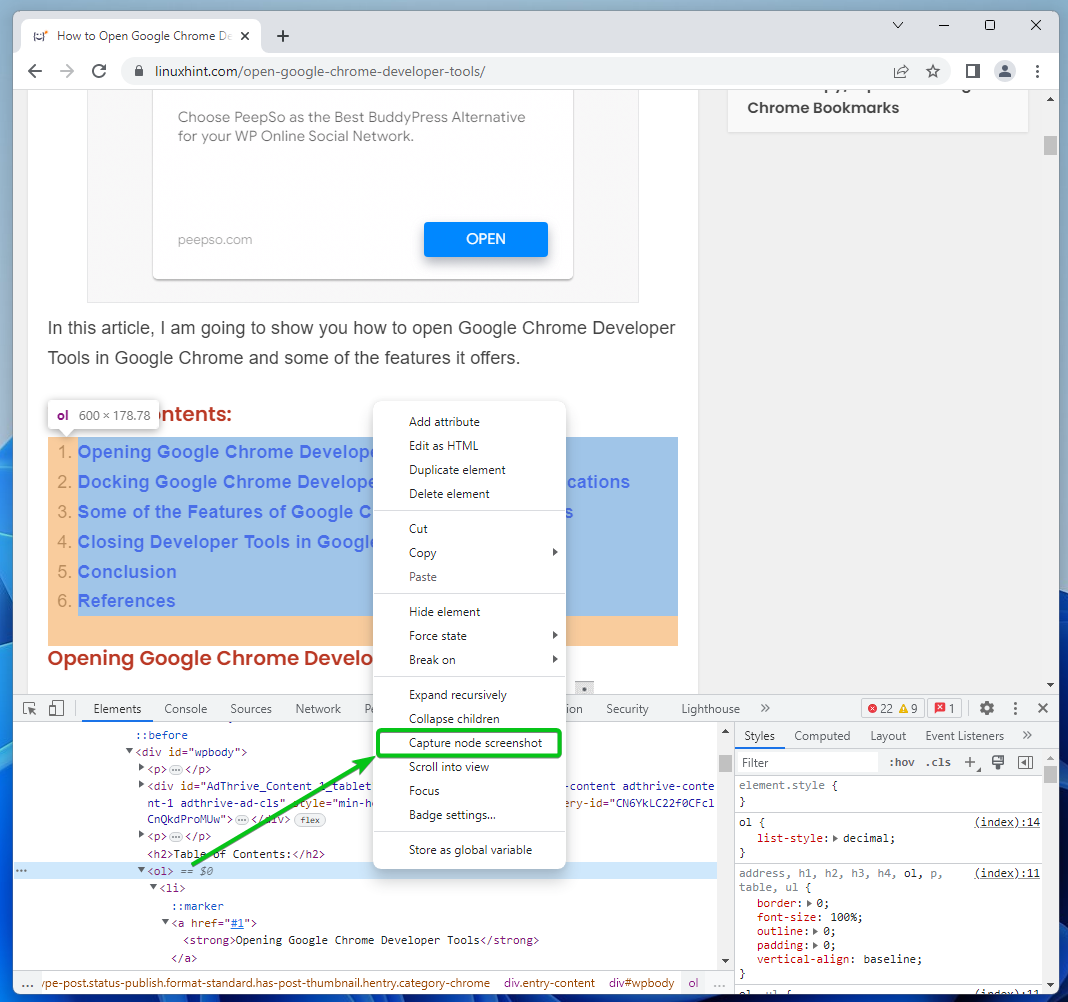
Let’s try to take a screenshot of another web page element using the Google Chrome Developer Tools.
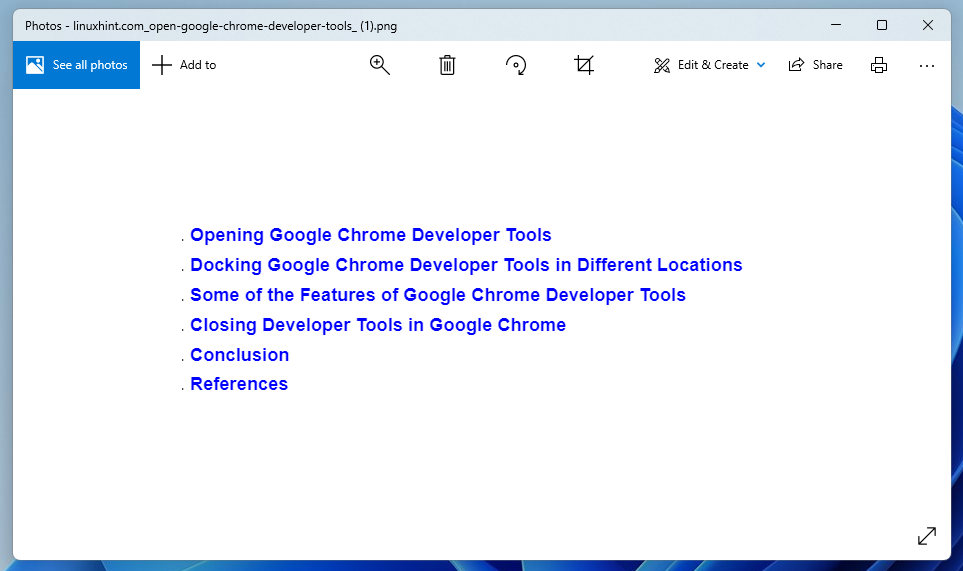
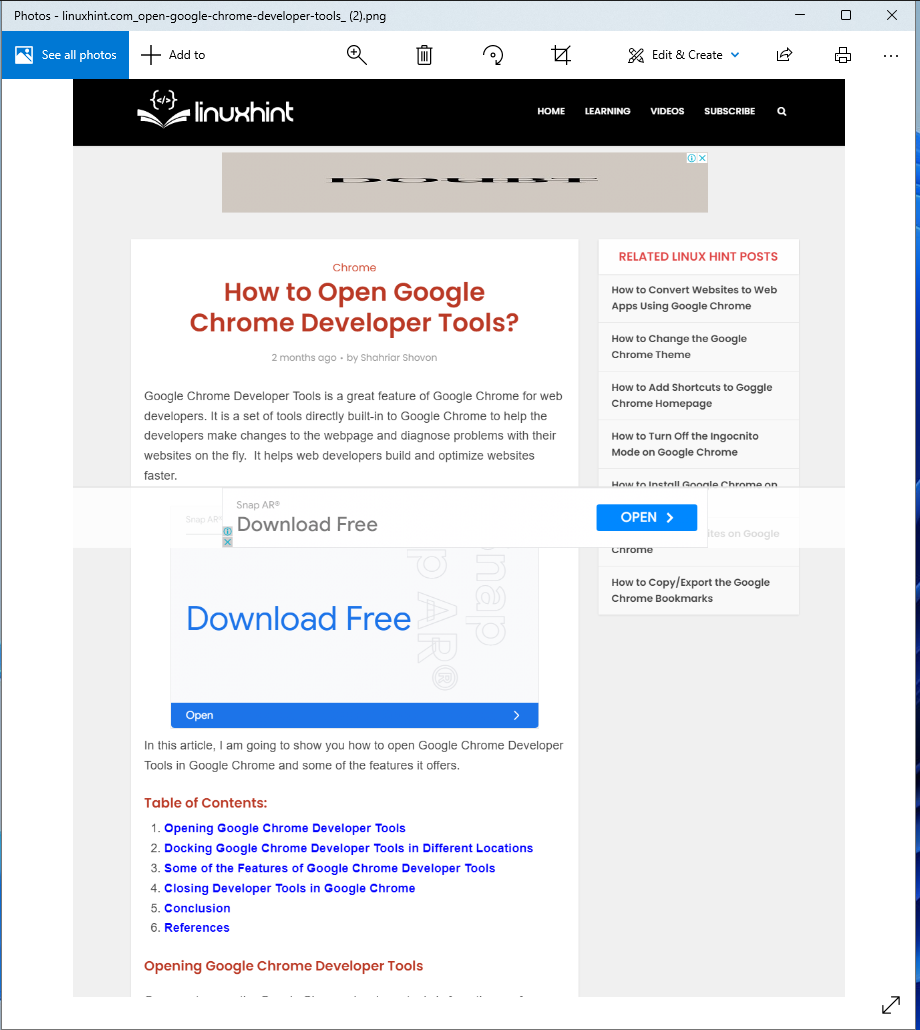
Select the table of contents in one of the LinuxHint articles, right-click (RMB) on it, and click on the “Capture node screenshot” to take a screenshot just as we recently did.
A screenshot is now taken and saved.
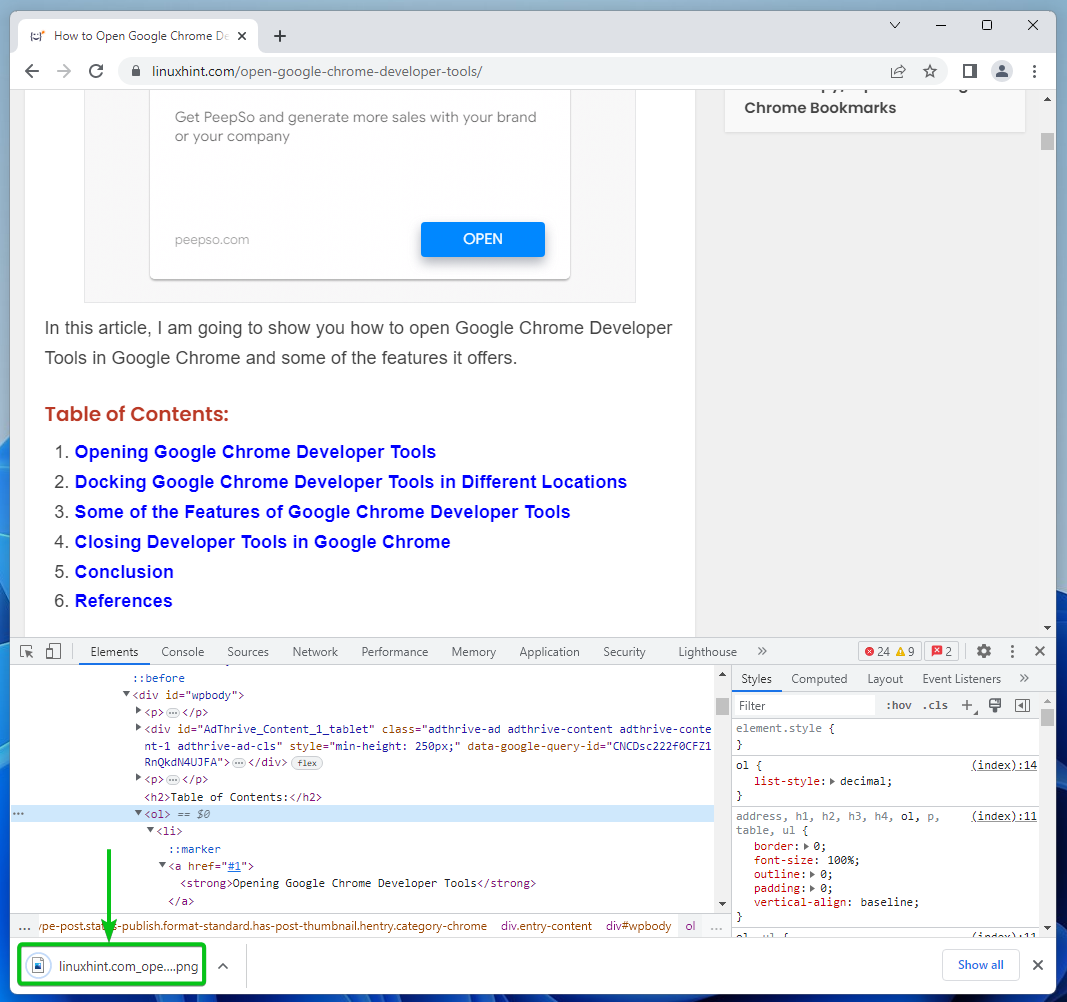
As you can see, a screenshot of only the table of contents is taken.
Taking Screenshots of the Full Webpage Using Google Chrome Developer Tools
To take a screenshot of the full webpage, navigate to the “Elements” tab of the Google Chrome Developer Tools. Scroll all the way up and select the html tag. This selects the entire web page.
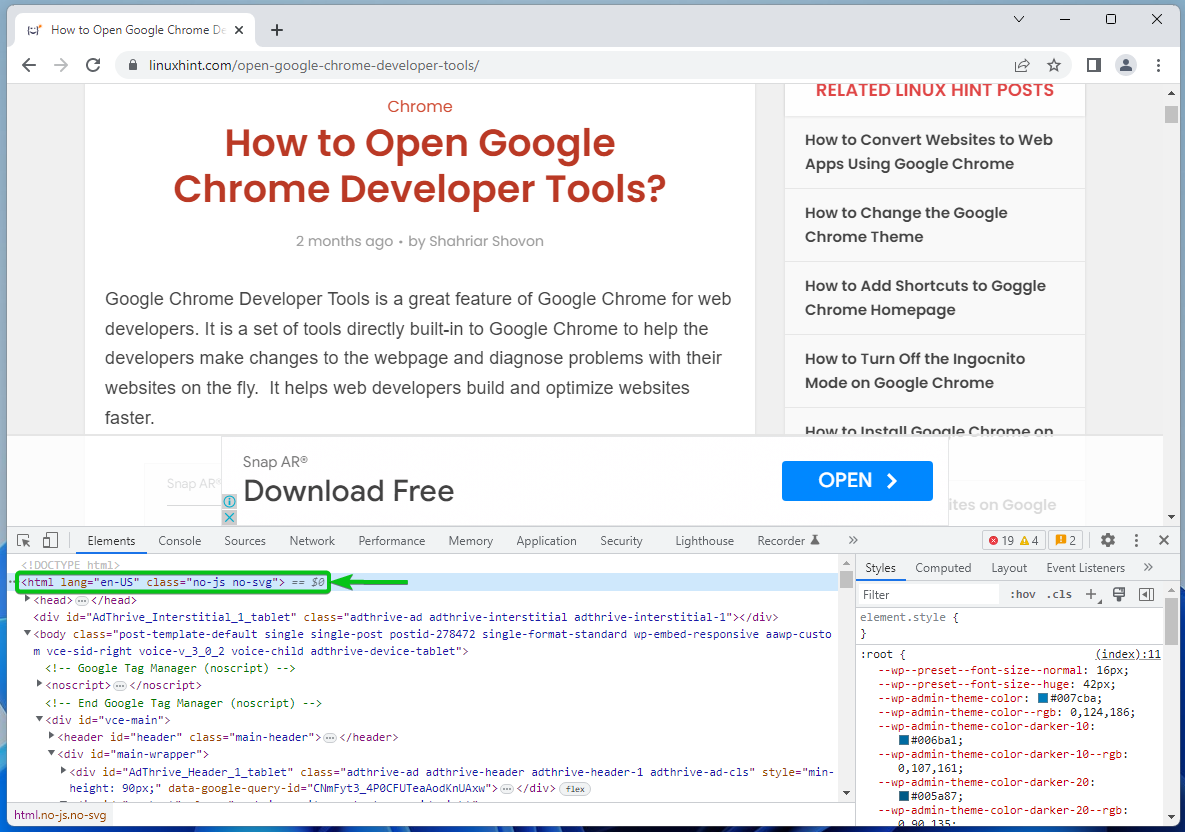
Now, right-click (RMB) on the html tag and click on “Capture node screenshot”.
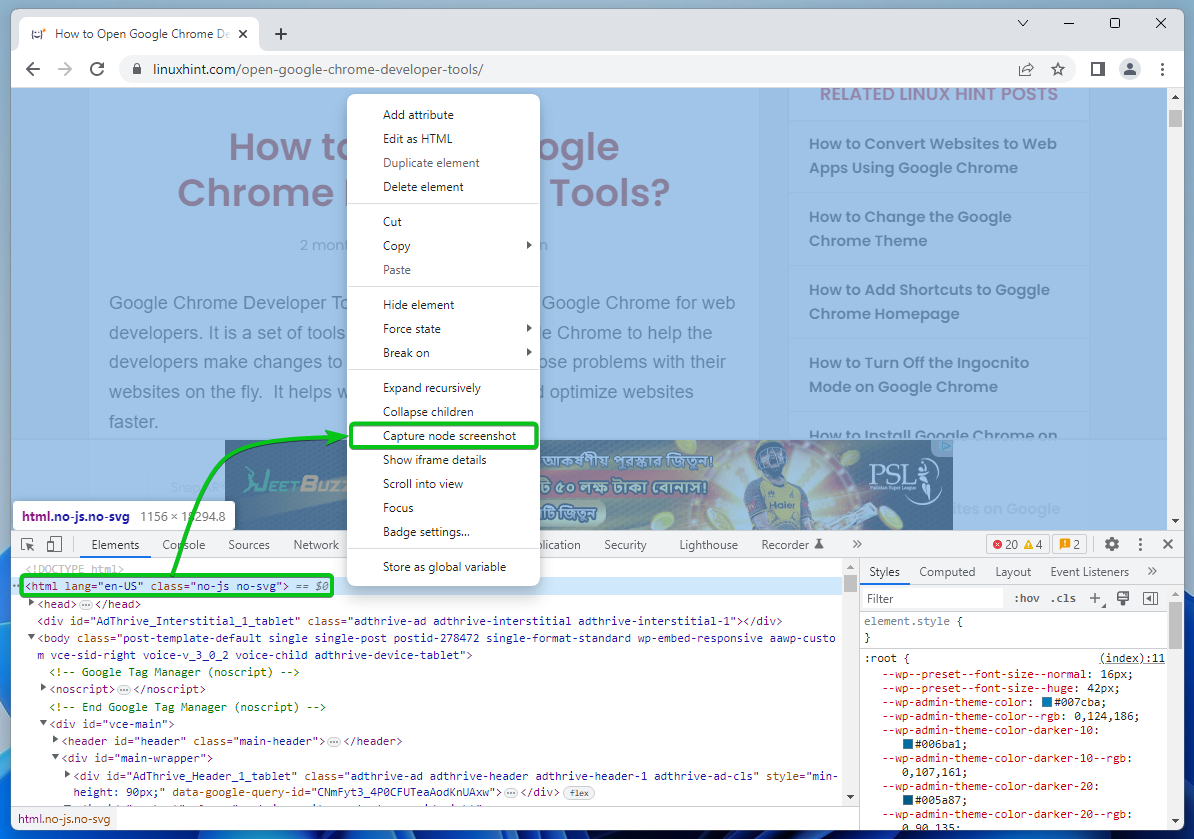
A screenshot of the entire web page should be taken and saved on your computer.
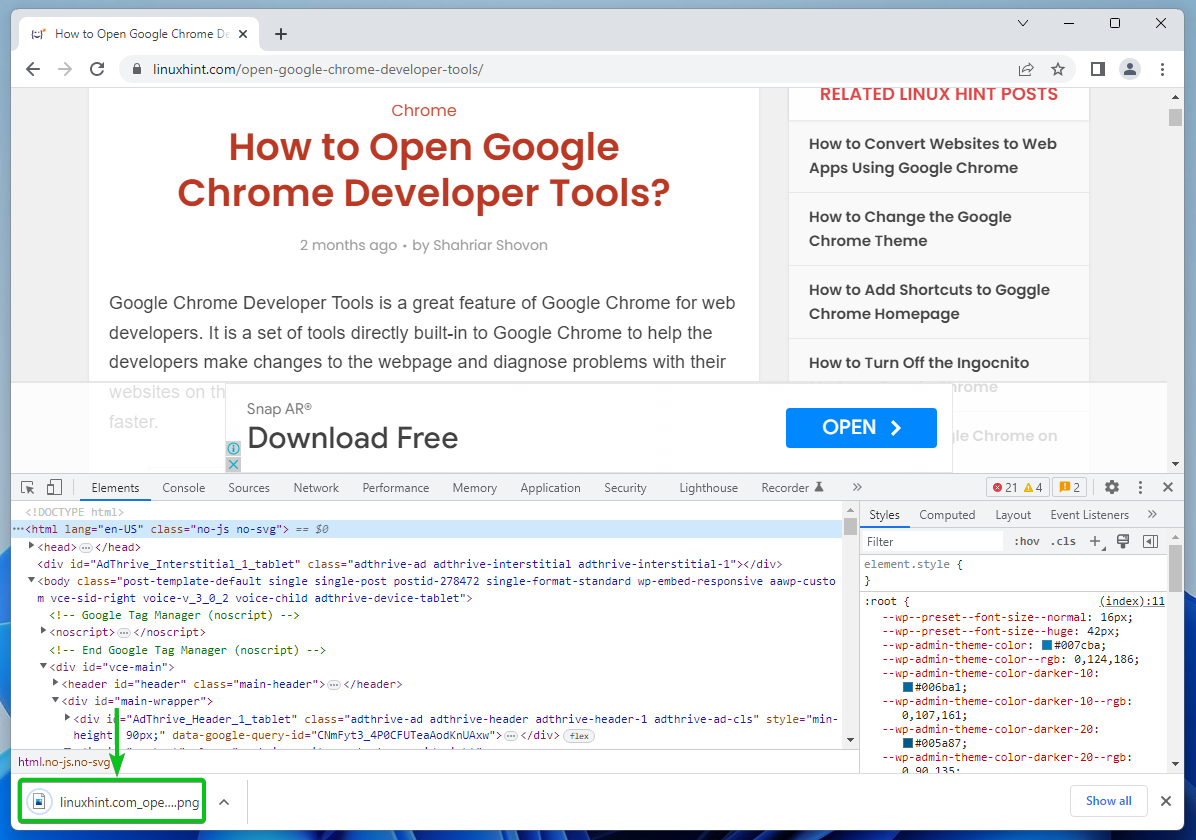
As you can see, the screenshot of the full web page is successfully taken.
Conclusion
We showed you how to open the Google Chrome Developer Tools. We also showed you how to select specific web page elements using the inspect tool of the Google Chrome Developer Tools and how to take screenshots of specific web page elements and the full web page using Google Chrome Developer Tools.
References:
Source: linuxhint.com