7 Fixes for “Windows Could Not Automatically Detect This Network’s Proxy Settings” Error
This write-up aims to fix the stated error via practical demonstration.
How to Configure Error of “Windows Could Not Automatically Detect This Network’s Proxy Settings”?
The stated error can be fixed using these methods:
- Reset TCP/IP
- Reset Wi-Fi router
- Disable proxy settings
- Run SFC scan
- Perform network reset
- Update network driver
- Run network troubleshooter
Let’s explore all these methods one by one.
Fix 1: Reset TCP/IP
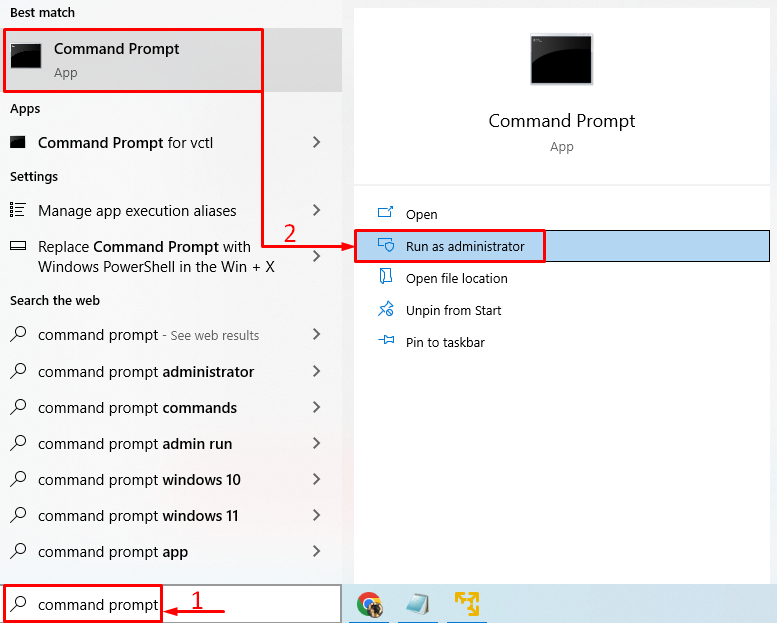
The first approach is to reset TCP/IP to fix the stated error. To do so, first of all, open the “Command prompt” via the Windows Start panel:
Run this command in the terminal to flush DNS:
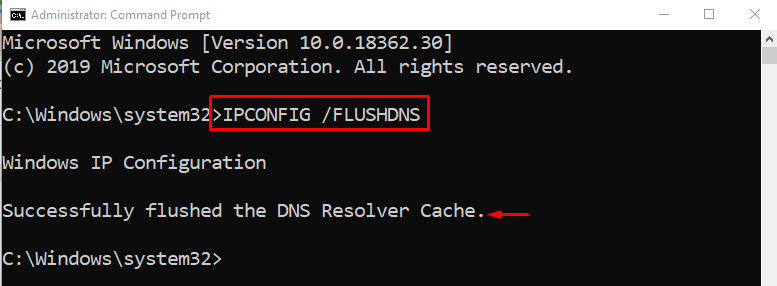
DNS has been flushed successfully.
Execute the below command to reset the Winsock catalog:
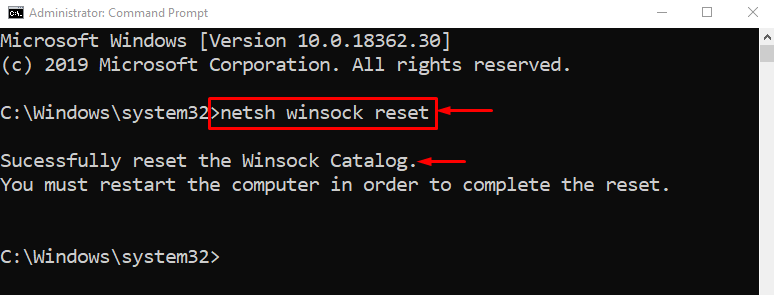
Restart Windows to complete the resetting of the Winsock catalog.
Run the given command to reset TCP/IP using netshell utility:


The TCP/IP settings have been reset successfully.
Fix 2: Reset Wi-Fi Router
Another reason could be a wrongly configured Wi-Fi adapter settings. So, you need to reset the Wi-Fi adapter to fix the problem. For that reason, first of all, plug out the power cable from the Wi-Fi adapter. Wait for at least 30 seconds, and then re-plug the power cable. Wait for your system to connect with the Wi-Fi adapter and review whether the issue is fixed or not.
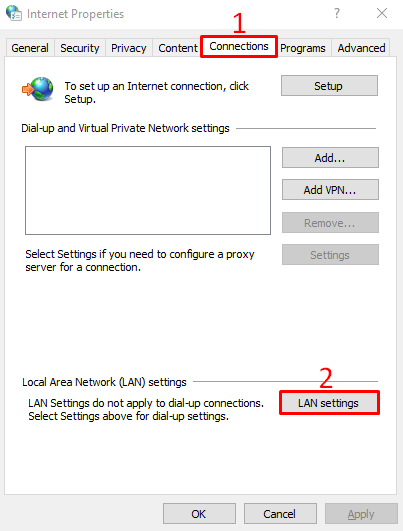
Fix 3: Disable Proxy Server
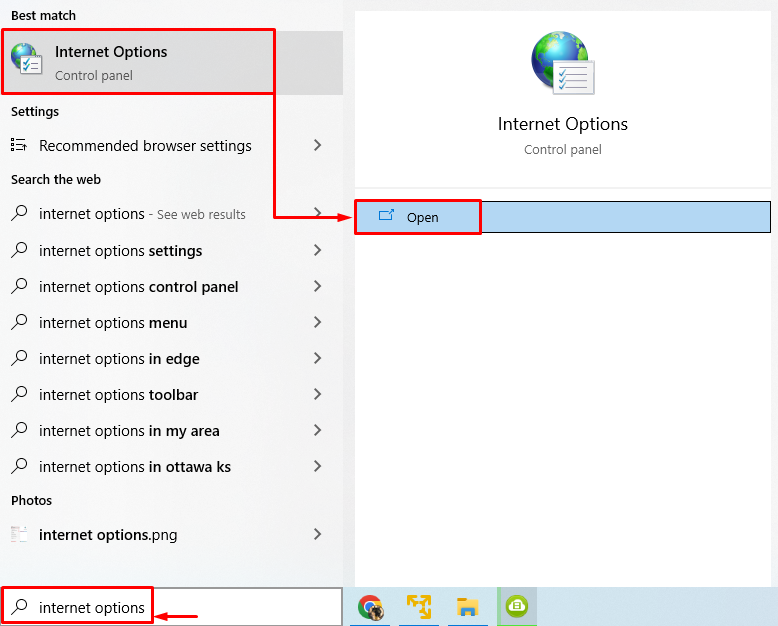
Disabling the proxy server can help the users to fix the stated error. For that purpose, launch “Internet Options” via the Windows Start panel:
Switch to the “Connections” tab. Trigger “LAN settings”:
Un-tick the rectangle box of “Use a proxy server for your LAN” and hit the “OK” button:
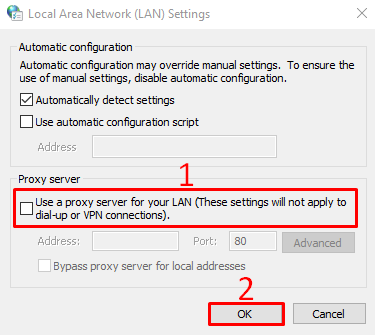
Reboot the PC and review whether the stated issue is fixed or not.
Fix 4: Run SFC Scan
Corrupt or missing system files can also be the culprit behind this error. Running an SFC scan helps repair the corrupt and missing files. For that purpose, initiate “CMD” as an administrator via the Start menu.
Run the command console to start the system file checker scan:
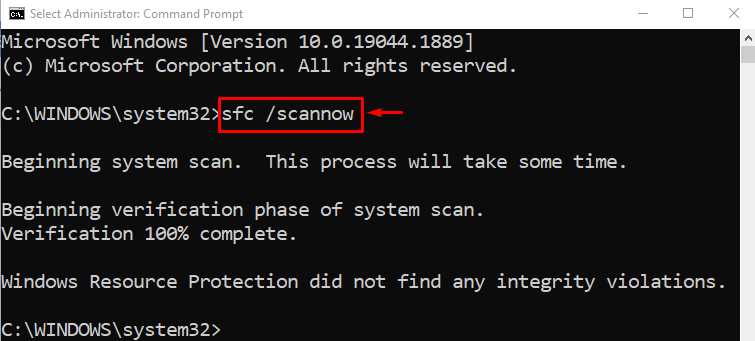
The SFC scan has been completed, and it repaired the corrupt system files. Hopefully, it may have resolved the problem.
Fix 5: Perform Network Reset
Network reset will reset all the settings that were manually configured. Resetting the network will surely resolve the problem. To do so, first of all, open “Network reset” from the Windows Start panel:
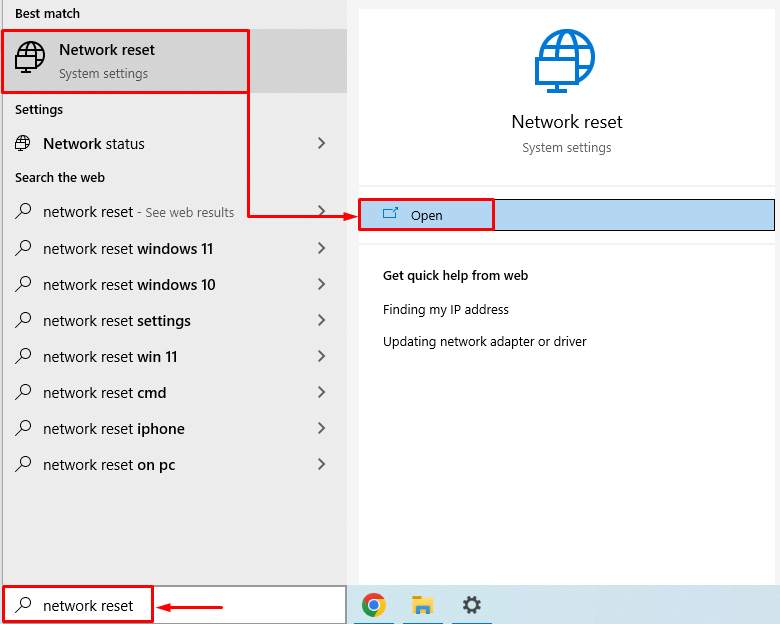
Click on the “Reset now” button:
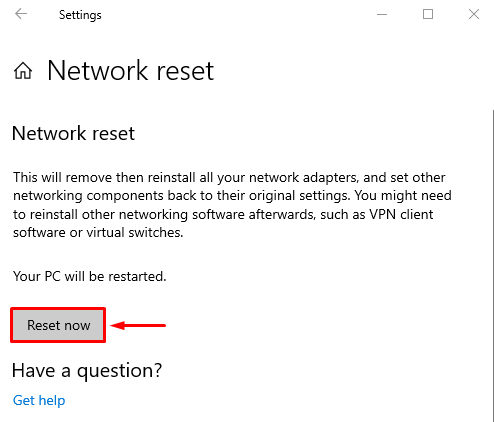
This will reset the network settings.
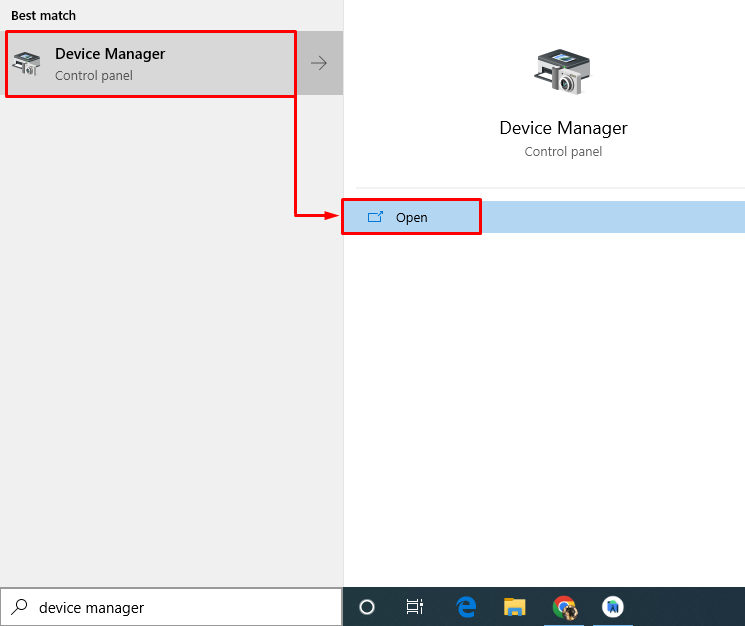
Fix 6: Update Network Driver
Updating the network driver may resolve the stated problem. For that purpose, open “Device Manager” via the Start menu:
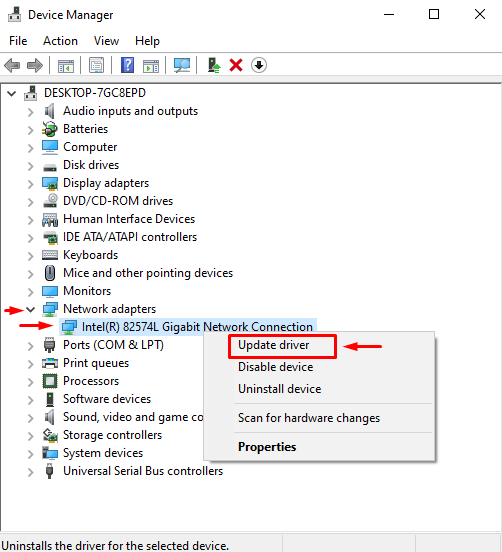
Extend the “Network adapters” segment. Right-click on the network adapter driver and choose “Update driver”:
Choose “Search automatically for drivers”:
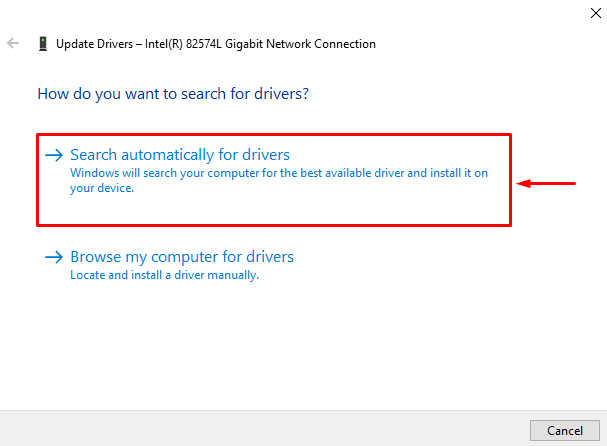
This will automatically search and update the driver to the newest version. Restart the system and check if the issue is resolved or not.
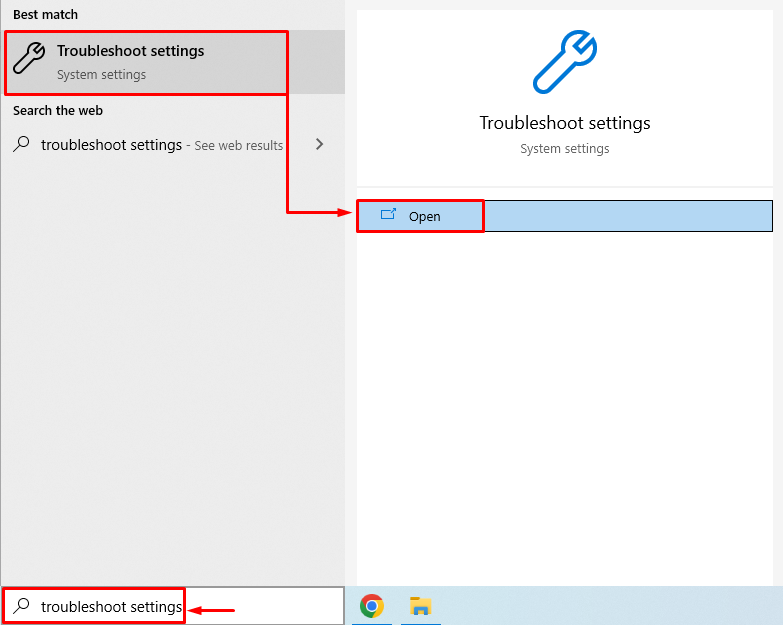
Fix 7: Run Network Troubleshooter
As the stated error is a network-related problem. So, running a network troubleshooter might resolve the stated problem. For that purpose, launch “Troubleshoot settings” from the Windows Start panel:
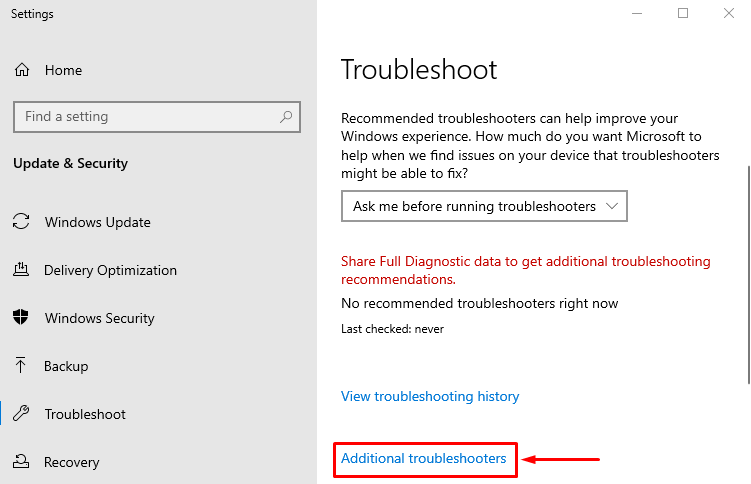
Click on “Additional troubleshooters”:
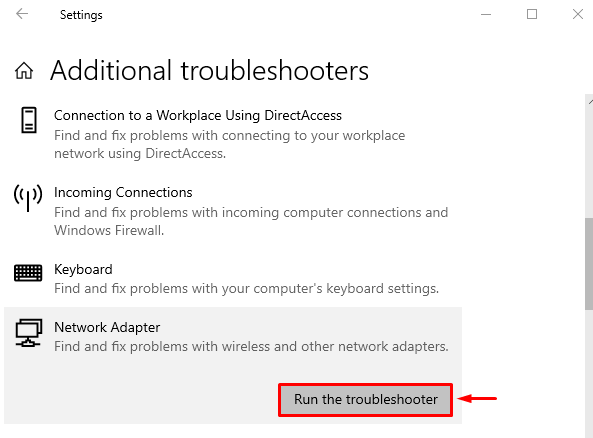
Find “Network Adapter” and hit “Run the troubleshooter”:
Select “Wi-Fi” from the adapters list and hit “Next”:

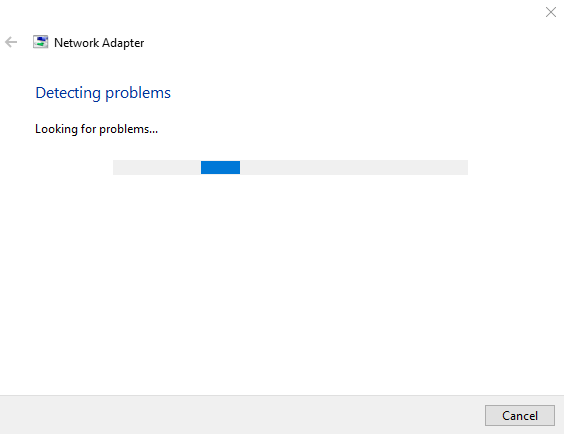
Network troubleshooter has started to troubleshoot the problems:
When the troubleshooter completes its process. Reboot the PC and examine if the issue is rectified or not.
Conclusion
The stated error can be fixed using several methods. These methods include resetting TCP/IP settings, resetting the Wi-Fi adapter, disabling proxy settings, running an SFC scan, resetting the network, updating network drivers, or running a network troubleshooter. This blog has provided all the authentic methods to fix the specified issue.
Source: linuxhint.com